Introduction
Documents, faces, and additional documents captured during the ID&V flow can be displayed on a Custom Data Form using session data and substitution variables with parameters that can reference the image or document page.
Data that can be displayed includes the following:
Data that can be displayed includes the following:
- Document Capture - Images only
- Face Capture - Images only
- Additional Document Capture - Images only
This guide will describe the required steps how to configure the Custom Data Form and Process Definition to display the image of a document, face, and additional document captured during the Process Instance.
Note the display of PDFs captured in Additional Documents is not supported in Custom Data Forms. If the display of PDF if required this can be performed using Custom Pages.
Display Captured Image
The process of displaying a captured document, face, or additional document image is similar among each identity image. This guide uses document image as a lead example but will detail differences for face and additional documents where applicable.
Support for displaying captured images in Custom Data Forms is available from `Custom Data Form V3'.
Step 1 - Prepare the Custom Data Form
Step 2 - Configure the Process Definition
This step follows the typical Process Definition configuration of a Custom Data Form. It is important than when adding the 'Custom Data Form' activity, the activity must be placed after all document and face capture activities have been completed to ensure that session data is available for the Custom Data Form.
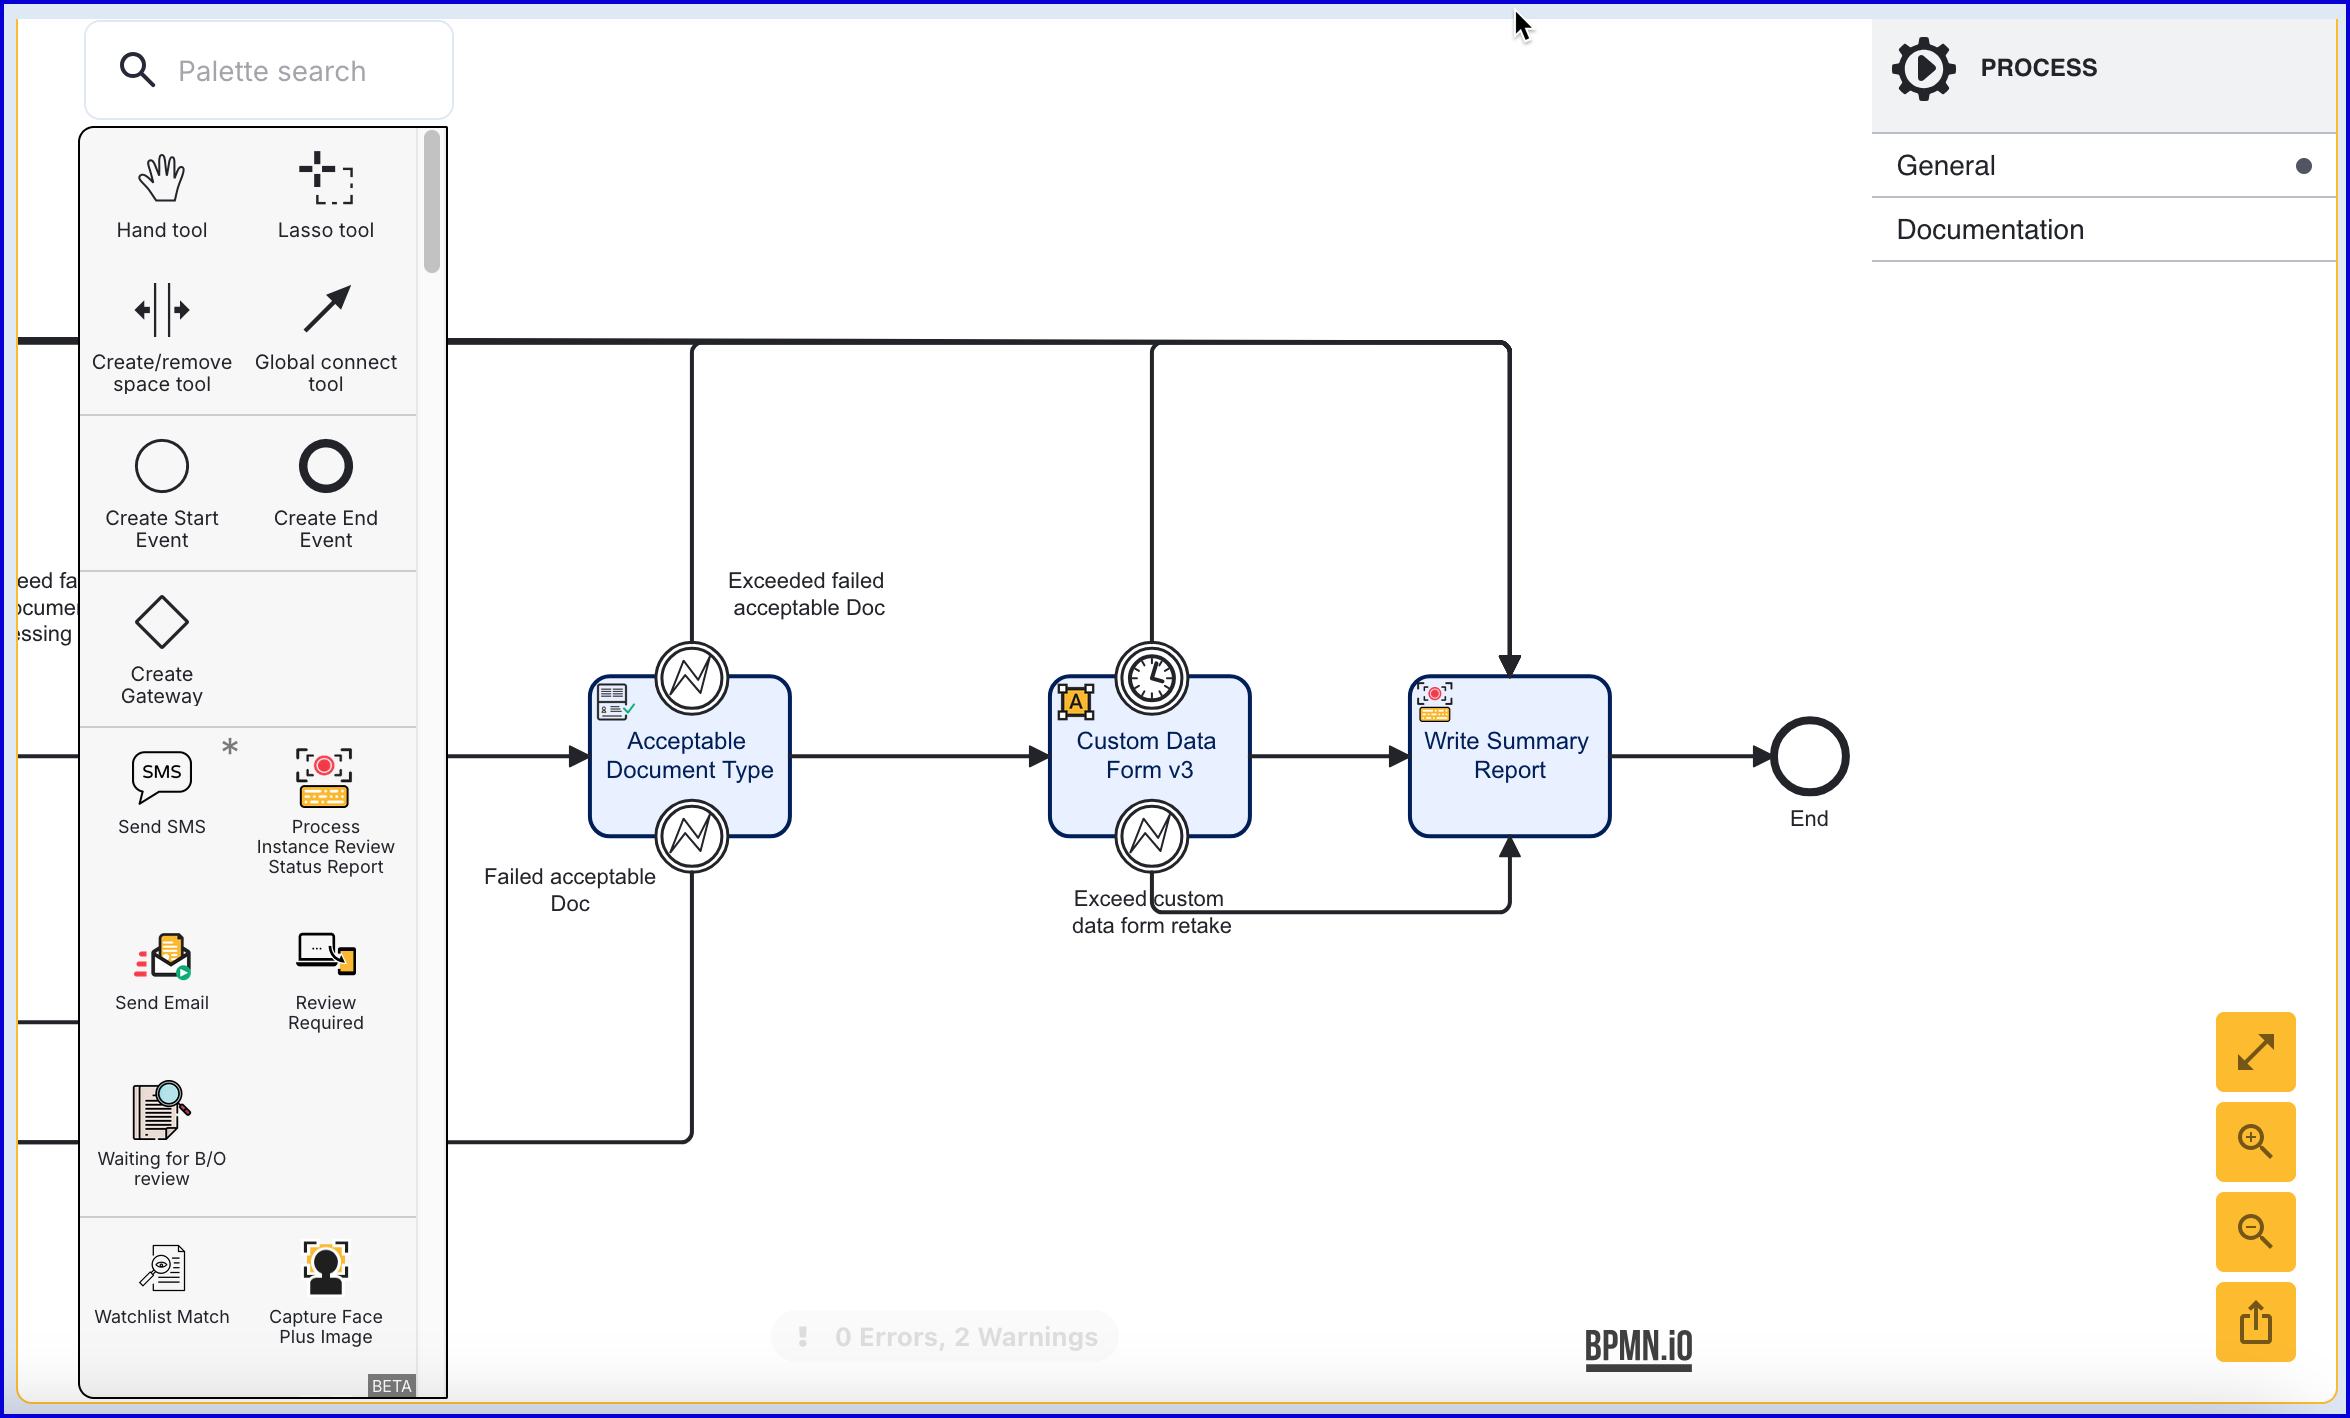
The example used in the image below demonstrates a basic document capture flow.
After the 'Acceptable Document Type' activity, add a 'Custom Data Form v3 'activity. Once added, connect the new activity to the 'Write Summary Report' and 'Acceptable Document Type' activities.
Select the 'Custom Data Form v3' activity to open the right-side contextual menu. Click to expand the input parameters and set the Data form name, Data form version, and Form data Key values.
Once all input parameters are defined, click to save the Process Definition.