Overview
Custom Pages provide users the power to customize their ID&V flow with additional steps during a Process Instance beyond the scope of customization offered by themes and custom forms.
Create a Custom Page
Create a Page in the Backoffice
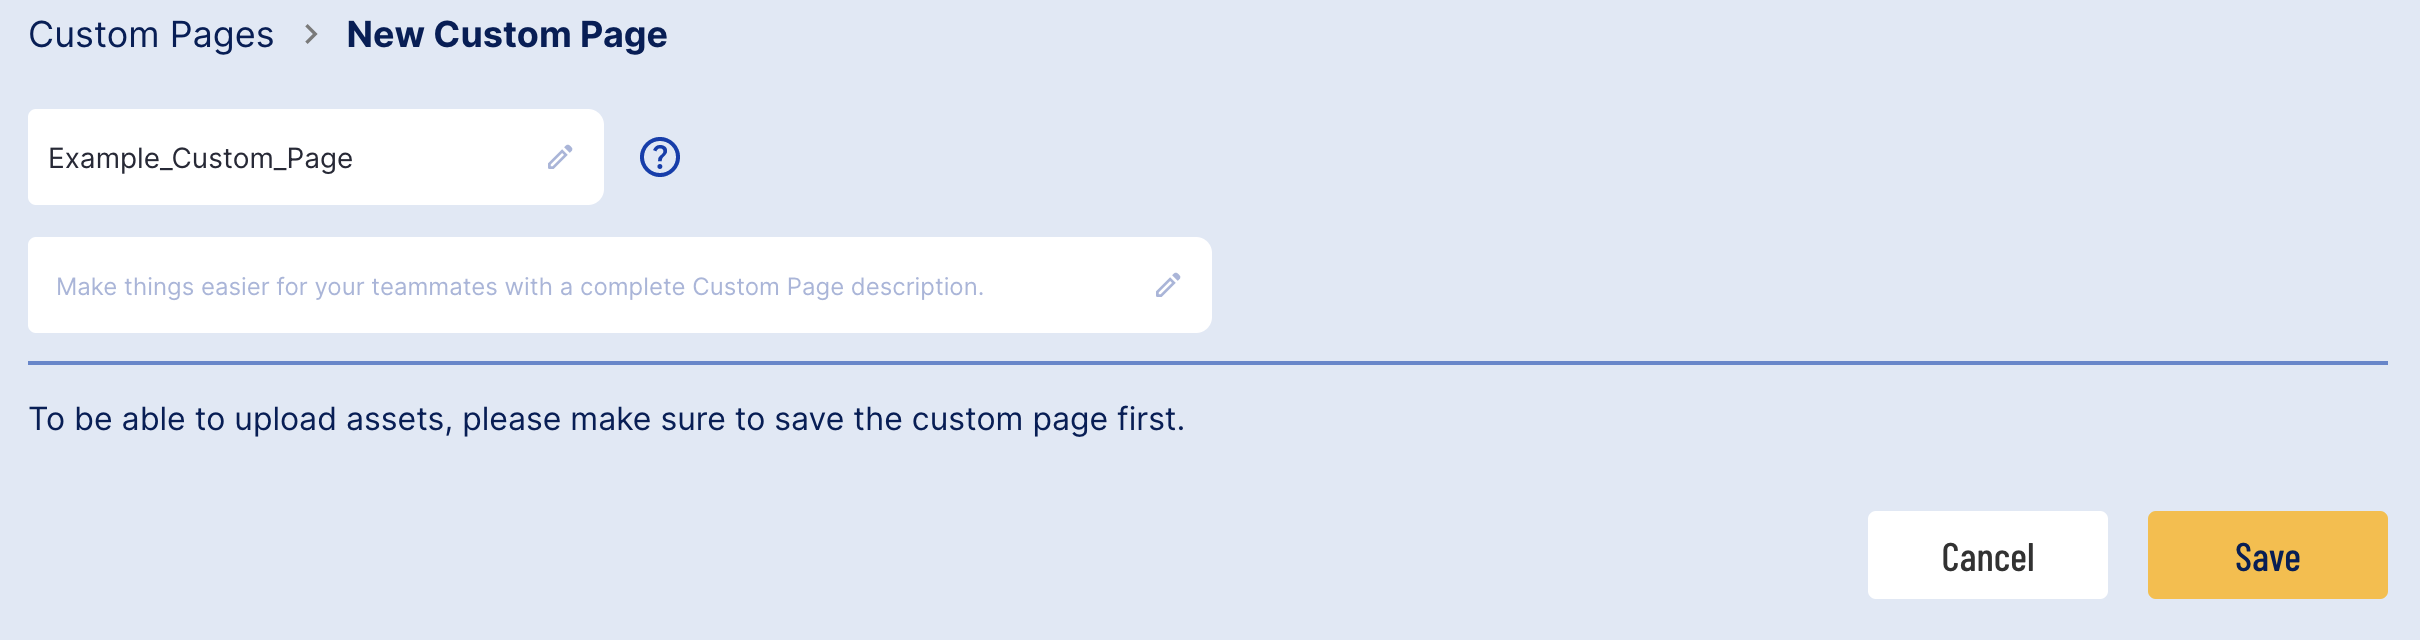
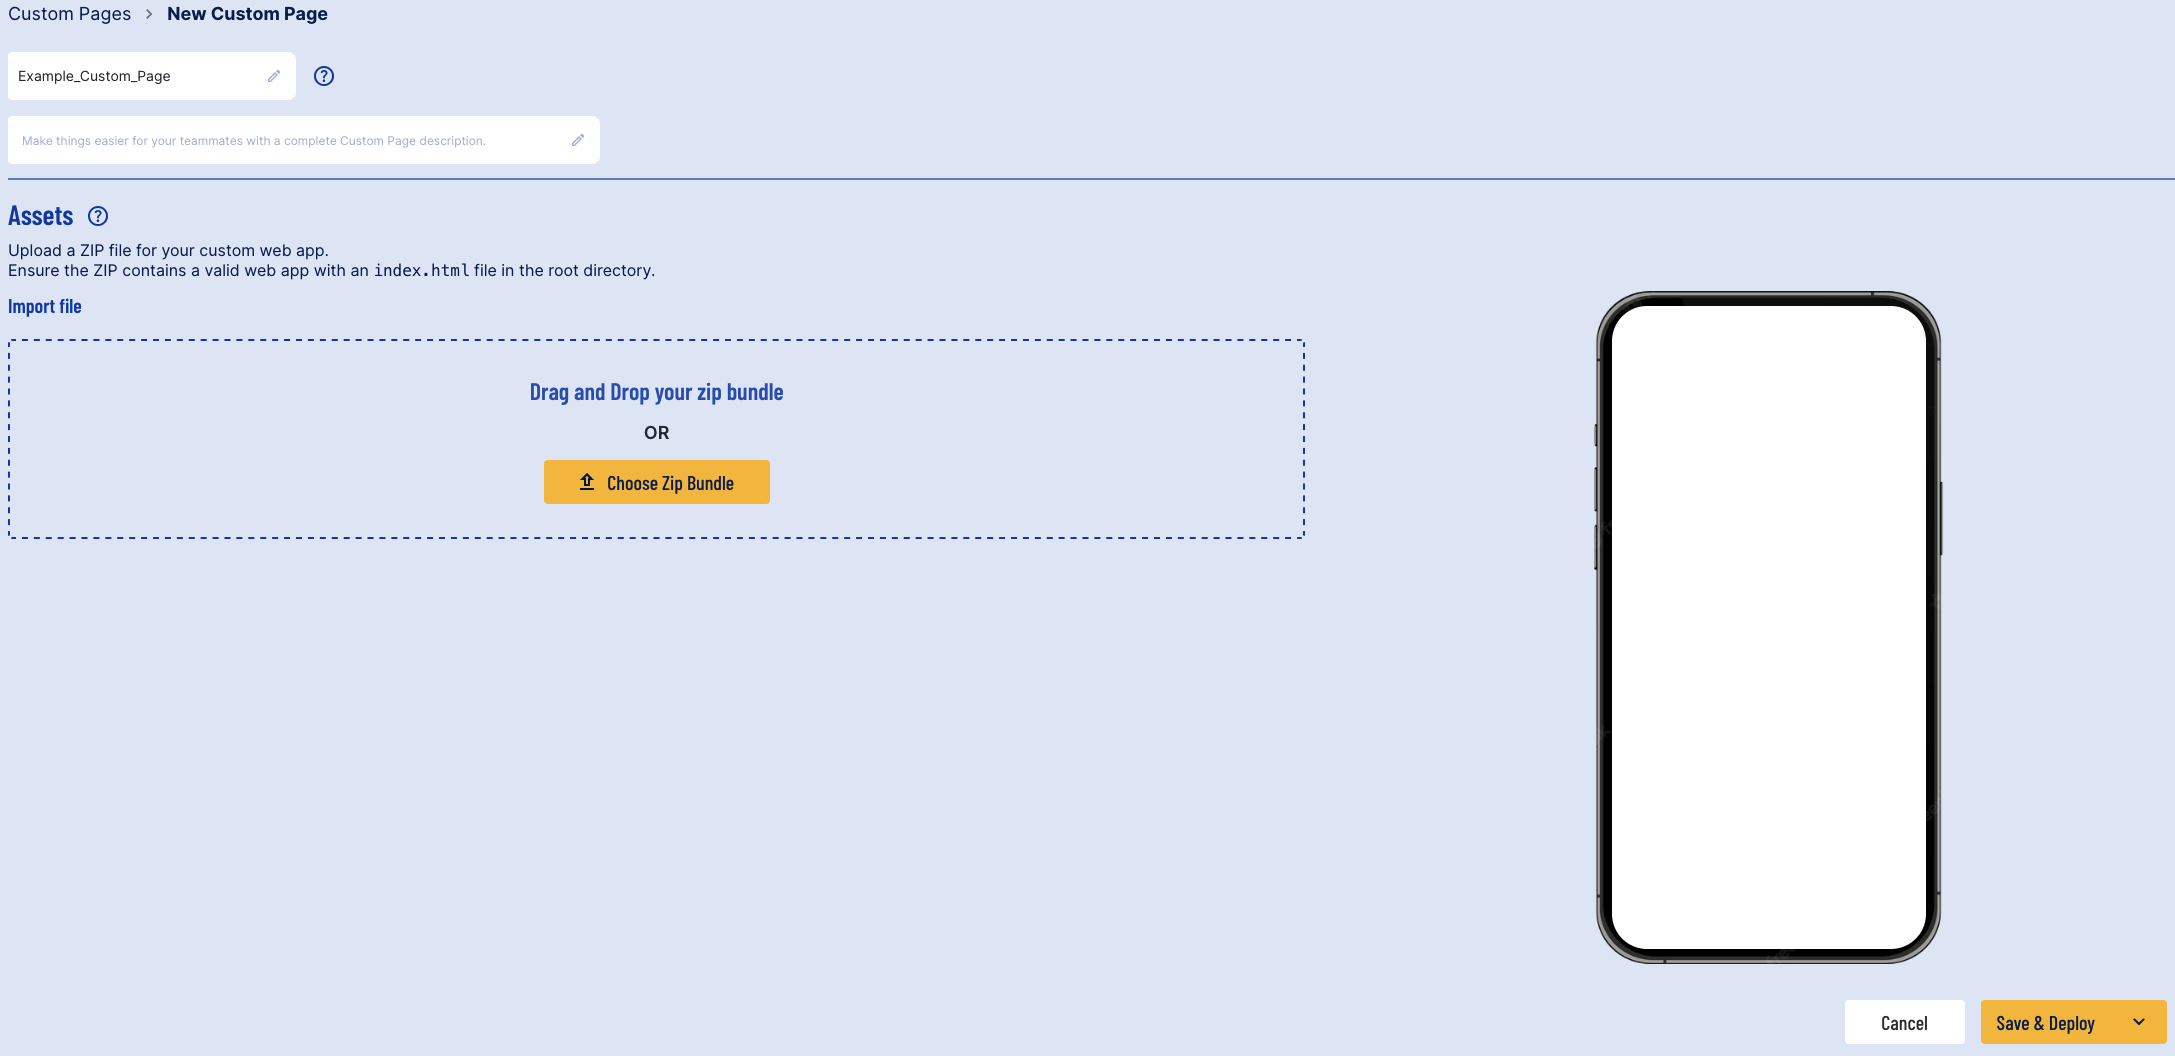
A new Custom Page can be created from the Backoffice application. Access the Backoffice and find the 'Custom Pages' page located in the 'Integration Hub' menu in the left-side navigation bar.

Click the 'New Custom Page' button located at the top-right of the screen to start creating a new Custom Page.

To upload assets and define a Custom Page, first give the new page a name and click the 'Save' button located at the right-side of the screen.
Upload Assets
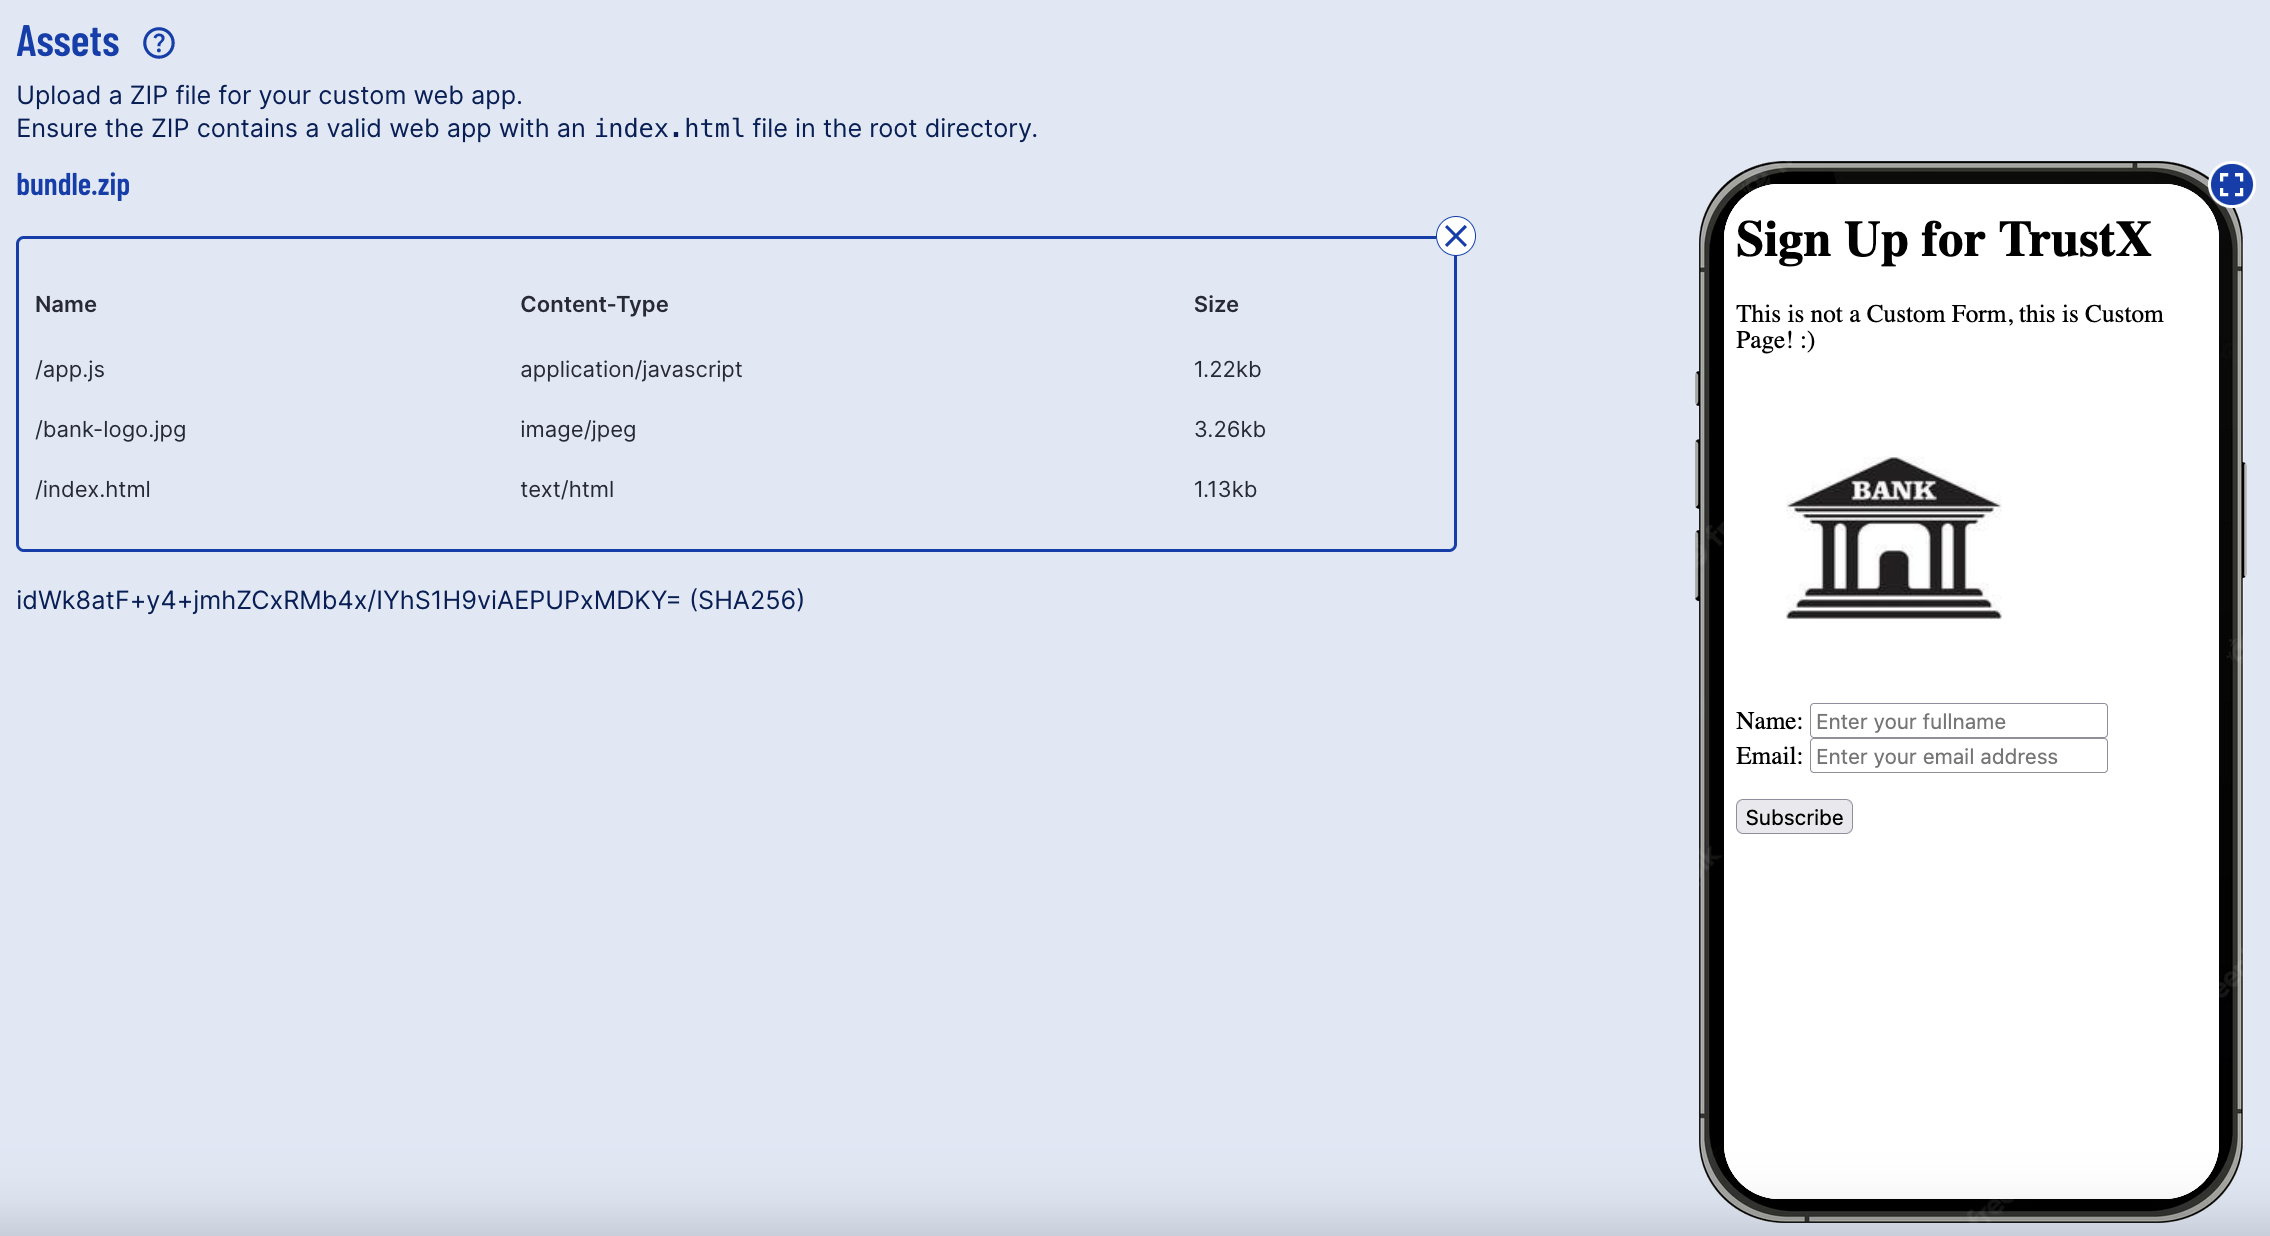
Once a new Custom Page has been saved, it will be possible to begin defining the details of the page by uploading assets.
The Custom Page creation provides a file upload or Base app URL where assets can be defined.
On the right-side of the screen, a preview of the page will be displayed.
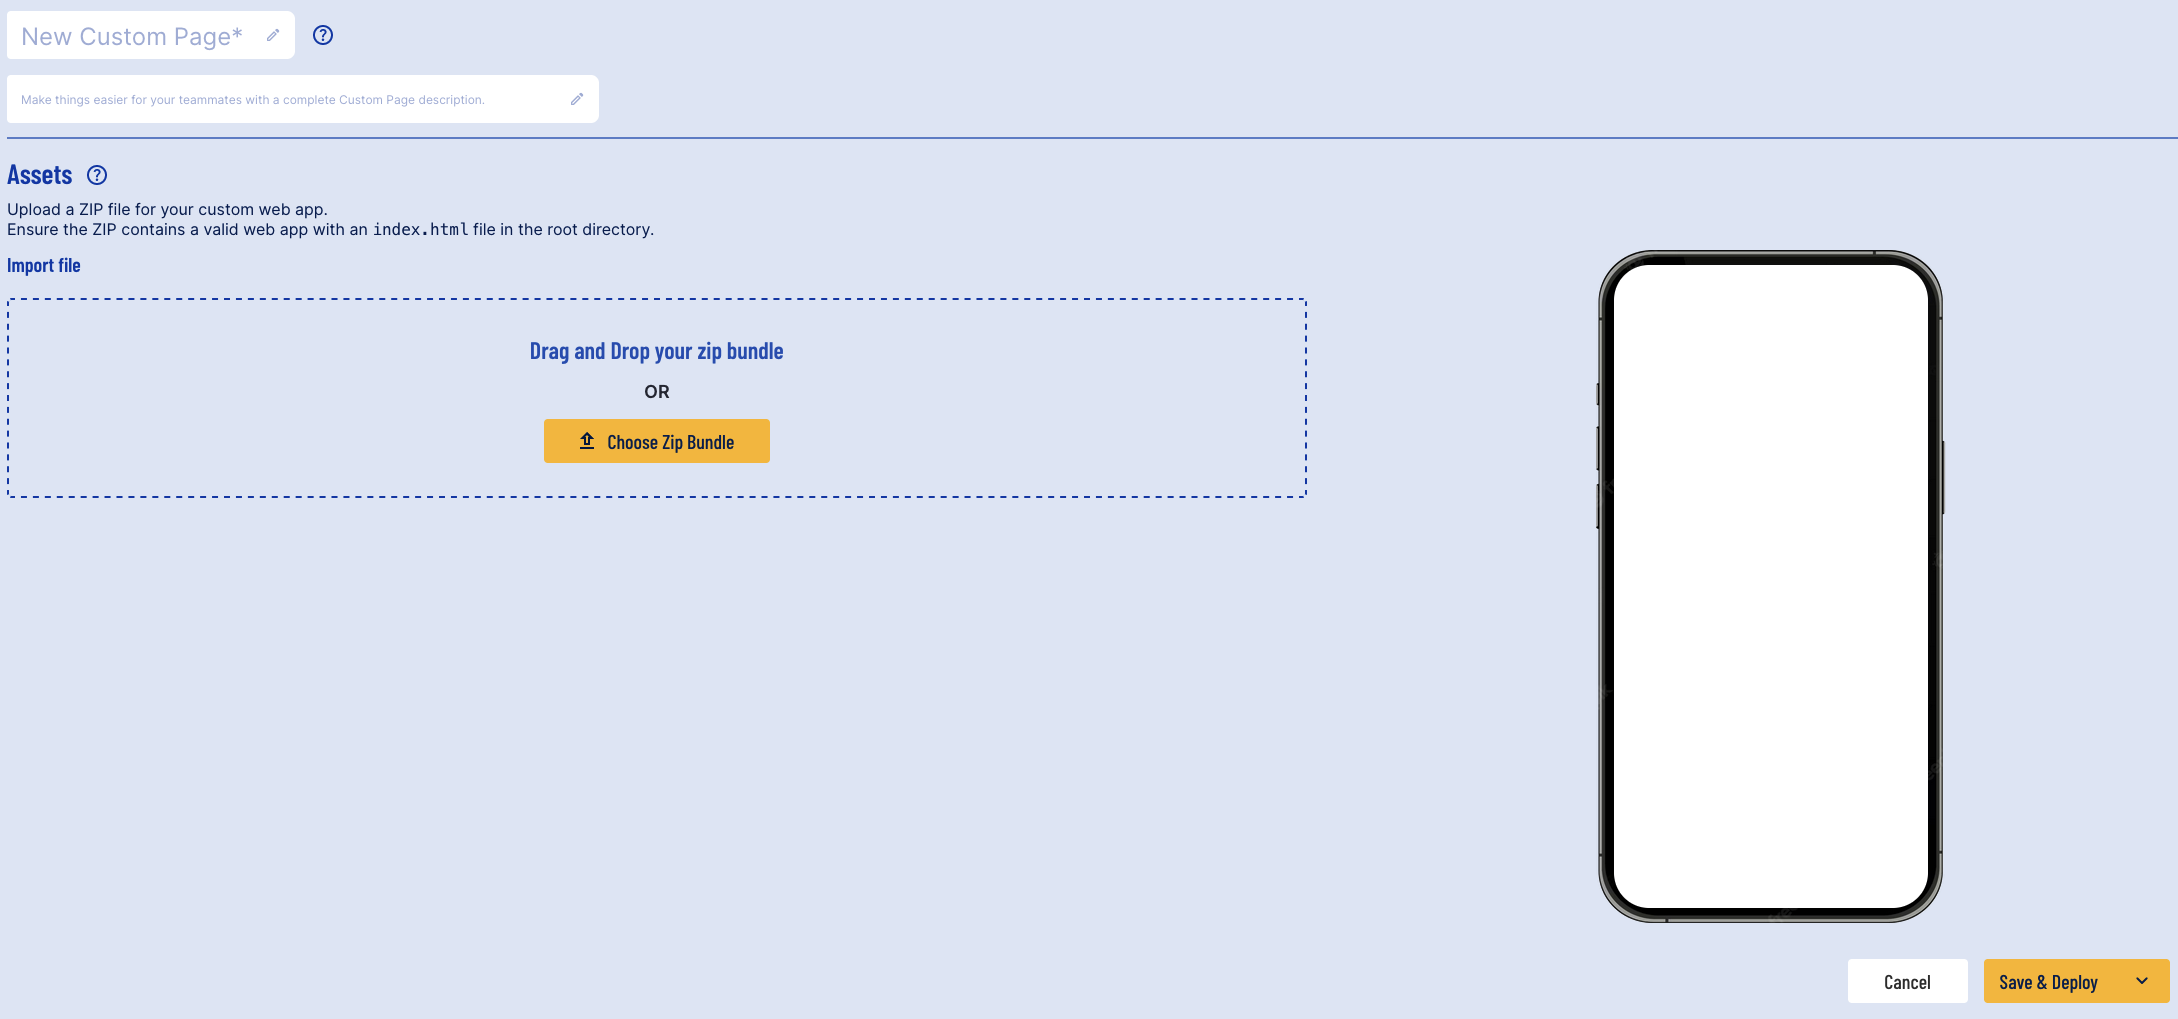
File Upload
Bundles of .zip and .tar.gz are supported, and contain folders or sub-folders of various types. By default, the max bundle size is 15MB. The following filetypes are supported:
Web - html, js, css, json, xml, txt, map, wasm
images - png, jpeg, jpg, gif, svg, ico
videos - mp4, mov, webm
fonts - woff, woff2, tff
docs - pdf
audio - mp3
Additionally, the following conditions must be met:
The root folder must contain an index.html file.
If a filetype not covered by the list above is uploaded, it will be rejected and upload will fail.
Once a bundle has been successfully uploaded, a preview of the page will appear on the right side of the screen.
Including CSP File
Custom Pages in TrustX can include Content Security Policy (CSP) files to help minimize the risk of security threats. Policies are defined as a list of semi-colon separated directives where each directive controls a different aspect of the content security.
CSP files are only supported using Custom Page version 3 or higher.
Example:
When uploading the .zip assets folder, ensure that the csp.txt is included in the assets bundle.
Advance to the Next Activity
Custom Pages can be configured to include buttons that advance to the next step in the ID&V process. In the example above, a 'Continue' button has been programmed to advance to the next activity in the Process Definition using Javascript.
This section will describe how to advance to the next page when the 'Continue' button is pressed.
Example Javascript:
Add Custom Page to a Process Definition
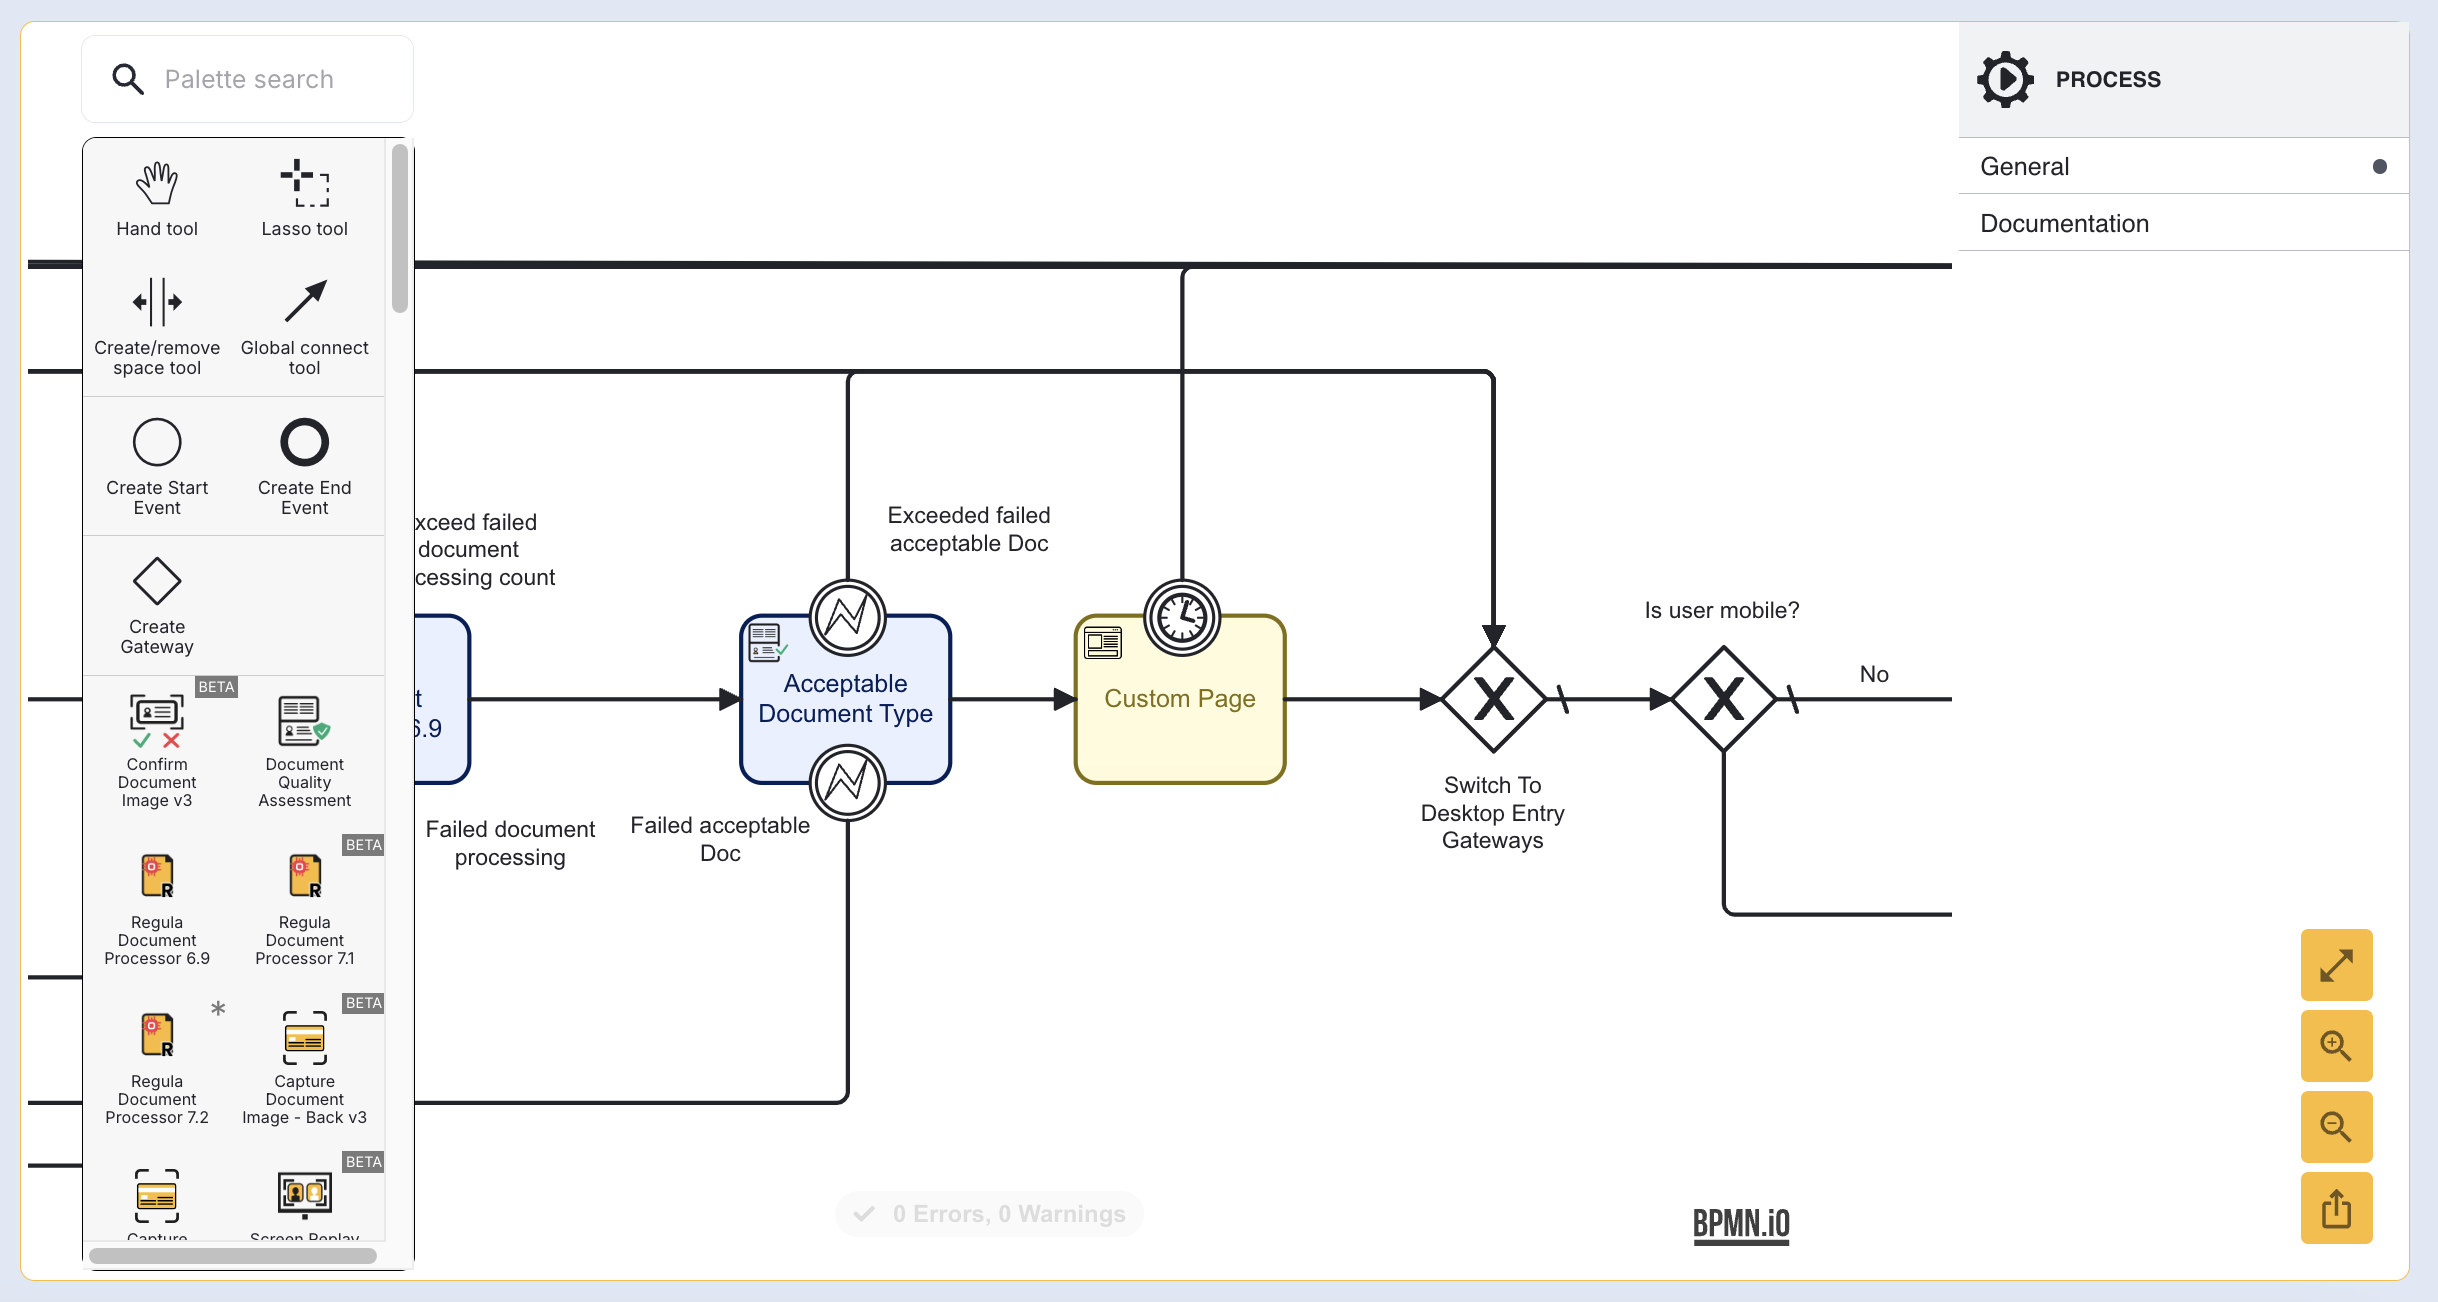
A Custom Page can be added to a Process Definition using the 'Custom Page' activity.
Note that 'Themes' do not apply to 'Custom Pages'. Custom pages can be styled as required by the provide of the custom page.

Conditional Logic
Using data submitted within a Custom Page, it is possible to create conditional logic to influence the flow based on the results of the Custom Page. This can be achieved using the _customUis variable. This section will demonstrate a simple implementation using a value submitted in the Custom Page.
Step 1 - Set Conditional Logic
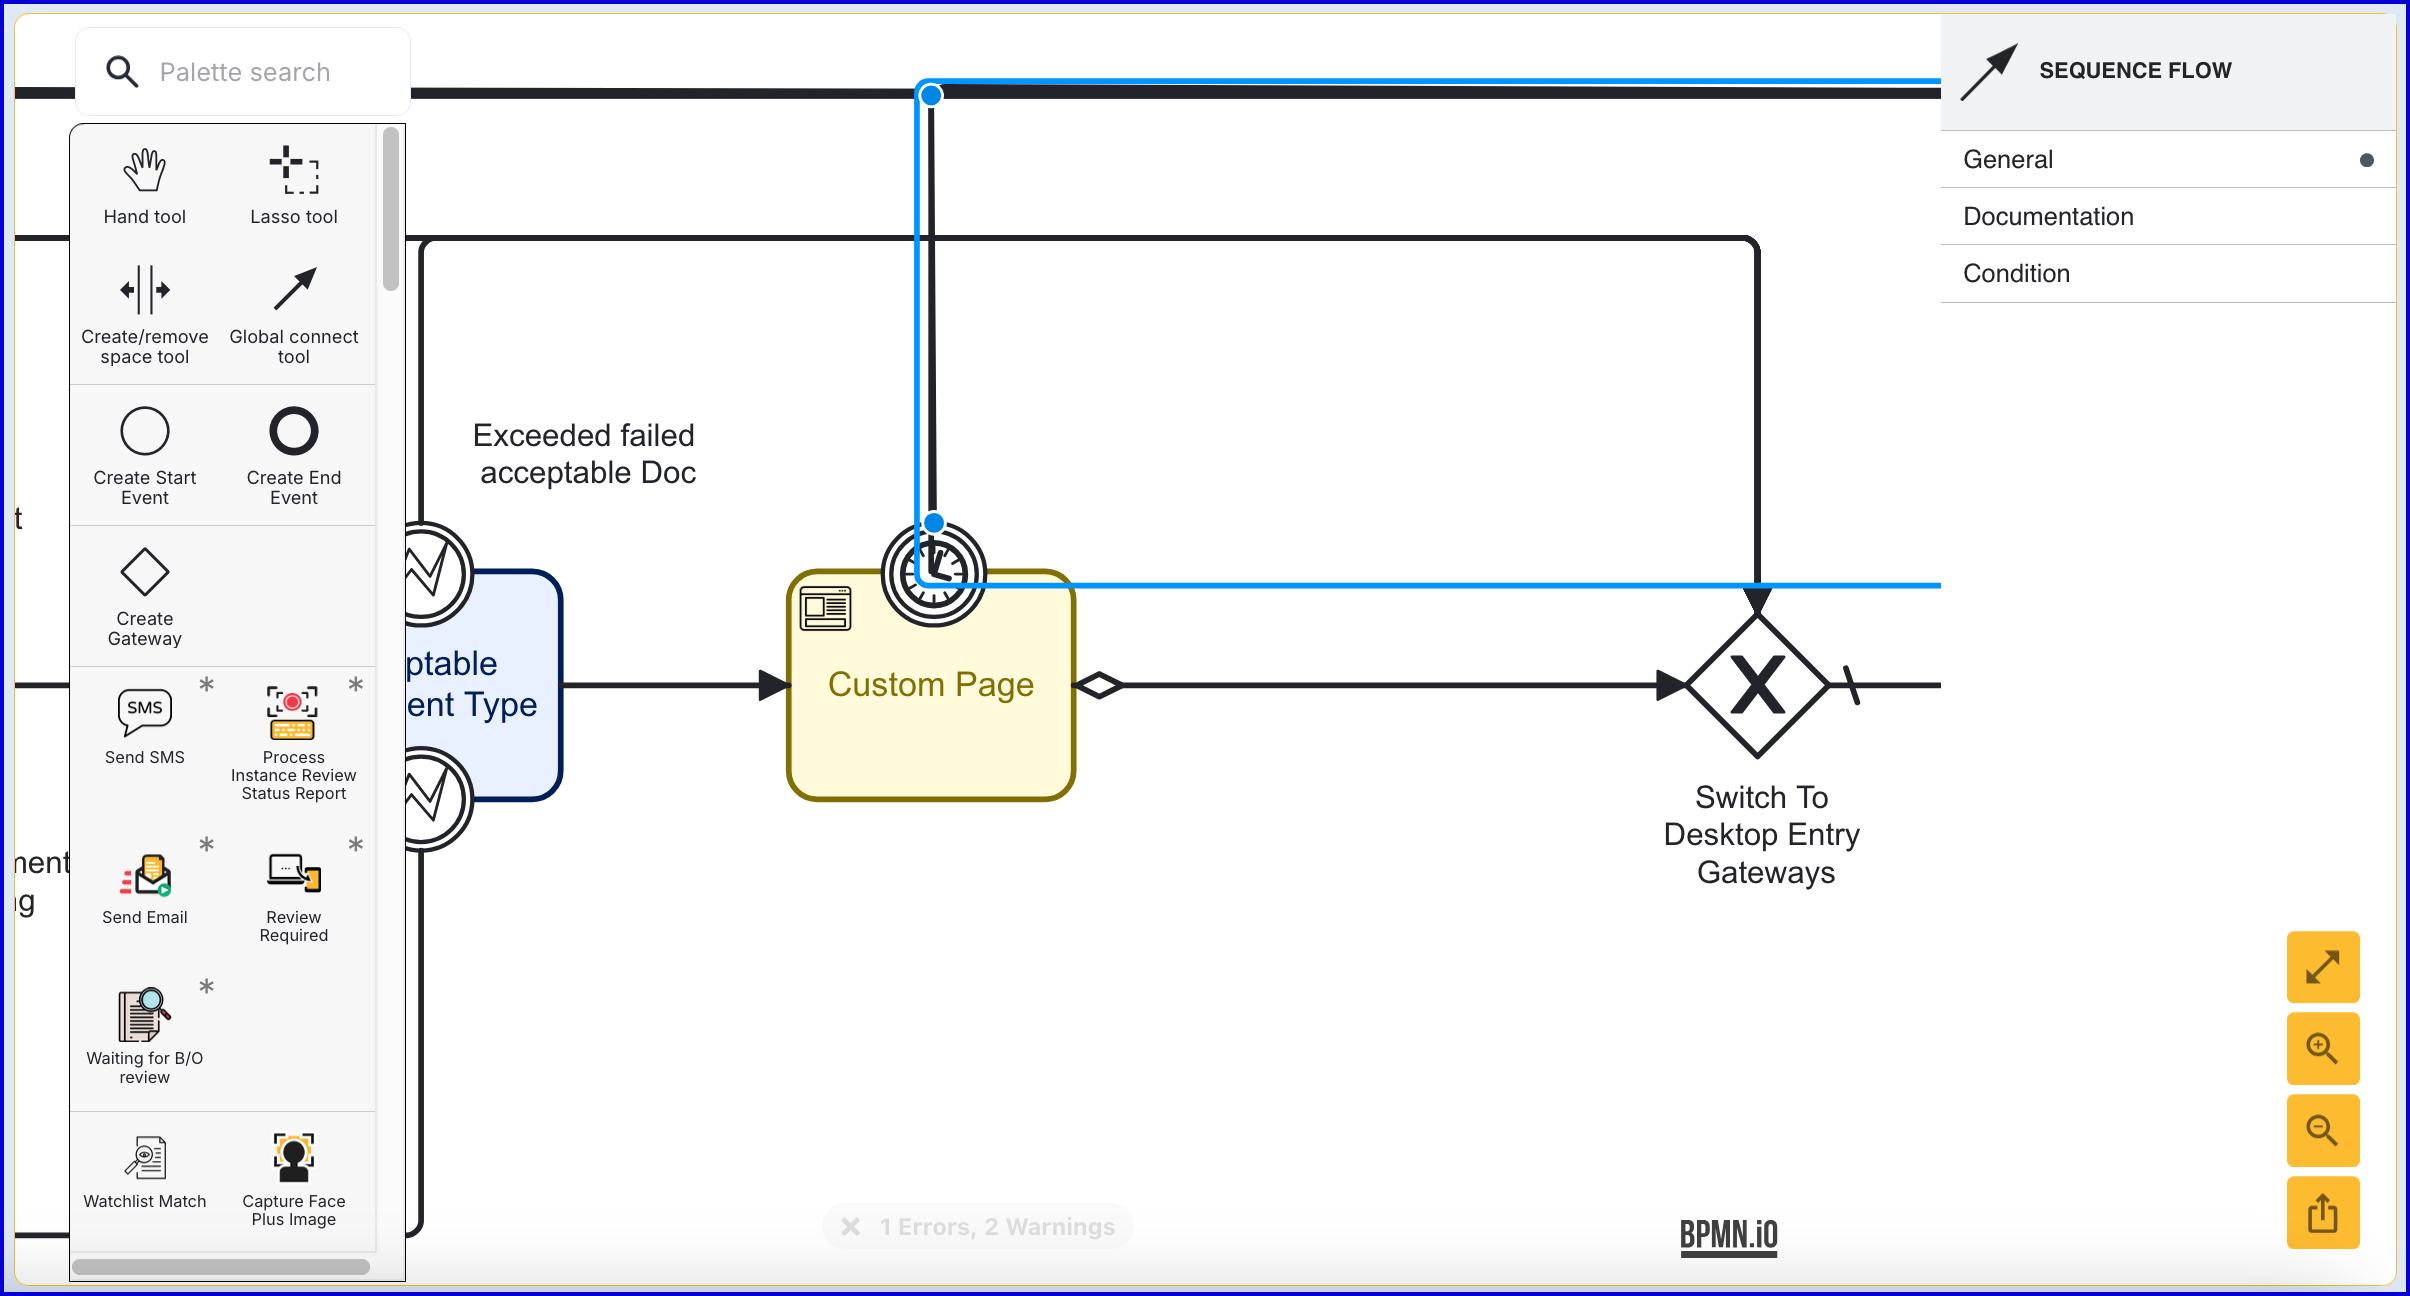
To set the conditional logic that follows a Custom Page activity, click the the sequence arrow that follows after the activity. This will open the right-side contextual menu. Expand the 'Condition' option and choose a type of 'Expression'.
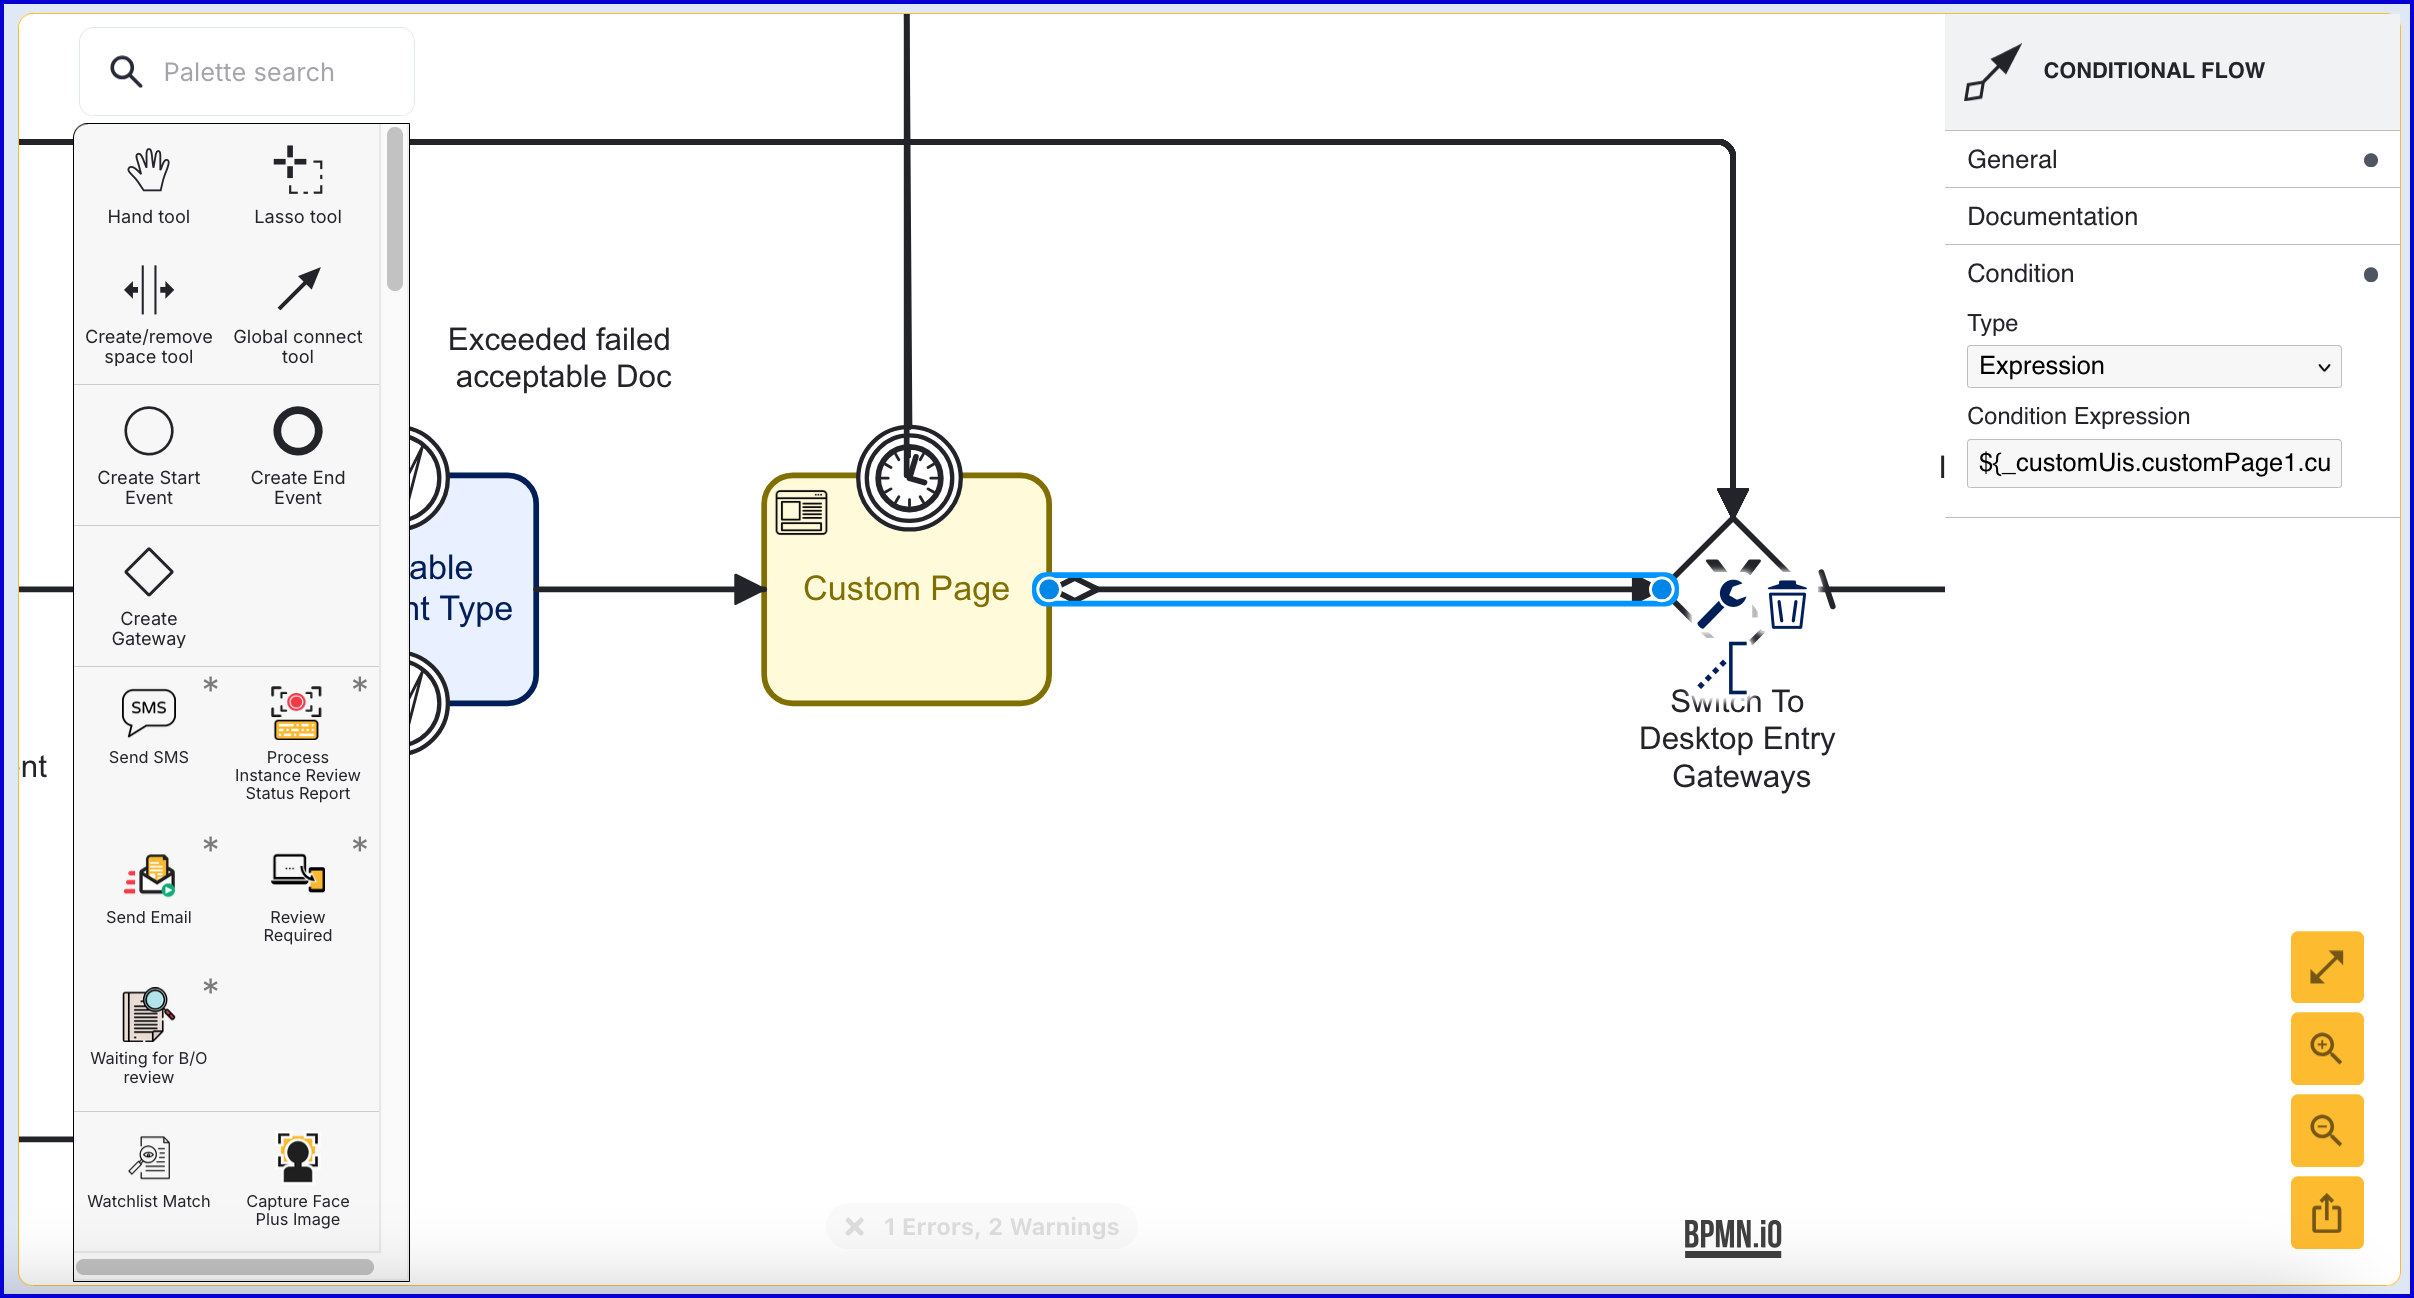
In the above example, the following expression is used: ${_customUis.customPage1.currentCapture.customPageParameters.pageValue.value == "example"}
This example can be described as follows:
_customUis.customPage1- customPage1 represents the Custom Page Key that is defined within the Custom Page activity input parameters..currentCapture- Represents the current entry of the Custom Page made during the flow..customPageParameters- Provides access to the parameters of the Custom Page..pageValue.value-.pageValuerepresents the Custom Page field to be accessed. For example, this can be a name, email, or country..valueretrieves the value entered for that field.
Step 2 - Set Default Flow
When conditional logic is used, the Process Definition will need a default flow to access in cases where the condition is not met. To achieve this, create a new sequence flow from the Custom Page activity and connect elsewhere in the Process Designer. In the example above, the sequence flow is connected to the Write Summary Report activity.
Custom Page Lifecycle
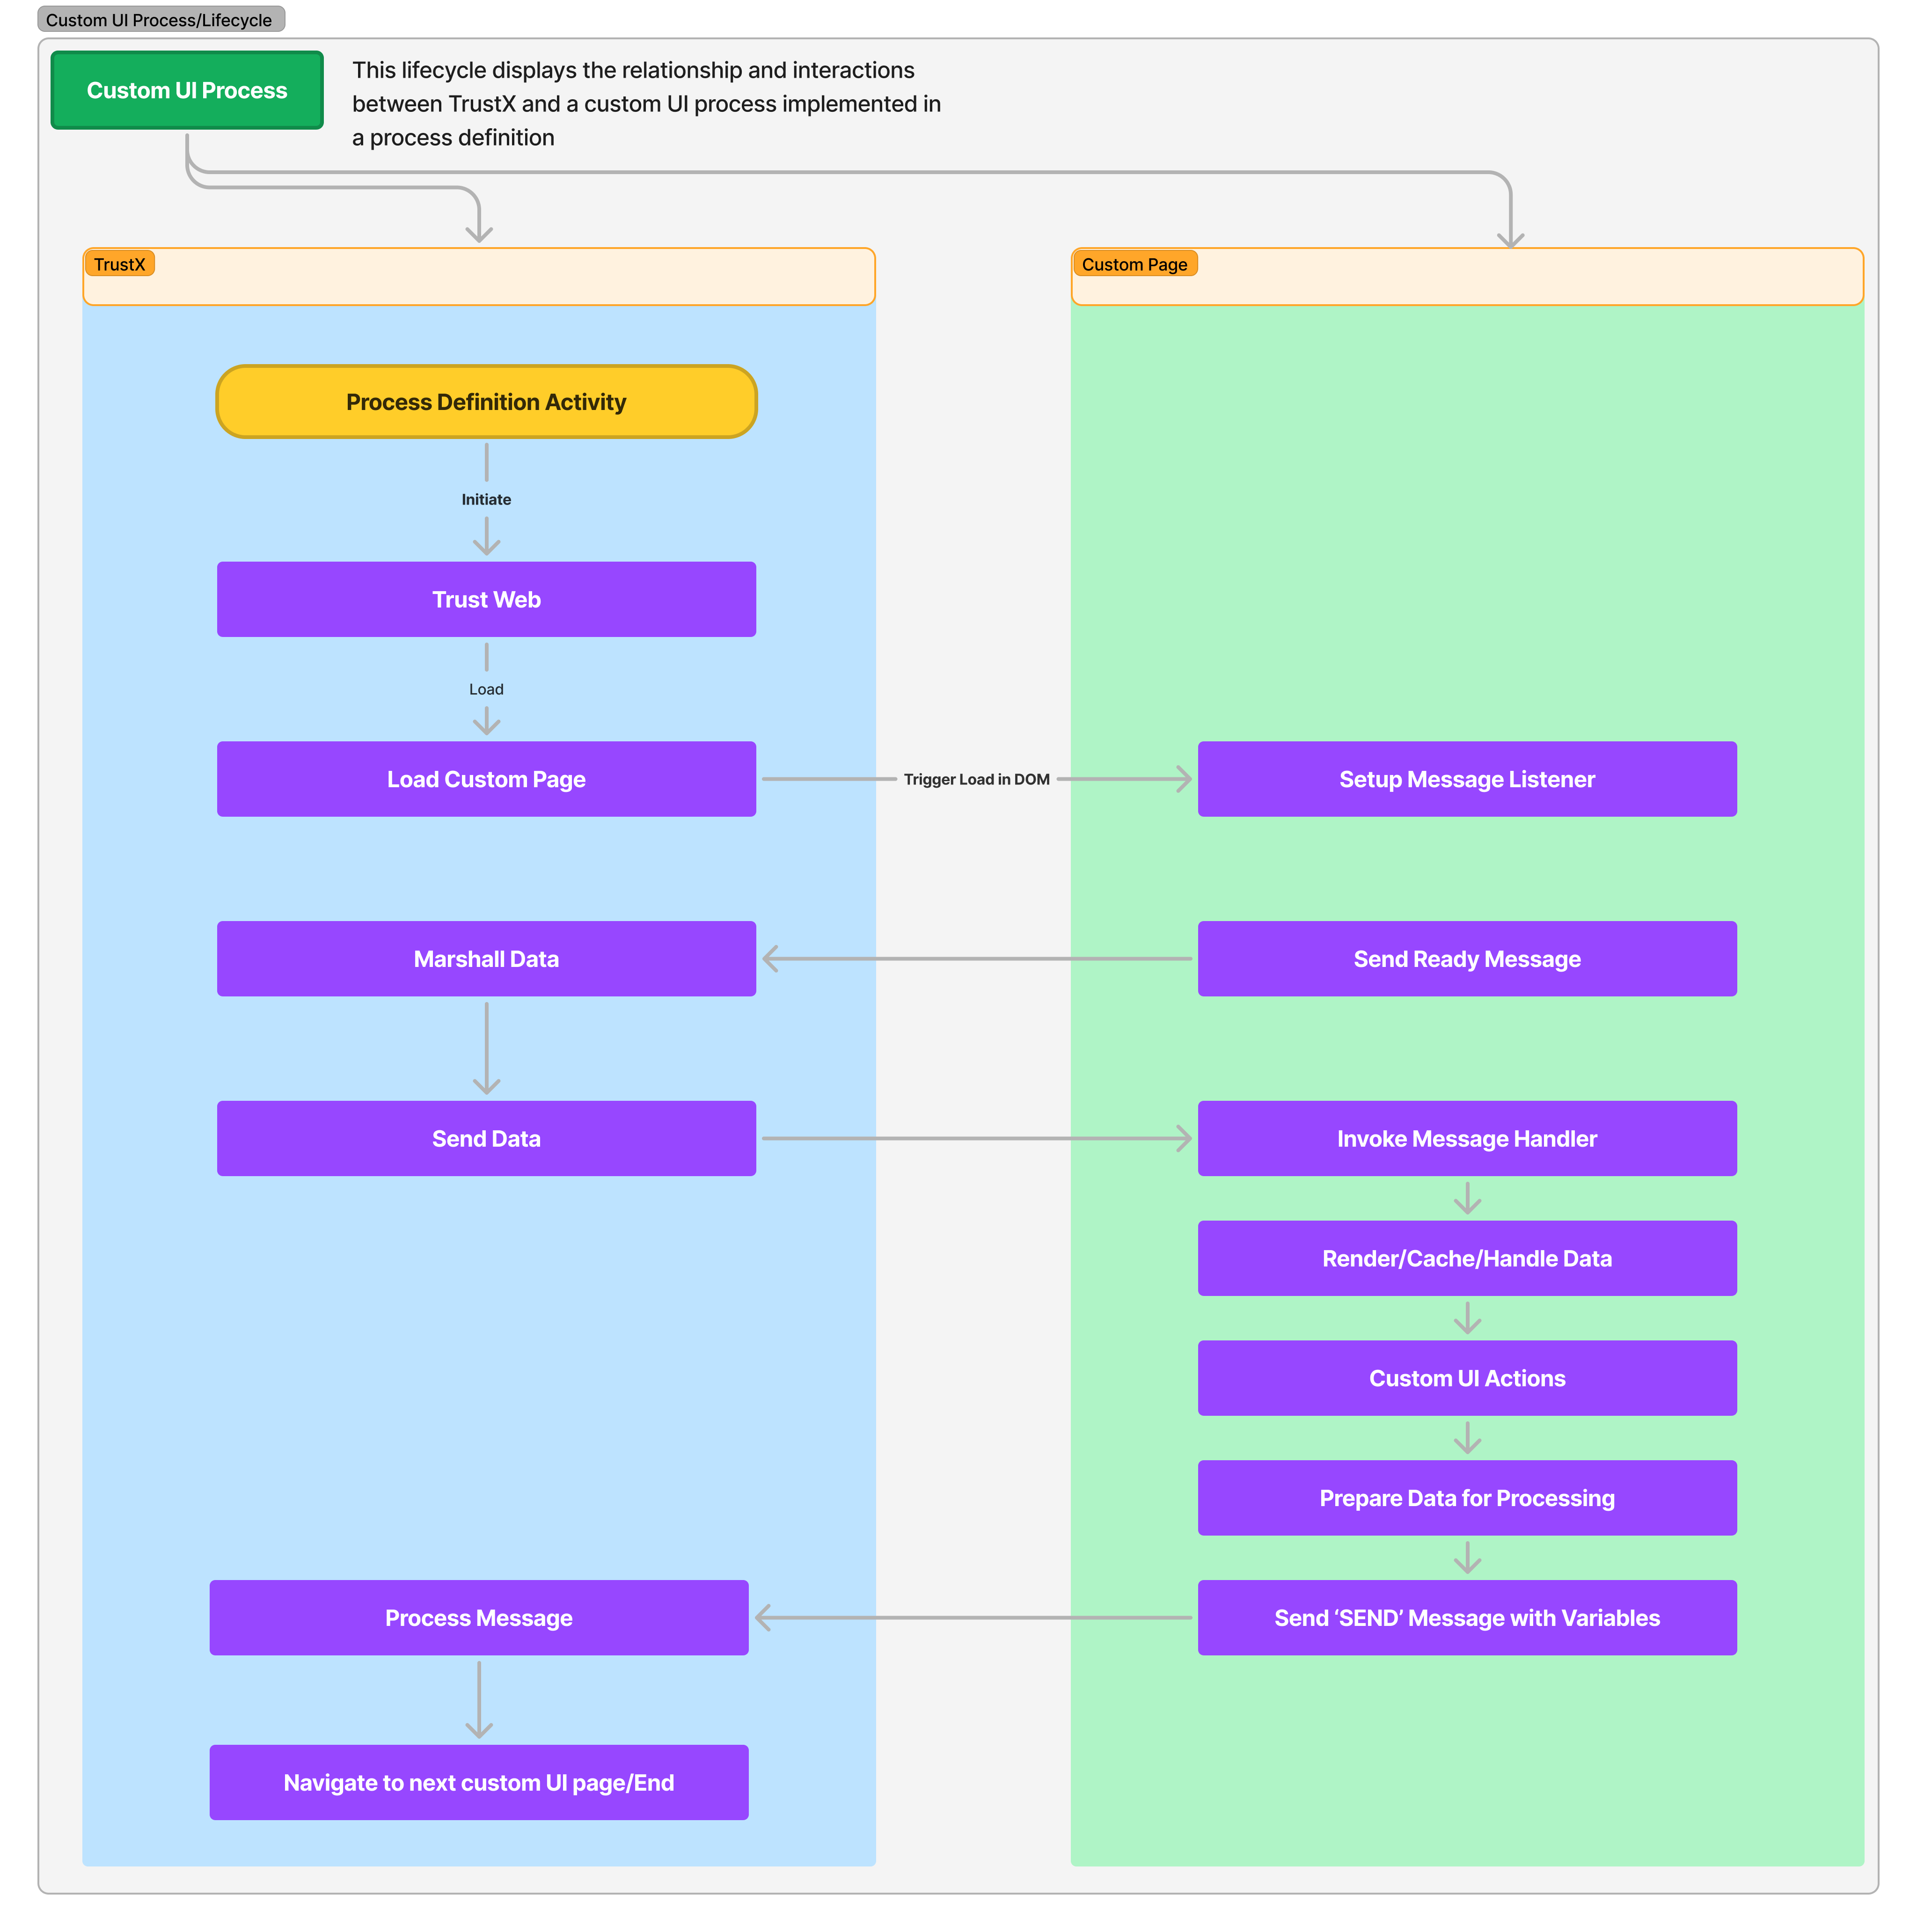
Sequence
TrustX Activity loads the page content from index.html
The page incorporates a listener for postMessage
Custom page invokes with a postMessage to let TrustX know the page is ready to receive data
TrustWeb initiates a callback to the custom page to provide the data
The custom page renders
End user completes activities on the custom page
User initiates the next page or end of process
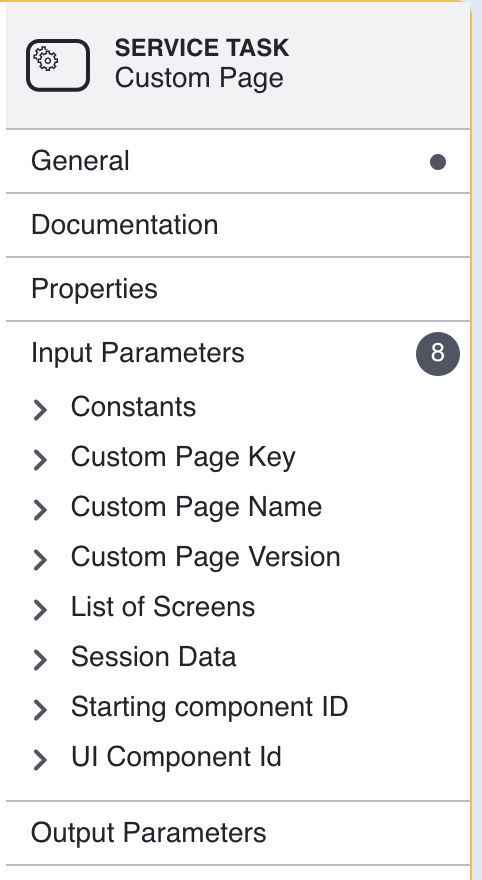
The Custom Page activity includes the following configurable Input Parameters.
Parameter | Description | Default |
|---|---|---|
Constants | A list of key value pairs that are sent to the custom page allowing users to customize behavior using variables between custom pages. | |
Custom Page Key | The unique identifier of the custom page activity. | customPage1 |
Custom Page Name | The name of the Custom Page to be used. This field is a drop-down menu that provides a list of all deployed Custom Pages created in TrustX. | |
Custom Page Version | The version of the selected Custom Page to be used in the Process Definition. | ${1} |
List of Screens | The list of screens to be presented to the user during the capture process. | custom-page |
Session Data | A key value list of session data to pass to the custom page. | |
Starting component ID | The name of the activity step to be sent to the UI. | custom-page |
UI Component ID | The name of the screen used in the capture UI. | custom-page |
Example OCR Implementation
This section will demonstrate how to implement a custom page that can be used for reviewing OCR data captured from a document.
The example in this section features a form created in a custom page that will request first name, last name, country, and gender. Fields will be automatically populated by data captured from a document. If the data is not found, customers can manually enter the data themselves.
Step 1 - Prepare Custom Page Assets
Prepare an assets zip folder that retrieves the OCR session data.
In the example Javascript below, OCR session data, a message event listens for the session data and populates each field if data is found.
Example Javascript:
Example HTML:
Step 2 - Create a New Custom Page
Navigate to the Custom Pages page found under the Integration Hub tab. within the Backoffice. Click the 'New Custom Page' button to create a new custom page.
Upload assets using the 'Choose ZIP Bundle' containing the Javascript and HTML samples provided above.

Once configurations are finalized, click the 'Save & Deploy' button to save the custom page.
Step 3 - Add Custom Page to Process Definition
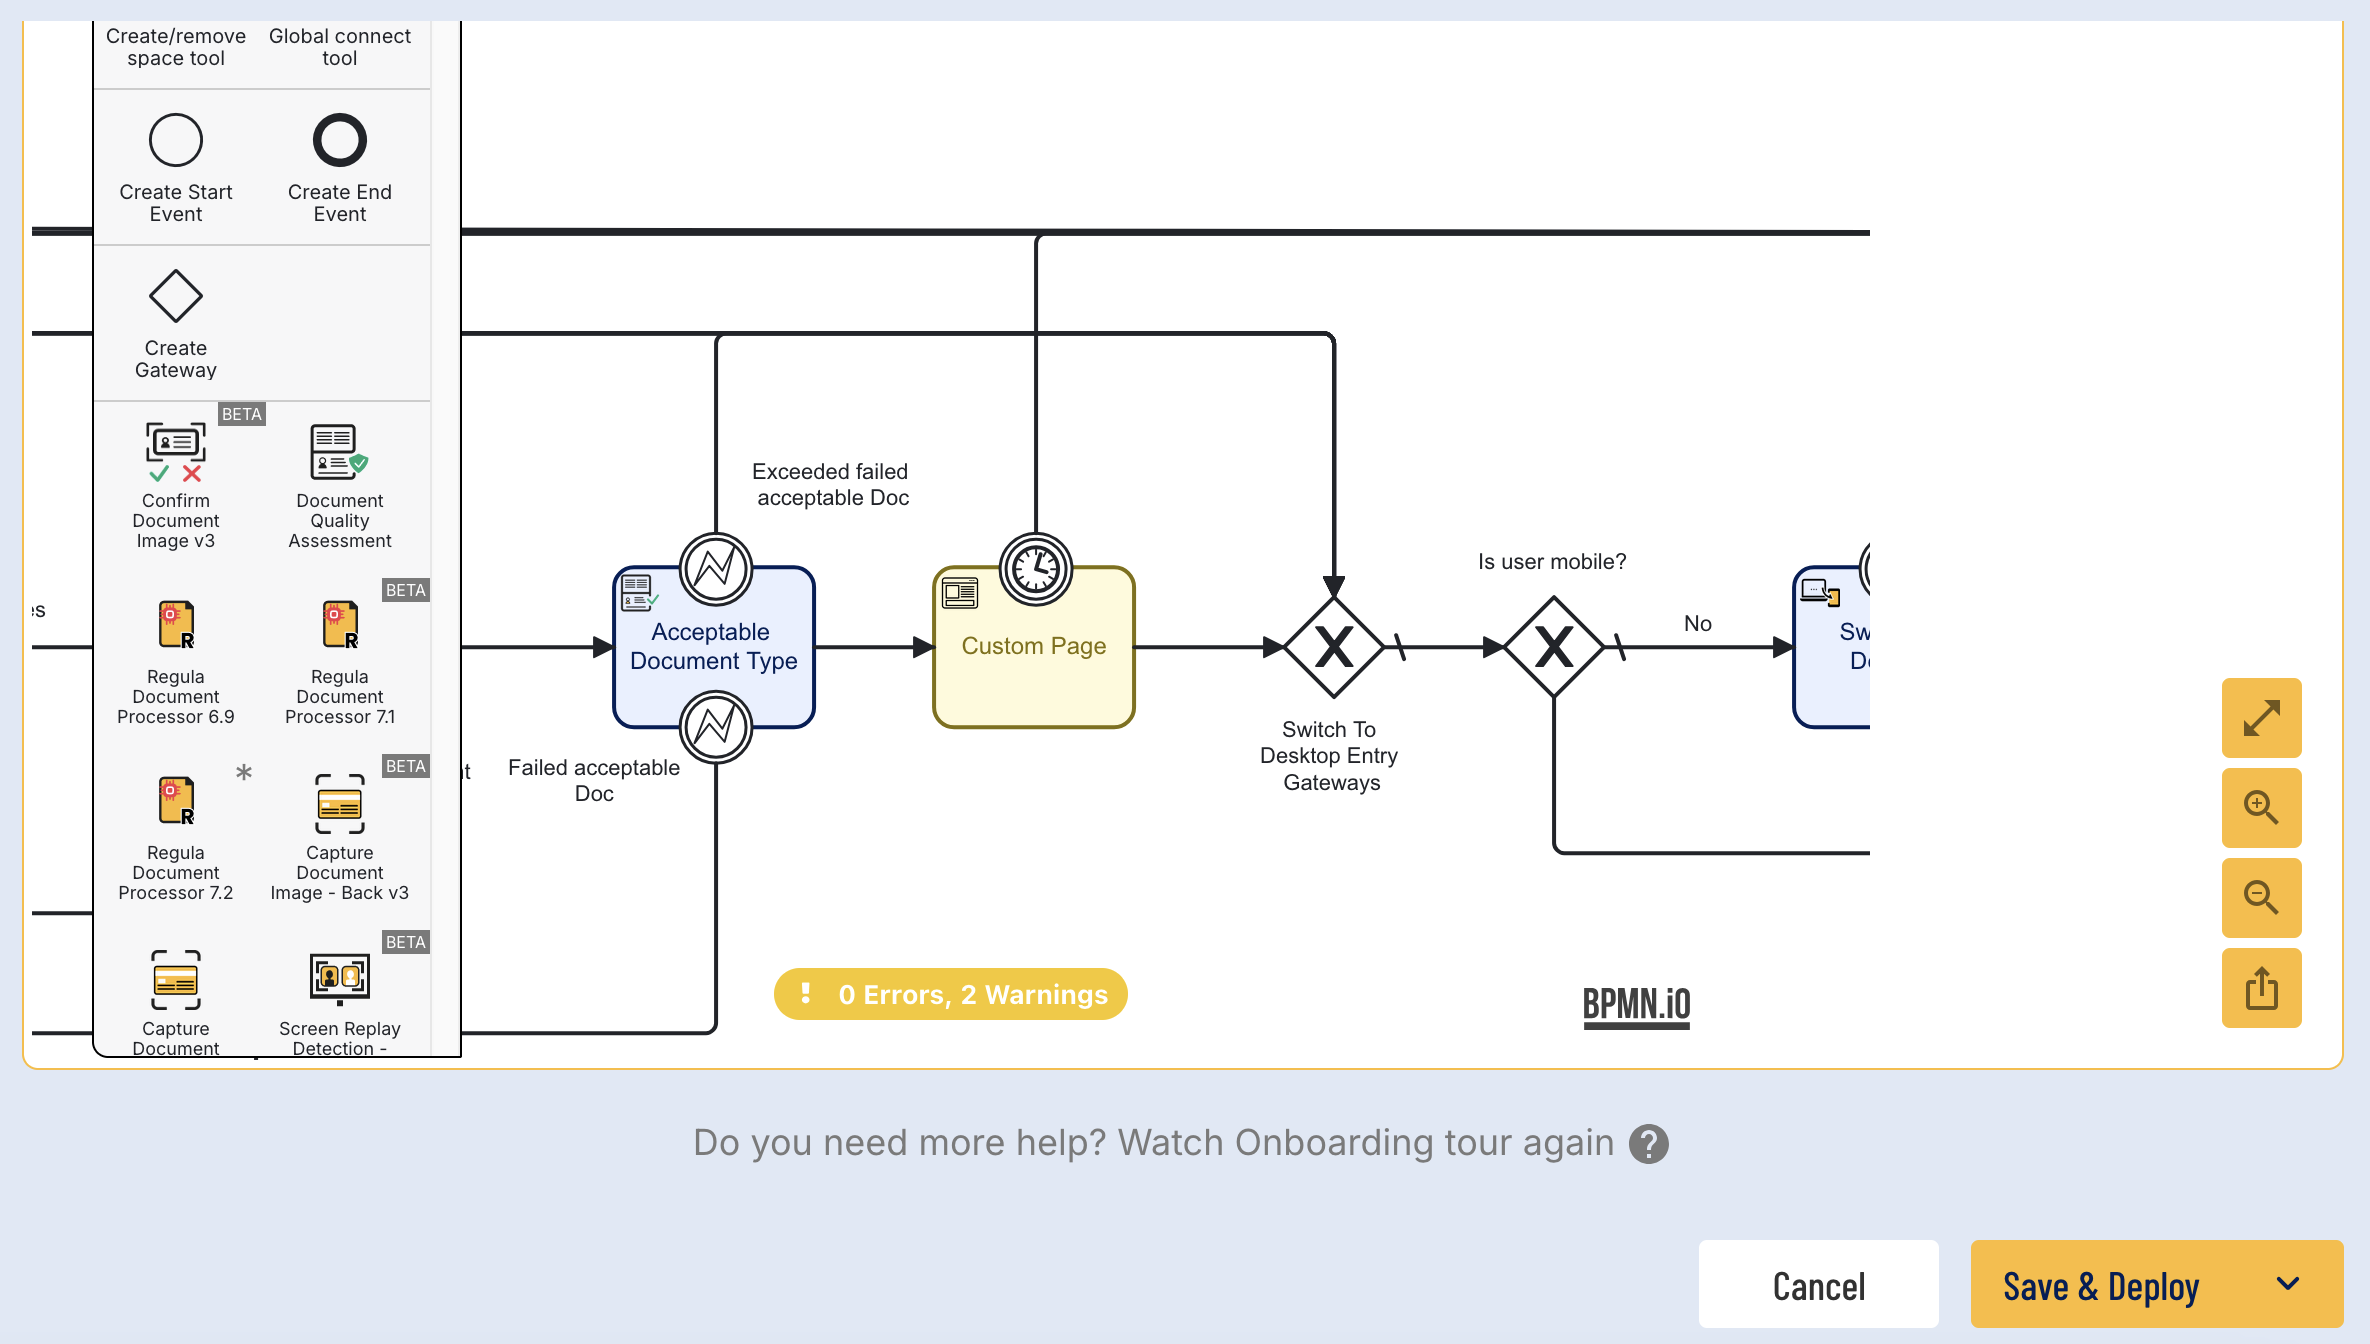
To retrieve OCR data inside the custom page, the custom page activity will be placed after a document has been successfully captured. This example demonstrates a standard document capture flow where the custom page appears after the end-user has successfully captured their document.
Step 4 - Configure Input Parameters
To ensure that the session data is passed to the custom page, it is required to map the entries in the session data input parameter. In this example, the following values must be mapped:
firstName
issuingCountry
lastName
gender
Click the 'Custom Page' activity to open up the right-side contextual menu.
Expand the 'Custom Page Name' input parameter and set the value to the previously created custom page.
Expand the 'Session Data' input parameter and click the '+' symbol to add a new entry for each session data that will be accessed (firstName, issuingCountry, lastName, gender).
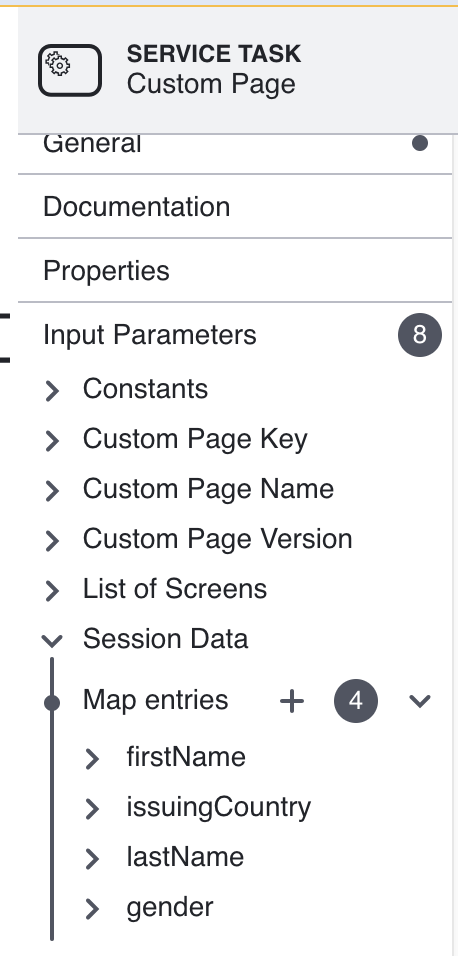
Each entry will require a key - value pair where the key is represented by the name of the session data (example: firstName) and the value will be represented by the session data retrieved during the Process Instance. In this example, the values are seen in the table below.
Key | Value |
|---|---|
firstName | ${_idDocs["doc1"].currentDocumentCapture.extractedText.ocrData.mrz["8"].value} |
issuingCountry | ${_idDocs["doc1"].currentDocumentCapture.extractedText.ocrData.mrz["38"].value} |
lastName | ${_idDocs["doc1"].currentDocumentCapture.extractedText.ocrData.mrz["9"].value} |
gender | ${_idDocs["doc1"].currentDocumentCapture.extractedText.ocrData.mrz["12"].value} |
From the above table:
_idDocs["doc1"] retrieves data from the __ idDocs session data table and "doc1" is the unique ID of the document.
.currentDocumentCapture represents the current document captured during the Process Instance flow.
.extractedText is the text extracted from the captured document image.
.ocrData.mrz["8"].value is the extracted ocr data where index 8 represents the firstName value.
For more information on the _idDocs session data tables, see the _idDocs session data guide.
Once all configurations are set, click the 'Save & Deploy' button to finalize the configuration.
Setting Language
To ensure that Custom Pages accepts language parameter when the user selects a new language from the Trust Web language selector, the LOCALE event variable must be implemented and data will be available inside event.data.variables.constants.language
This functionality is only supported by with the latest 'Custom Page V4' and 'Custom Page V4 - External' activities.
In the example implementation below, the function will listen for a change in the language and apply the selected language accordingly: