Email Templates Guide
Introduction
Email Templates allow users to define emails that can be sent from a Process Definition using the Send Email activity. Email Templates are highly customizable and provide in HTML format for designing and creating the content of an email. Additionally, session date can be used to personalize the email by including variables in the email body.
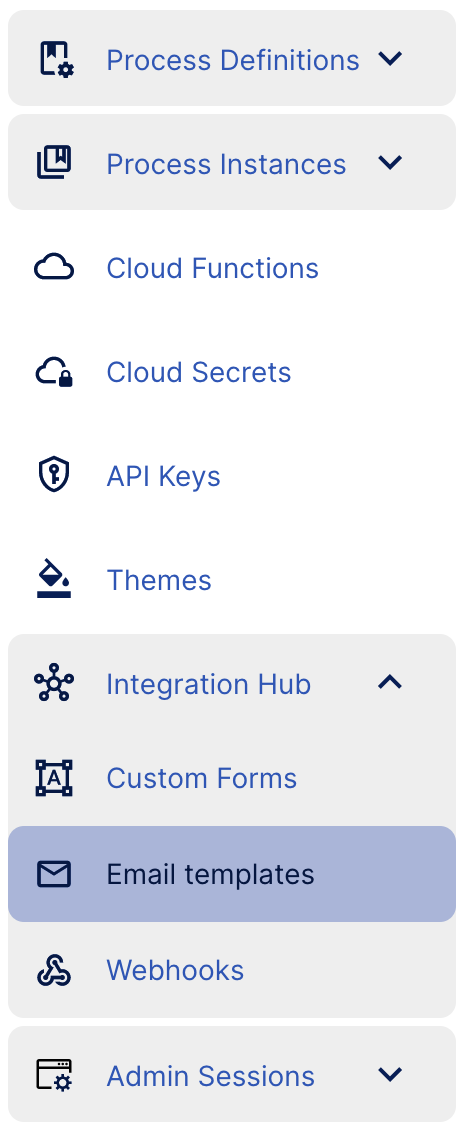
The Email Templates menu is available under the Integration Hub menu item found in the left-side navigation bar.
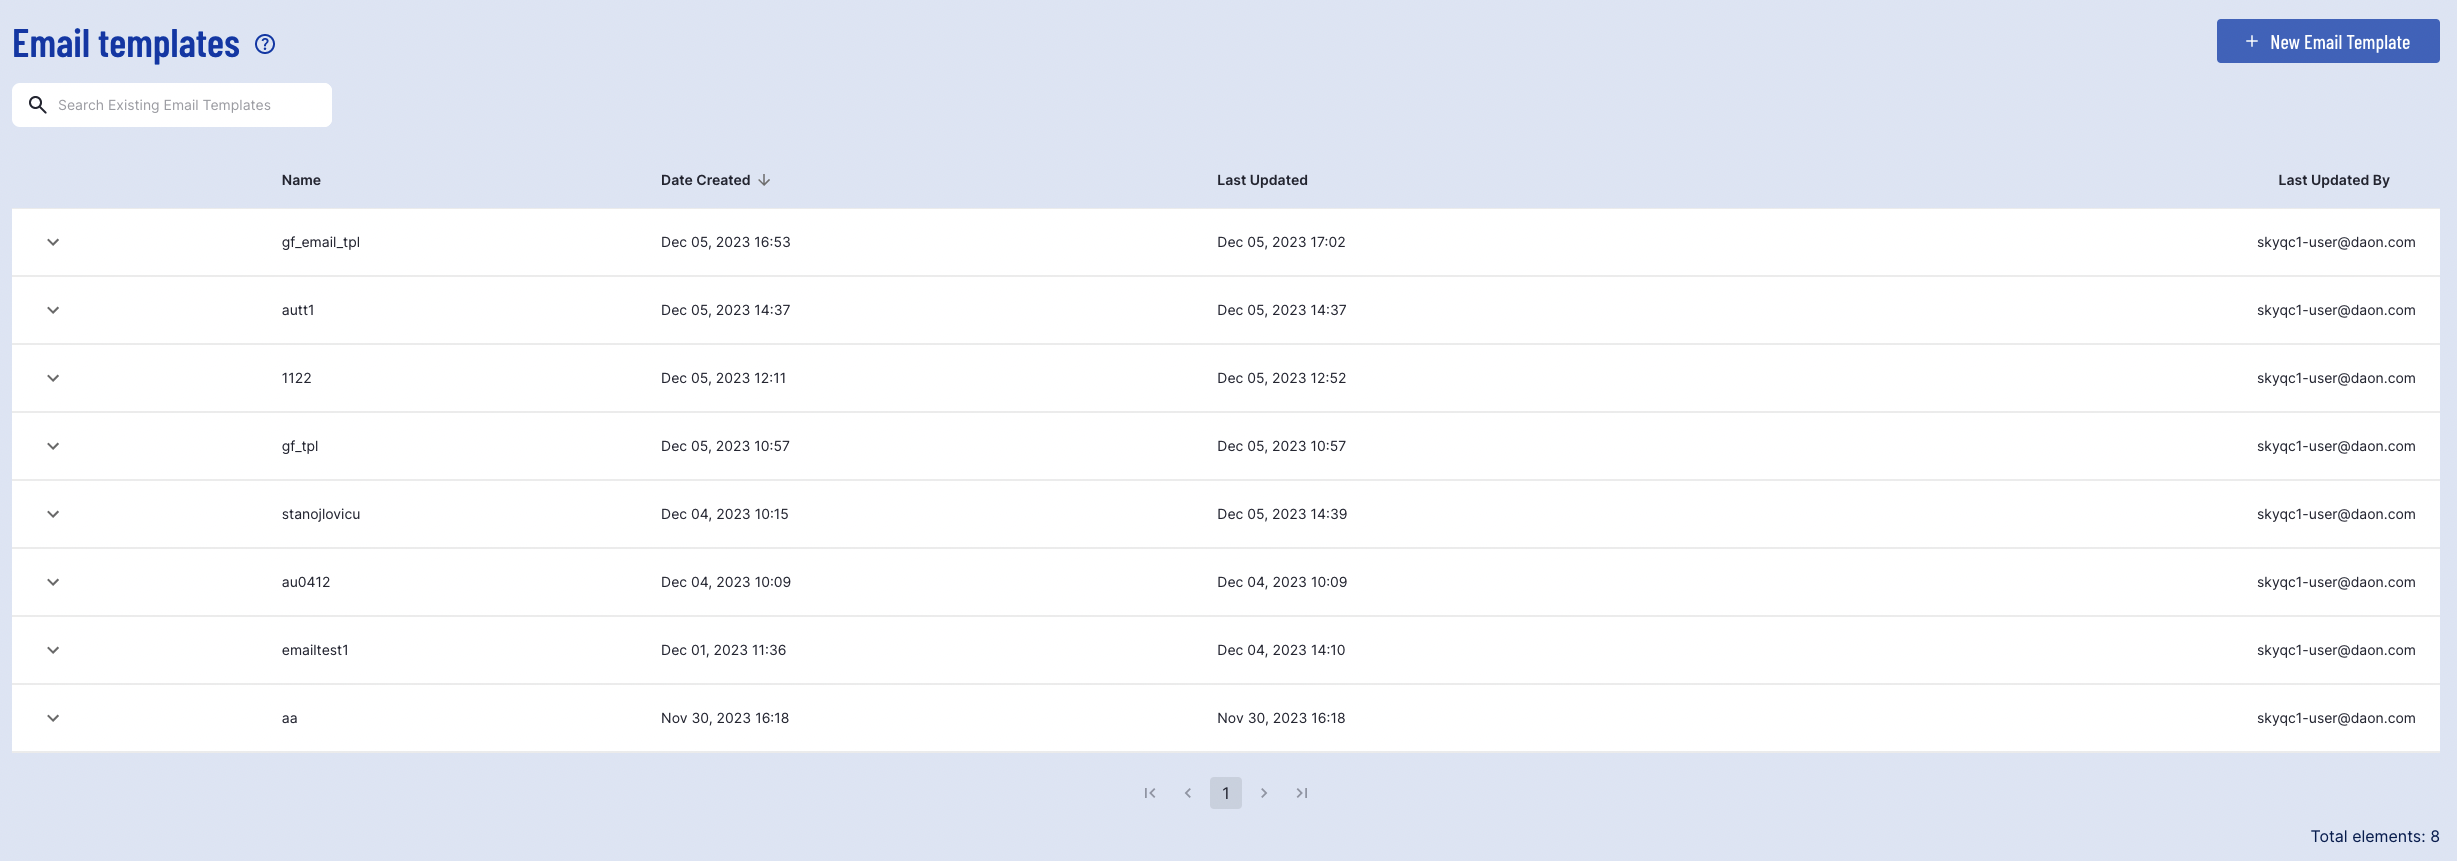
The Email Templates landing page provides a list of all Email Templates that have been created by the tenant in TrustX.
Creating an Email Template
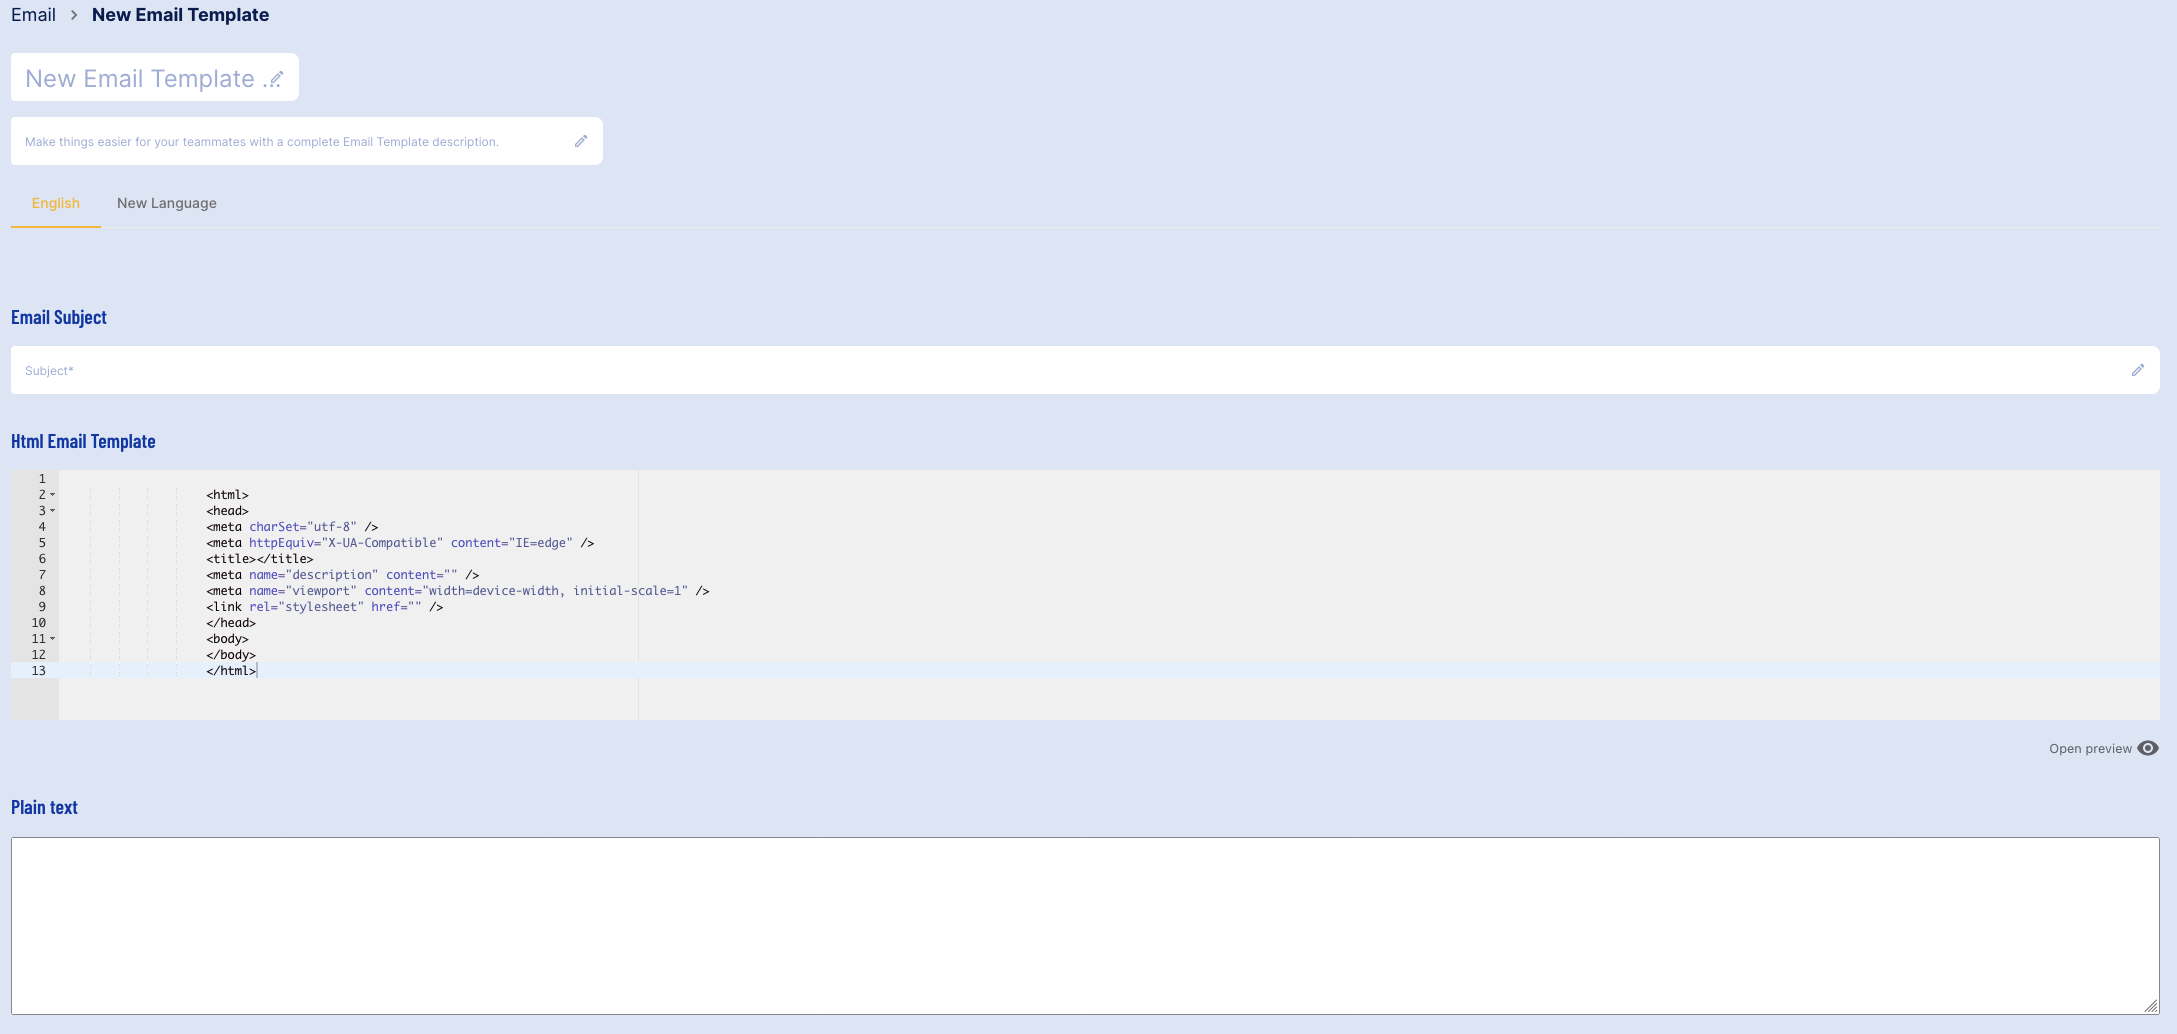
To create a new Email Template, click the 'New Email Template' button found at the top-right of the page.

An email template consists of the following elements:
- Name - The name of the Email Template.
- Description - A brief description to outline the purpose of the template.
- Languages - A list of languages the email can be displayed in.
- Email Subject - The subject of the email. This will be visible to those that receive the email. This field is mandatory.
- HTML Email Template - Defines the email body and style.
Defining the Email Body
The email body is defined within the <body> elements of the HTML. This will serve as the main content of the email sent from the Send Email activity.
For example:
<html> <head> <meta charSet="utf-8" /> <meta httpEquiv="X-UA-Compatible" content="IE=edge" /> <title></title> <meta name="description" content="" /> <meta name="viewport" content="width=device-width, initial-scale=1" /> <link rel="stylesheet" href="" /> </head> <body> Dear User, A new Process Instance is pending review action. Kind regards, Daon Team </body></html>Using Session Data
It is possible to use session data and perform variable substitution to personalize emails or provide further information regarding the Process Instance.
Session Data is provided in the format: {{processvar.Object["Data”]}}
For example, we can retrieve the first name of the tenant by accessing the initParams object and extracting the firstName data: {{processvar.initParams["firstName”]}}.
For a full list of Session Data tables, see the Session Data Tables guide.
For example, an email can be sent that includes the tenant first name:
<html> <head> <meta charSet="utf-8" /> <meta httpEquiv="X-UA-Compatible" content="IE=edge" /> <title></title> <meta name="description" content="" /> <meta name="viewport" content="width=device-width, initial-scale=1" /> <link rel="stylesheet" href="" /> </head> <body> Dear {{processvar.initParams["firstName”]}}, A new Process Instance is pending review action. Kind regards, Daon Team </body></html>Deleting an Email Template
Email Templates can be deleted via the Backoffice by navigating to the Email Templates page and finding the Email Template that you wish to delete. An Email Template can be deleted when it satisfies one of the following scenarios:
- An Email Template has been saved but not yet deployed.
- An Email Template has been set to the "inactive" or "retired" status.
- An older version of an Email Template can be deleted if multiple versions exist. Note that the most recently created version of an Email Template cannot be deleted.
The most recently created version of an Email Template that is deployed and active cannot be deleted. In this case, the delete icon will not appear under the actions column.
To delete an Email Template, expand the list of option by clicking the arrow next to the template name.

Under the actions column, click the delete bin icon and a pop-up will appear asking you to confirm this decision. Note that once an Email Template is deleted, it cannot be undone.

Previewing Emails
A preview of the email can be viewed by clicking the preview button beneath the HTML Email Template.

An 'Email preview' window will open to the right of the editor, displaying a preview of the email body.

Variable Substitution will not be performed in the email preview. As such, use of session data will remain as code.
A 'Test Send' feature is also available. This allows users to send test emails to a specified list of recipients.
Click the 'Test Send' button to open a pop-up modal.

Add emails by entering the email address into the available text field, then press the 'Enter' key to confirm the address.
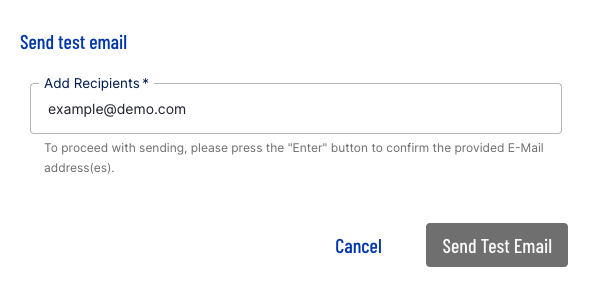
Press the 'Enter' key to confirm the addition of the email.
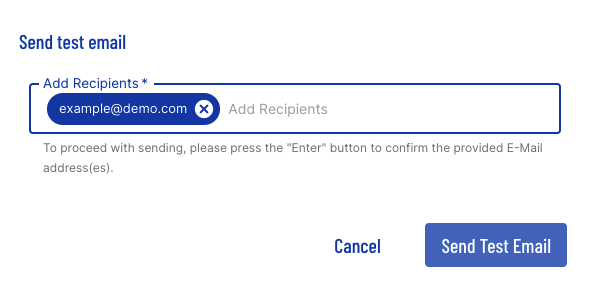
Multiple recipients can be included on the test email.
As with the email preview, variable substitution will not be performed when sending a test email. Session data will be displayed as code.