Title
Create new category
Edit page index title
Edit category
Edit link
Setting Counters
Introduction
Counters can be included in a Process Definition to keep track of the number of times an action is performed. This can be used to determine the flow of a Process Instance depending on the count of actions taken. This functionality can be added to a Process Definition using the Counter activity.
Counters can be used for any number of use cases, such as recording how many times an user has executed a path or activity within a process and making making a decision on how a users journey should proceed once a counter value has been exceeded.
Configuring a Counter
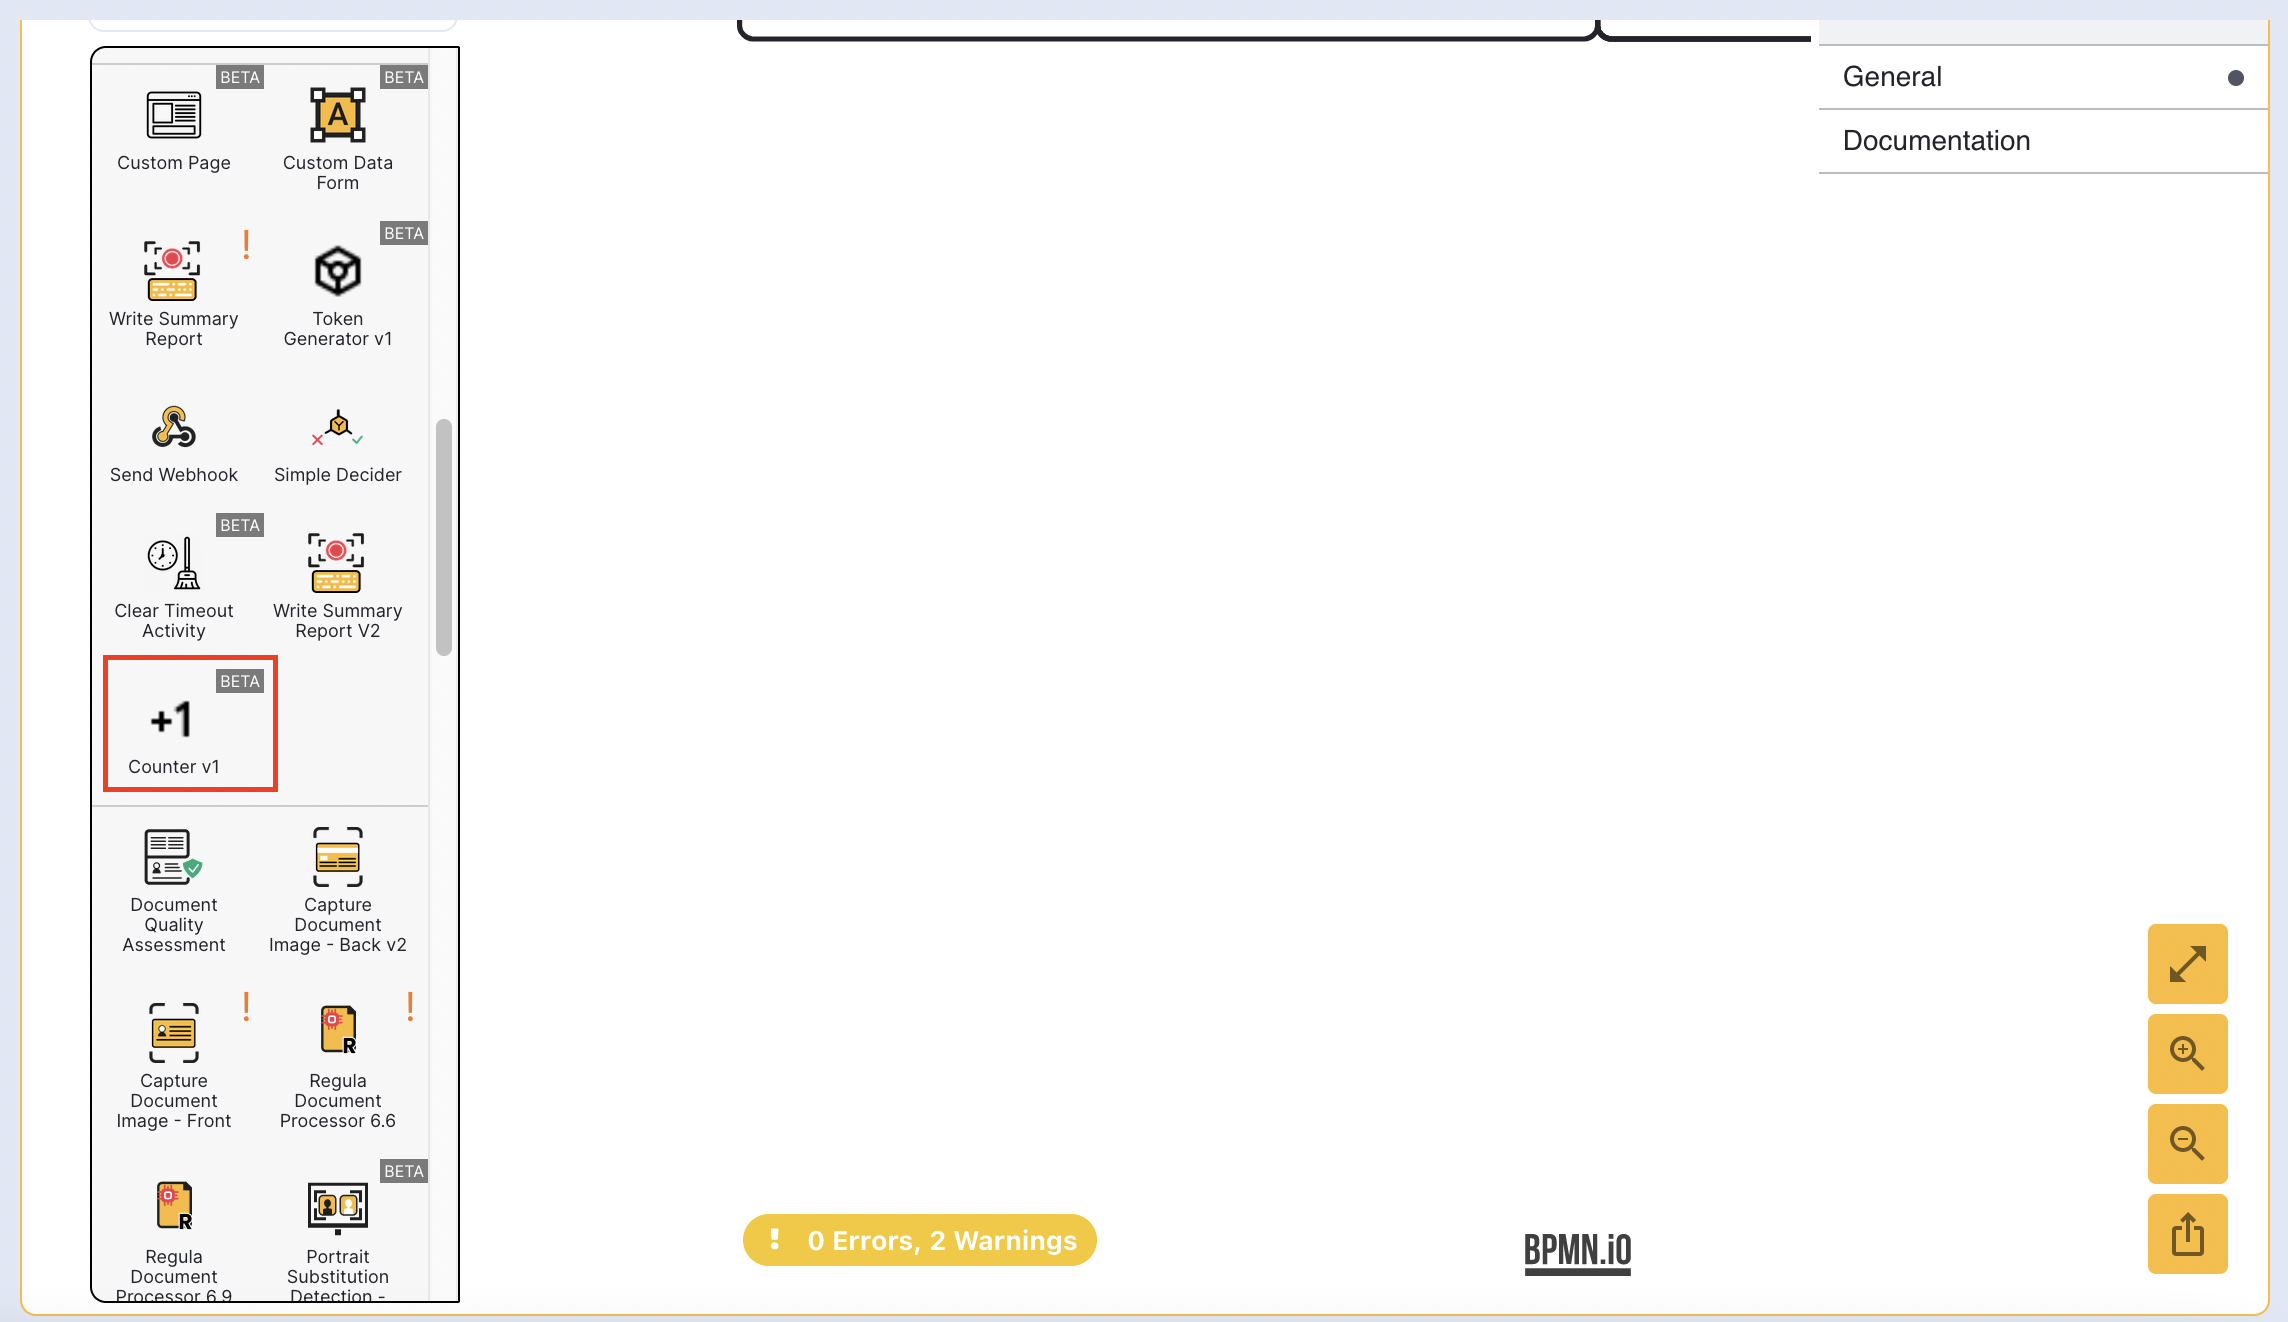
Counters are added to a Process Definition using the Counter activity which can be found in the activity palette inside the Process Designer.

In the example below, a counter will be configured to determine how many times the end-user has failed the verification checks within a document capture process. If the count exceeds a given number, the end-user will be redirected to a custom form.
Setting the Process Definition
In this example, a standard template is used that include document capture and verification checks. First, drag the Counter activity from the left-side pallet into the Process Designer.

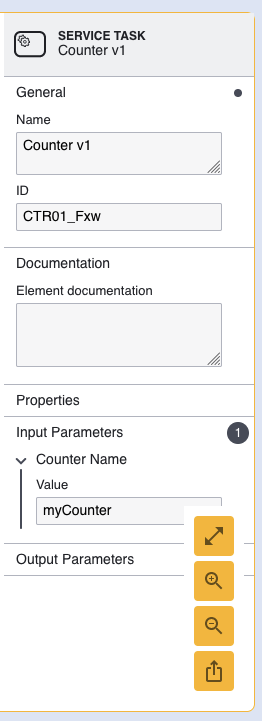
In this example, the default Counter Name value of 'myCounter' will be used.
The values of counters are stored as execution variables using the 'Counter Name'. These execution variable can be accessed in expressions in activity inputs as well as within Cloud Functions if needed.

Next, connect sequence flow arrows from each of the error boundary events to the newly created counter. This will ensure that each time an error is discovered, a the value of the counter will be incremented.
The counter will set the value to 1 on the execution and increment by 1 each time the counter is executed.

Next, add a gateway to the Process Designer. This gateway will be used to determine which direction the Process Instance will go if the counter has not exceeded a certain number. This gateway will be connected to the Counter using a sequence flow arrow.

Add the custom form activity to the Process Designer and connect the activity to the newly created gateway using a sequence flow arrow. In the example below, the timer and error boundary events of the form have been connected to the end activity.

If the counter has not exceeded a number of 5, the end-user will be directed to capture page instead of the custom form. To configure this, create a new sequence arrow connecting the gateway to the 'Capture Document Image - Front' activity.

Select the sequence flow arrow connecting the gateway to the custom form and find the spanner icon to set this sequence flow arrow as the default.

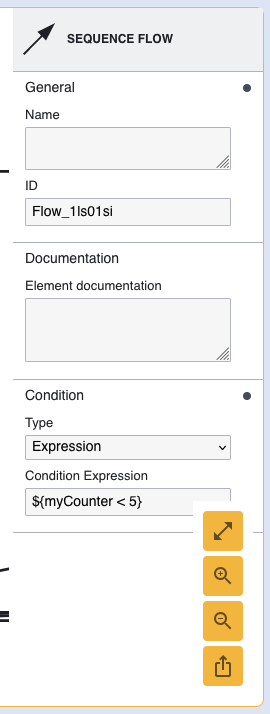
Return to the sequence flow arrow connecting the gateway to the document capture activity. From the right-side contextual menu, create a new condition of type 'Expression' and enter ${myCounter < 5} as the Condition Expression value where 'myCounter' represents the name given to the Counter activity input parameter.

Finally, create a sequence flow arrow connecting the custom form to the Select Document Type activity. This will indicate that once the form is complete, the end-user will be redirected to restart the document capture process.

This example is just one of many use cases that the counter activity can be used for to determine the flow of a Process Instance.