Overview
OIDC Client integration enable users to integrate OIDC protocol to standardize authentication and authorization of end-users. This will allow the relying party to authenticate end-users from their desired application by using the ID&V flow in TrustX.
A typical OIDC integration will follow the outlined steps:
The end-user will start at the relying party application.
The end-user will authenticate using the TrustX ID&V flow.
Once the ID&V flow is complete successfully, the end-user is redirected back to the relying party application using the
redirect_uri.During the session, the relying party can retrieve proof of the end-user authentication using the ID Token or retrieve various claims about the end-user.
The session can be ended by calling the
/logoutendpoint. The end-user will be redirected to the Post Logout Redirect URI
OIDC integration is disabled by default. To enable this feature, contact Daon Support to get started.
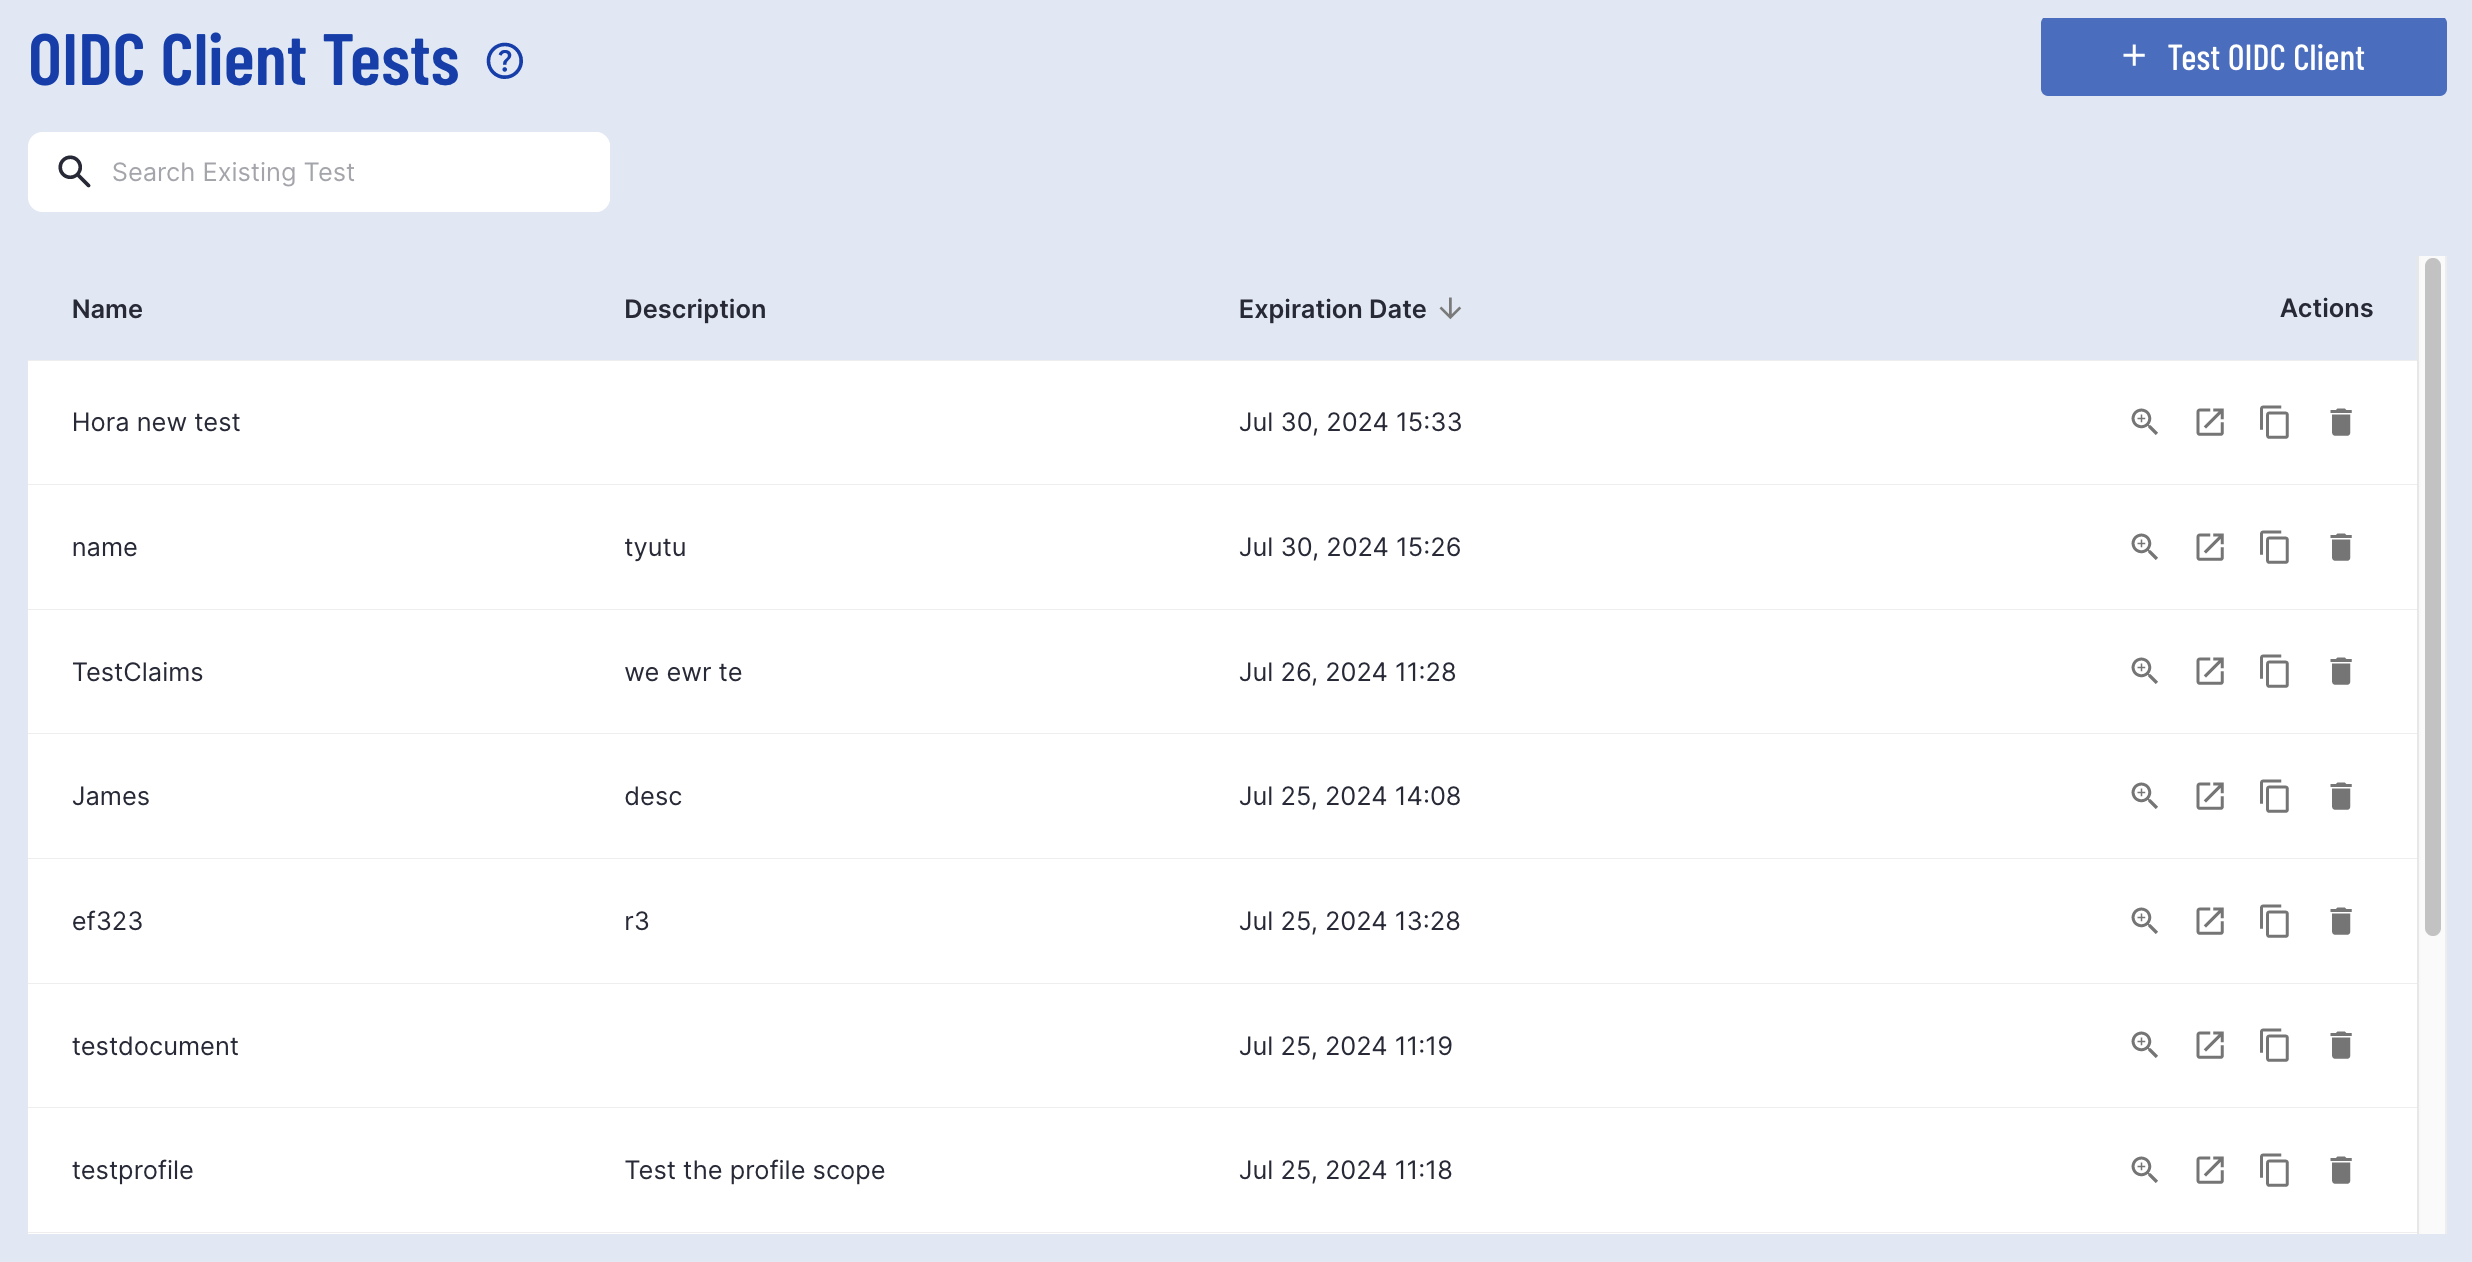
OIDC Clients Landing Page
OIDC Clients can be accessed via the Backoffice application by selecting 'OIDC Client' found under the OIDC tab in the right vertical menu.
The OIDC Clients landing page will provide a list of all clients created in TrustX. By default, only one OIDC Client will be created for each tenant. This client is used by TrustX for the OIDC Tests environment. To get started with OIDC integration, a new OIDC Client will need to be created.
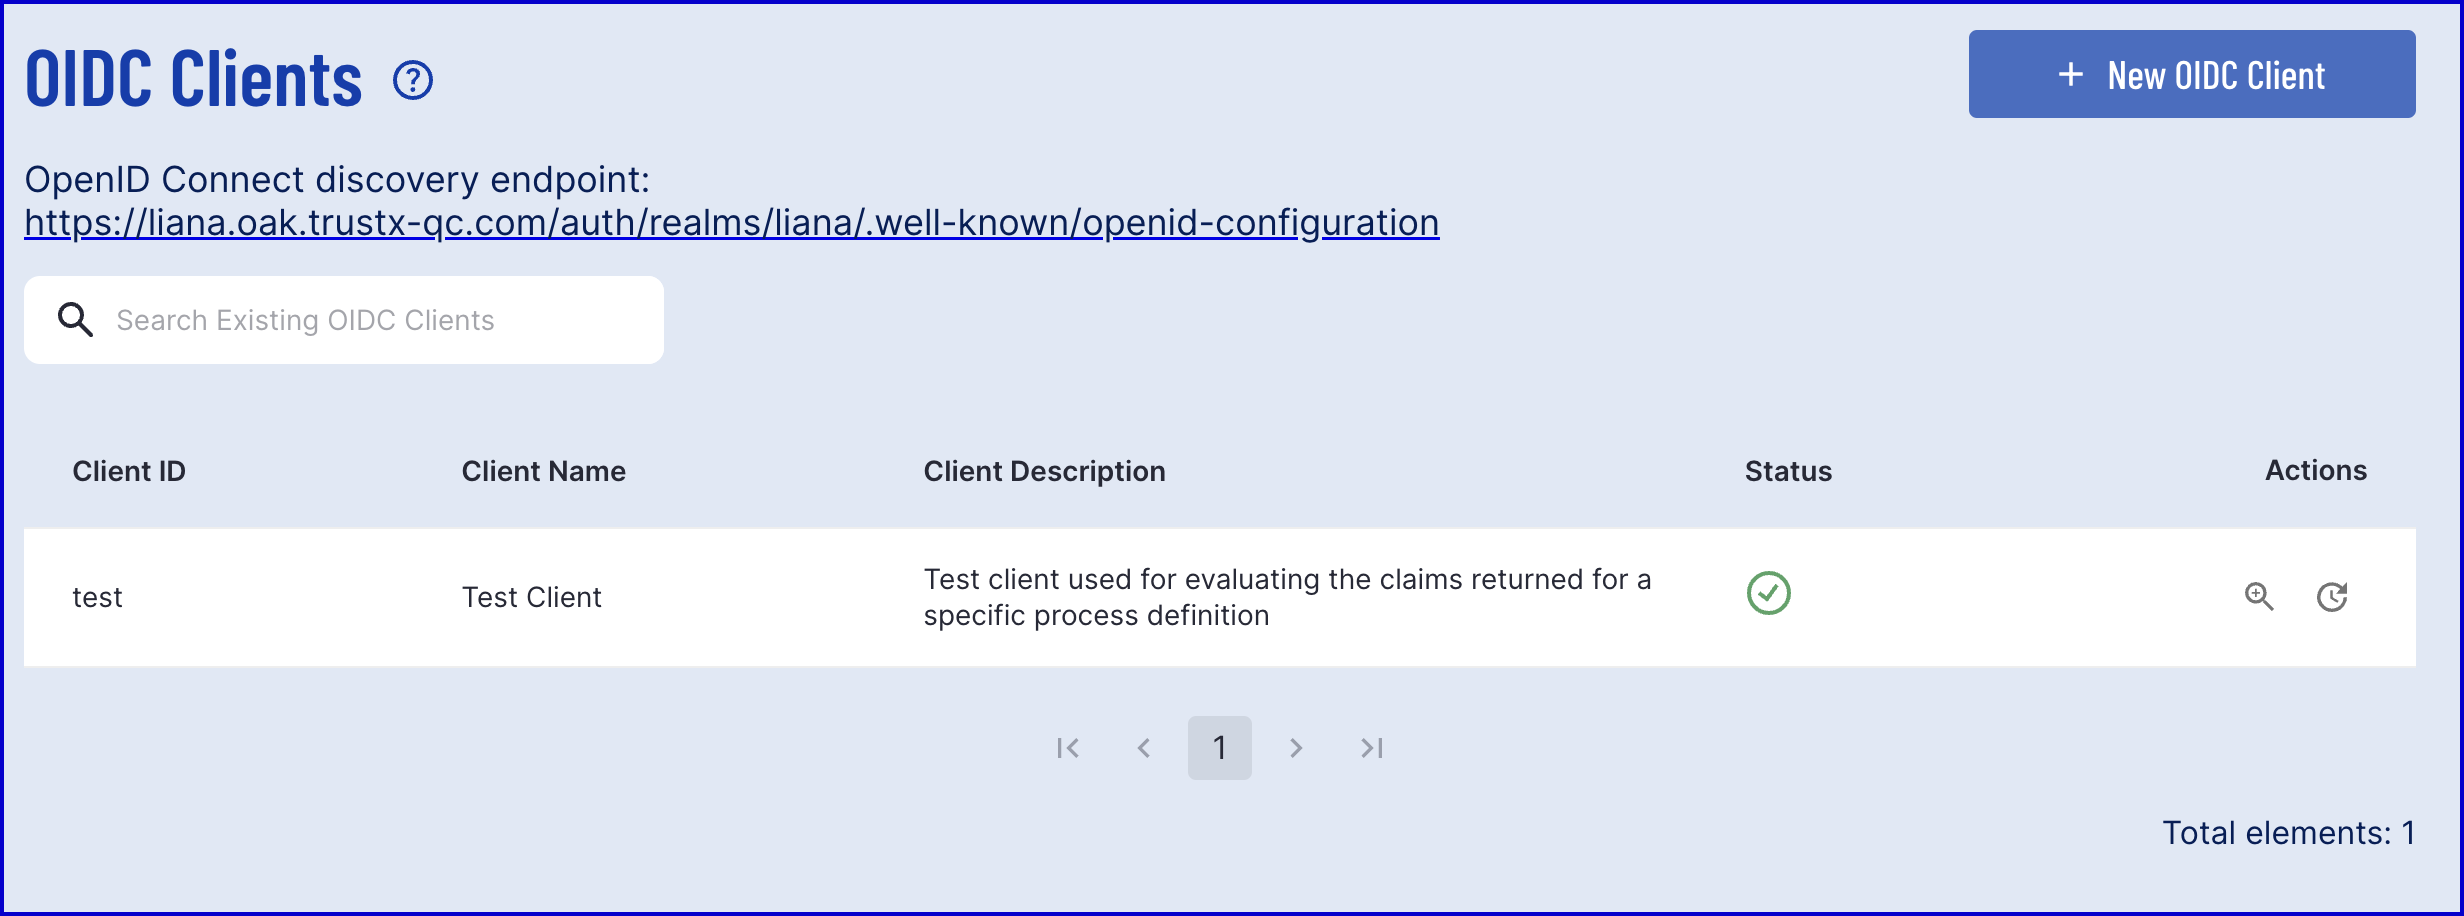
The landing page also includes the discovery endpoint. Clicking this link will redirect to the full configuration specification, including the authorization endpoint, token endpoints and end-session endpoint.
Endpoint Name | Endpoint URI | Description |
|---|---|---|
authorization_endpoint | https://{tenantid}.oak.trustx.com/auth/realms/{tenantid}/protocol/openid-connect/auth | This endpoint is used to authenticate a user. Specify the query parameters such as scope and claims to define what data will be accessed in the request. |
token_endpoint | https://{tenantid}.oak.trustx.com/auth/realms/{tenantid}/protocol/openid-connect/token | Request a token using the specified client. |
userinfo_endpoint | https://{tenantid}.oak.trustx.com/auth/realms/{tenantid}/protocol/openid-connect/userinfo | This endpoint will return claims or information about the end-user currently logged in. |
end_session_endpoint | https://{tenantid}.oak.trustx.com/auth/realms/{tenantid}/protocol/openid-connect/logout | This endpoint is used to terminate an existing session. The Post-Logout Redirect URIs will be used to redirect the user back to the relying party application. |
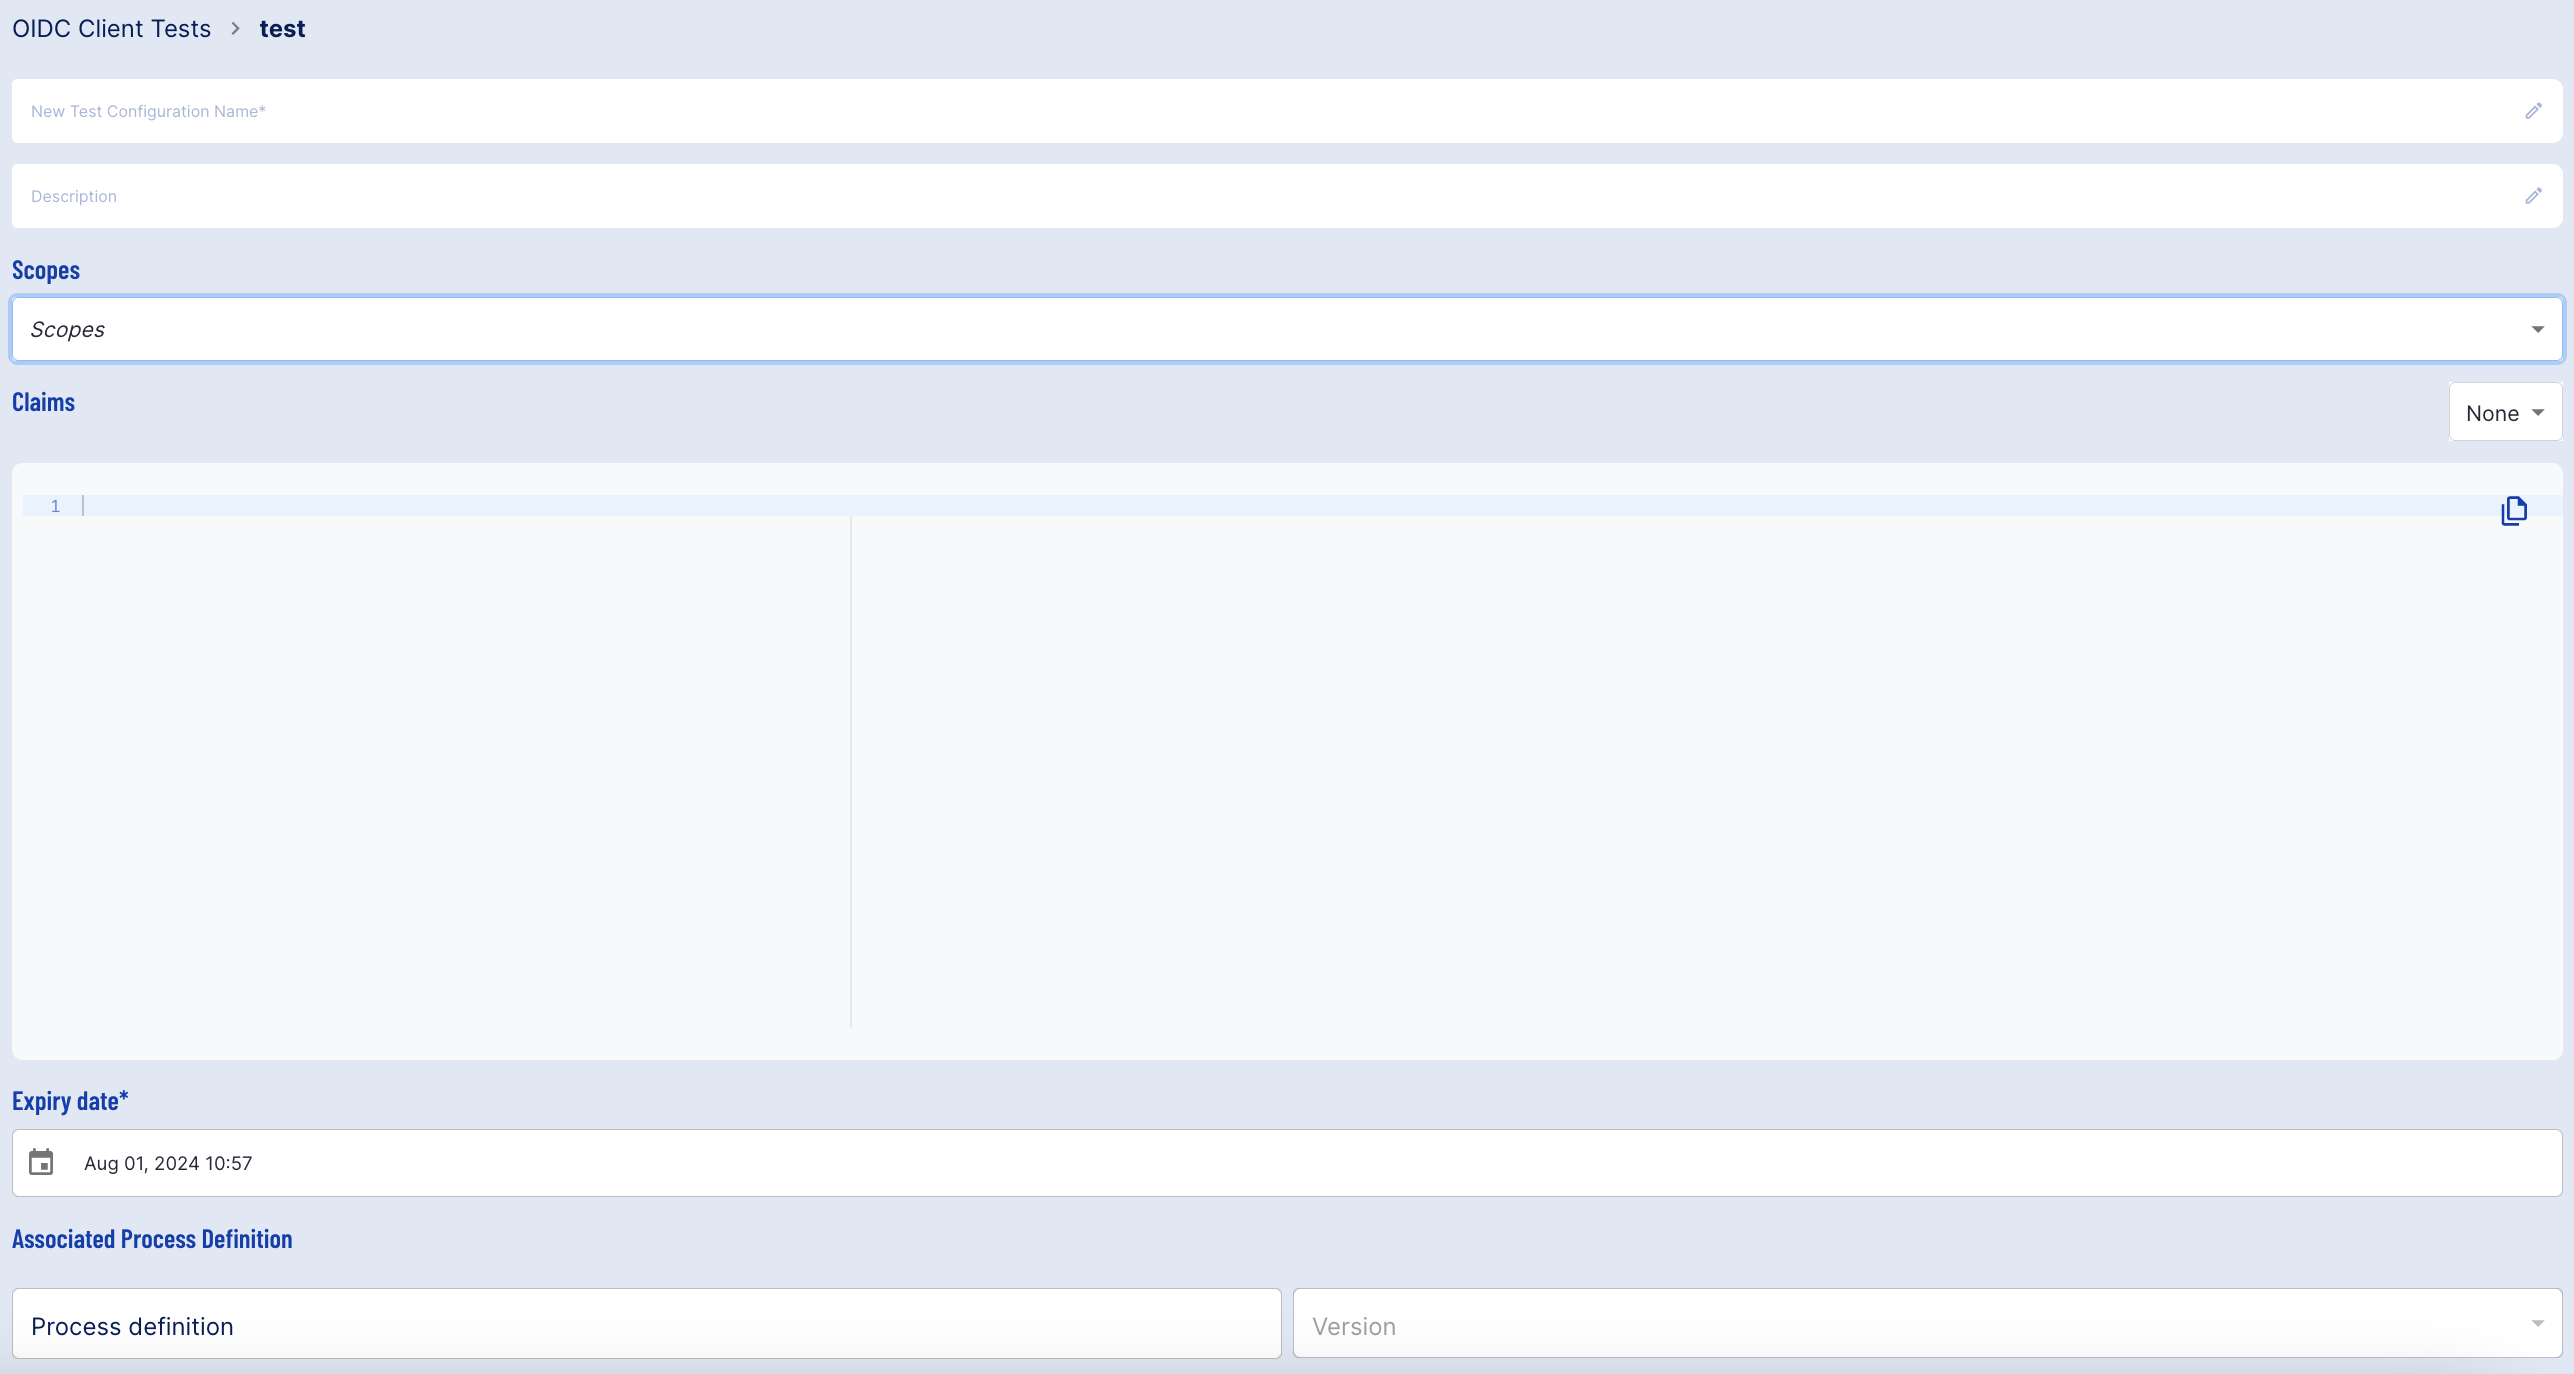
Create an OIDC Client
A new OIDC Client can be created by selecting the 'New OIDC Client' button found at the top-right of the OIDC landing page.

The New OIDC Client page will let users configure various properties of their OIDC client, including the Process Definition that the client will be associated with.
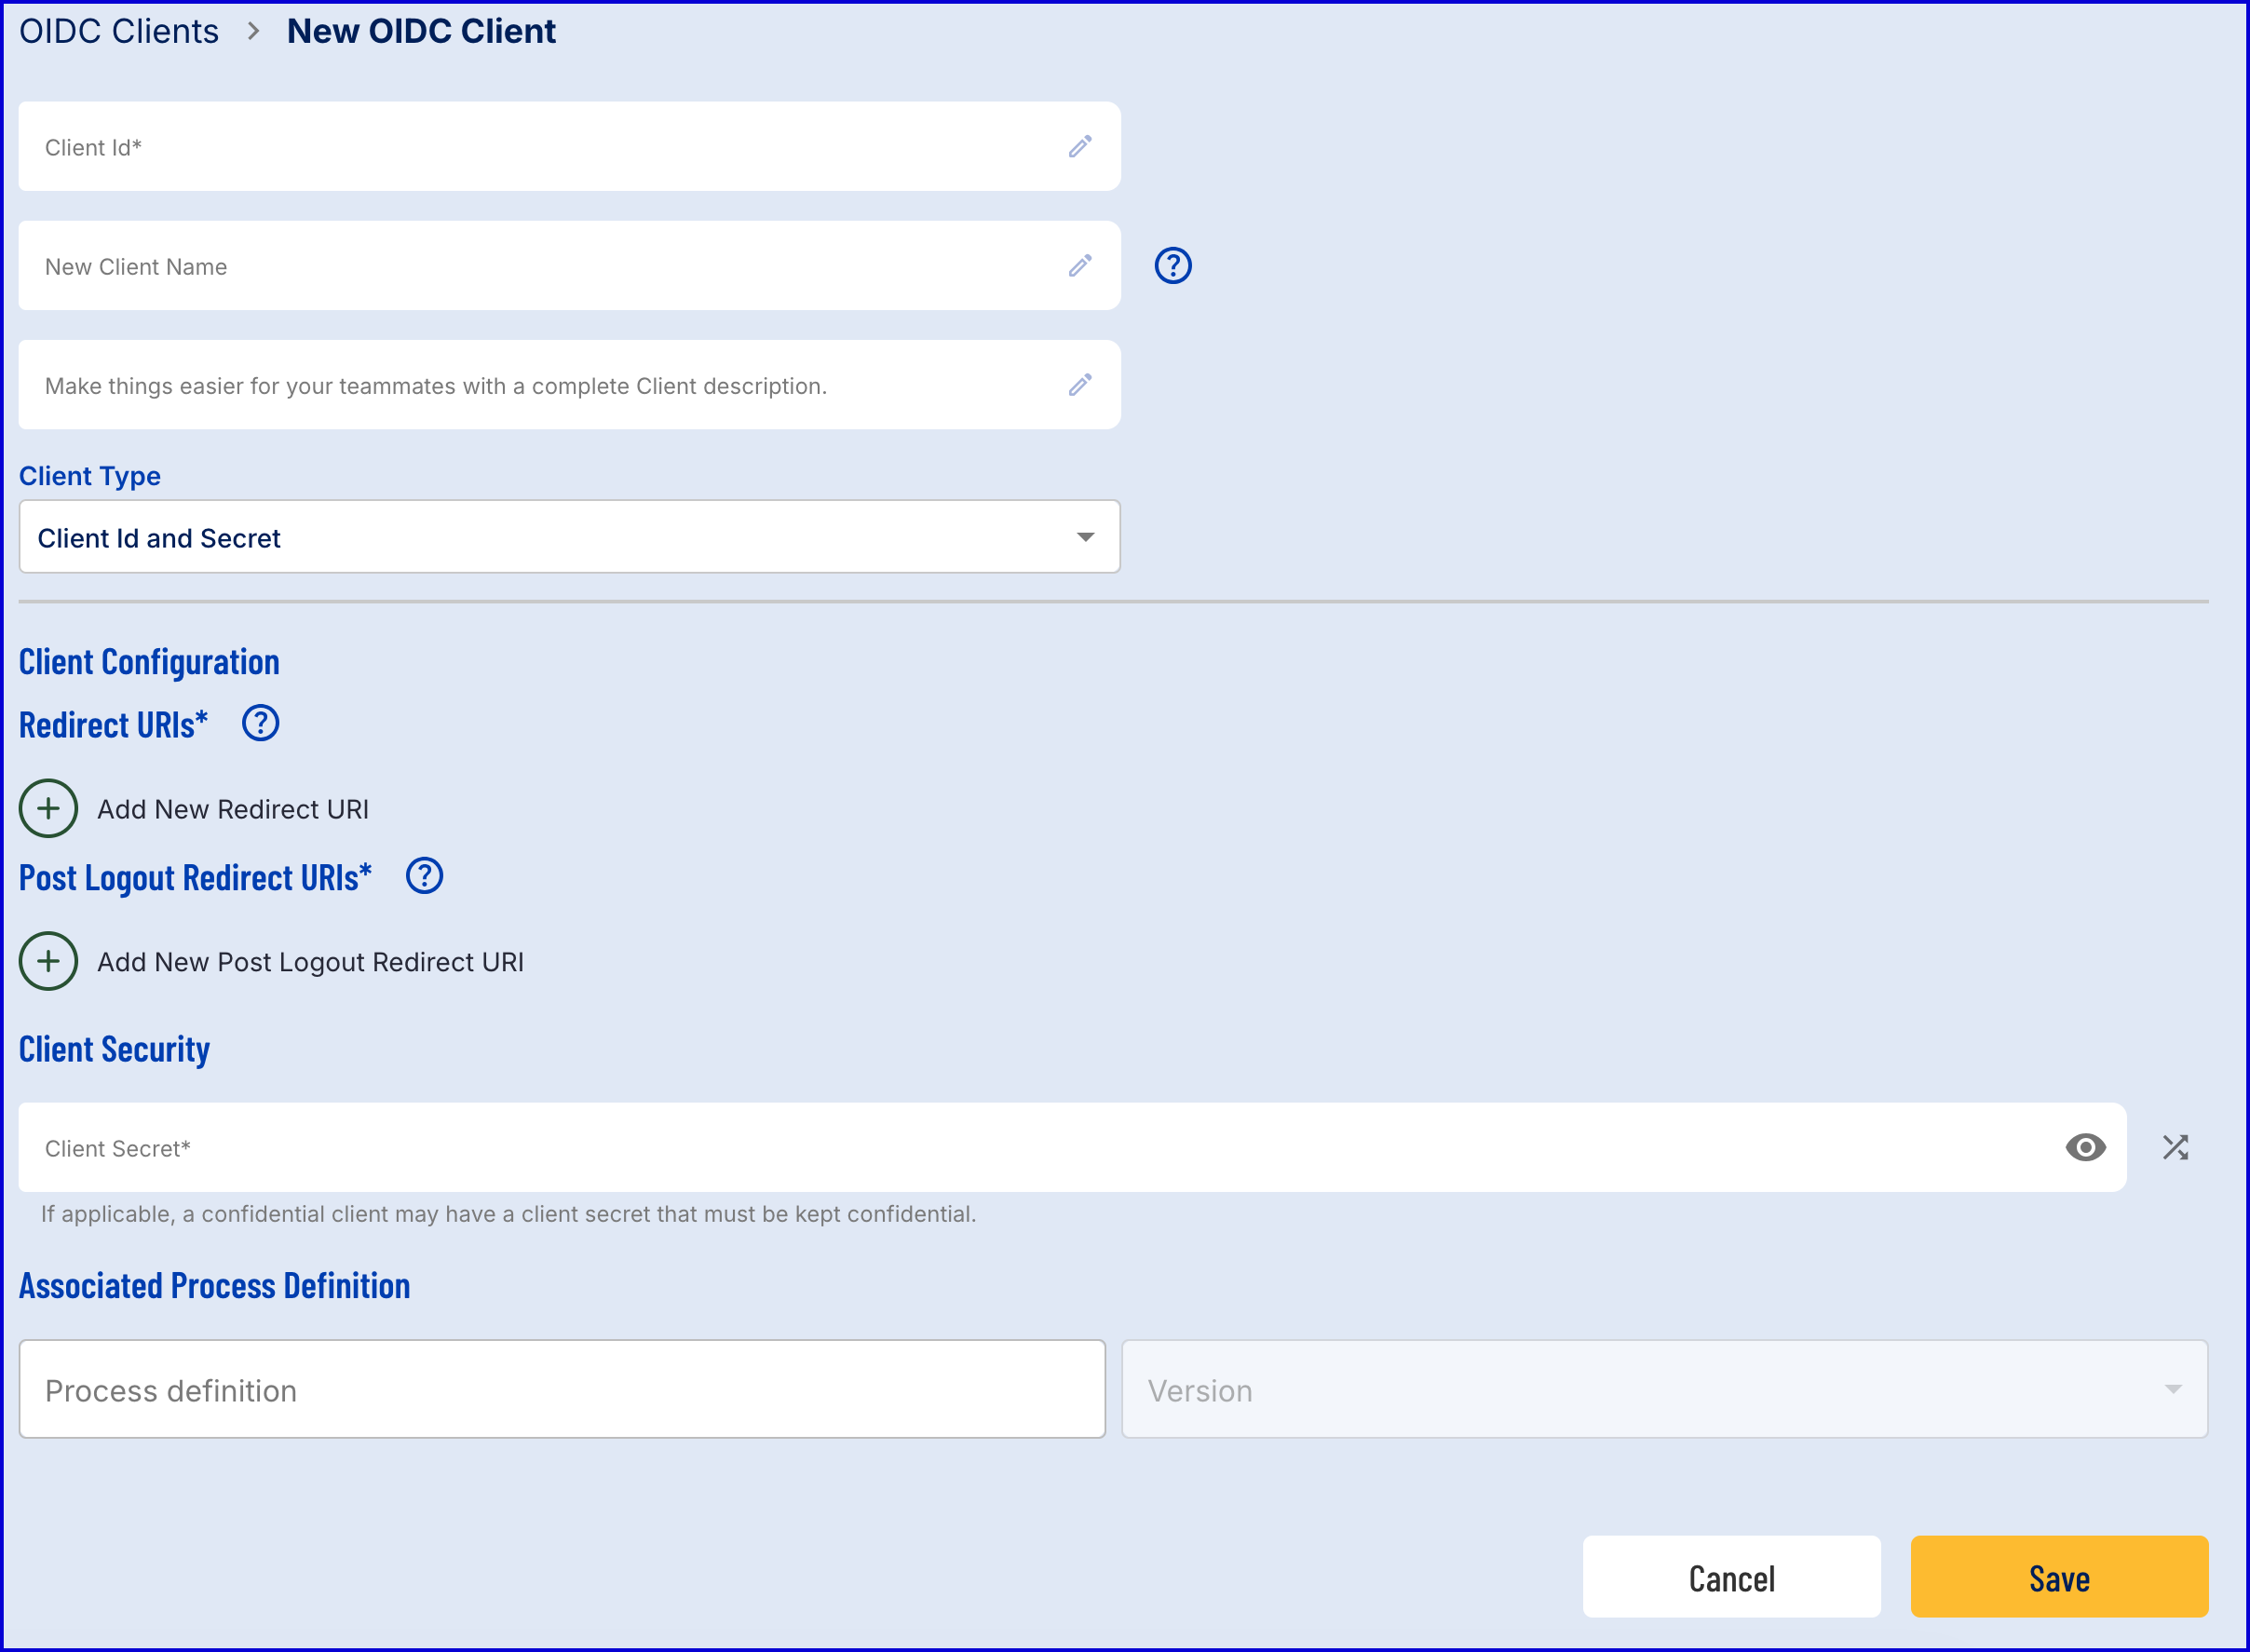
The following configurable fields are available. Required fields are marked with an * asterisks.
Field Name | Description |
|---|---|
Client Id* | A unique identifier for the OIDC Client. |
New Client Name | A name given to the new OIDC Client. This field is optional. |
Description | A description of the OIDC Client. This field is optional. |
Client Type | Choose between Client ID and Secret or Signed JWT for Client Security. |
Redirect URIs* | Valid URI pattern a browser can redirect to after a successful login. Simple wildcards are allowed such as 'http://example.com/*'. |
Post Logout Redirect URIs* | Valid URI pattern a browser can redirect to after a successful logout. A value of '+' or an empty field will use the list of valid redirect URIs. A value of '-' will not allow any post logout redirect URIs. Wildcards are allowed such as 'http://example.com/*' |
Client Secret* | A confidential client may have a client secret that must be kept confidential. Only visible for Client ID and Secret security client types. |
Verification Method | Select between Client Certificate and JWKS URL for verification. This field will is only visible for Signed JWT client types. |
Associated Process Definition Name | The Process Definition that the OIDC Client will be utilized for. Once a successful login has been established, the end-user will be redirected to the chosen Process Definition. |
Associated Process Definition Version | The version of the Process Definition. This field provides a dropdown list of all versions available for the selected Process Definition. |
Client Security
Two Client Types are available when configuring an OIDC Client in Trust.
Client ID & Secret - Enables users to set a Client Secret to secure the Client.
Signed JWT - Secures the client using a JSON Web Token (JWT). Users can verify with a Client Certificate or JSON Web Key Set (JWKS) URL.
Client ID & Secret
This Client Type will allow users to set a Client Secret using the provided text field. This secret can be a string of letters and numbers. A random generator is also provided to create a strong client secret.

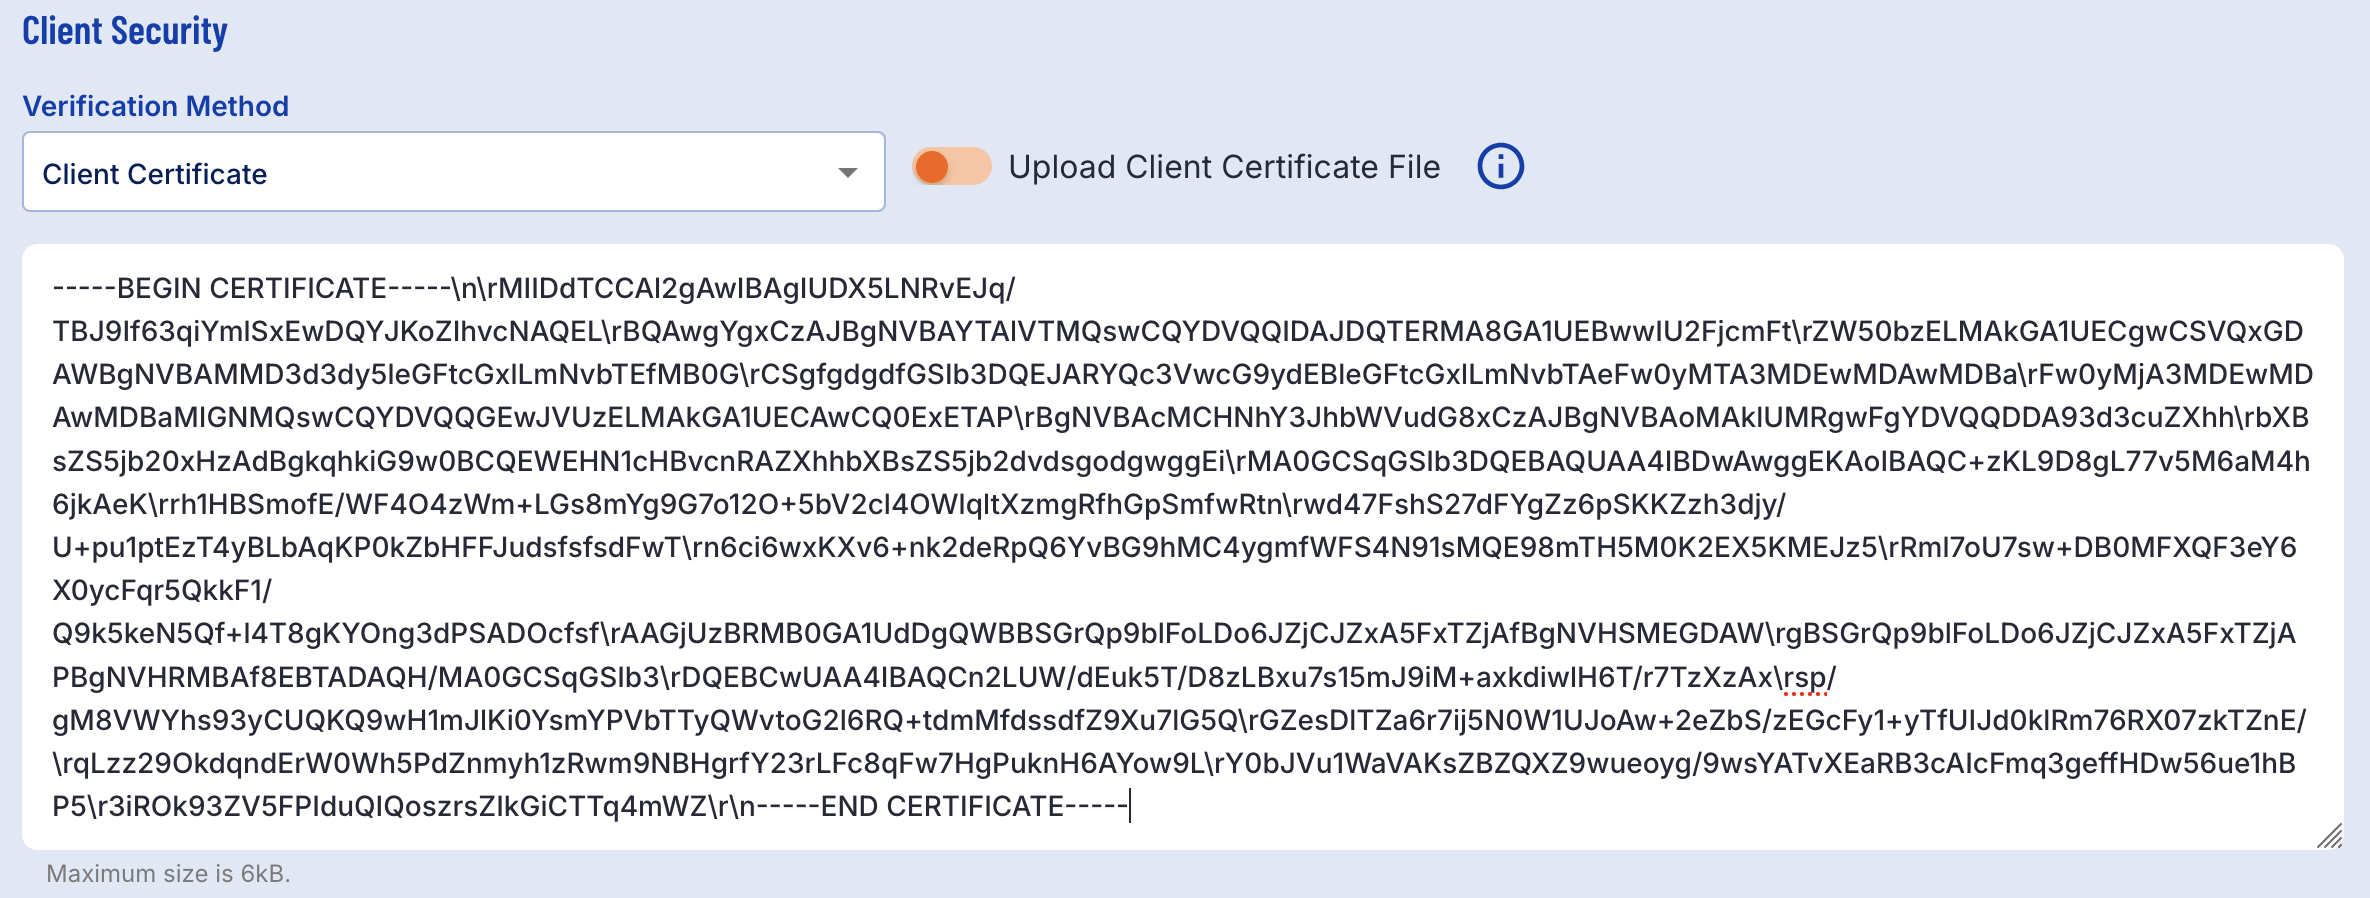
Signed JWT
The Signed JWT Client Type enables users to secure their client using a Client Certificate or JWKS URL.
Client Certificate allows users to upload a certificate file. This file must be under 6kb. The contents must begin with -----BEGIN CERTIFICATE----- and conclude with -----END CERTIFICATE-----.
Users can also toggle file upload using the provided toggle button. In this case, a .pem certificate file can be uploaded using the file chooser.
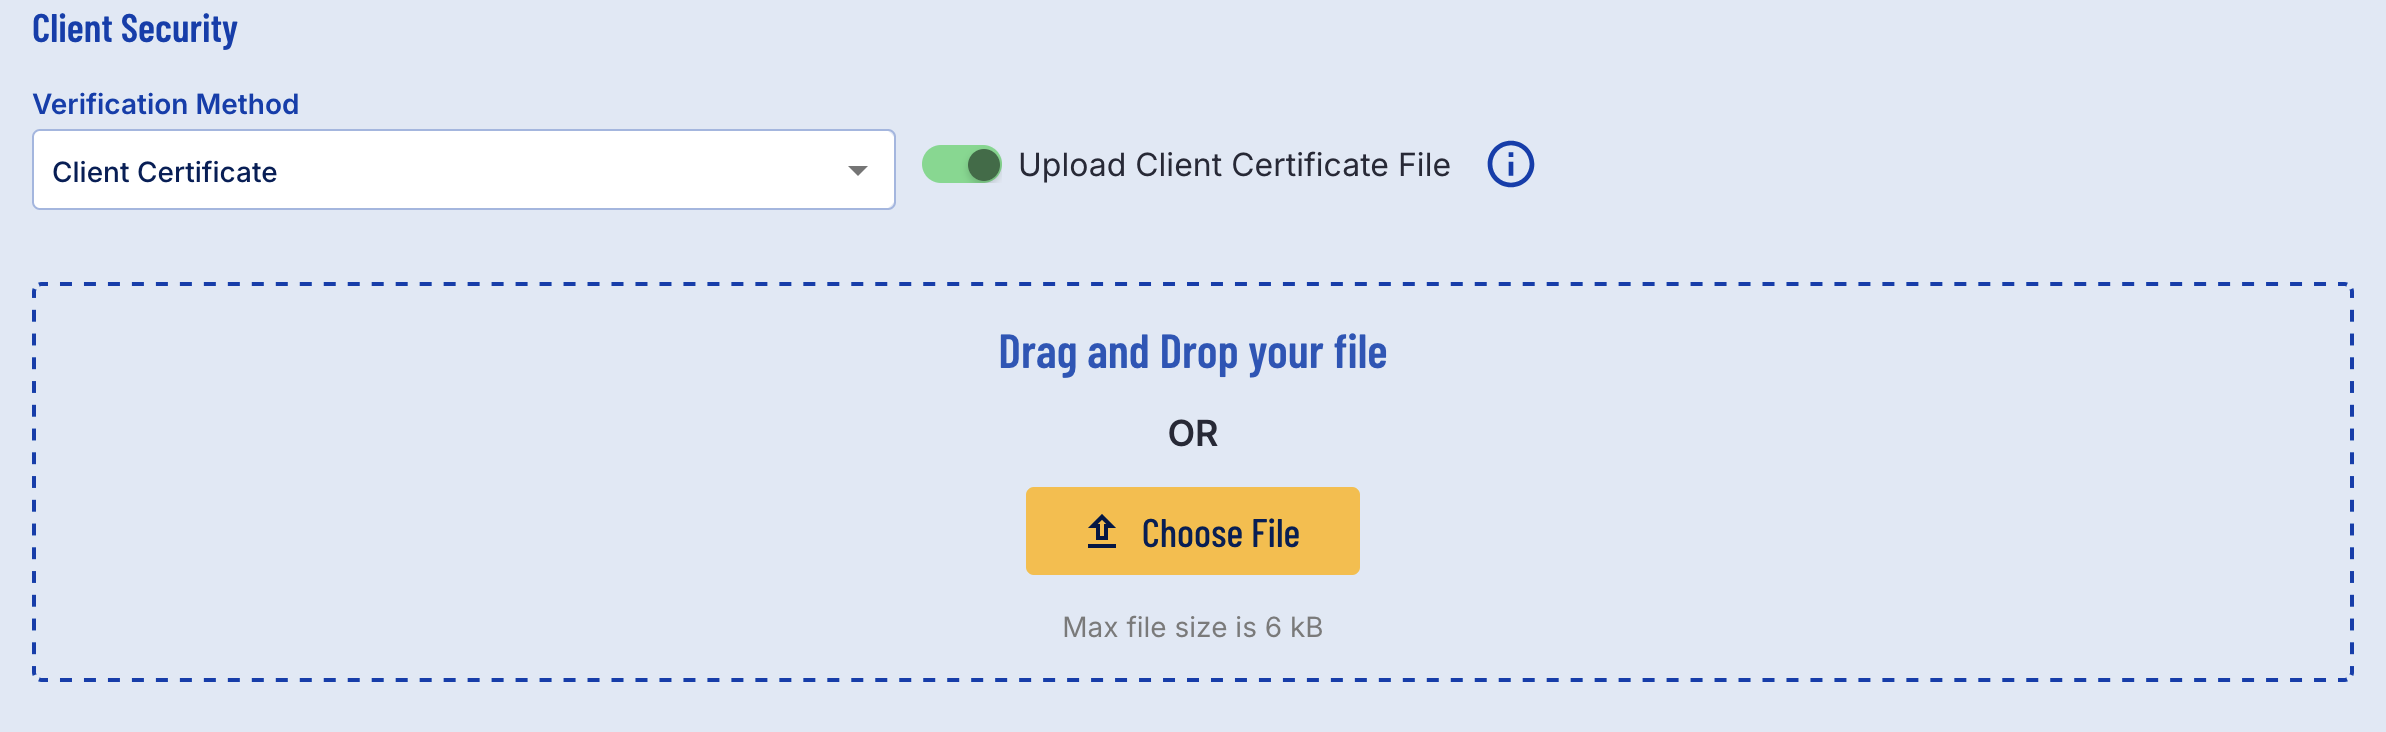
The JWKS URL verification method requests users to share their JWKS URL to enter a URL under 500 characters into the text field provided.

Sending an Authorization Request
Once an OIDC Client has been created, an authorization request can be sent via the TrustX API. Using the endpoint specified in the landing page section above, users can set the parameters of the request.
The purpose of this call is to authenticate the user and also to retrieve information about the user in the form of claims.
Claims are always returned on a "per request" basis - by default no claims are returned. They can be specified directly in the claims parameter or through the use of scopes. Scopes are a convenient way of requesting predefined groups of claims.m
Example:
Query Parameter | Description |
|---|---|
response_type | Indicates what response type will be received. Currently, only 'code' is supported. This will return an authorization code within the response. |
client_id | The unique identifier used when creating the OIDC client. |
scope | The list of scopes the application will have access to during a session, including user details such as name. 'openid' is required. Other possible values include acr, address, document, and profile. |
state | A unique identifier for each authorization. This must be unique for each authorization request. |
redirect_uri | The URI that the end-user will be redirected to after completing the ID&V flow. |
claims | Optional - can be used to requests specific attributes in order to avoid the verification process returning more information then needed. |
Retrieve Authorization Code
Upon successful authentication, an end-user will be redirected to the URI specified in the redirect_uri . An authorization code will be included as part of the returned URI, specified as a code value contained within the URI. The authorization code can be used to request an ID Token.
The URI below is an example of a URI returned after the user has been successfully authenticated:
https://your-application.com/callback?code={authorization-code}&state={state}&session_state={session-state}
Parameter | Description |
|---|---|
code | Contains the authorization code. This can be used to retrieve an ID Token. |
state | A unique identifier used for each authorization request. This was defined as part of the original authorization request. It is used to maintain state between the request and the callback. |
session-state | This represents a unique identifier for the current session. |
Sending a Token Request
The ID Token is proof that end-user has authenticated by successfully completing the ID&V flow. After the end-user has successfully authenticated, they will be redirected to the URL provided as the Redirect URI value. The ID Token may contain claims about the end-user as requested by the relying party. An ID Token, Access Token, and Refresh Token can be retrieved by sending a POST request to the /token endpoint.
Example Response:
The response will include a base64 encoded string for each token. This token can be decoded to reveal further details about the token.
For example, an idToken can be extracted to reveal the following details:
Retrieve End-User Information
Claims and user information can be retrieved by sending a request to the /userInfo endpoint.
The query expects the accessToken to retrieve user info. This can be retrieved by sending a request to the /token endpoint as specified in the section above.
Example Request:
Example Response:
Testing OIDC
TrustX provides a sandbox test environment where OIDC tests can be run to view expected results. Elements such as scope, claims, and individual process definitions can be configured as part of each test.
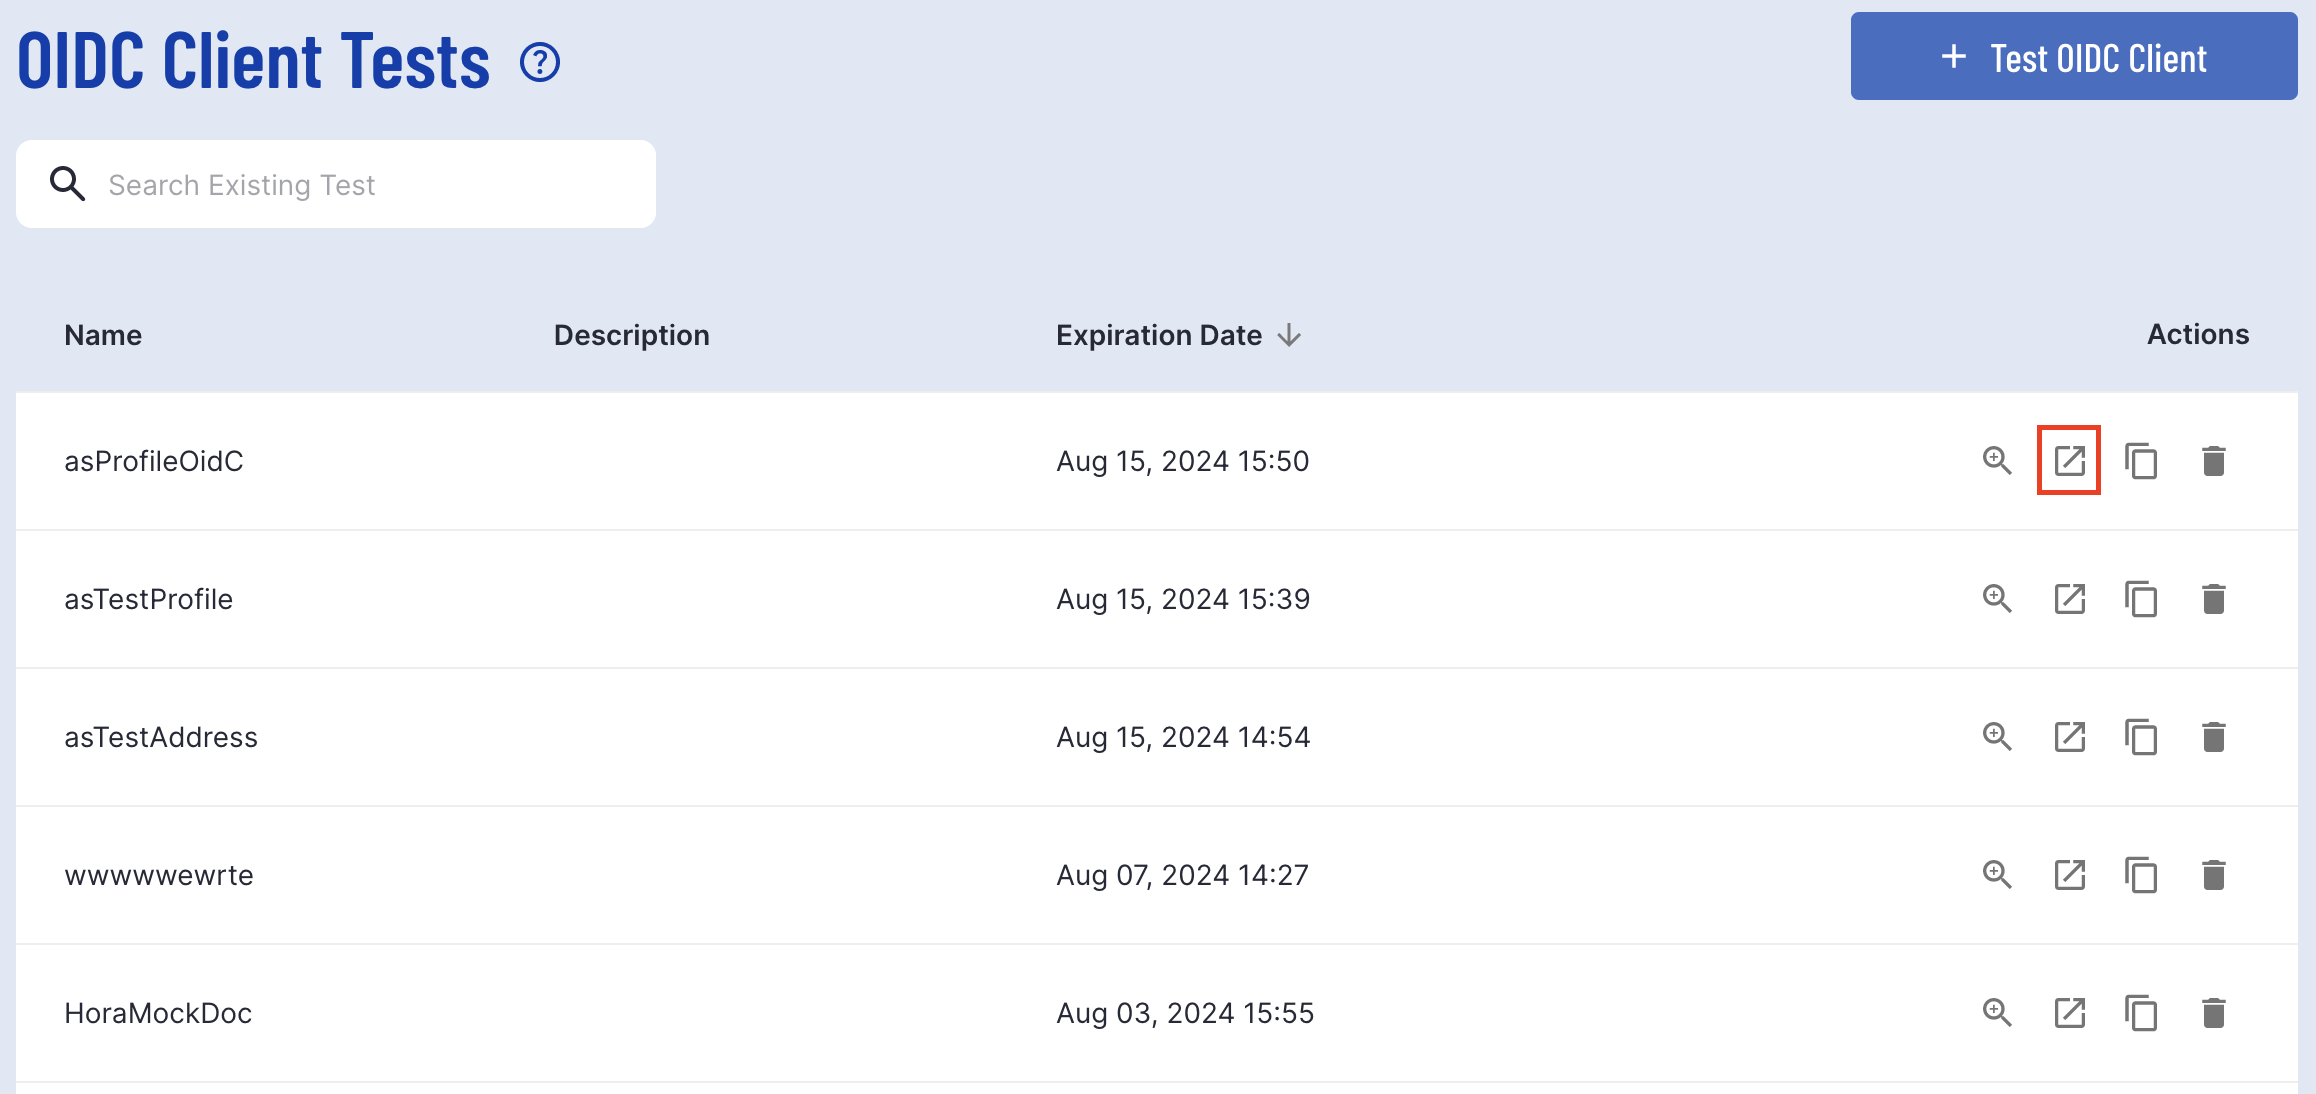
OIDC can be tested by accessing the OIDC Tests page found under the OIDC submenu of the right-side vertical navigation bar.
Selecting this page will open the OIDC Tests landing page where a list of tests created in TrustX can be found.
Create a new OIDC Test
To create a new OIDC Test, click the 'Test OIDC Client' button located at the top-right of the landing page.
Field Name | Description |
|---|---|
Test Configuration Name* | A name for the OIDC test. |
Description | A description of the OIDC Client test. |
Scopes | Determines the scope of user data that the mock OIDC Client will have access to. |
Claims | Determines the user data claims that the mock OIDC Client will have access to. |
Expiry Date* | The date after which the test will expire. |
Associated Process Definition Name | The Process Definition that will be used as part of the test. |
Associated Process Definition Version | The version of the Process Definition to be used as part of the rest. |
Scope
Scopes that will be included as part of the test can be defined by selecting the available Scopes listed under the drop-down menu. Four scopes are available to choose from
acr - Returns the process definition name and version.
address - Grants address scope, including address, address city, and address postal code.
document - Includes document details such as type, issuing date, and date of expiry, document number, and classification.
profile - Grants profile scope, including full name, date of birth, nationality and nickname.

Claims
If you need finer-grained control over the information returned about the user, you can use claims instead of scopes in OpenID Connect (OIDC). Additionally, if you want to leverage the OIDC extension for Identity Assurance, you must request claims in a specific format.
There are two examples of claims requests available: one adhering to the classic OIDC format and another following the extension for OIDC Identity Assurance.

Run Test
Step One - Start the Test
Once a test has been created, it can be tested by selecting the test button from the OIDC Test landing page found under the 'Actions' column.
A 'Demo Company' page will appear that serves as a mockup of a relying party application.
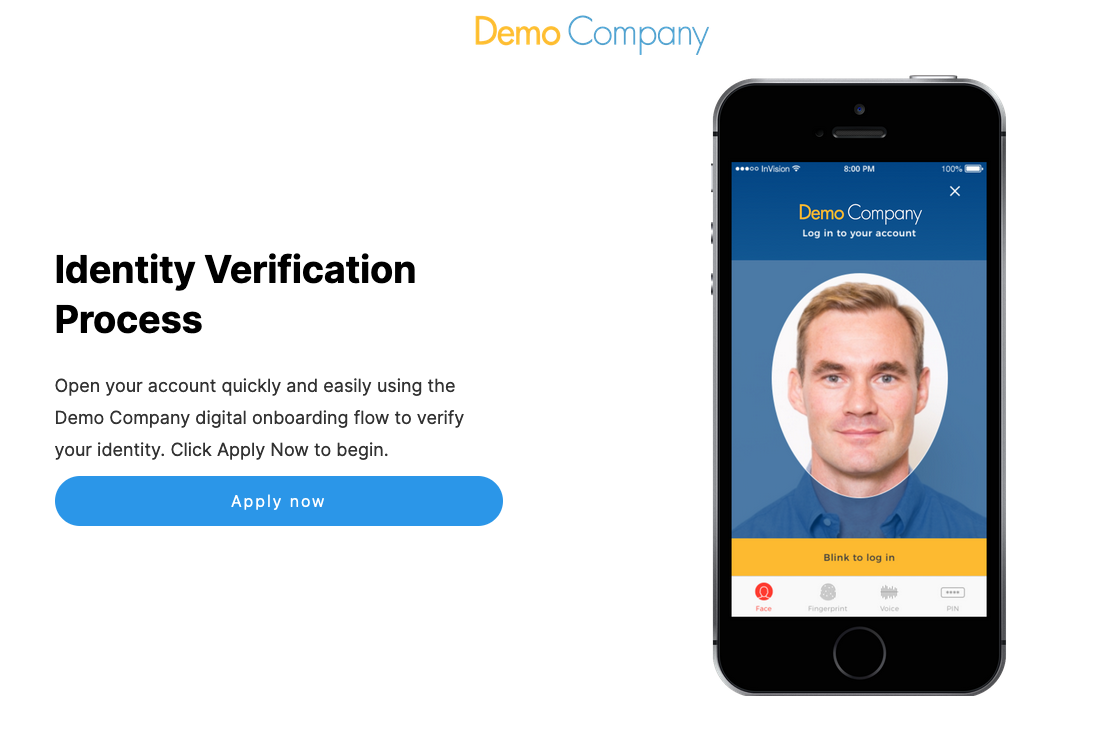
Step Two - Authentication
Clicking the 'Apply now' button will begin an authorization request using the details defined in the test as query parameters for the call and begin the ID&V flow using the Process Definition selected when creating the OIDC test.
Once the ID&V flow has been completed successfully, the end-user will be redirected to the 'redirect URL' of the relying party.

When using the OIDC test sandbox, the redirect URL will be configured to the page above. This page provides three options:
Show ID Token - Show the ID Token retrieved when performing the authorization request.
Show user info - Uses the ID Token to retrieve user info based on the scope and claims defined in the OIDC test.
Logout - Send a request to end the session. This will redirect the user to the Post Logout Redirect URI.