Introduction
The Manual Review provides a simple way for users to perform a review of end user flows that require additional documents/ information to complete the ID&V flow successfully.
This document will describe the necessary steps required to configure a Manual Review flow using the Process Designer. Please note that the implementation outlined in this document is only one example of a possible implementation of the Manual Review flow.
Step 1 - Add the Simple Decider
The Simple Decider is an activity available in the Process Designer that is required when configuring a Manual Review flow. This activity will collect all checks performed during the ID&V flow and determine a 'PASS' or 'FAIL' verdict depending on the results of each individual check. If a failed check is discovered, the Simple Decider will log a 'FAIL' result.
Using the Manual Review flow, rather than fail the ID&V flow, the Simple Decider can be configured to enter a 'REVIEW' status that will redirect the flow to the review process. Note that the default value for the Simple Decider is 'FAIL'.
Start by beginning a new Process Definition (For more information, see Process Definition Guide). The steps in this document will use a full flow as an example.
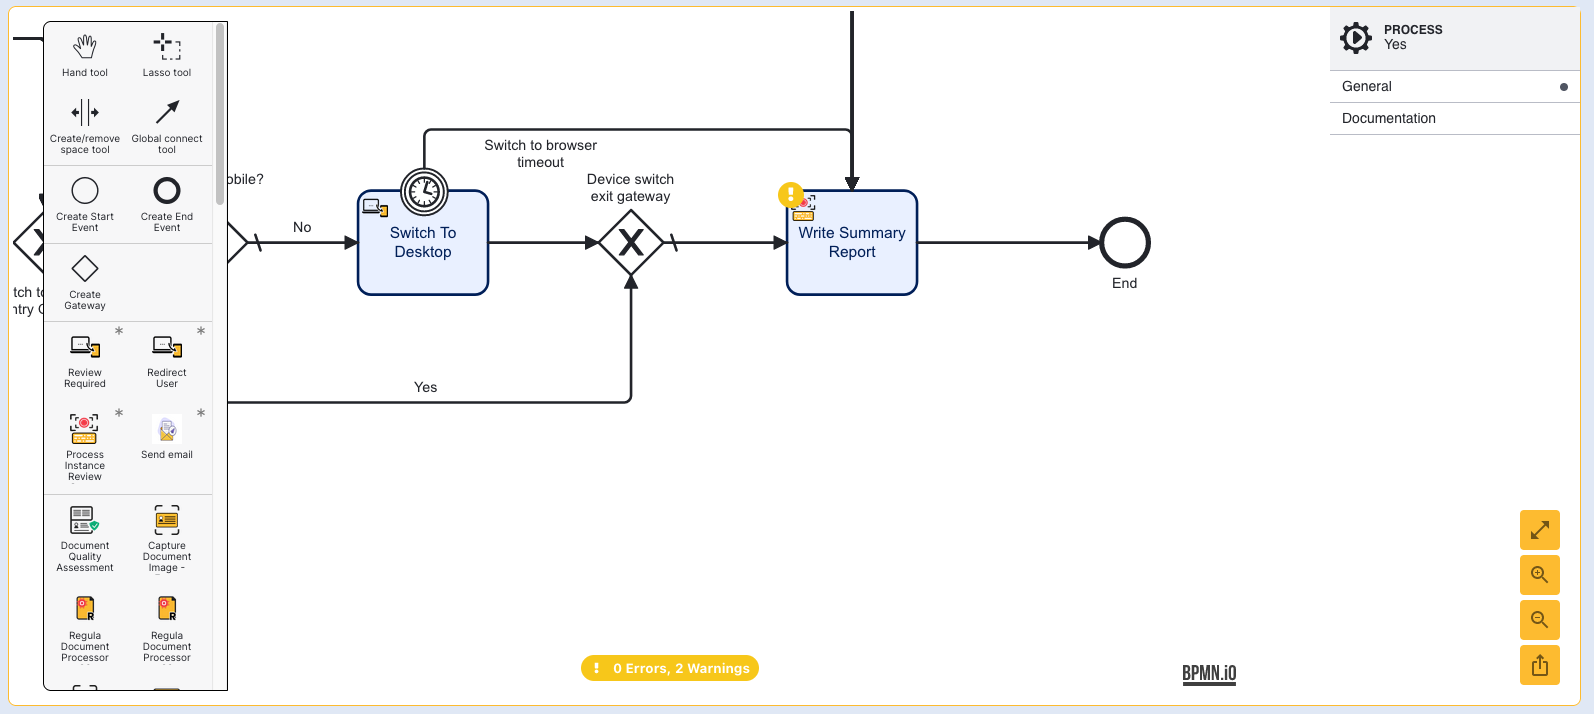
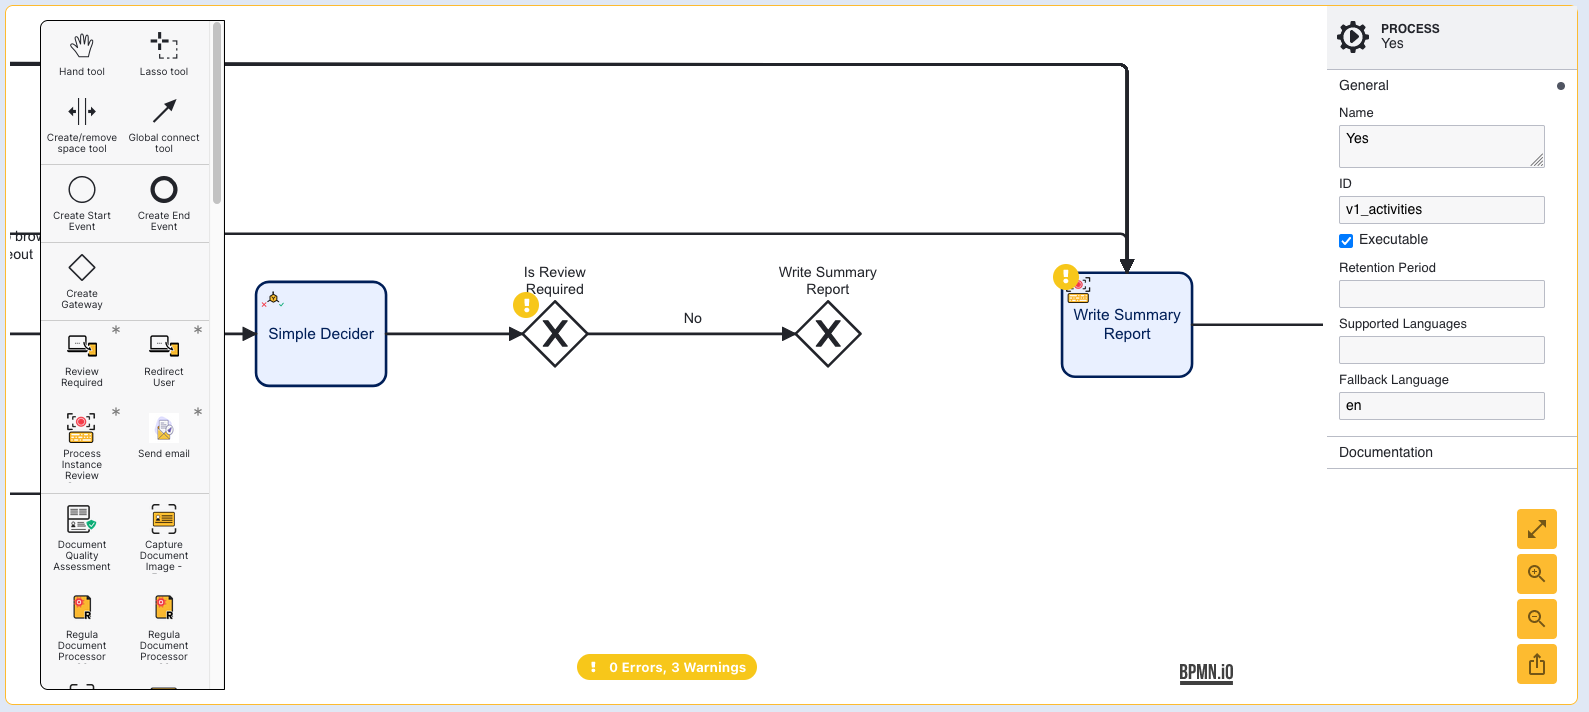
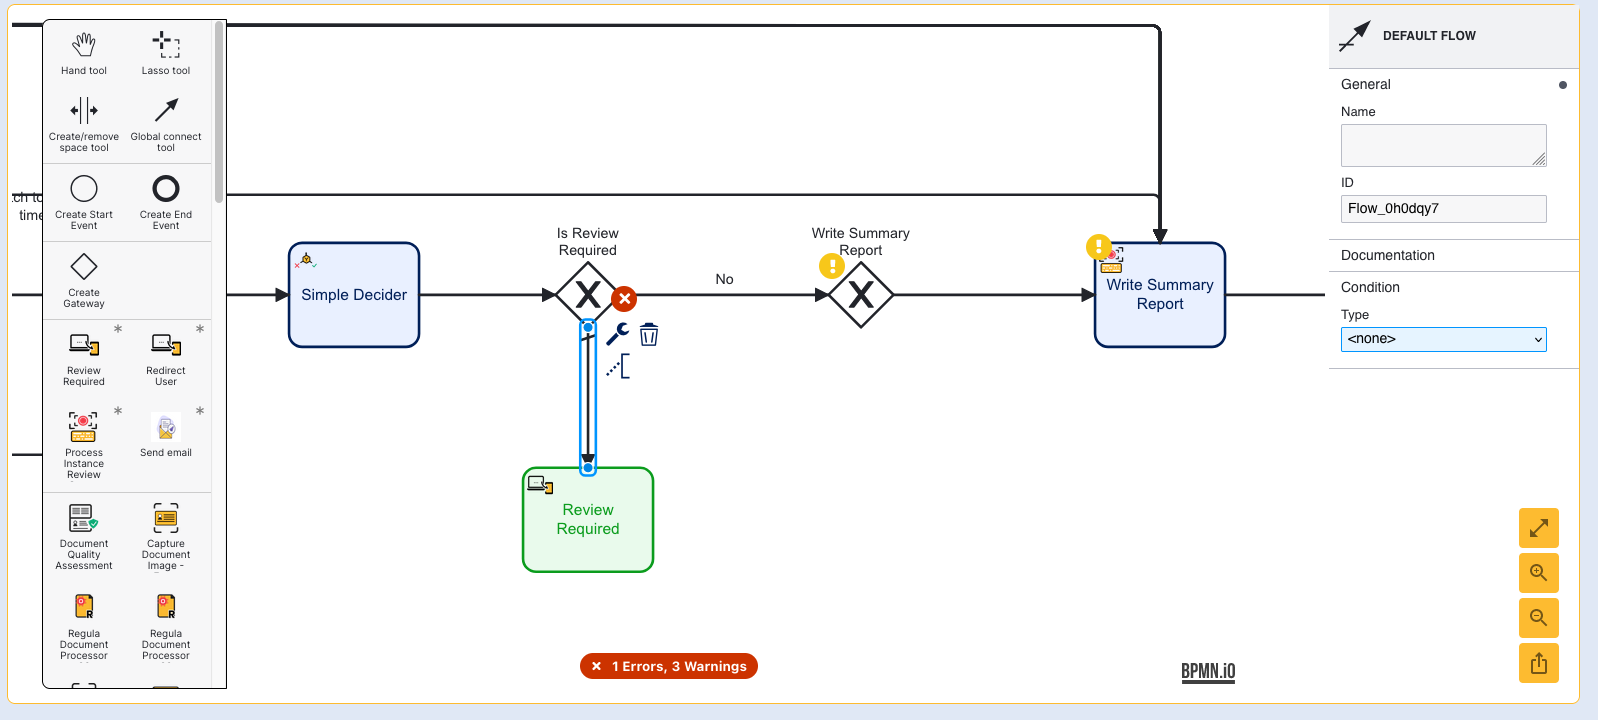
With a new Process Definition started, navigate to the Write Summary Report activity found toward the end of the Process Definition. The Simple Decider activity should be placed before the Write Summary Report activity to ensure that all document and face checks are considered in the decision.
Add the Simple Decider activity and connect the sequence flow arrow from the Switch to Desktop gateway to the Simple Decider.
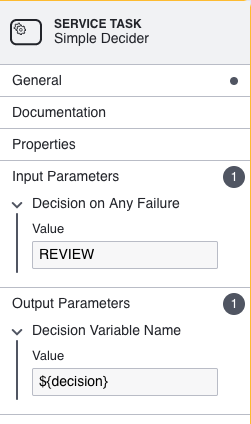
Next, click the Simple Decider activity to open the right-side contextual menu. Expand the Input Parameters title to find the Decision on Any Failure parameter. By default, this value is set to 'FAIL'. To implement the Manual Review flow, update this value to 'REVIEW'.
Step 2 - Configure the Gateways
After the Simple Decider activity has been added to the flow, two gateways are required to redirect the user depending on the results determined by the Simple Decider.
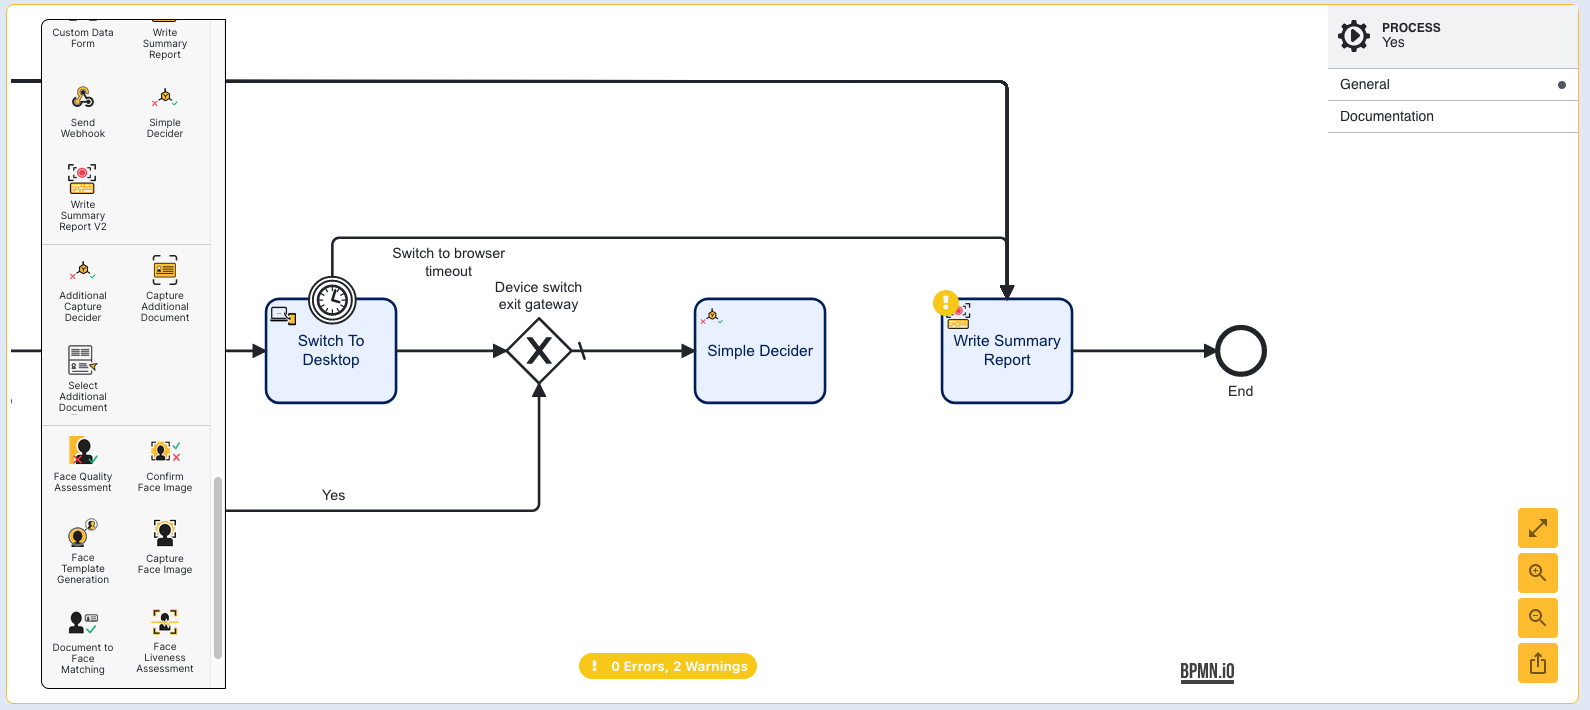
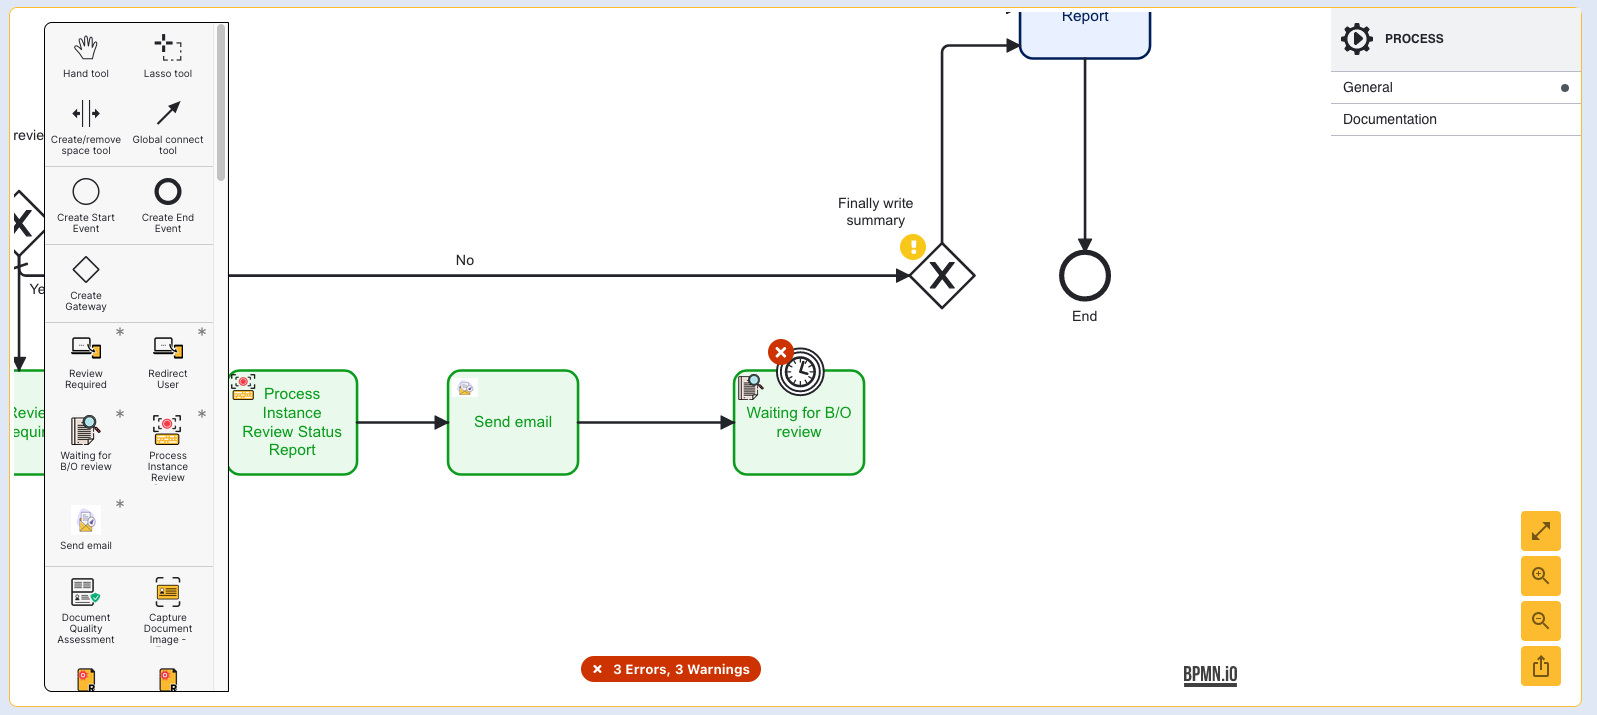
First, create a new exclusive gateway and connect the Simple Decider to the gateway with a sequence flow arrow. This exclusive gateway will redirect the end user depending on whether a review is required.
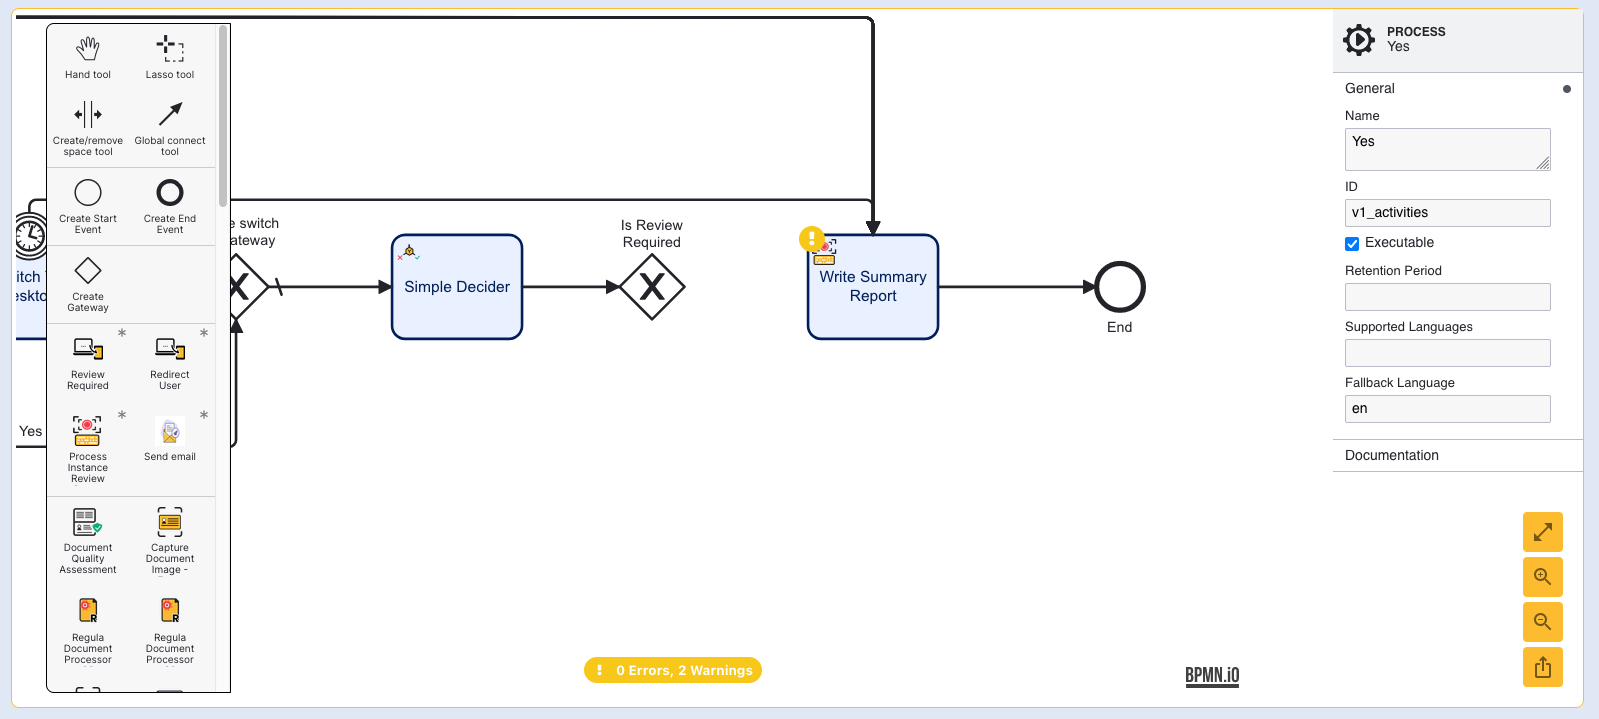
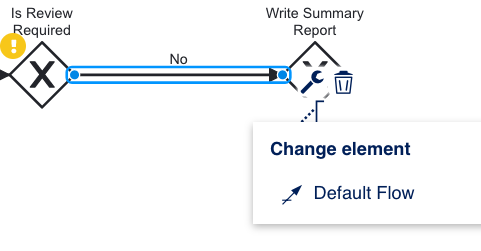
For this step, the path where a review is not required can be created. First, add an additional exclusive gateway and connect the previous gateway with a sequence flow arrow. This gateway will server as the "Write Summary Report" gateway that will connect the outcome of the current path or the review path to the Write Summary Report activity.
Click the flow arrow and find the "Change element" options button. Select the "Default Flow" option to update the type.
Finally, connect the Write Summary Report gateway to the Write Summary Report activity using a sequence flow arrow.
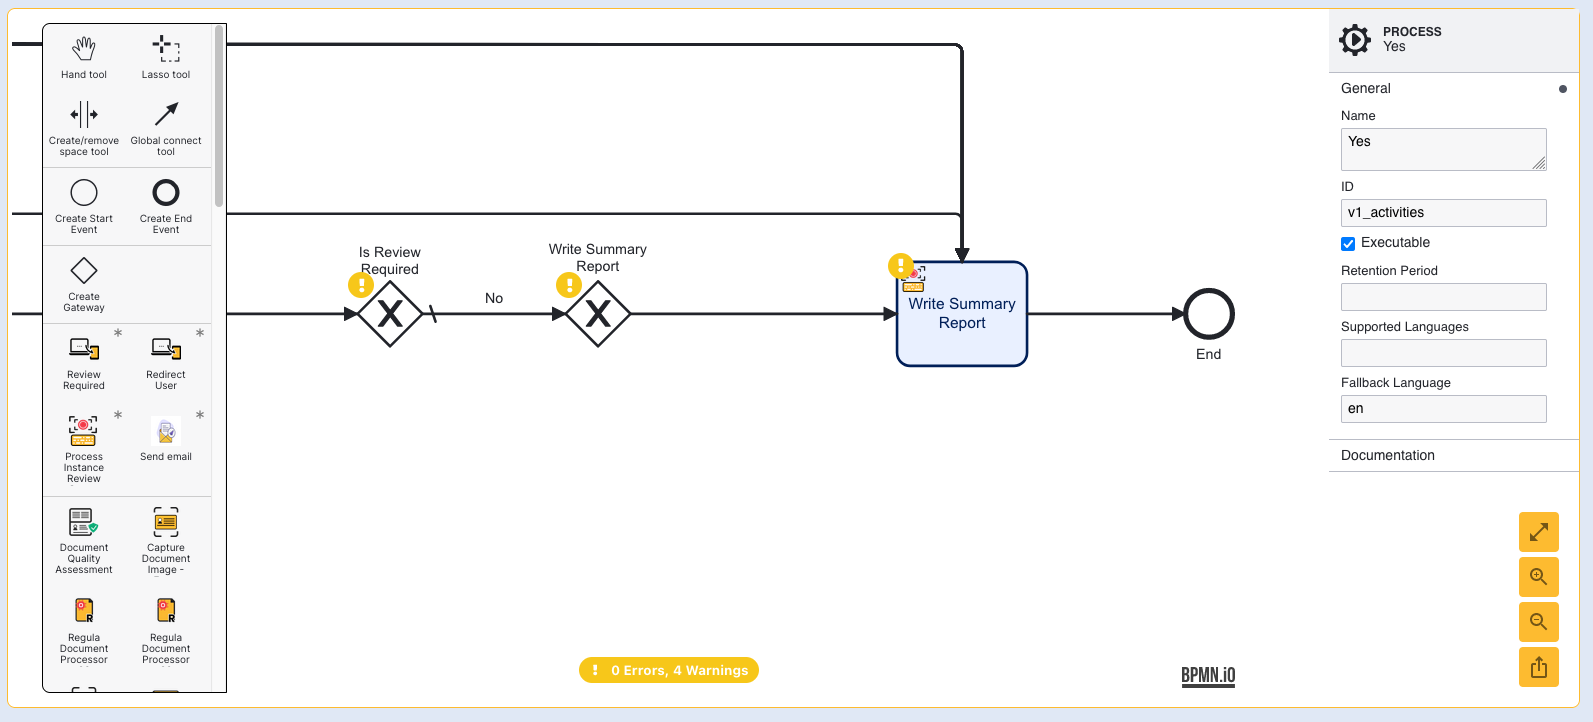
Now that the "No review" path has been configured, the next steps will begin by configuring the review path of the process.
Step 3 - Configure the Review Required Activity
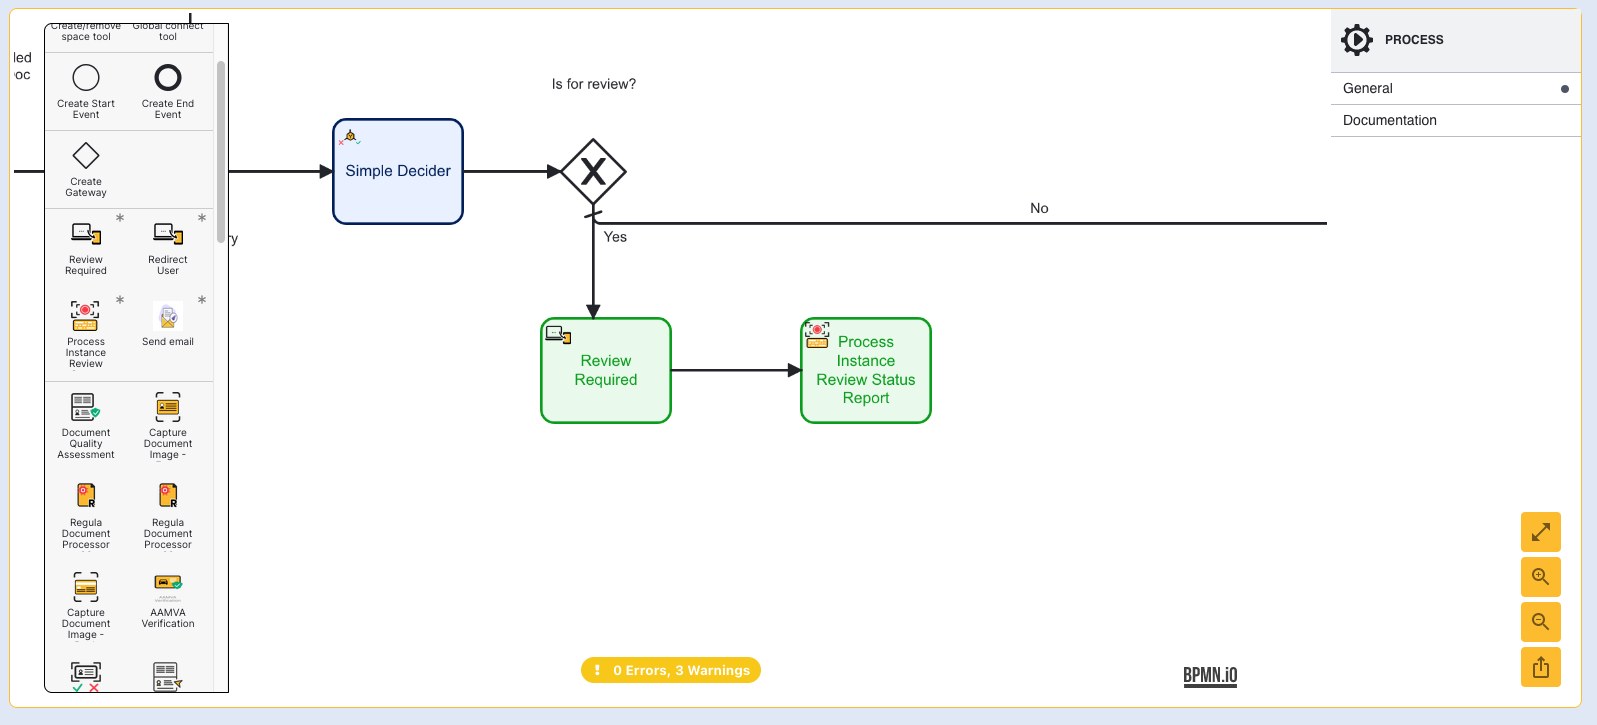
The 'Review Required' activity presents the end user with a screen that will explain the need for additional information to complete the ID&V flow successfully. This activity is found in the Review section of the activity palette.
Drag a new instance of the activity into the Process Designer and connect a default flow arrow from the "Is Review Required" gateway to the new activity.
Optionally, when configuring a flow using a Custom Decision Outcome, using the latest 'Review Required v2' activity to ensure that the decision outcome is viewable within the Backoffice and recorded in the summary report.
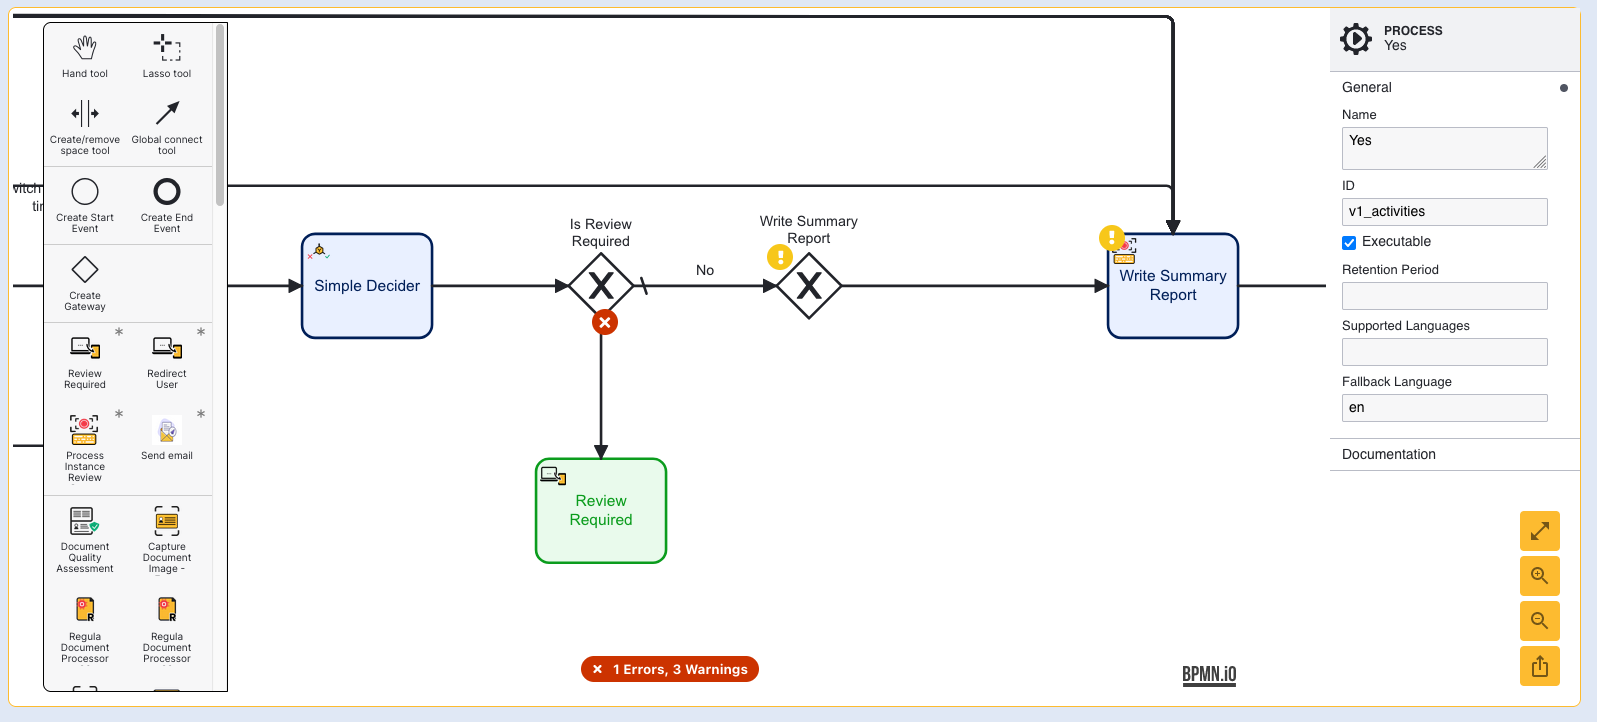
When the sequence flow is added, an error will appear that reads "Sequence flow is missing condition". This error can be resolved by selecting the flow arrow and expanding the Condition section found in the right-side contextual menu.
Here, the condition required for redirecting the flow to the Review Required activity will be defined. Under Condition > Type, create a new "Expression".
An additional "Condition Expression" text field will appear. Enter the following expression: ${_decision.equals("REVIEW")}
A name must also be provided to resolve the error.
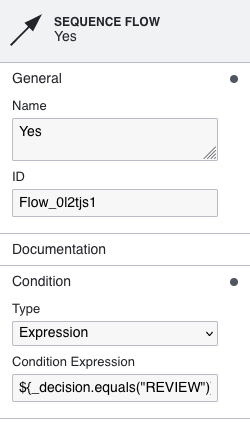
This expression will check the value of the _decision Process Variable defined in the Simple Decider activity. If the value is 'PASS', then the process will continue directly to the Write Summary Report. In this case, when the value is 'REVIEW', the flow will be directed to the Review Required activity.
Review Required Input Parameters
The Review Required activity has three input parameters that are defined as follows.
Parameter Name | Default Value | Description |
|---|---|---|
List of Screens | thank-you | The list of screens to be presented to the user during this activity. |
Starting component ID | review | The name of the component ID for this activity. |
UI Component ID | review | The name of the screen used in the capture UI. |
Step 4 - Update Process
The Process Instance Review Status Report activity is used to update the status of the Process Instance to 'review'. This will ensure that the Process Instance is listed for review in the 'For Review' page. Additionally, this activity will also write a summary report so that the data will be later available.
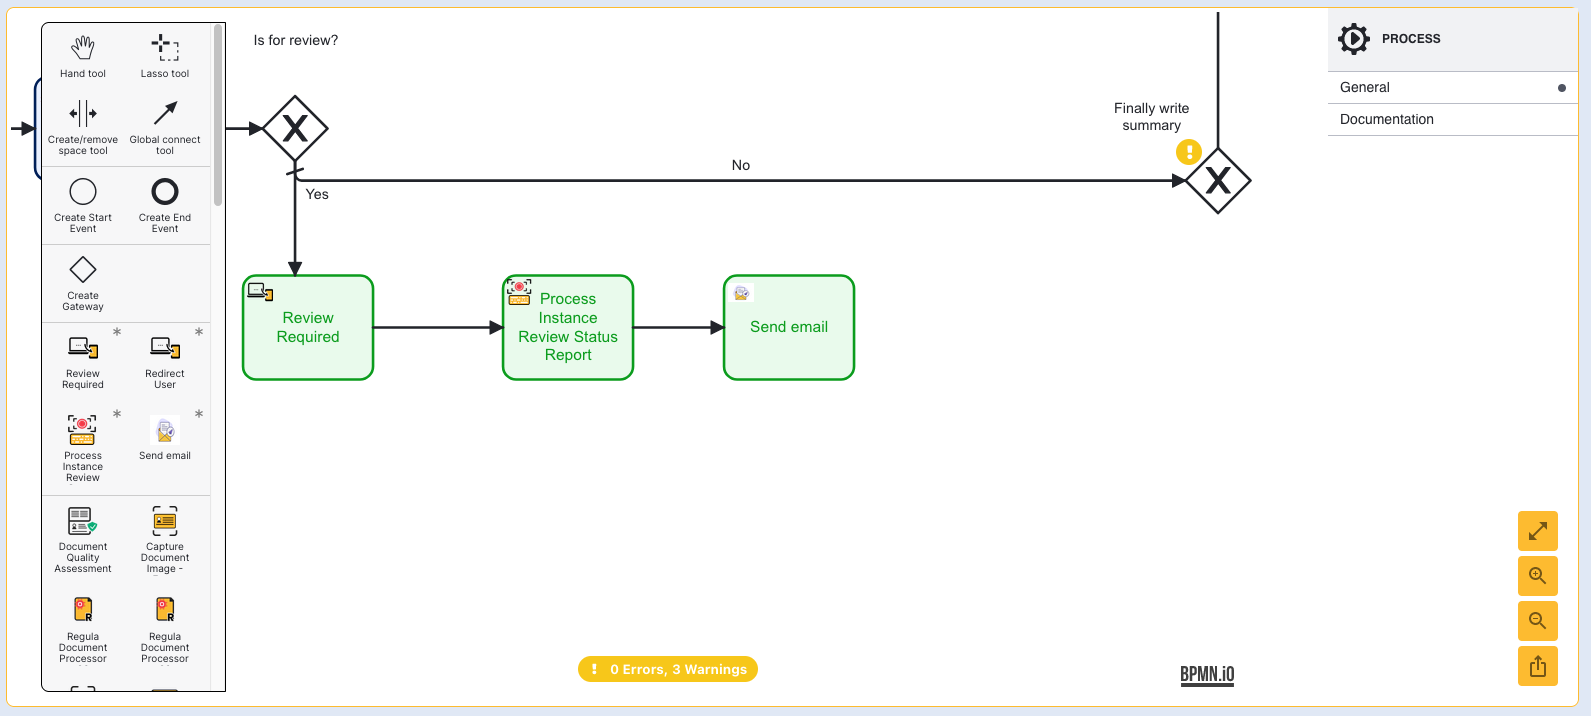
Add the activity to the Process Designer and connect the Review Required activity using a sequence flow arrow.
No additional configuration is required for this activity.
Step 5 - Send an Email
From this point in the process, an email can be sent that reports that a review is required. For example, an email could be sent to notify staff that action is required for review. Click and drag the Send Email activity into the Process Designer and connect to the Review Required activity using a sequence flow arrow.
Send Email Input Parameters
The Send Email activity provides various input parameters to configure the details of the email which will be sent, including recipients, the language of the email, and sender information. The body, subject, and design of the email will be handled using an Email Template. For more information on creating an Email Template, see the Email Templates Guide.
Below is a list of all available input parameters associated with the Send Email activity.
Parameter Name | Type | Default Value | Description |
|---|---|---|---|
BCC | String List | null | The list of blind carbon copy recipients. |
CC | String List | null | The list of carbon copy recipients. |
Email template language | String | null | The language that the email will be displayed in. |
Email template name | Drop-Down Option | null | A drop-down list of all email templates created in the Backoffice. |
Email template version | Integer | ${1} | The version of the selected email template to send. |
Fail on Invalid Email | Boolean | ${false} | Determine whether to fail the activity if an invalid email is provided. |
From | String | The From address that the email is sent from. | |
To | String List | null | A list of recipients to send the email to. |
Step 6 - Add Backoffice Review Activity
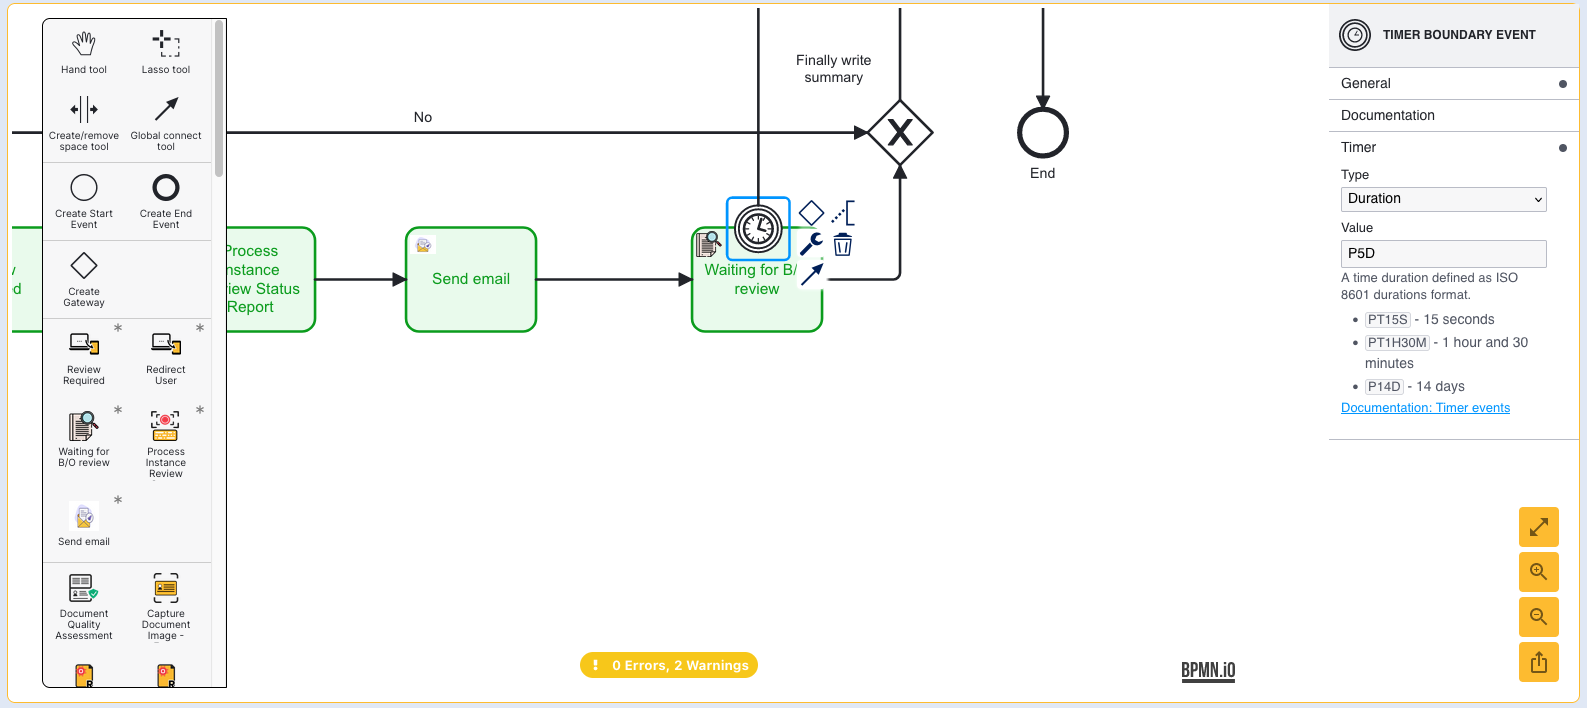
The 'Waiting for B/O review' activity is used to pause the ID&V process until a review has been completed in the Backoffice. A Timer Boundary Event is configurable alongside this activity that allows users to set how long the activity will be suspended before continuing without review.
Optionally, when configuring a flow using a Custom Decision Outcome, using the latest 'Waiting for B/O review v2' activity to ensure that the decision outcome is viewable within the Backoffice and recorded in the summary report.
To configure this activity, first drag & drop the activity into the Process Designer and connect the Send Email activity using a sequence flow arrow.
Connect the activity to the "Write Summary" gate using a sequence flow arrow. This ensures that when the review process is complete, the flow will wrote a summary report before finalizing the ID&V flow.

In this example, the Timer Boundary gate will be connected directly to the Write Summary Report activity. The duration can be configured by clicking the Timer Boundary gate and entering a value under the Timer. This can be defined as the following:
Type | Description |
|---|---|
Duration | A time duration defined as an ISO 8601 duration format. For example, P14D = 14 days and PT15s = 15 seconds. |
Date | A specific date-time defined as an ISO 8601 combined date and time representation. For example, 2019-10-01T12:00:00Z. Times are in UTC. |
Sending Review Information from Webhook
The status of a review can be sent from a webhook using session data. This can be used to send a webhook to notify a system when the status of a Process Instance has been reviewed. For more information on utilizing session data in webhooks, see Webhooks and Session Data and Cloud Secrets guide.
Step 1 - Configure the Webhook
First, create or edit an existing webhook from the Webhooks page of the Backoffice. The Webhooks Guide outlines the general configuration steps.
In the body tab of the webhook, add the following JSON:
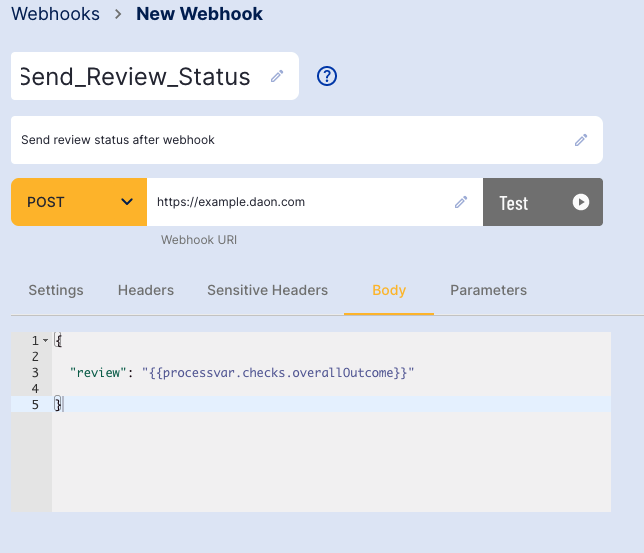
The results of the review process can be found in the overallOutcome of the _checksobject (See _checks for more information).
This will populate the webhook body with the result of the review process.
Step 2 - Configure the Process Definition
To send the webhook, add a Send Webhook activity to the Process Designer after all review activities have been completed. For this example, the webhook will be added after the Write Summary Report activity.
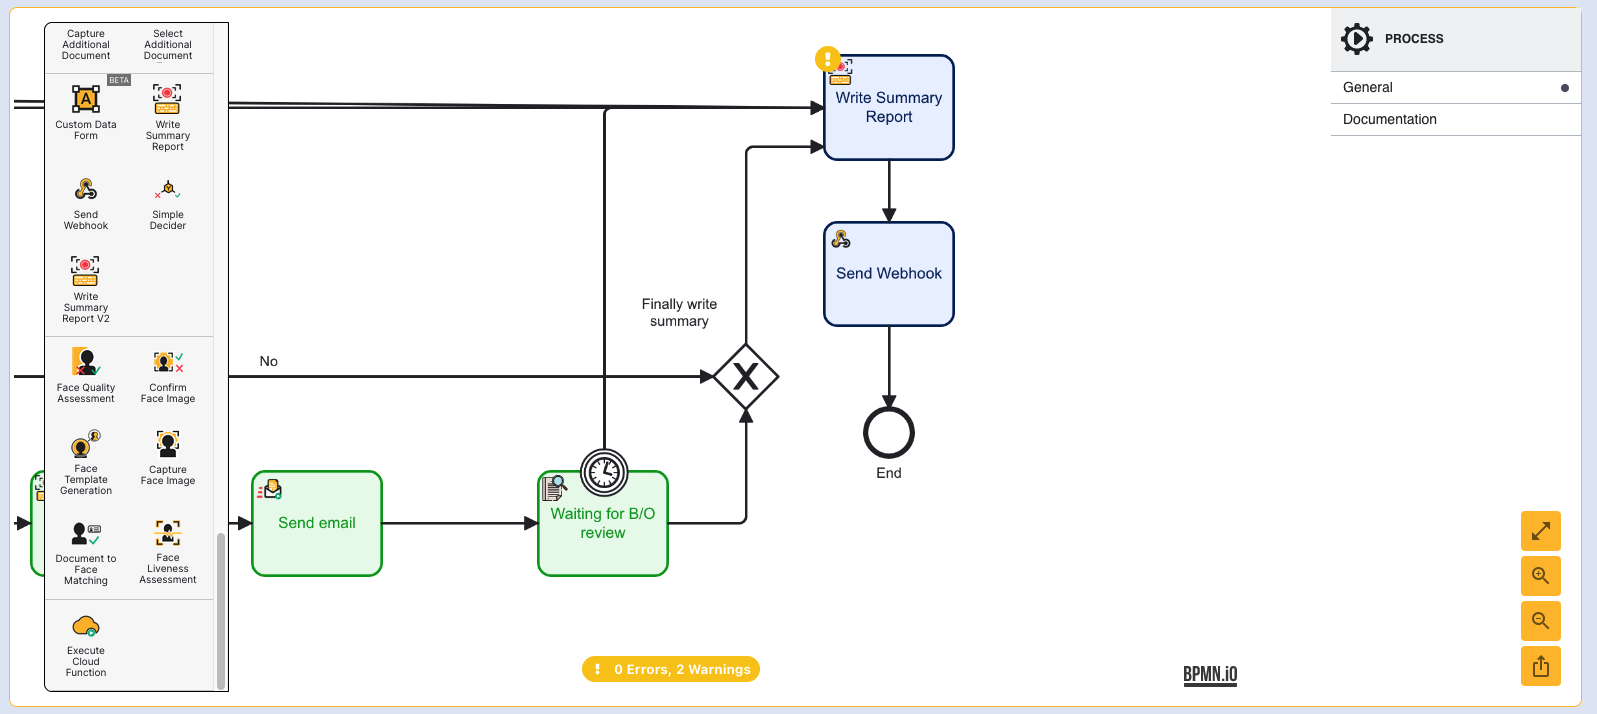
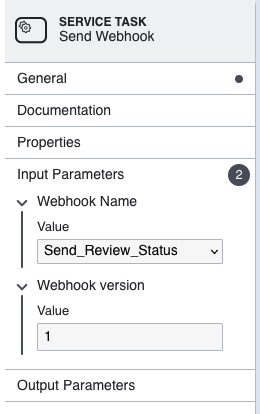
Click the webhook activity and select the webhook and version created in Step 1 using the right-side contextual menu.
Click the 'Save' or 'Save & Deploy' button to finish the update. TrustX will now send a webhook containing the results of the Process Instance review once the review has been completed.
Update Review Status From a Cloud Function
Conclusion
The implementation in this document covers one possible implementation example. Once the Process Definition is created, click the Save or Save & Deploy button to complete changes to the Process Definition.
Next, pending reviews and review statuses can be managed from the For Review page of the Backoffice. See the Managing Reviews Guide for more information.