
Introduction
Documents, faces, and additional documents captured during the ID&V flow can be displayed on a Custom Page using session data and substitution variables with parameters that can reference the image or document page.
Data that can be displayed includes the following:
Document Capture - Images only
Face Capture - Images only
Additional Document Capture - Images or PDF
This guide will describe the required steps how to configure the Custom Page and Process Definition to display the image of a document, face, and additional document captured during the Process Instance.
Display Captured Image
The process of displaying a captured document, face, or additional document image is similar among each identity image. This guide uses document image as a lead example but will detail differences for face and additional documents where applicable.
Support for displaying captured images in Custom Pages is available from activities Custom Pages V2, Custom Pages V2 - External, Custom Page Without Response and Custom Page External Without Response.
Step 1 - Prepare the Custom Page
Prepare a Custom Page that includes a HTML <img> tag and an ID that will be used to populate the image using the captured document image.
Document Image Example:
In the example above, the image will be displayed within the<img src="" id="docImg" alt="Error while trying to show the image"></img> using the ID docImg .
Data will be retrieved using an event listener in Javascript.
if (event.data.variables)- This condition will check to determine that data variables from the Process Instance have been retrieved.var sessionData = event.data.variables.sessionData- Represents all session data retrieved from the Process Instance. This is stored in the sessionData variable.var docImage = sessionData.docImg_doc1_FRONT_url- Represents the front document image captured during the Process Instance. The format for retrieving a document from the session dataisdocImg_{{docKey}}_{{page}}_urlwhere:docImg - The name of the session data input parameter defined in the Custom Page activity. This value must be set to 'docImg' in both the custom page and the input parameter of the Custom Page activity.
{{docKey}} - Is the document key defined in the document capture activity.
{{page}} - Can be either the FRONT, BACK or BOTH pages of the document.
document.getElementById("docImg").src = docImage- Updates the source of thedocImgHTML element to the docImage session data.
Face Image Example:
In the example above, the image will be displayed within the <img src="" id="faceImg" alt="Error while trying to show the image"></img> using the ID faceImg .
Data will be retrieved using an event listener in Javascript.
if (event.data.variables)- This condition will check to determine that data variables from the Process Instance have been retrieved.var sessionData = event.data.variables.sessionData- Represents all session data retrieved from the Process Instance. This is stored in the sessionData variable.var faceImage = sessionData.faceImg.face1- Represents the face image captured during the Process Instance where:faceImg - Is the session data key defined in the input parameters of the Custom Page activity. This value must be set to 'faceImg' in both the custom page and the input parameter of the Custom Page activity. This is also the case for externally uploaded face images.
face1 - Is the unique ID of the face image defined in the face capture activity.
document.getElementById("faceImg").src = faceImage- Updates the source of the faceImg HTML element to the faceImage session data.
Additional Document Image Example:
In the example above, the image will be displayed within the<img src="" id="addDocImg" alt="Error while trying to show the image"></img> using the ID addDocImg .
Data will be retrieved using an event listener in Javascript.
if (event.data.variables)- This condition will check to determine that data variables from the Process Instance have been retrieved.var sessionData = event.data.variables.sessionData- Represents all session data retrieved from the Process Instance. This is stored in the sessionData variable.var docImage = sessionData.addDocImg_addDoc1_page_1_url- Represents the front document image captured during the Process Instance. The format for retrieving a document from the session data isaddDocImg_{{docKey}}_{{page}}_urlwhere:addDocImg - The name of the session data input parameter defined in the Custom Page activity. This value must be set to 'docImg' in both the custom page and the input parameter of the Custom Page activity.
{{docKey}} - Is the document key defined in the document capture activity.
{{page}} - Can be page_1, page_2, etc.
document.getElementById("addDocImg").src = docImage- Updates the source of theaddDocImgHTML element to the docImage session data.
Step 2 - Configure the Process Definition
When configuring the Process Definition, it is important that the Custom Page is added after capture activity for document, face, and additional document capture. This is to ensure that session data exists and is retrievable by the Custom Page.
The custom page can be placed at any place in the process definition once the capture, of the data to be displayed, has been performed.
The example used in the image below demonstrates a basic document capture flow.
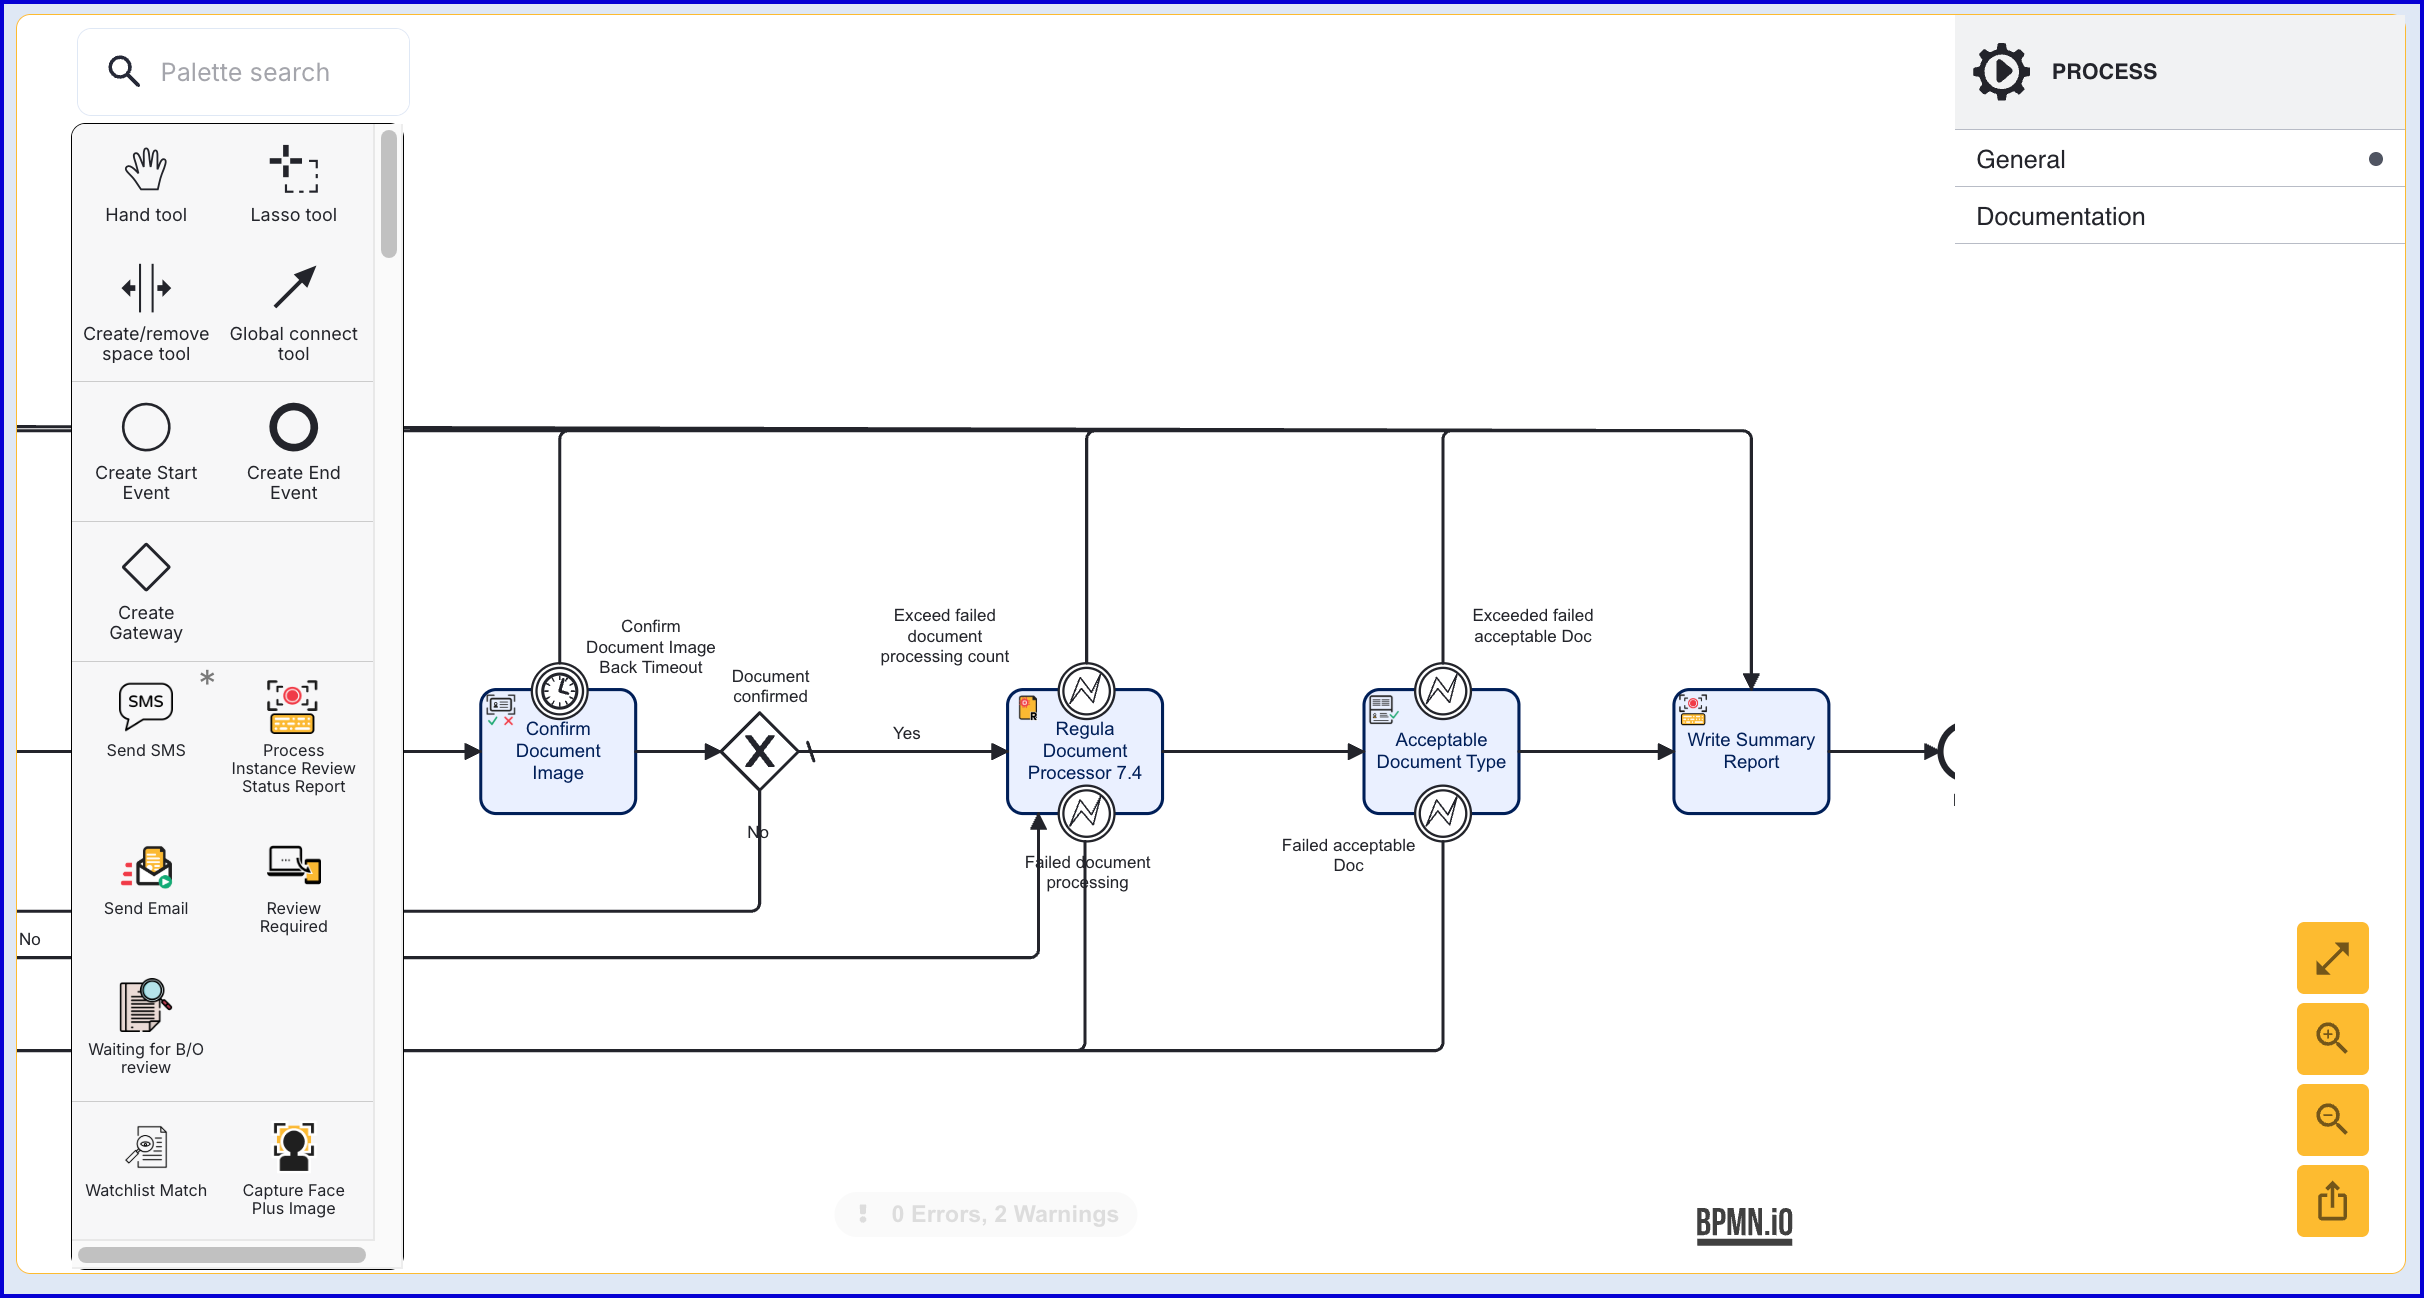
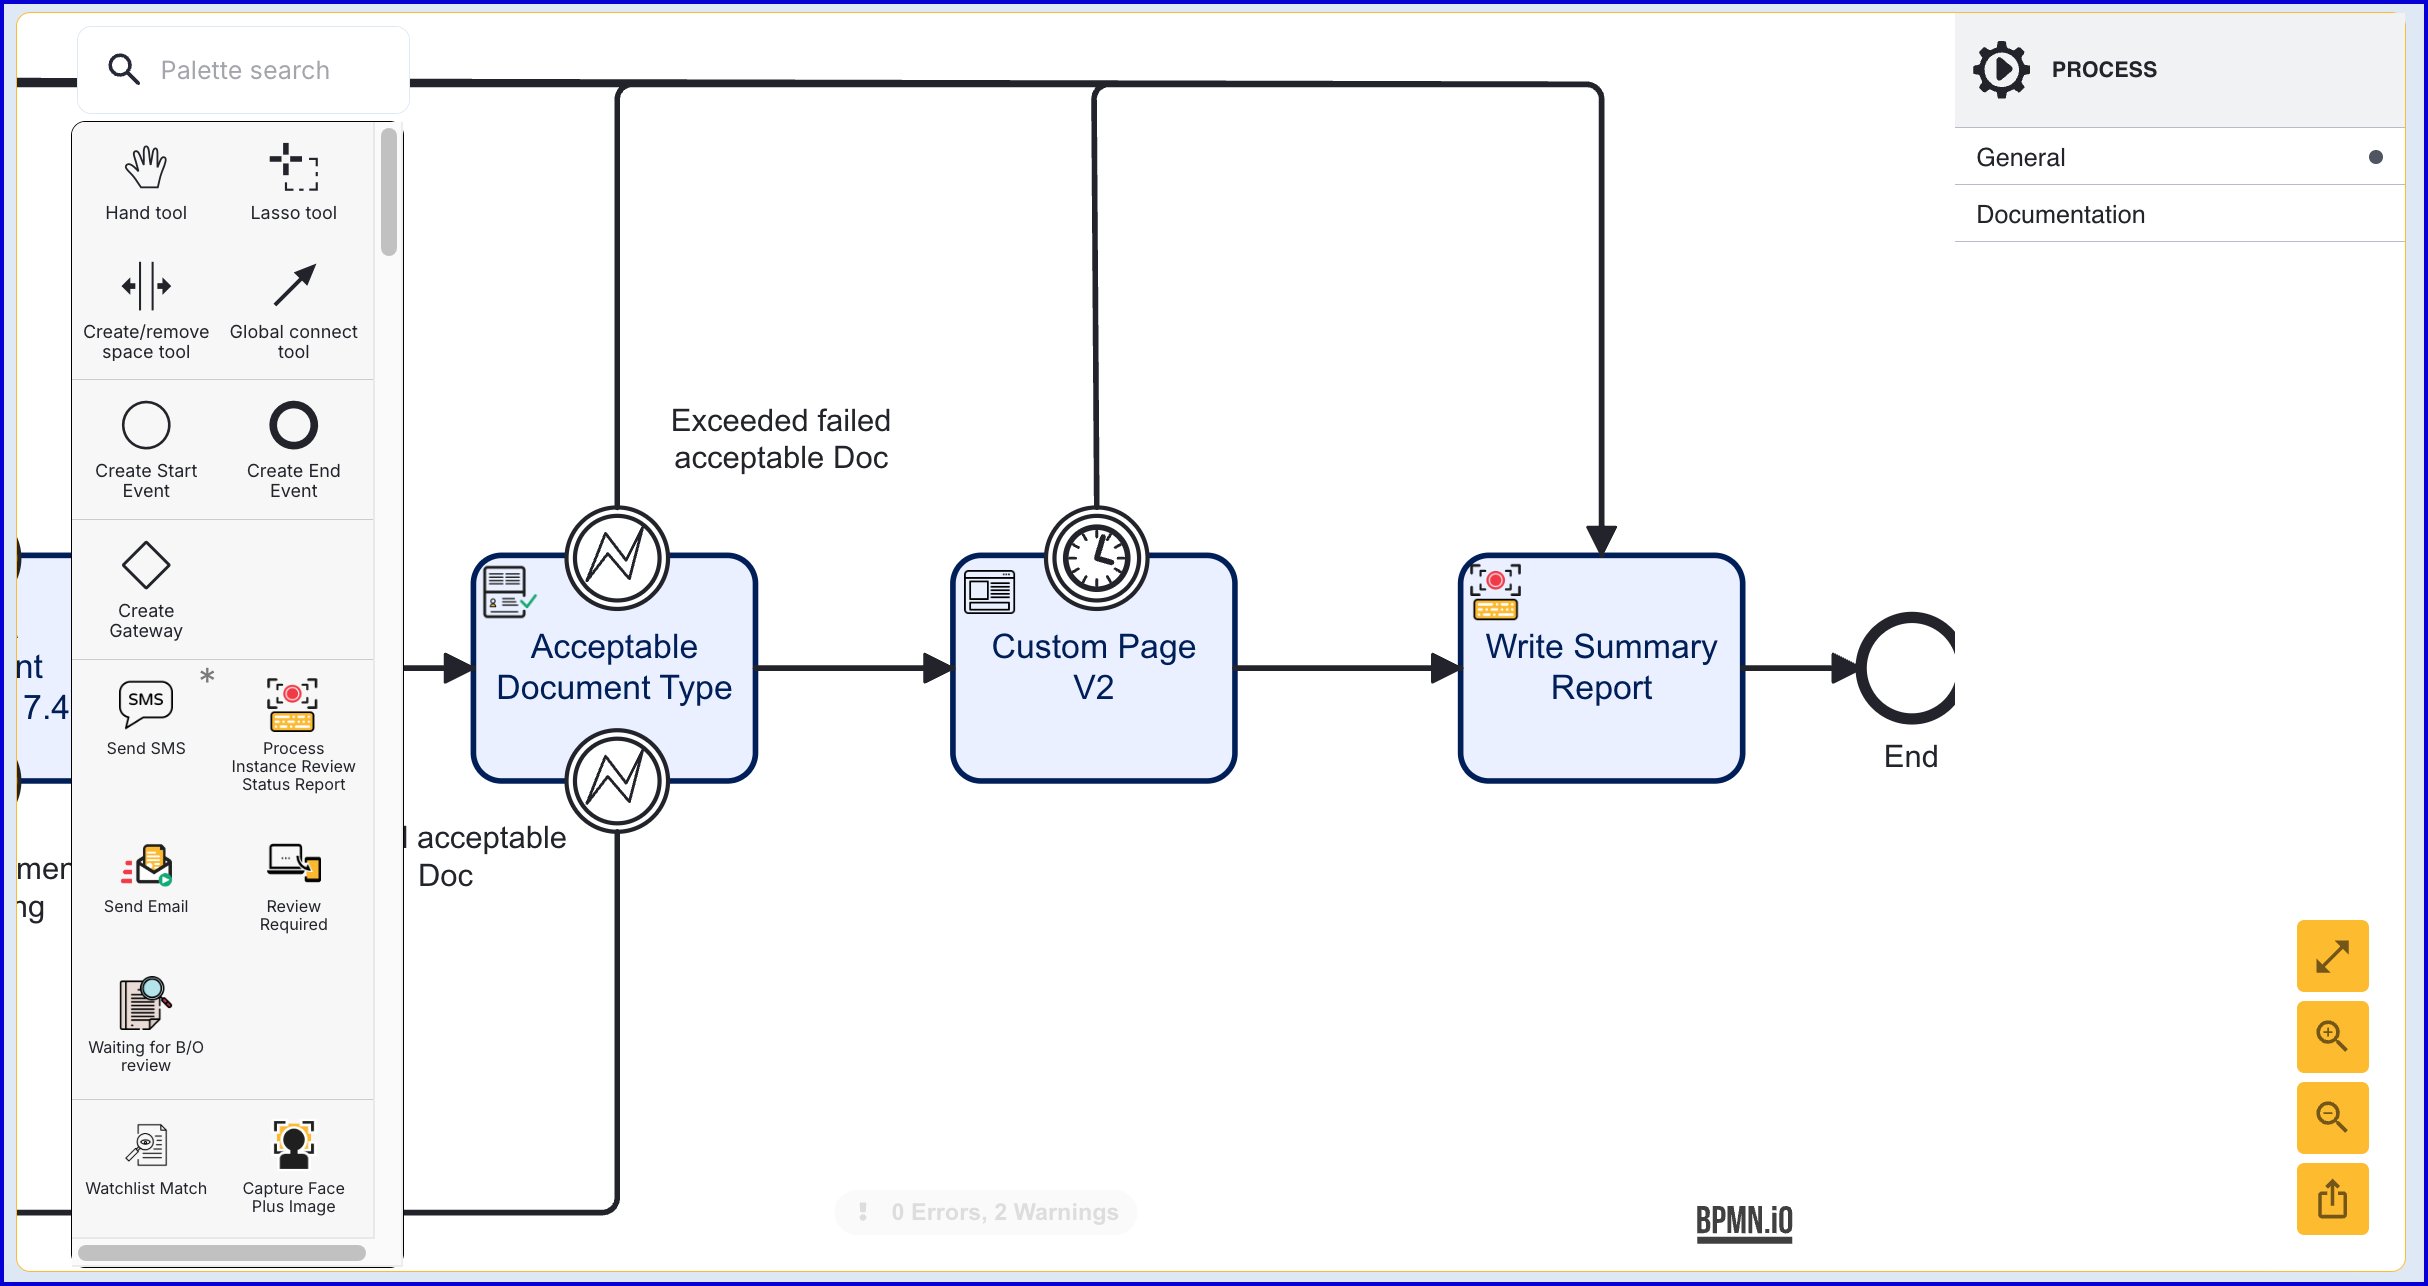
After the 'Acceptable Document Type' activity, add a 'Custom Page v2 'activity.
Click the 'Custom Page v2' activity to open the right-side contextual menu. Expand the list of input parameters and find the 'Session Data' input parameter. Add a new map entry for "docImg".
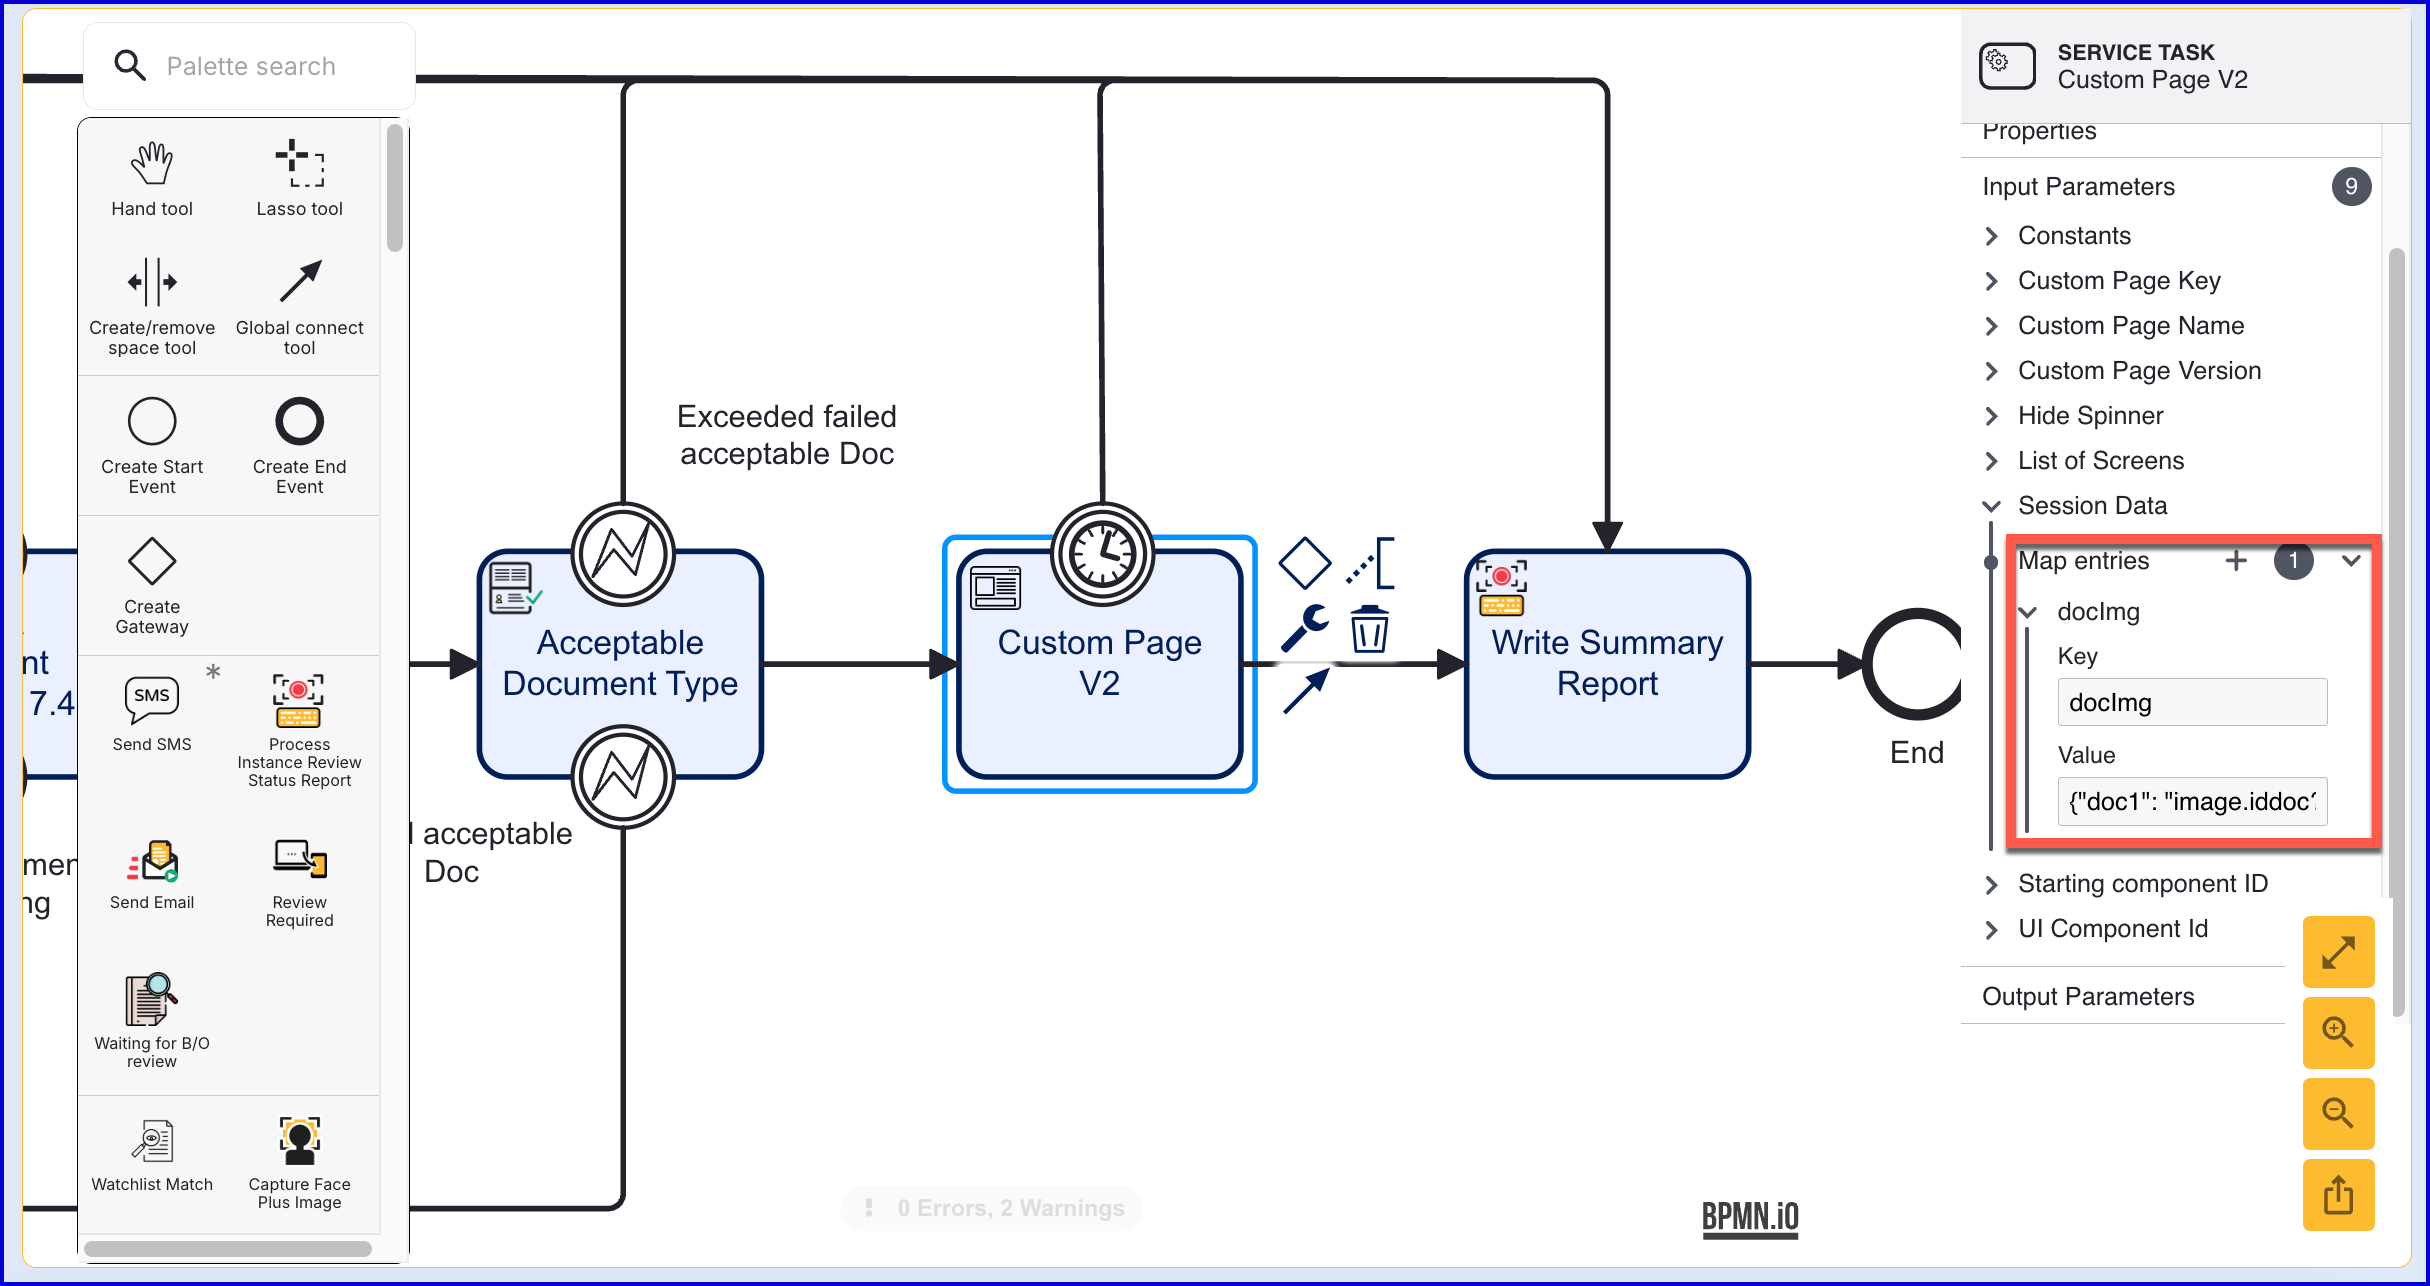
From the screenshot above, the key and value pair are defined as follows:
Key -
docImgis used to identify the session data in Custom Page that is sent to the HTML image tag in Step 1.For documents, this key must be set to
docImg.For faces and external faces, this key must be set to
faceImg.For additional documents, this key must be set to
addDocImg.
Value -
{"doc1": "image.iddoc?key=doc1&page=FRONT&profile=UNCROPPED&ttl=PT30M"}
The structure of the value parameter follows a URL parameter like pattern of configuration options separated by an '&' between each configuration.
Example Document Format:
{{key} : "image.iddoc?key={key}&page={page}&profile={profile}&ttl={ttl}"} .
The table below describes each configuration option:
Parameter | Required | Default | Description |
|---|---|---|---|
key | Yes | This is the document key. For example 'doc1'. | |
page | Yes | FRONT | BACK represents which page of the document will be passed to the Custom Page. | |
profile | Yes | CROPPED | UNCROPPED determined whether to send the cropped or uncropped document image to the Custom Page. | |
ttl | No | PT15M | An ISO 8601 Duration. The default duration is 15 minutes. |
Example Face Format:
{{key}:”image.face?key={key}&ttl={ttl}}
For example: {"face1":"image.face?key=face1&ttl=PT30M"}
The table below describes each configuration option:
Parameter | Required | Default | Description |
|---|---|---|---|
key | Yes | This is the face key. For example 'face1'. | |
ttl | No | PT15M | An ISO 8601 Duration. The default duration is 15 minutes. |
Example Additional Document Format:
{{key}}: "image.adddoc?Key={key}&addDocId={addDocId}&ttl={ttl}&page={page}
The table below describes each configuration option:
Parameter | Required | Default | Description |
|---|---|---|---|
key | Yes | this is the doc key - i.e. adddoc1 or adddoc2 etc. | |
ttl | No | PT15M | This is an ISO Duration The default duration should come from a global config. |
page | Yes | This is free form but is currently the page number. | |
addDocId | Yes | This is the id of the additional document which is taken from the additionalDocuments input from the activity. |
Once both session data is defined, save the Process Definition. The Custom Page is now able to retrieve session data passed from the document capture process.