The standard TOTP registration flow will implement the 'Start TOTP Registration' and 'Complete TOTP Registration' activities alongside a Custom Form to handle the registration and first authentication of a secret using an authenticator application.
Before starting, a TOTP policy is required. This can be configured in the Backoffice by navigating to Identity Stores > Policies. For more information, see the TOTP Configuration section of the 'Managing Policies 'guide.
Process Overview
An end-user completes TOTP registration by following a two step process:
- A QR code is generated in the TrustWeb application which is scanned and stored in their authentication application.
- An initial authentication is completed by the end-user to prove that they have registered the QR code and it is compatible with their authenticator application.
Step 1
TOTP registration is initiated by sharing TOTP parameters with a client device via a registration QR code containing:
- Secret: A secret unique value for this TOTP authenticator shared between the client and server. The authentication code is generated based on this value and the current time divided by the period (see below).
- Period: The time window in seconds for which a code will be valid.
- Digits: The number of digits in the authentication code.
- Algorithm: The optional algorithm applied to the secret and time step to generate the authentication code. Some authenticators ignore this parameter. If not supplied then the authenticator chooses which algorithm to use.
- Issuer: The optional name of the provider or service this authenticator is associated with. Although this field is optional it is highly recommended that it is given a value.
- User Identifier: This is a mandatory user identifier that identifies the user account this authenticator is associated with.
The label of the authenticator in the authenticator app (using Google Authenticator as an example) depends on whether issuer is supplied or not.
If the issuer and user identifier are both supplied then the authenticator label is: {issuer}:{user identifier}
Example: Example Bank:johndoe@example.com
If issuer is not supplied then the authenticator label is just the user identifier. This is why it is recommended that both are used for maximum clarity and disambiguation of one authenticator from another.
The static TOTP parameters (period, digits, algorithm, issuer) are part of a TOTP Policy which can be configured via in the Backoffice.
On the Identity Store server a TOTP record will be created as a result of this step but it will be PENDING with an expiration date/time.
The maximum number of PENDING and ACTIVE TOTP records per user is configurable.
Step 2
TOTP registration is completed by a verifying an authentication code generated by the authenticator app on the client’s device. The TOTP Policy, user identifier and authentication code are required as inputs in the 'Complete TOTP Registration' activity.
If the authentication code is validated successfully within the allotted time, the TOTP status will be updated to ACTIVE and the TOTP is ready to receive user authentications.
The TOTP policy will typically be configured to support multiple algorithms so that the widest variety of client authenticators is supported. In this case the server will try and validate the authentication code using each of the algorithms. The one that matches will be associated with the TOTP record.
Registering via Process Definition
Step 1 - Prepare the Custom Form
In this flow, a Custom Form will request the end-user to scan a QR code or enter the secret manually using a text field.
- In the Backoffice application, navigate to Integration Hub > Custom Forms.
- Click the 'New Custom Form' button to create a new form.
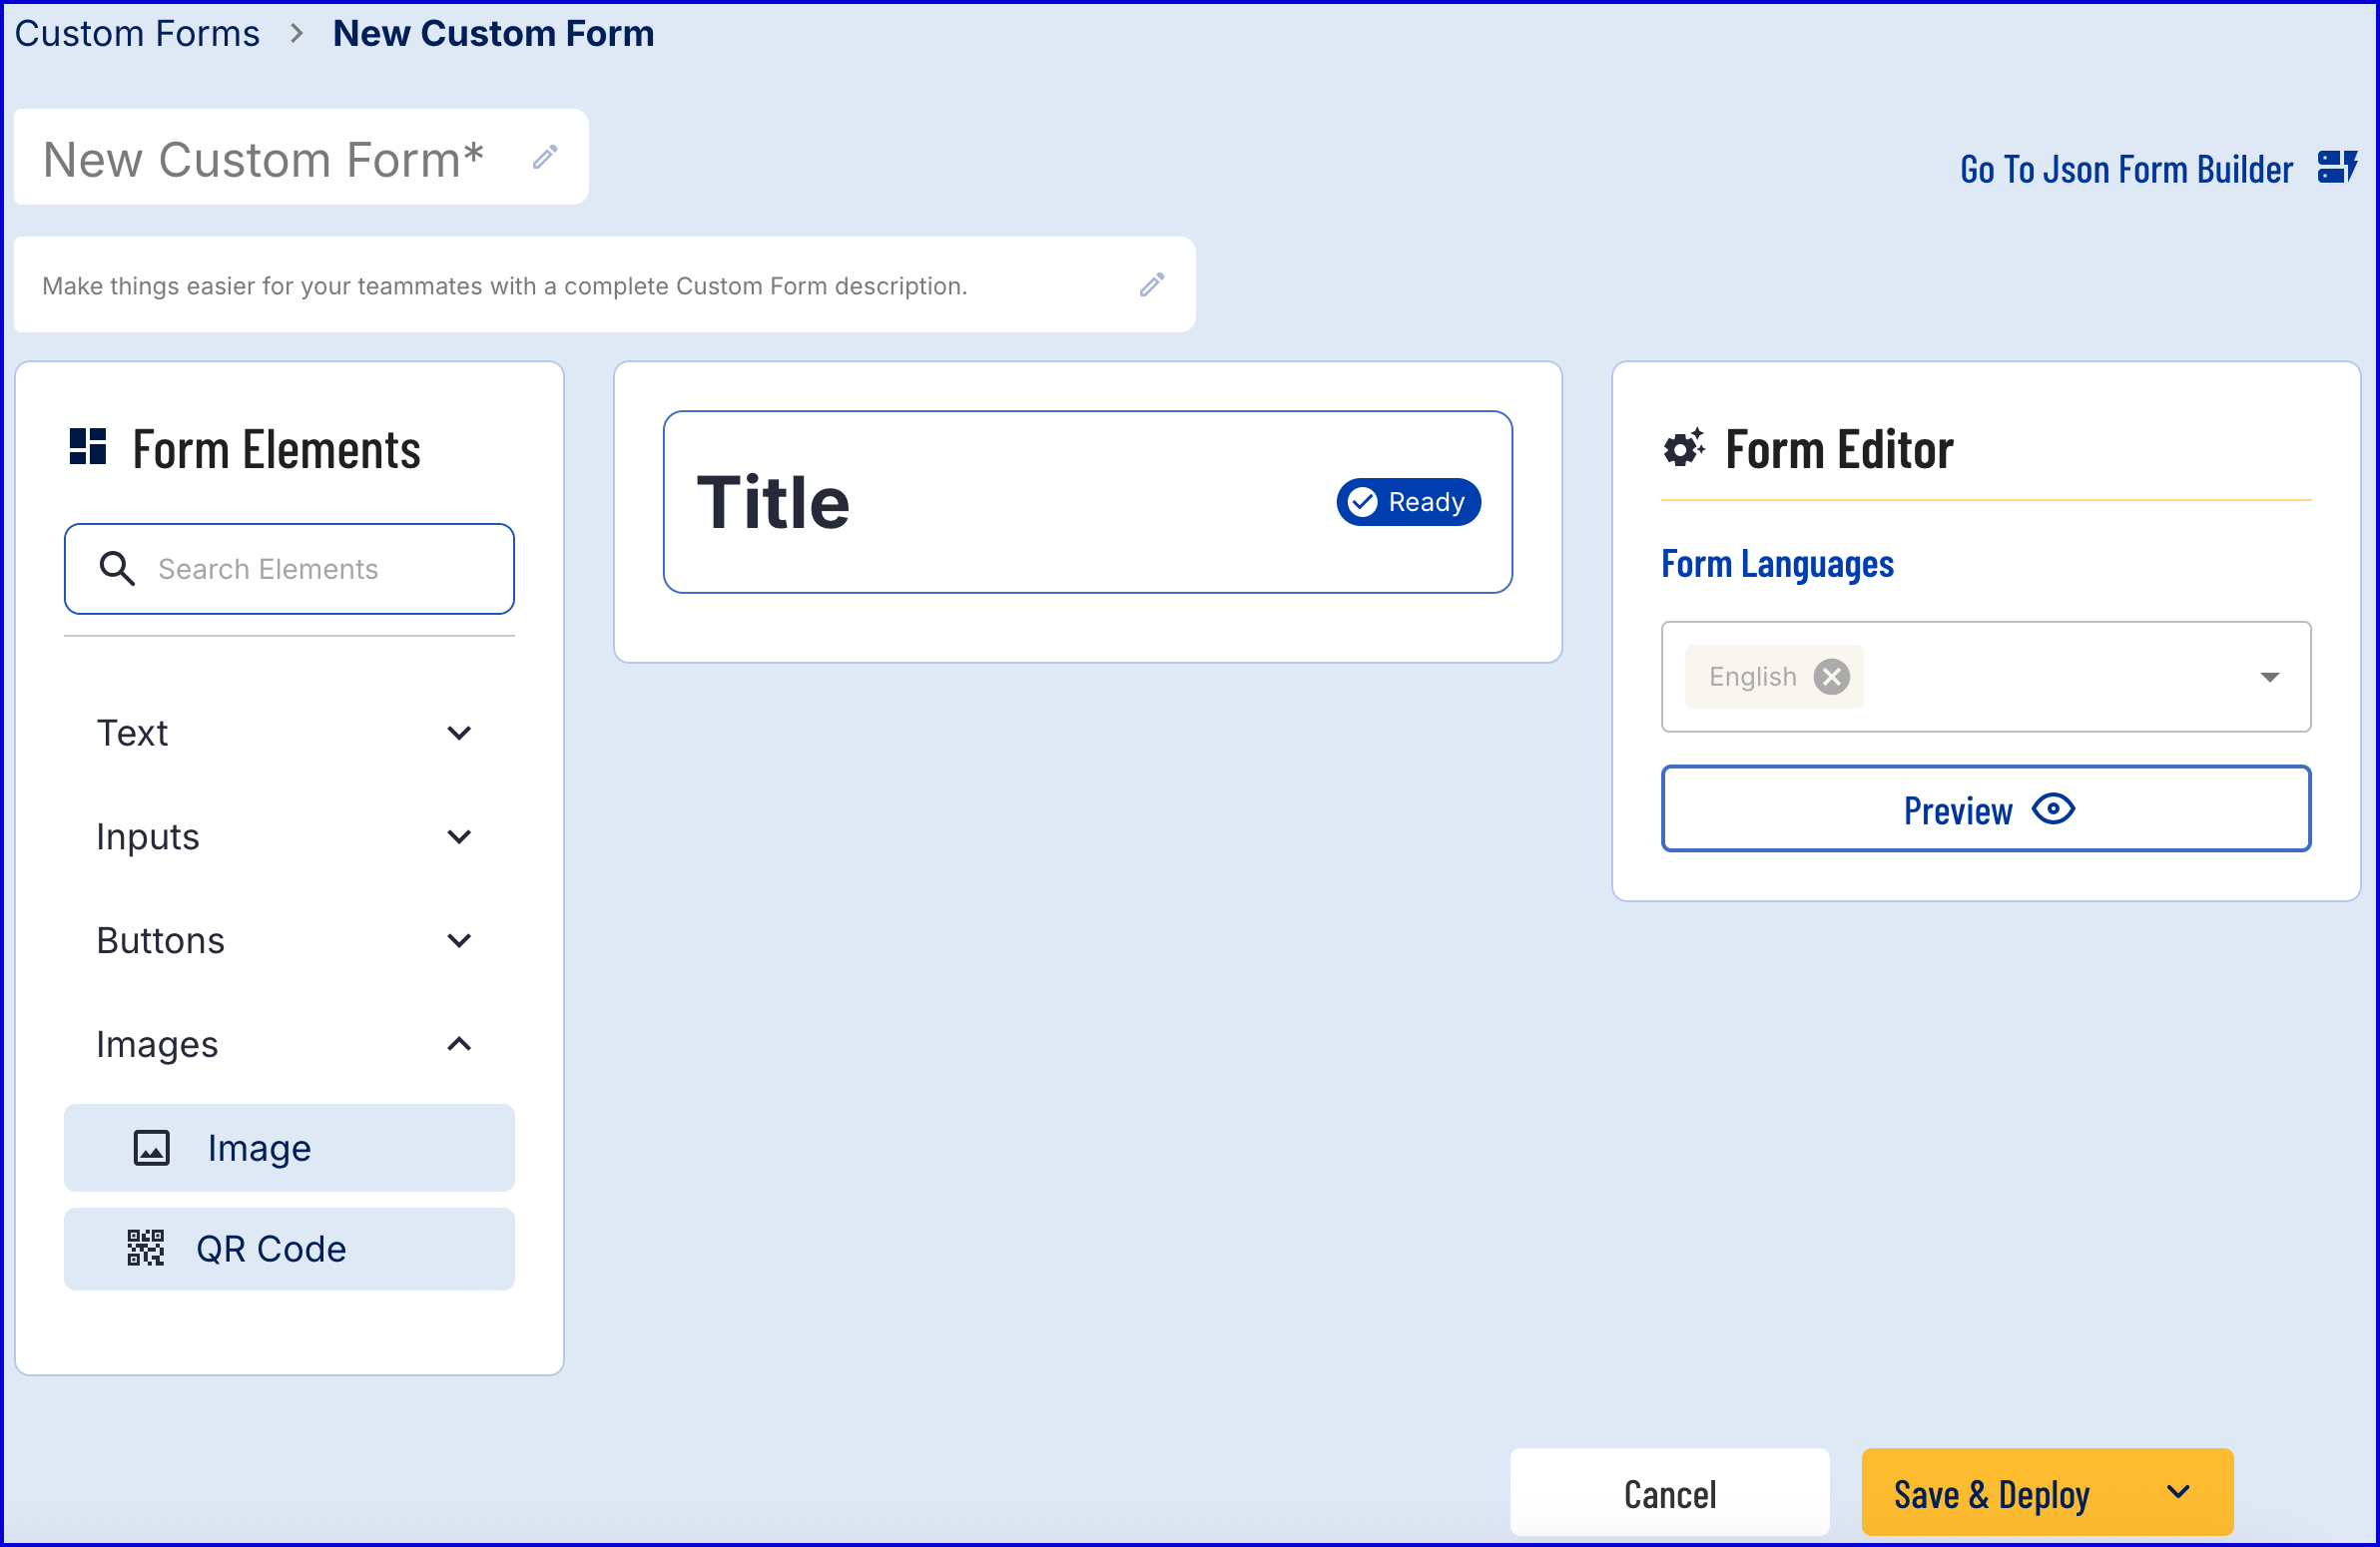
- The form builder provides a drag-and-drop Visual Form Builder or a JSON Form Builder to create a new Custom Form. In this example, the Visual Form Builder will be used. For more information on using this feature, see the Custom Data Forms guide.
- Add a 'QR Code' form element found under the 'Images' dropdown list.
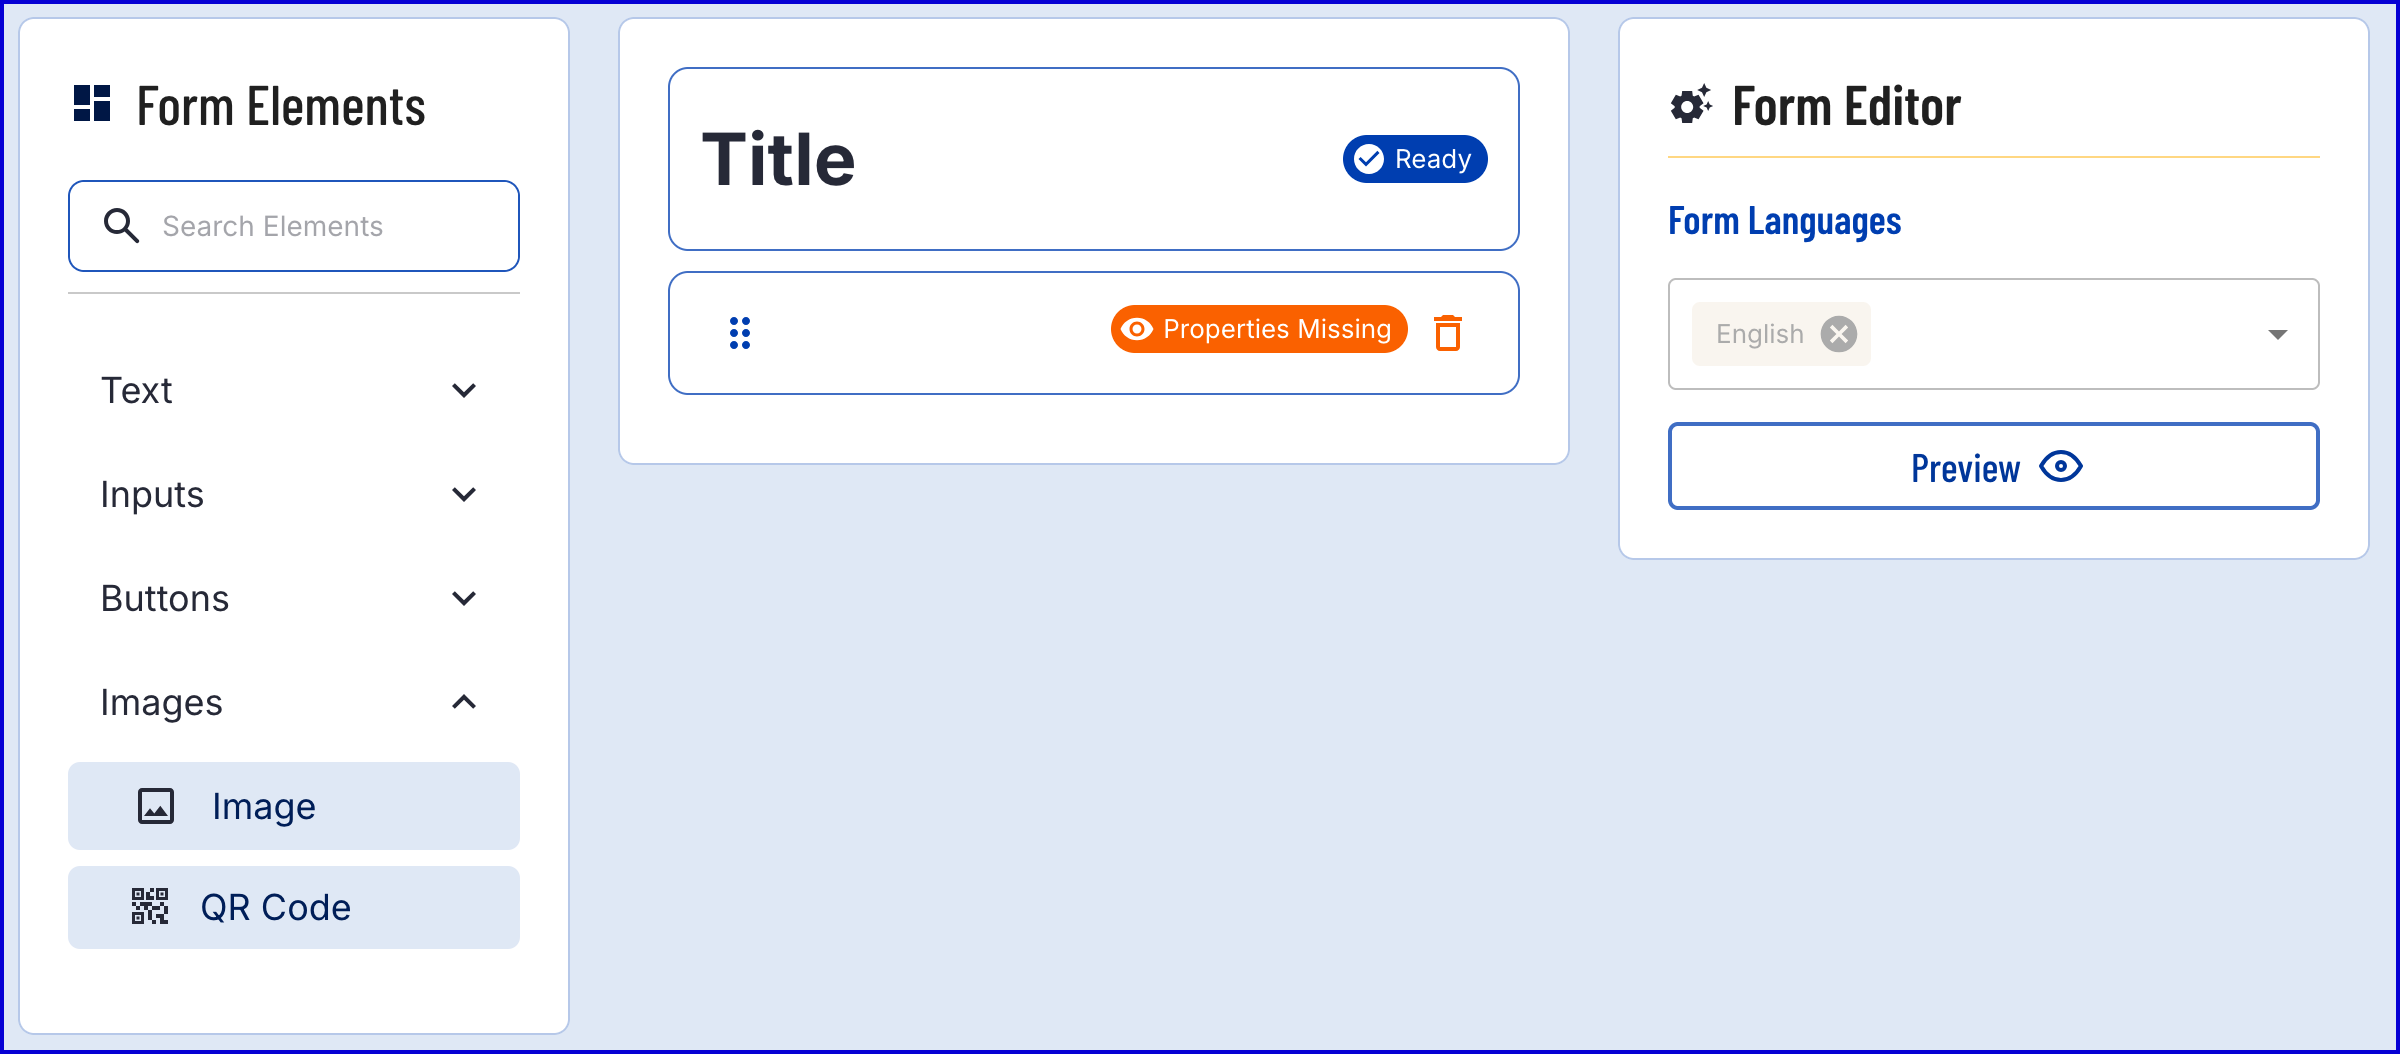
- The new form element will be added beneath the title and will display a "Properties Missing" error. To resolve this, click on the element to open the configuration settings in the Form Editor section.

- The QR Code contains the following properties:
| Property | Description |
|---|---|
| Element ID | The unique identifier of the QR Code form element. |
| QR Content | Generates a QR code based on the provided string input. |
| Size | The size of the QR code that will be displayed. |
- For this example, the properties are set as follows:
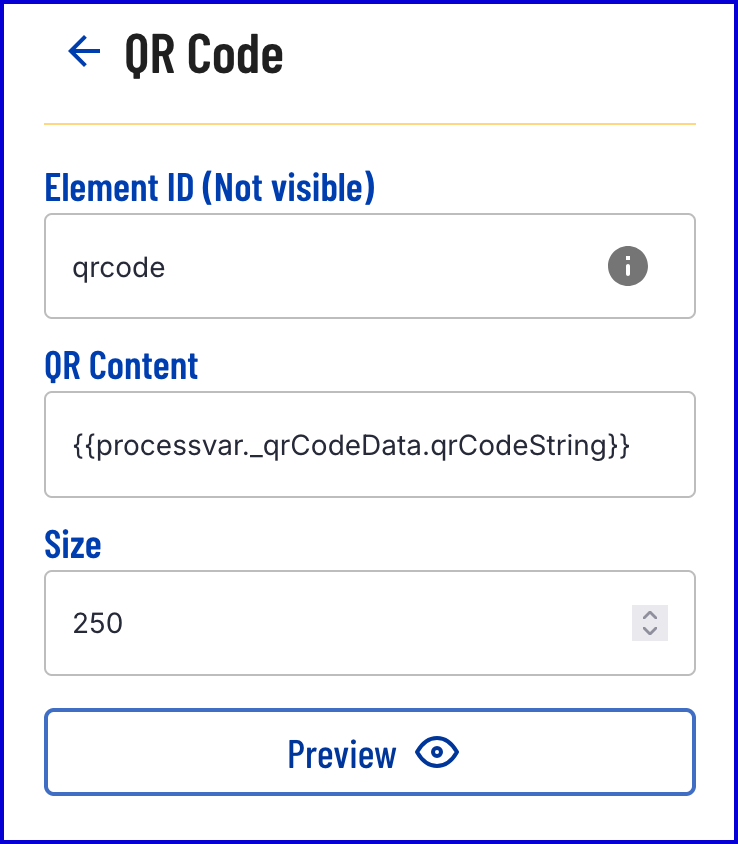
From the example above, the QR Content is set to
{{processVar._qrCodeData.qrCodeString}}. This string can be understood as follows:- processVar - Access the process variables table. This contains variable data generated during the Process Instance.
- _qrCodeData - Accesses the _qrCodeData table which contains QR code data generated as part of the Process Instance.
- qrCodeString - Access the string representation of the QR code data.
Once the QR Code form element is defined, add a 'Link' form element, found under the 'Buttons' dropdown list.
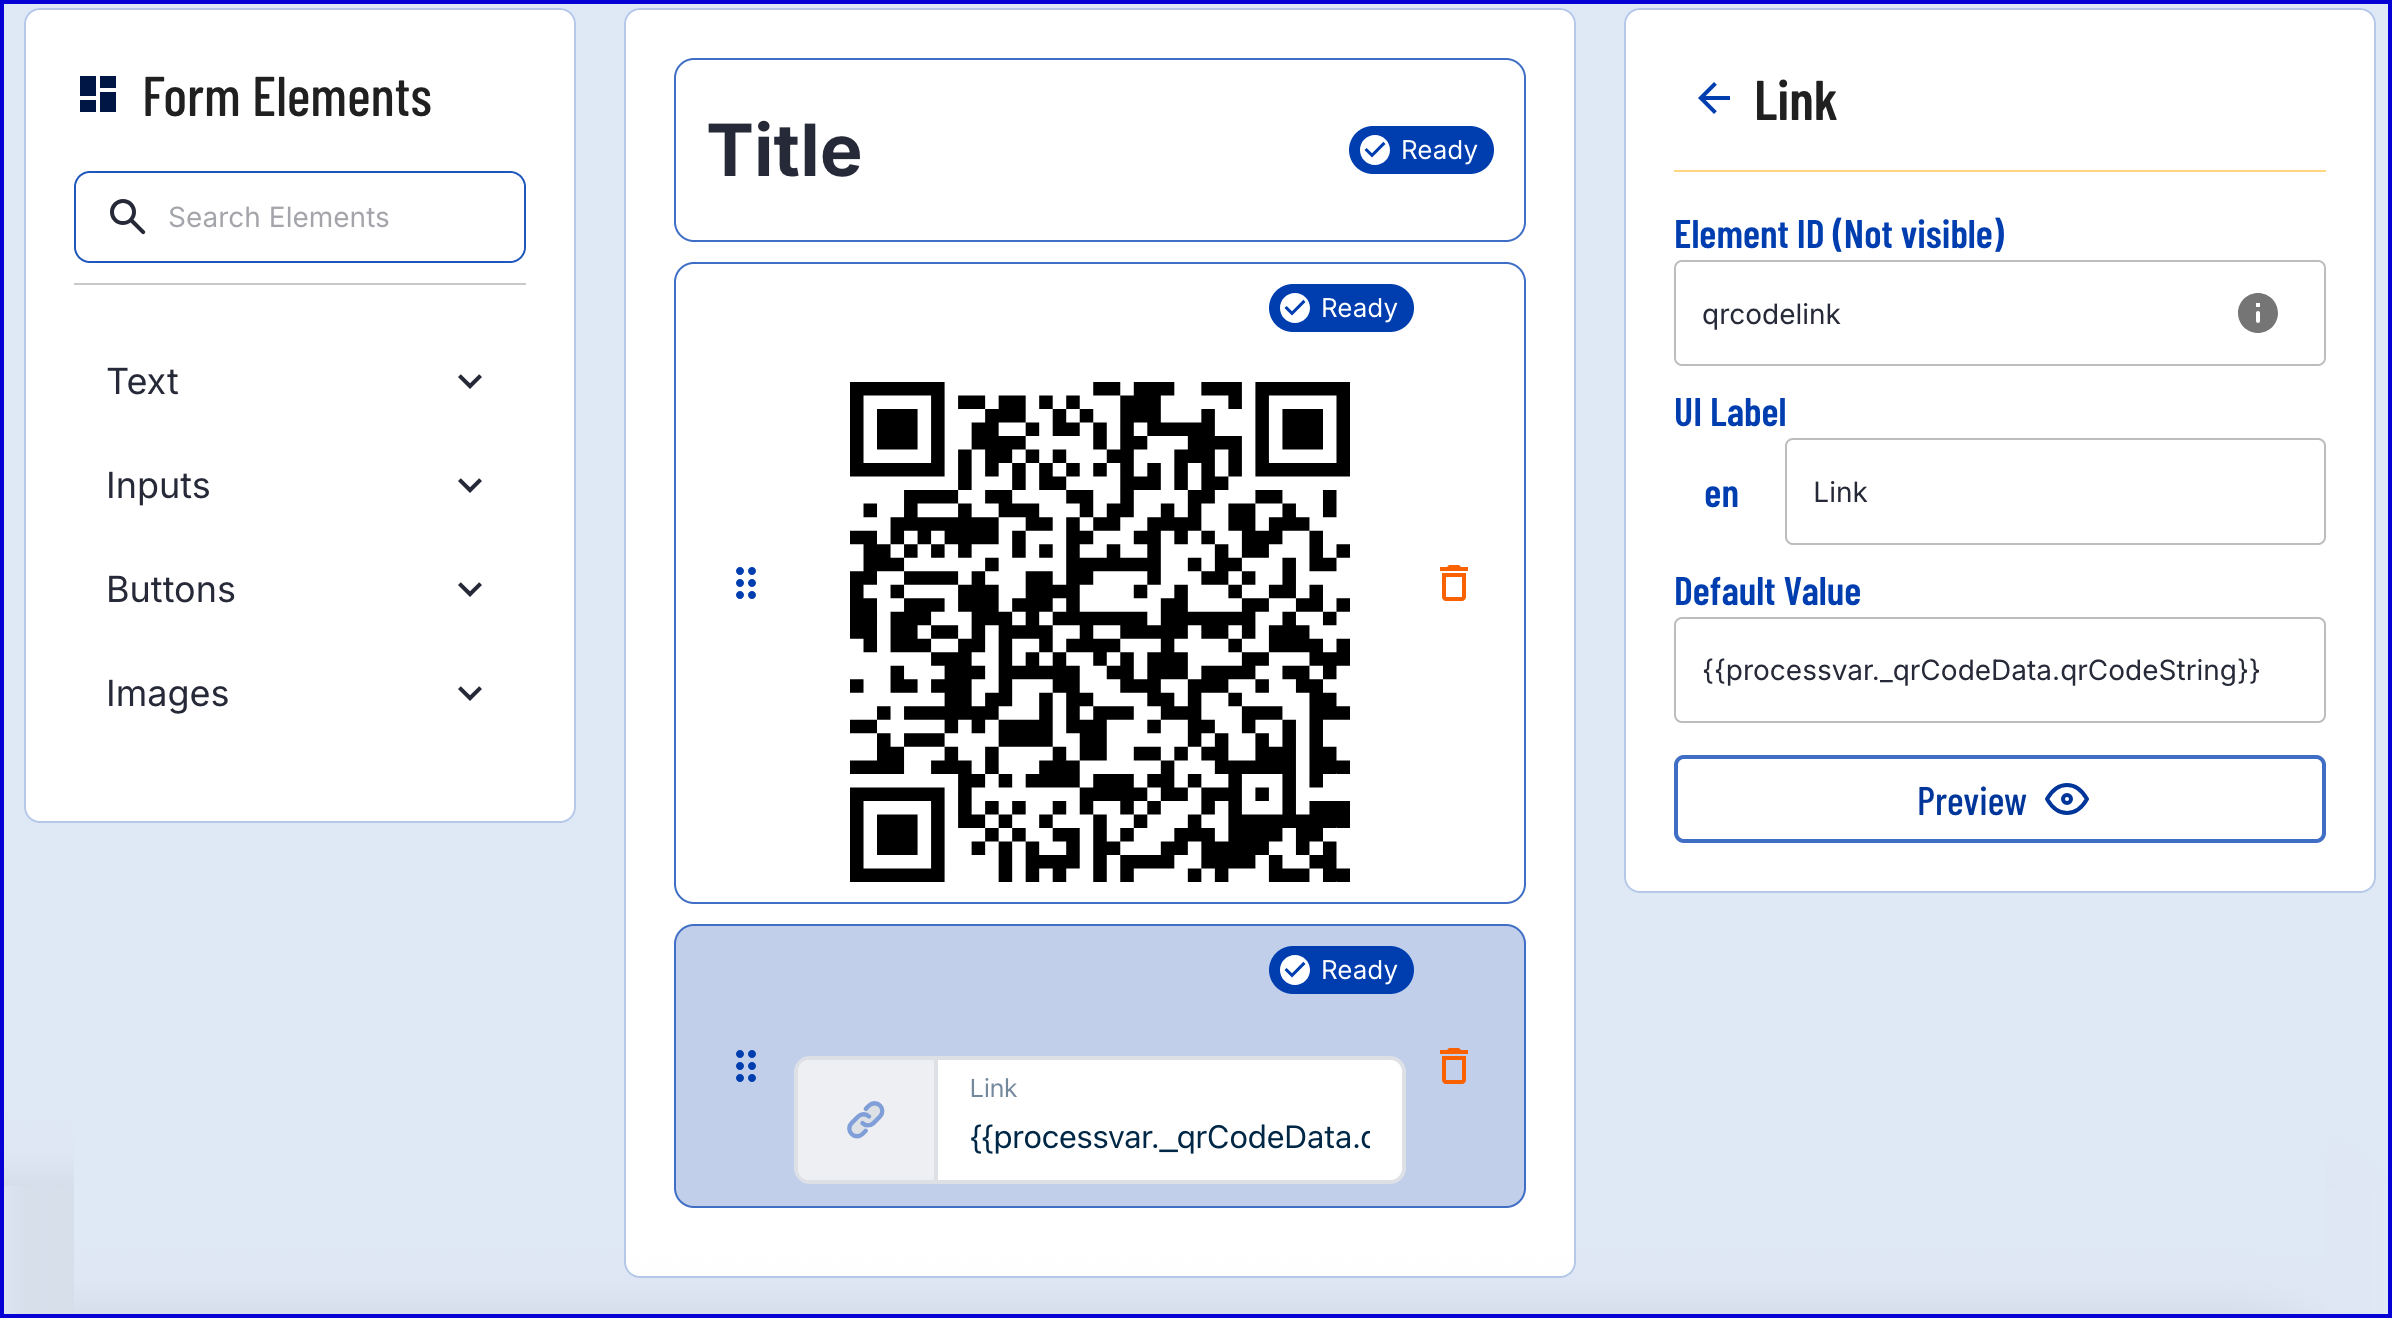
- The 'Link' form element contains the following properties:
| Property | Description |
|---|---|
| Element ID | The unique ID of the form element |
| UI Label | A UI label that will be displayed to the user in the TrustWeb application. |
| Default Value | The default value of the link that will be displayed to the user. |
- In the example above, the URL will also use the
{{processVar._qrCodeData.qrCodeString}}value. When the link is clicked, the user's default authenticator application will open to register the TOTP password. - Add a 'Copy' form element found under the 'Buttons' dropdown list.
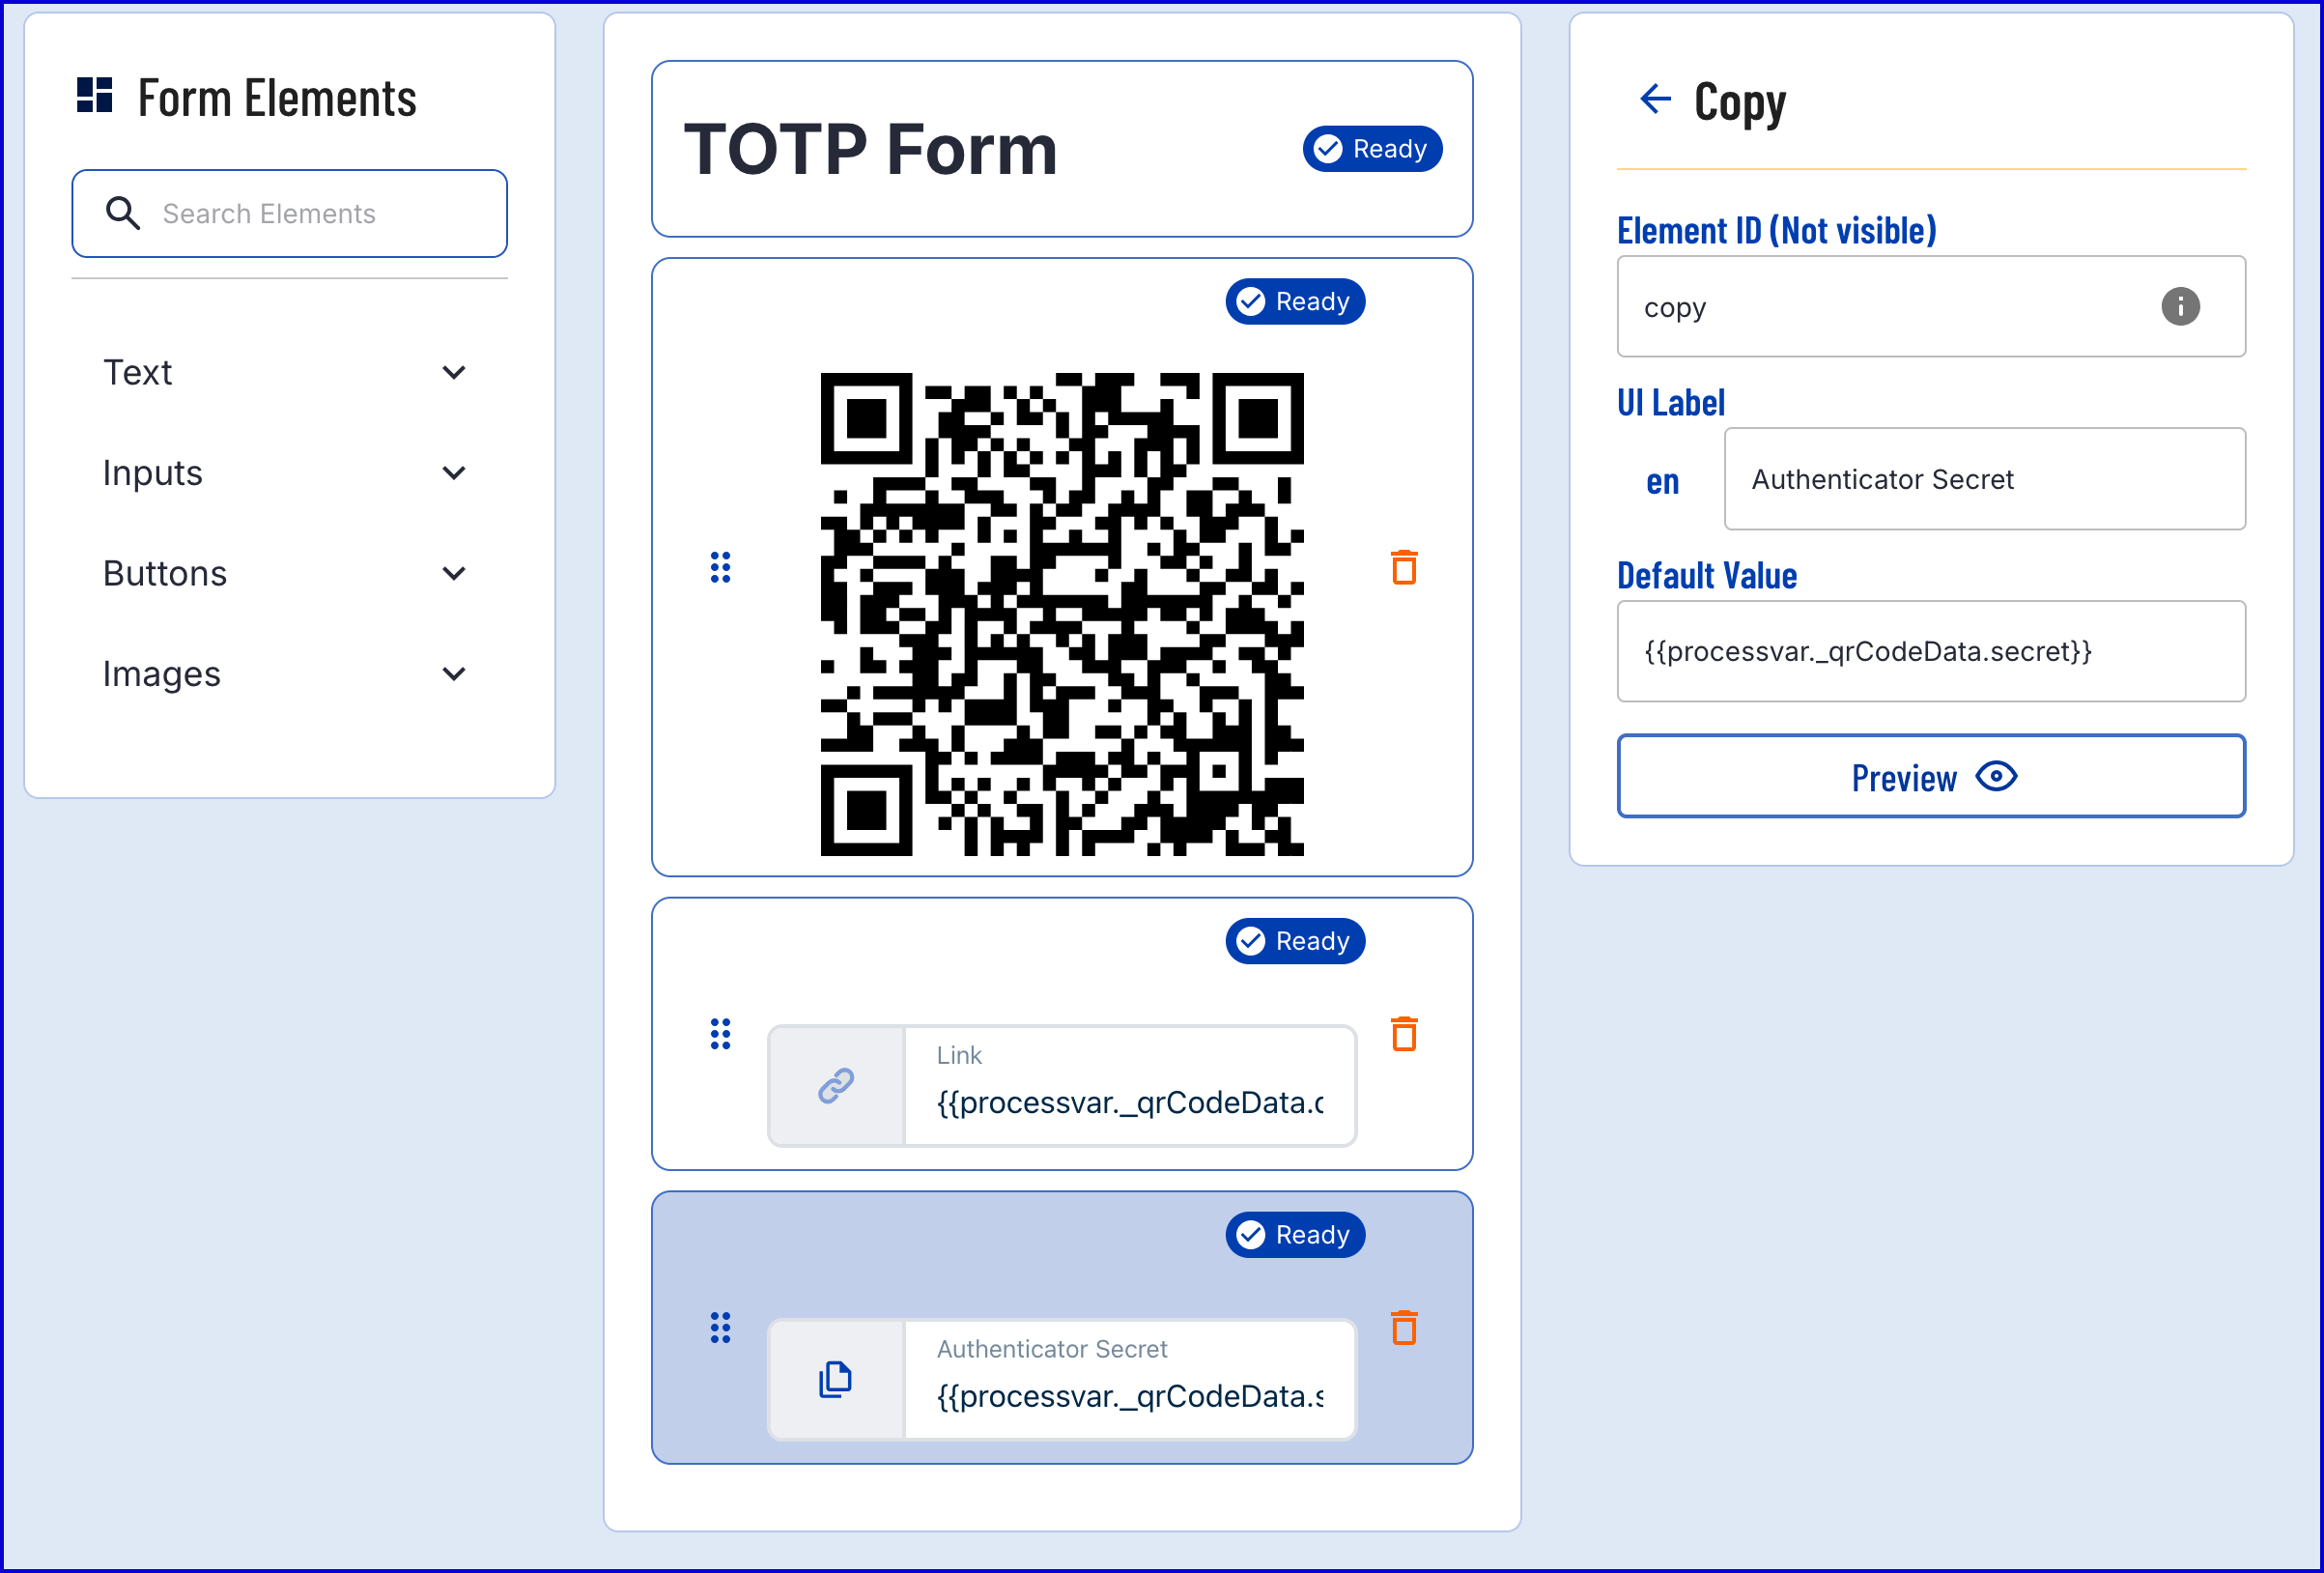
- The 'Copy' element has the following properties:
| Property | Description |
|---|---|
| Element ID | The unique ID of the form element |
| UI Label | A UI label that will be displayed to the user in the TrustWeb application. |
| Default Value | The default value that will be copied to the user's clipboard when the copy button is pressed. |
- In the above example, the default value is set to
{{processvar._qrCodeData.secret}}. This will retrieve the secret of the QR code and make it available to copy directly to the clipboard for manual configuration in the authenticator app. - Add a new 'Text' form element found under the the 'Inputs' dropdown menu. This text input will be used for inputting the generated TOTP retrieved from the authenticator application and is a required parameter.

- Once the Custom Form is finalized, click the 'Save & Deploy' button.
Step 2 - Create a Process Definition
- Create a new Process Definition by navigating to Process Definitions > New Process Definition in the Backoffice application.
- Add a 'Create Start Event' to the Process Designer.
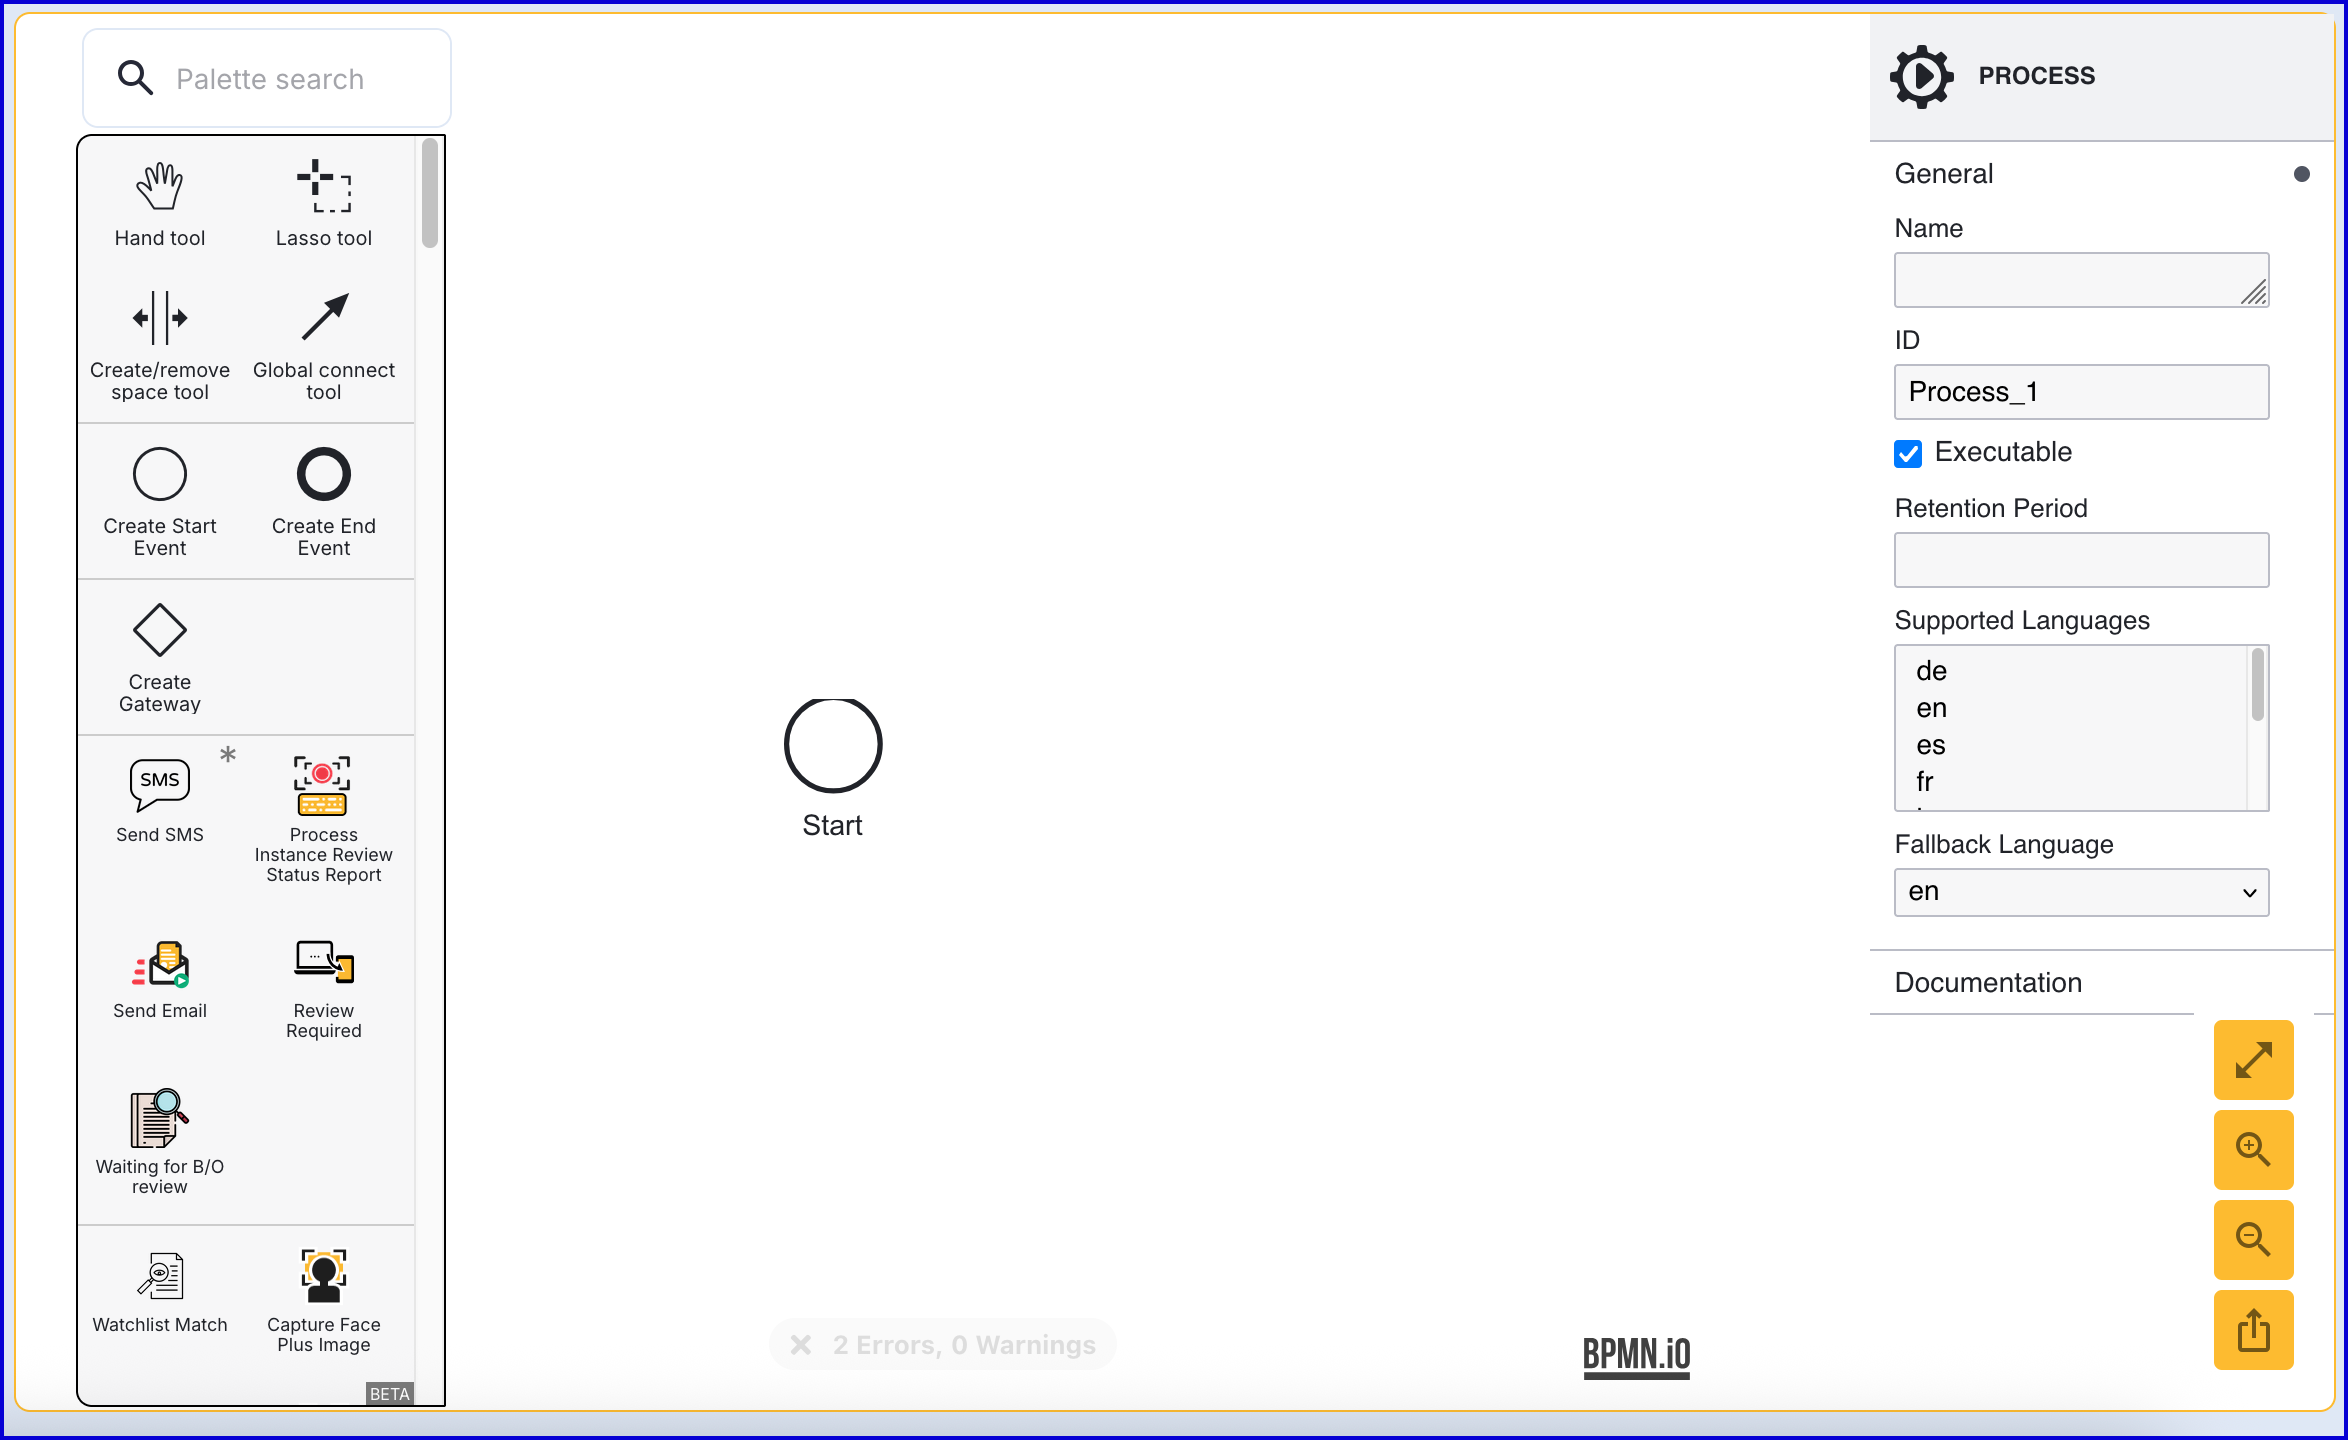
- Click the 'Start' event to open the right-side contextual menu and enter a name for the 'Name' input parameter.
- Add a 'Create End Event' to the Process Designer and connect it to the 'Start' event using a sequence flow arrow.
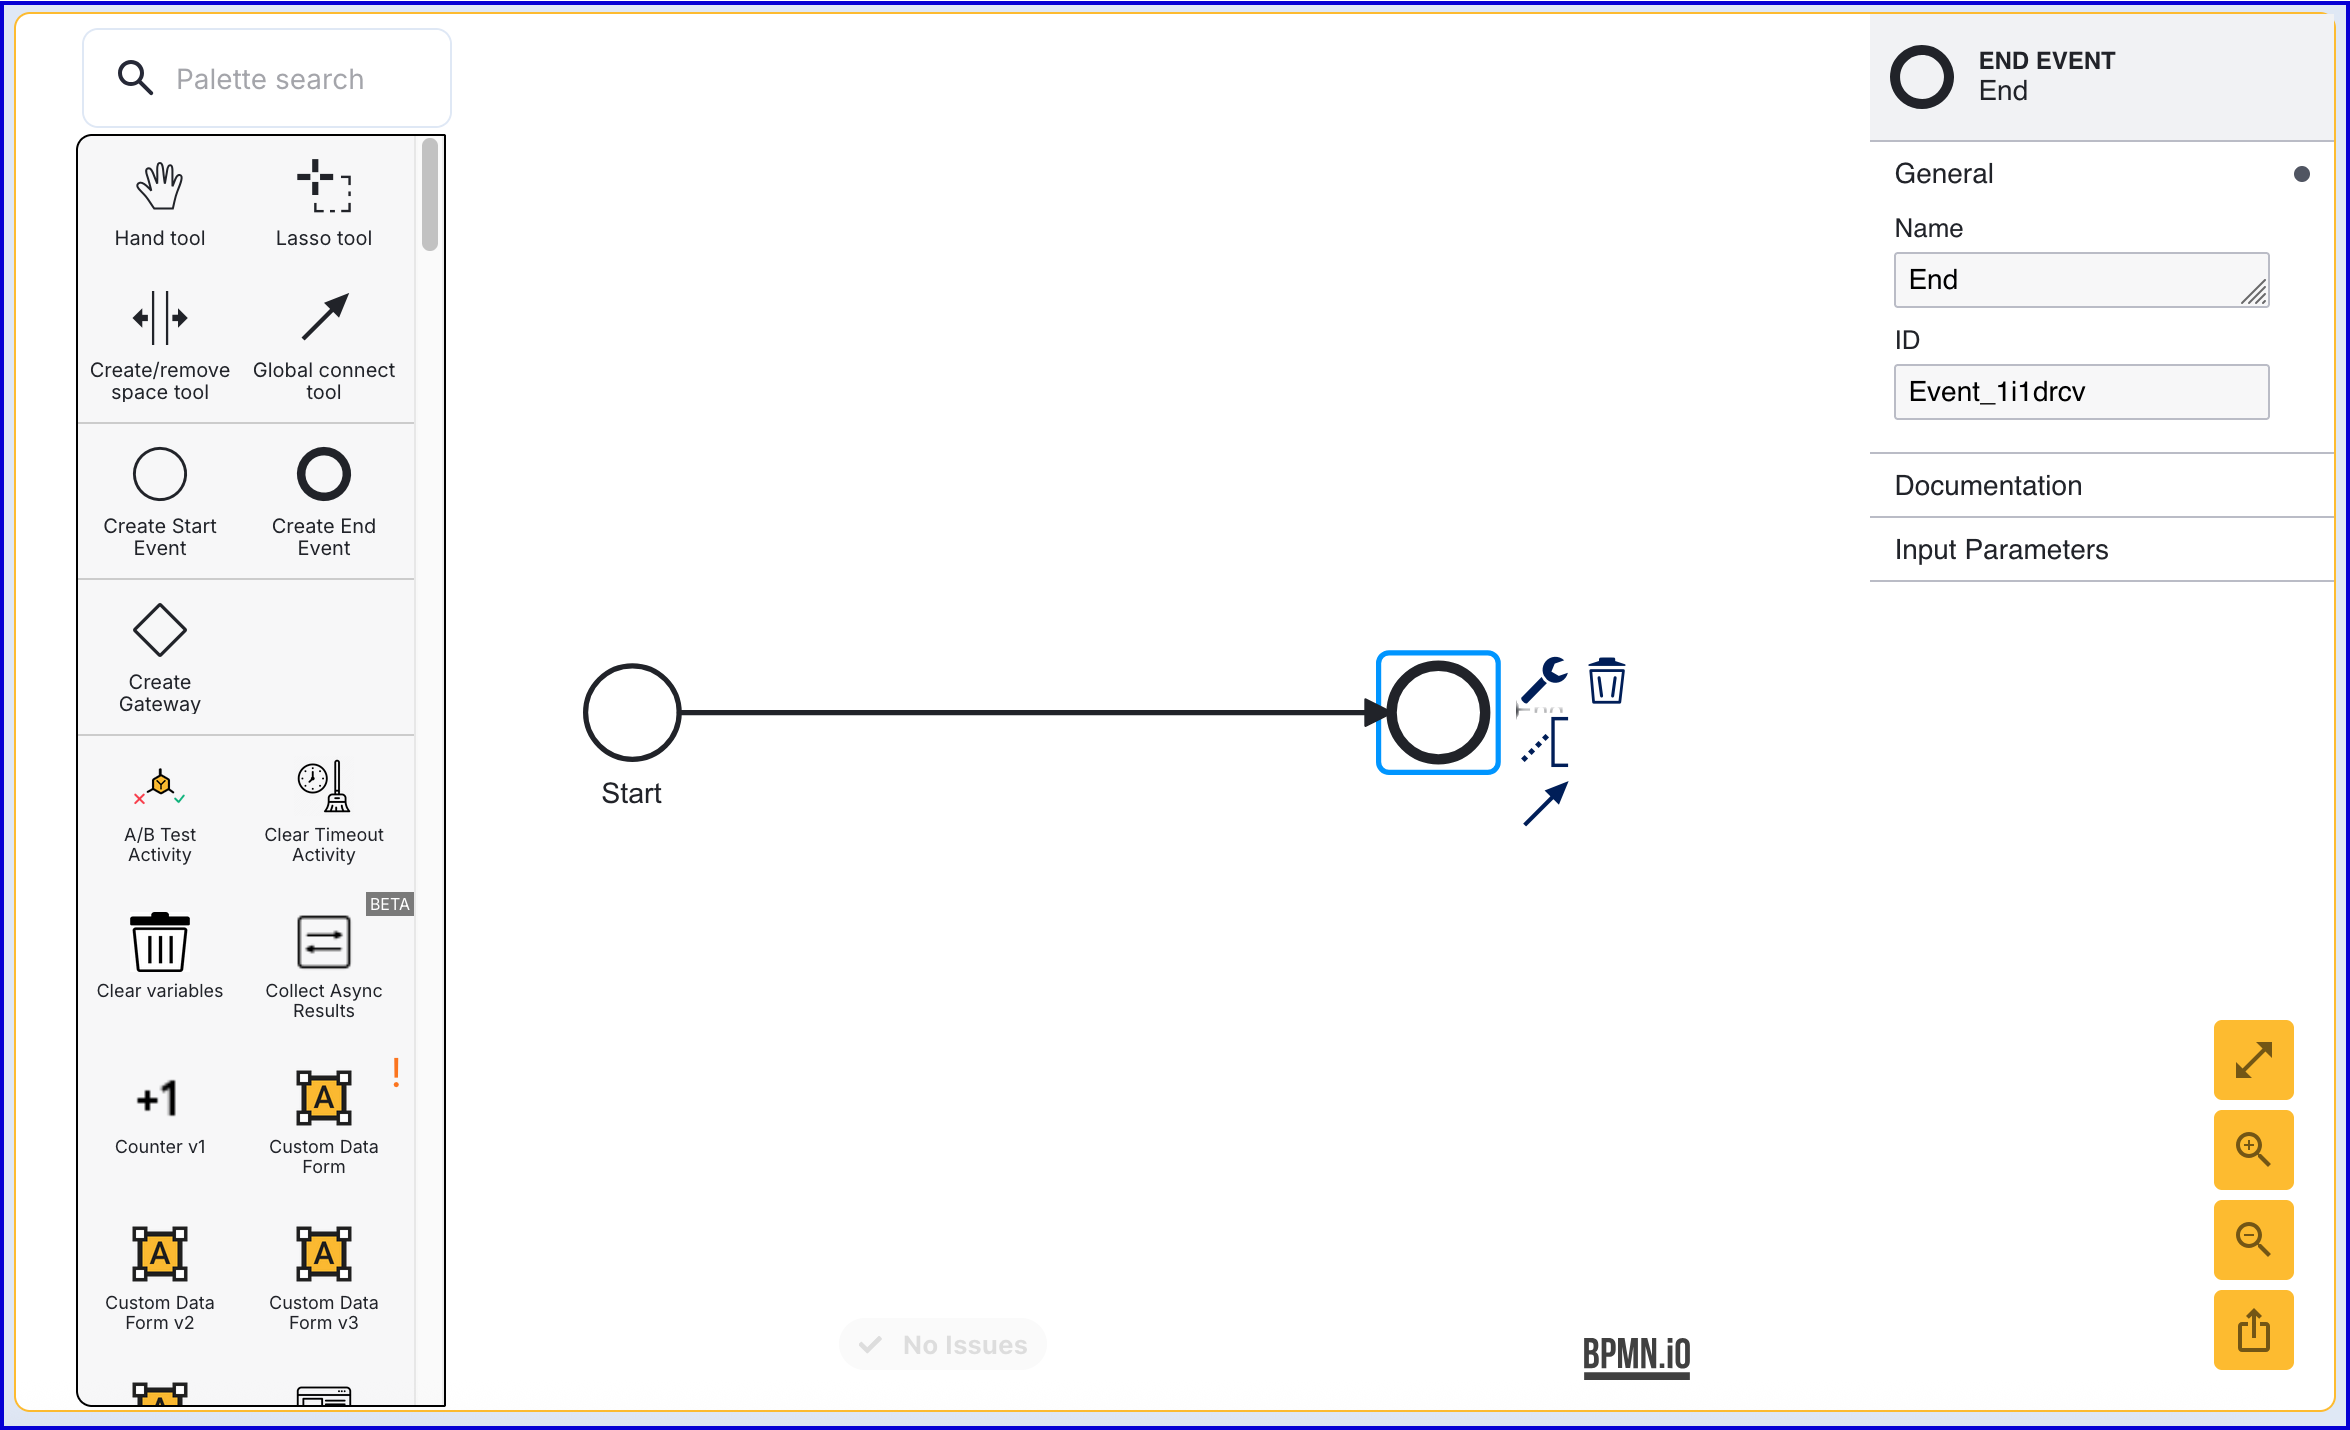
- Click the 'End' event to open the right-side contextual menu and enter a name for the 'Name' input parameter.
Step 3 - Add a User (Optional)
This step is only required if the User has not been added to the Identity Store. See Managing Users for more information on adding a User.
- The 'Add User' activity is used to add a new User to an Identity Store. Find the activity and connect it to the 'Start' and 'End' events using a sequence flow arrow.

The 'Add User' activity includes two error events. In this example, the error events have been connected to the 'End' event.
- Failed to add the user - This event is triggered when an error occurs adding the User to the Identity Store.
- ExtId Not Unique - This event occurs if the External ID provided is not unique.
Click the 'Add User' activity to open the right-side contextual menu. Using the available input parameters, information about the User can be defined, including the External ID and which Identity Store the user will be added to.

- When creating a User, the following input parameters are available:
| Input Parameter | Type | Description |
|---|---|---|
| Store Name* | String | Required - Represents the Identity Store that the User will be added to. |
| User Attributes | <String, String> | A key-value pair of additional optional attributes used to describe the User. |
| User Date of Birth | Date | The User's date of birth in the format: "yyyy-mm-dd" |
| User Email | String | The User's email address in the format: "example@domain.com" |
| User External ID | String | A unique User ID. If no ID is required, an external ID will be generated automatically by TrustX. |
| User First Name | String | The first name of the User. |
| User Key | String | Required - A key used to identify the User. |
| User Last Name | String | The last name of the User. |
| User Locale - Country | String | The User country. |
| User Locale - Language | String | A two-letter ISO-639 formatted language tag. |
| User Locale - Variant | String | A variant subtag of the User country. 5-8 letters or 4 characters starting with a digit, separated by hyphens. |
| User Nationalities | String | The nationality of the User. |
| User Status | String | The User status indicates whether the User is in a pending, active, locked or disabled state. |
| User Timezone | String | The timezone of the User Country. This value must be in line with TZDB code format. Example: EST. |
| User Type | String | An optional parameter used for organizing Users into different types. A maximum of 64 characters is allowed. |
Step 4 - Start TOTP Registration
- Add the 'Start TOTP Registration' activity to the Process Designer and connect the activity to the 'Add User' activity using the global connect tool.
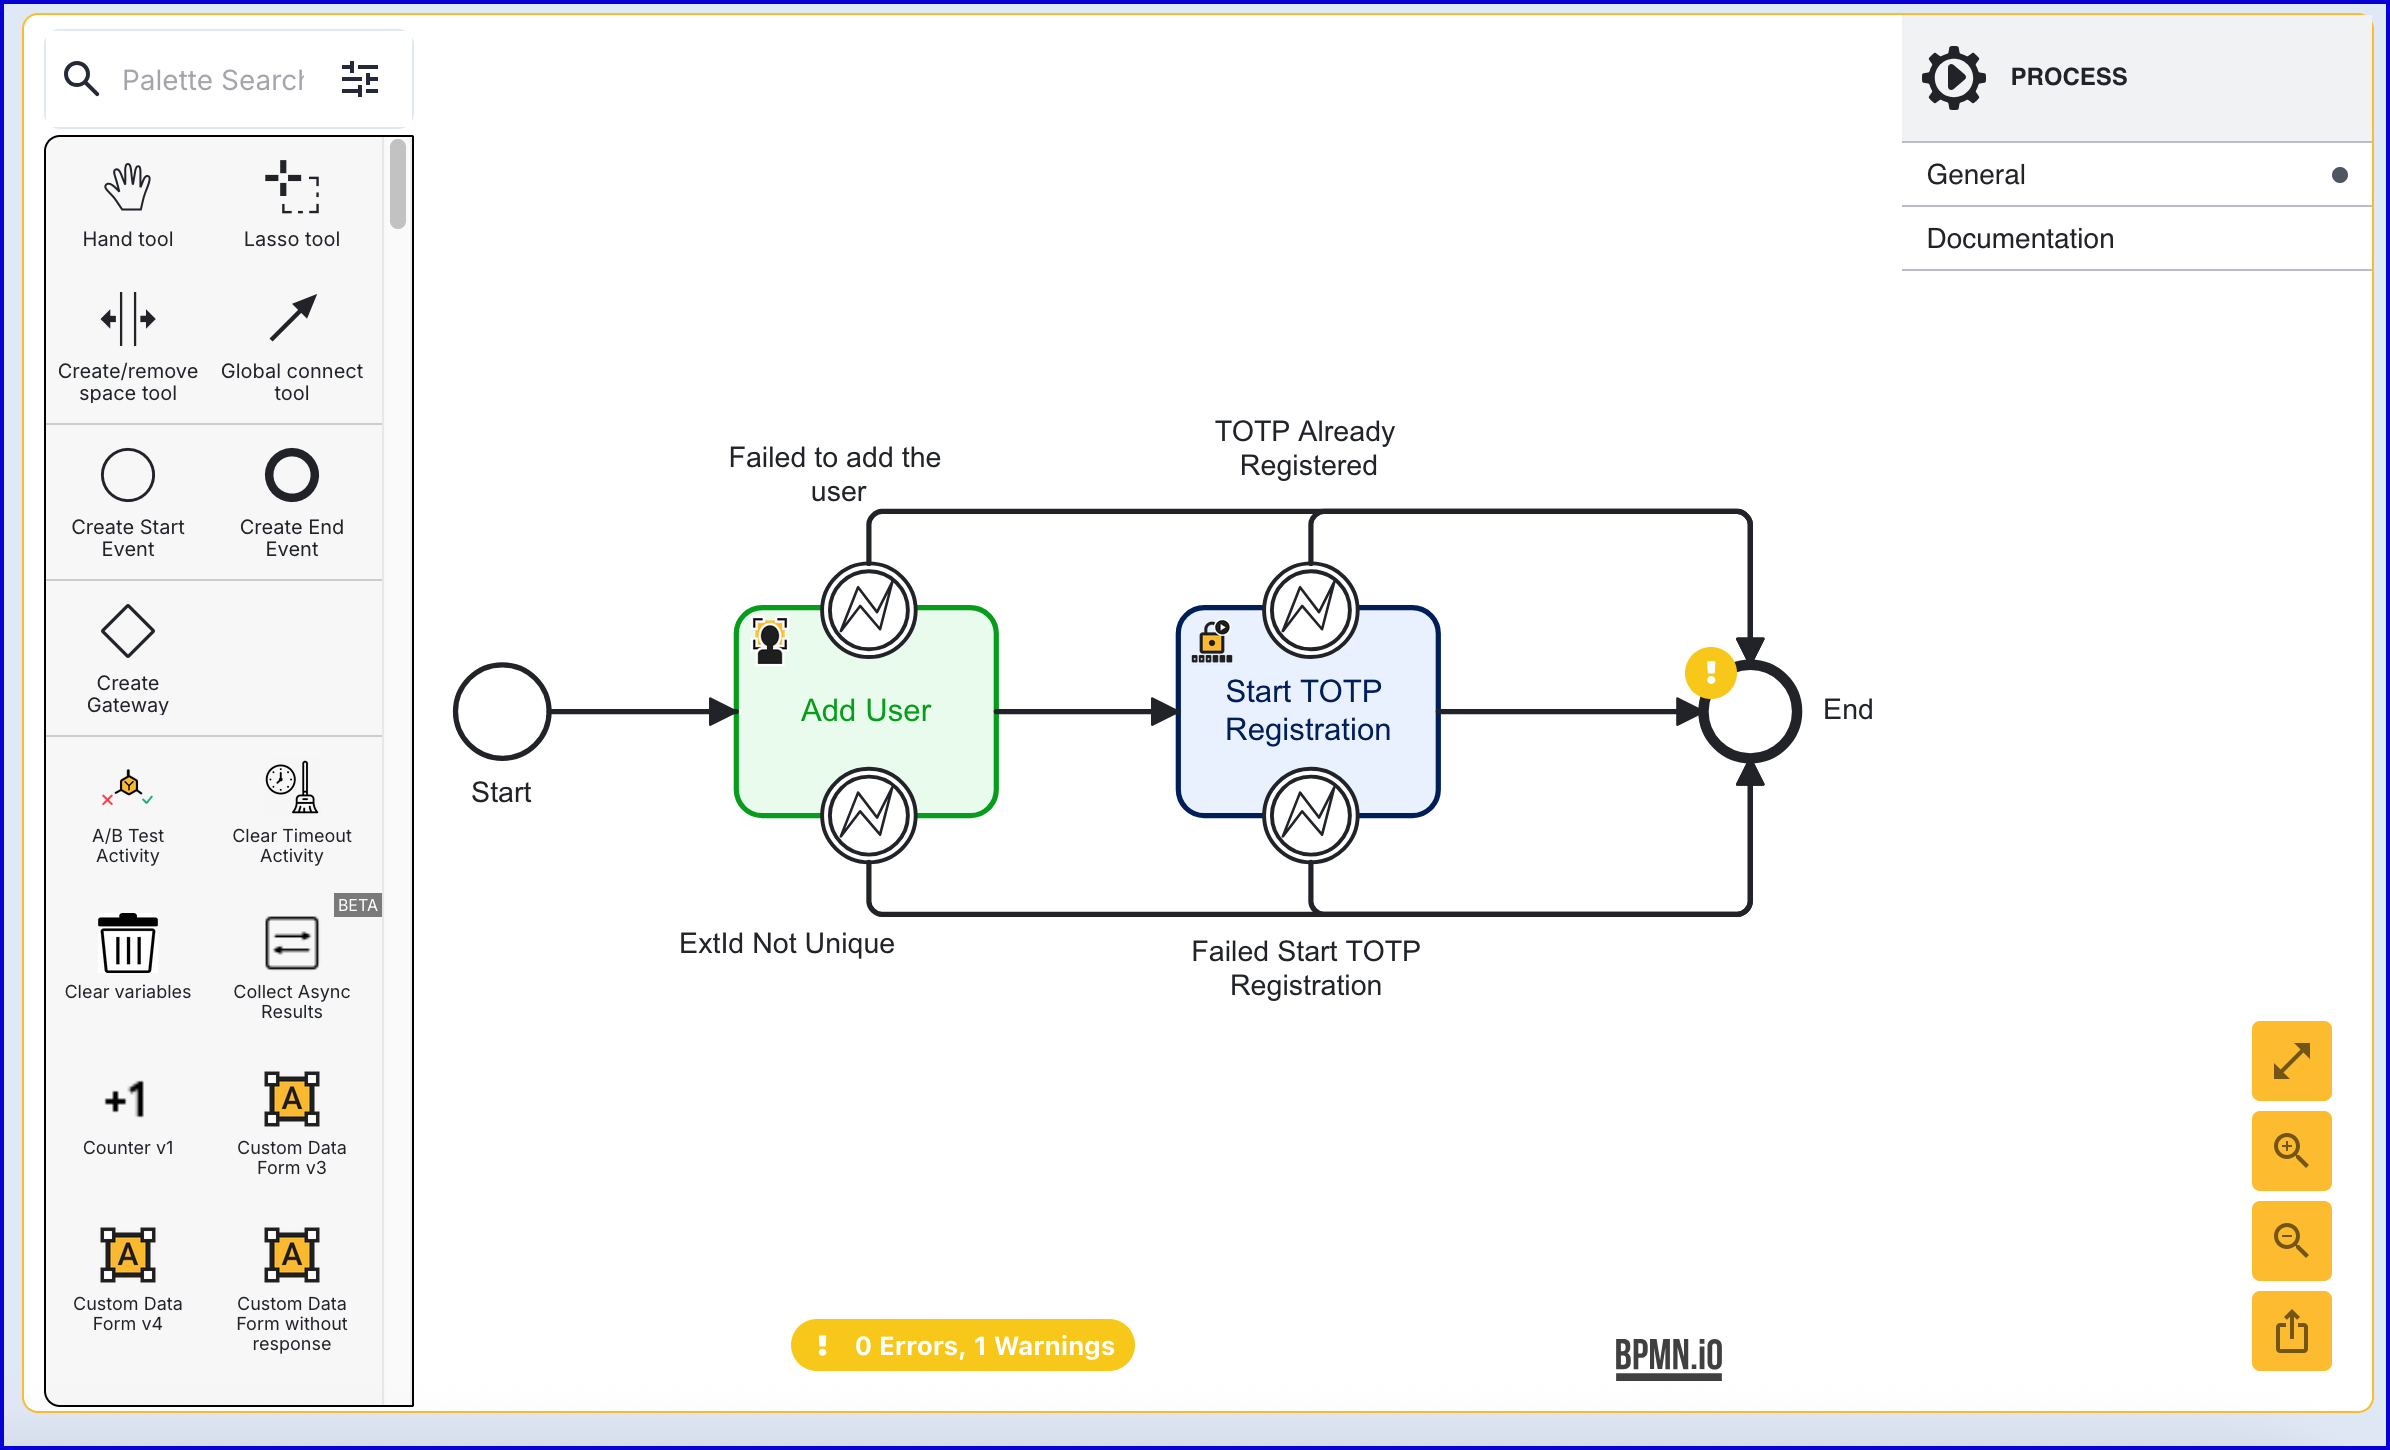
- The 'Start TOTP Registration' activity contains the following input parameters:
| Parameter | Description | Type | Default |
|---|---|---|---|
| Store Name | The name of the Identity Store that the TOTP registration attempt applies to. | String | |
| TOTP Policy | The name of the TOTP policy that will be used in the registration attempt. | String | |
| TOTP Registration Key | The key used to identify the TOTP registration attempt. | String | totpReg1 |
| User External ID | This property can be used to identify the User that the TOTP registration applies to. | String | |
| Store Name | Required - Represents the Identity Store of the User. | String | |
| User External ID | The External ID of the User. | String | |
| User ID | The unique ID automatically generated when the User is created. In the context of the 'Start TOTP Registration' activity, this ID can be used to identify the User that the TOTP registration applies to. | String | |
| User Key | The User Key that can be used to identify the User that the TOTP registration applies to. | String | user1 |
Step 5 - Add the QR Code Form
- Add a 'Custom Data Form' activity to the Process Definition and connect it to the 'Start TOTP Registration' activity.
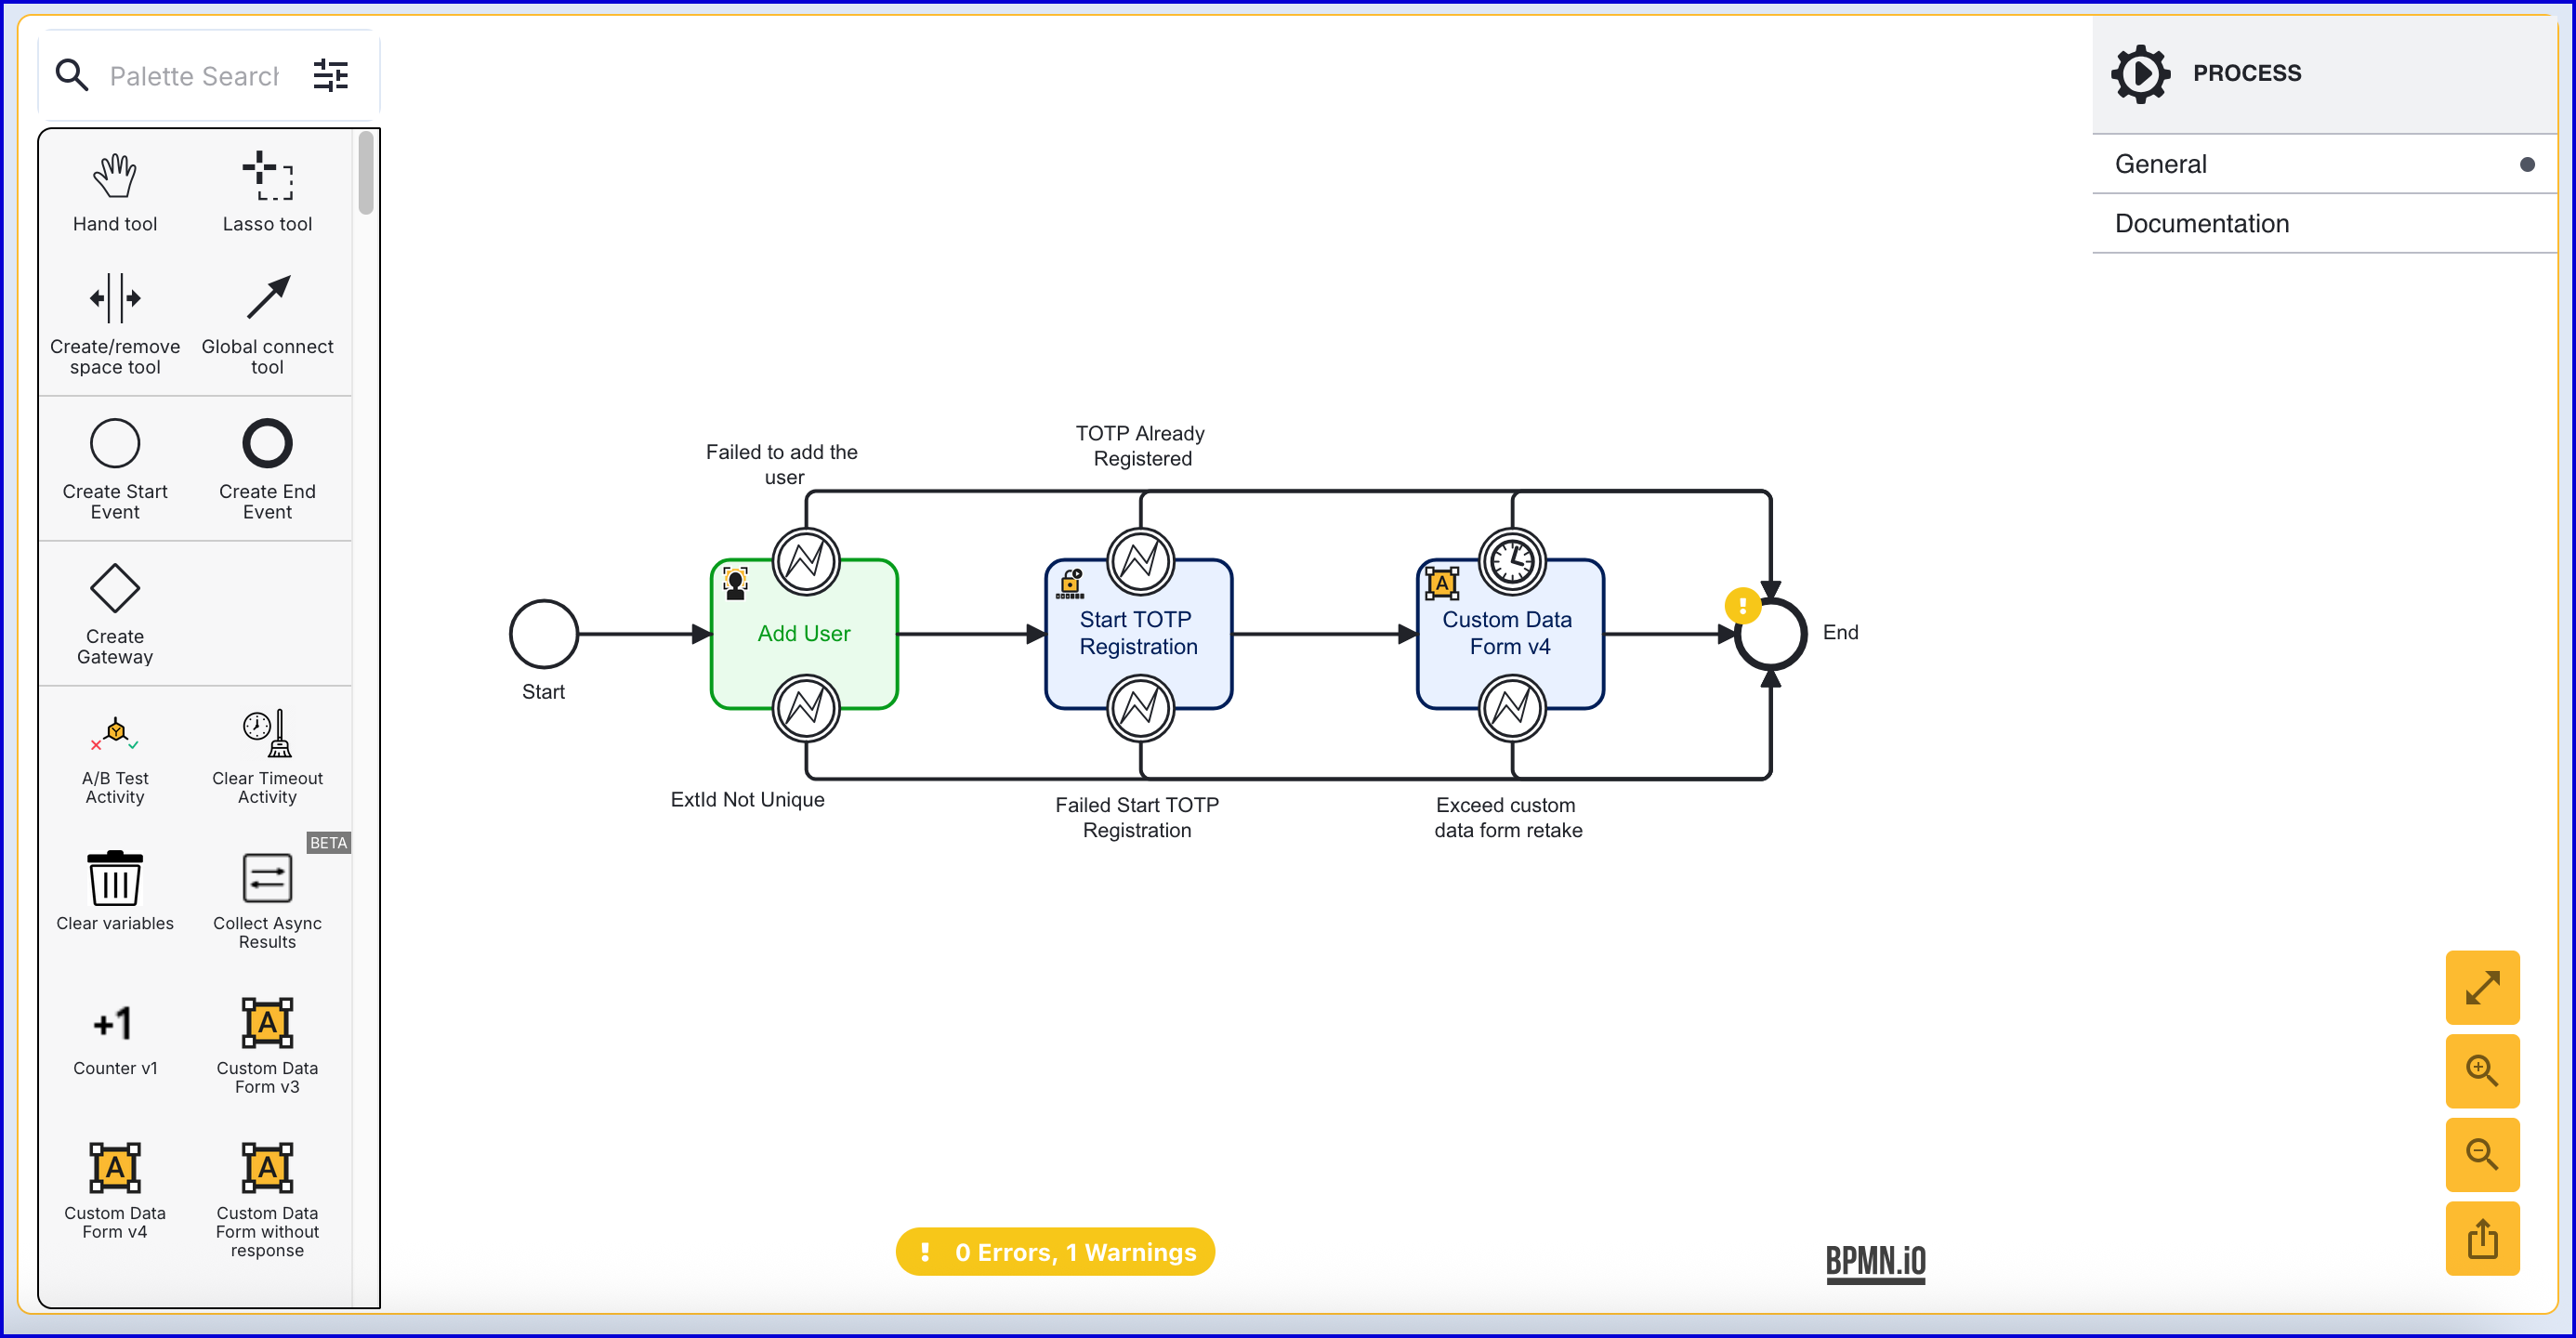
- The 'Custom Data Form' activity supports the following input parameters:
Step 6 - Compete TOTP Registration
- After the 'Custom Data Form v4' activity, add a 'Complete TOTP Registration' activity and use the global connect tool to connect them. This activity will perform an initial authentication and complete the registration process.
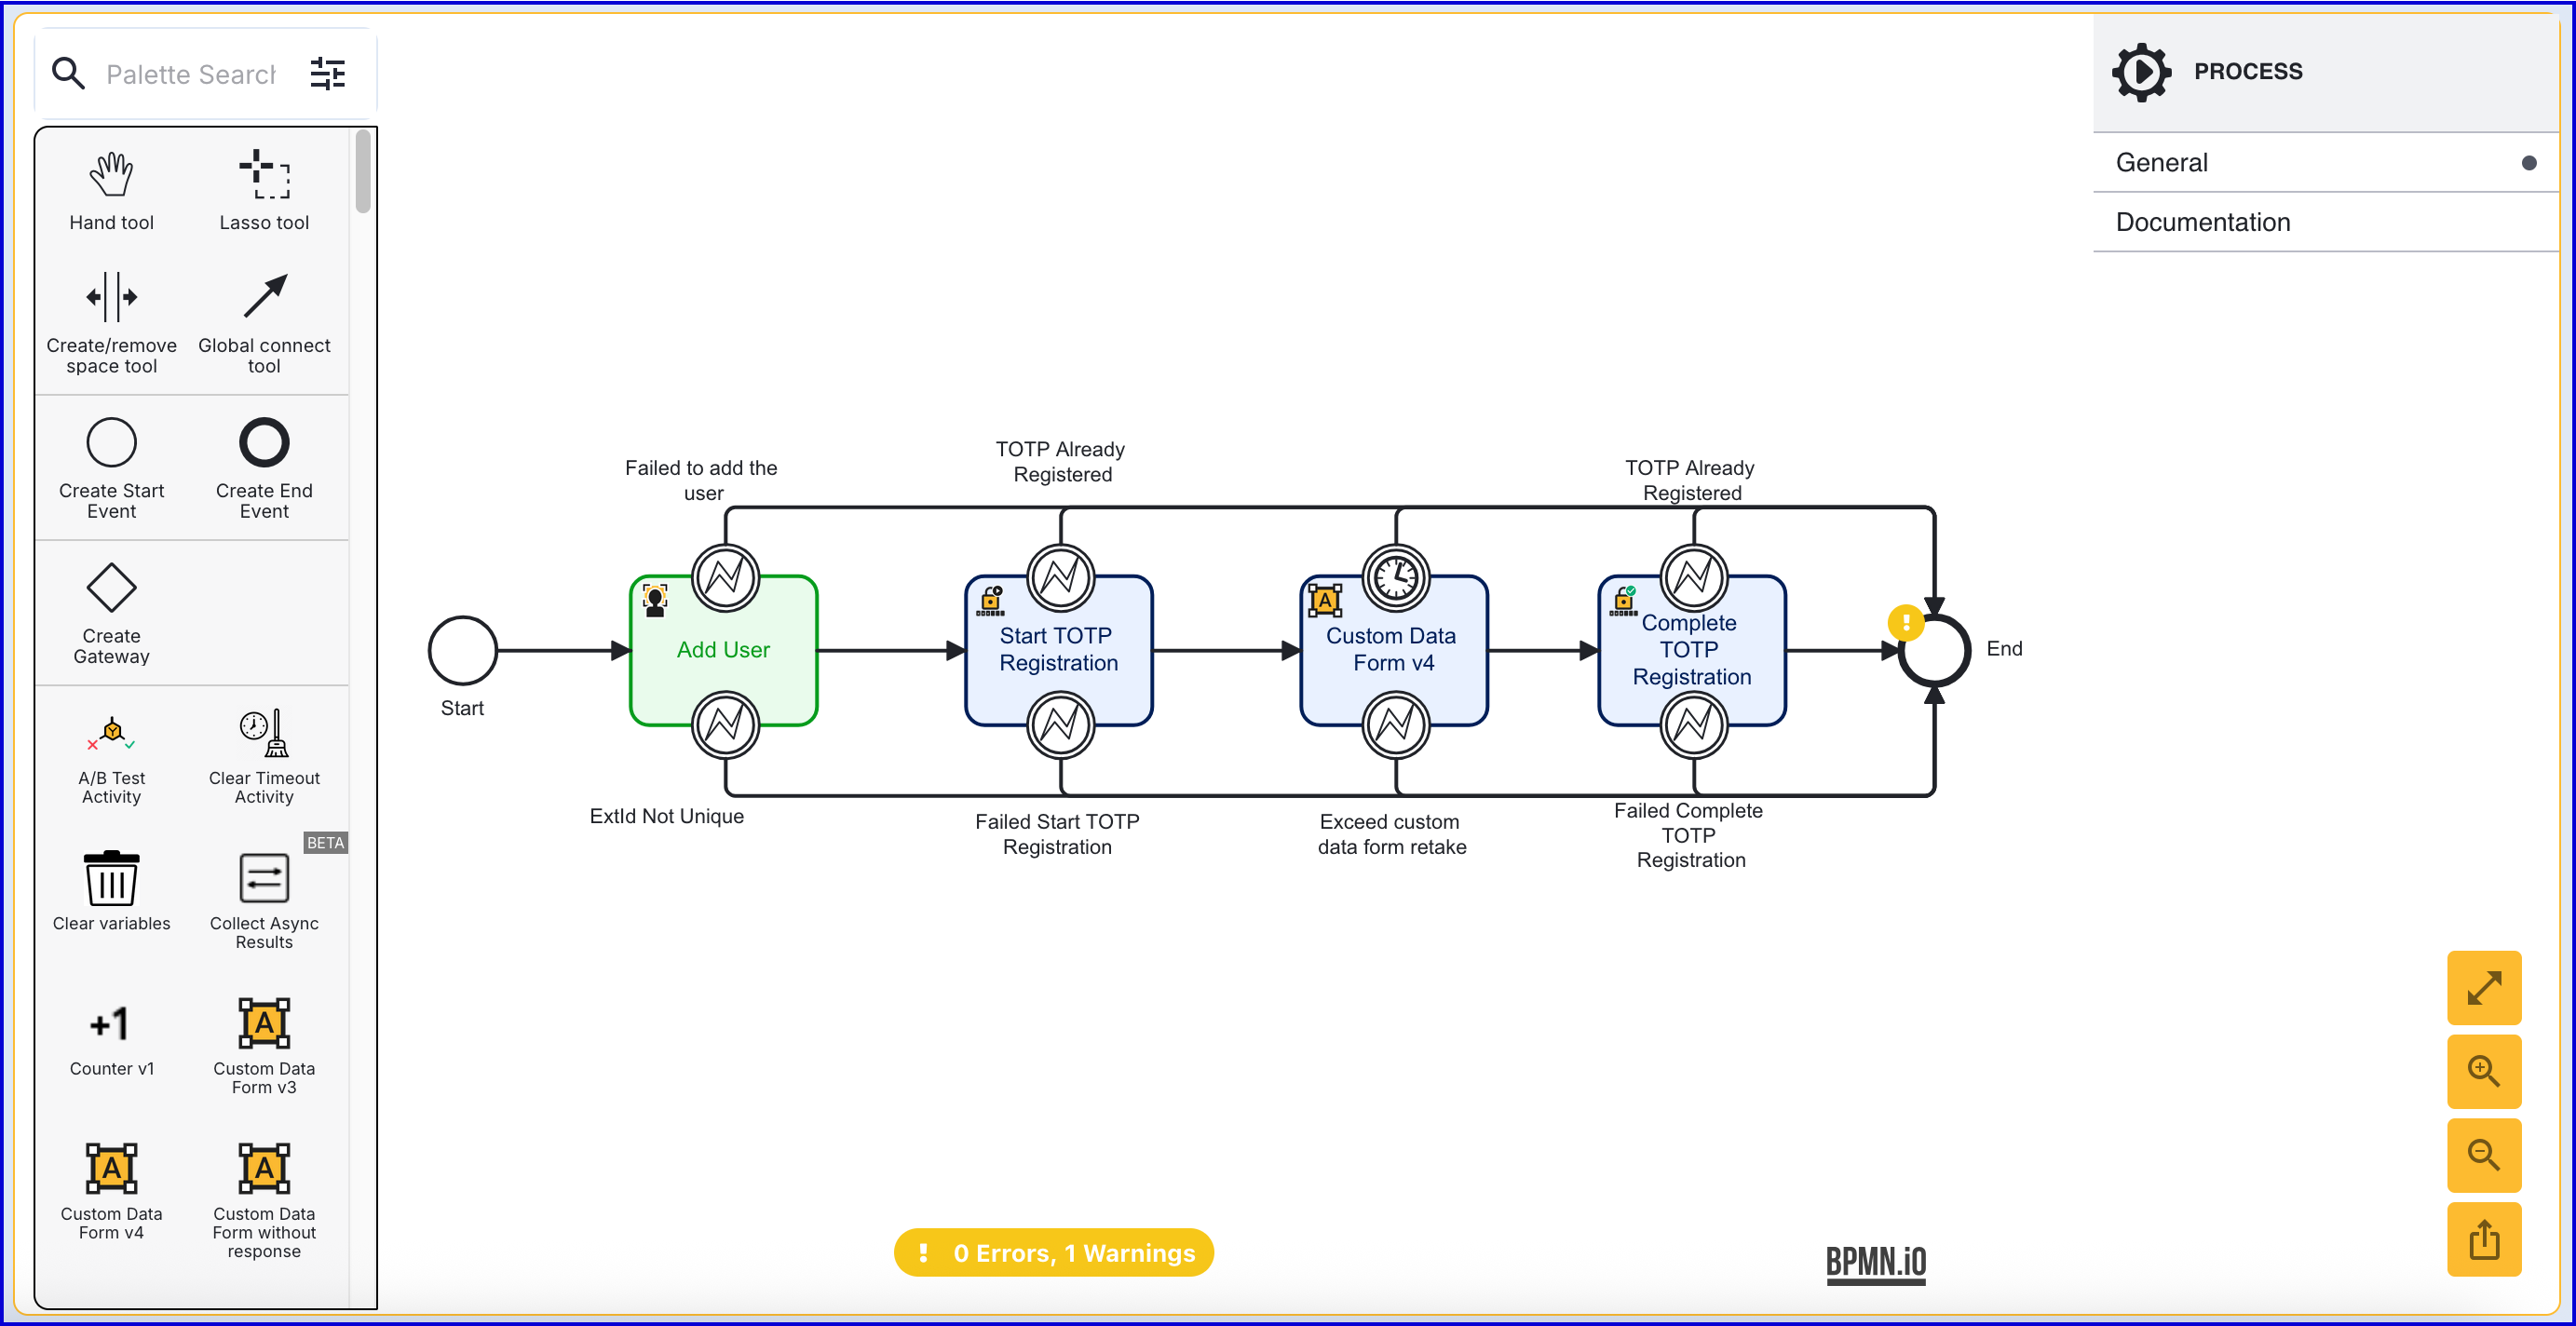
- The 'Complete TOTP Registration' activity contains the following input parameters:
| Parameter | Description | Type | Default |
|---|---|---|---|
| Authentication Code | Represents the submitted TOTP code. | String | |
| Steps Allowed | The number of previously generated TOTPs that will be accepted as valid. | Integer | 1 |
| TOTP Registration Key | The key used to identify the TOTP registration attempt. | String | totpReg1 |
In this example, the authentication code will be set to
${_customFormData.totpQRCodeForm.currentCapture.customDataFormDataMap["submittedCode"]}where:_customFormData- Accesses the customFormData table.enterCodeForm- Represents the 'Form data Key' set for the 'Custom Data Form v4' activity.currentCapture- Accesses the form data captured during the Process Instance.customDataFormDataMap["submittedCode"]- Access data from the 'submittedCode' form element inside the data map of the Custom Data Form.
Step 7 - Add a Simple Decider Activity
- Add a 'Simple Decider' activity to the Process Definition and connect it to the 'Complete TOTP Registration'. This activity will set the decision of the Process Instance based on the outcome of the TOTP registration attempt.
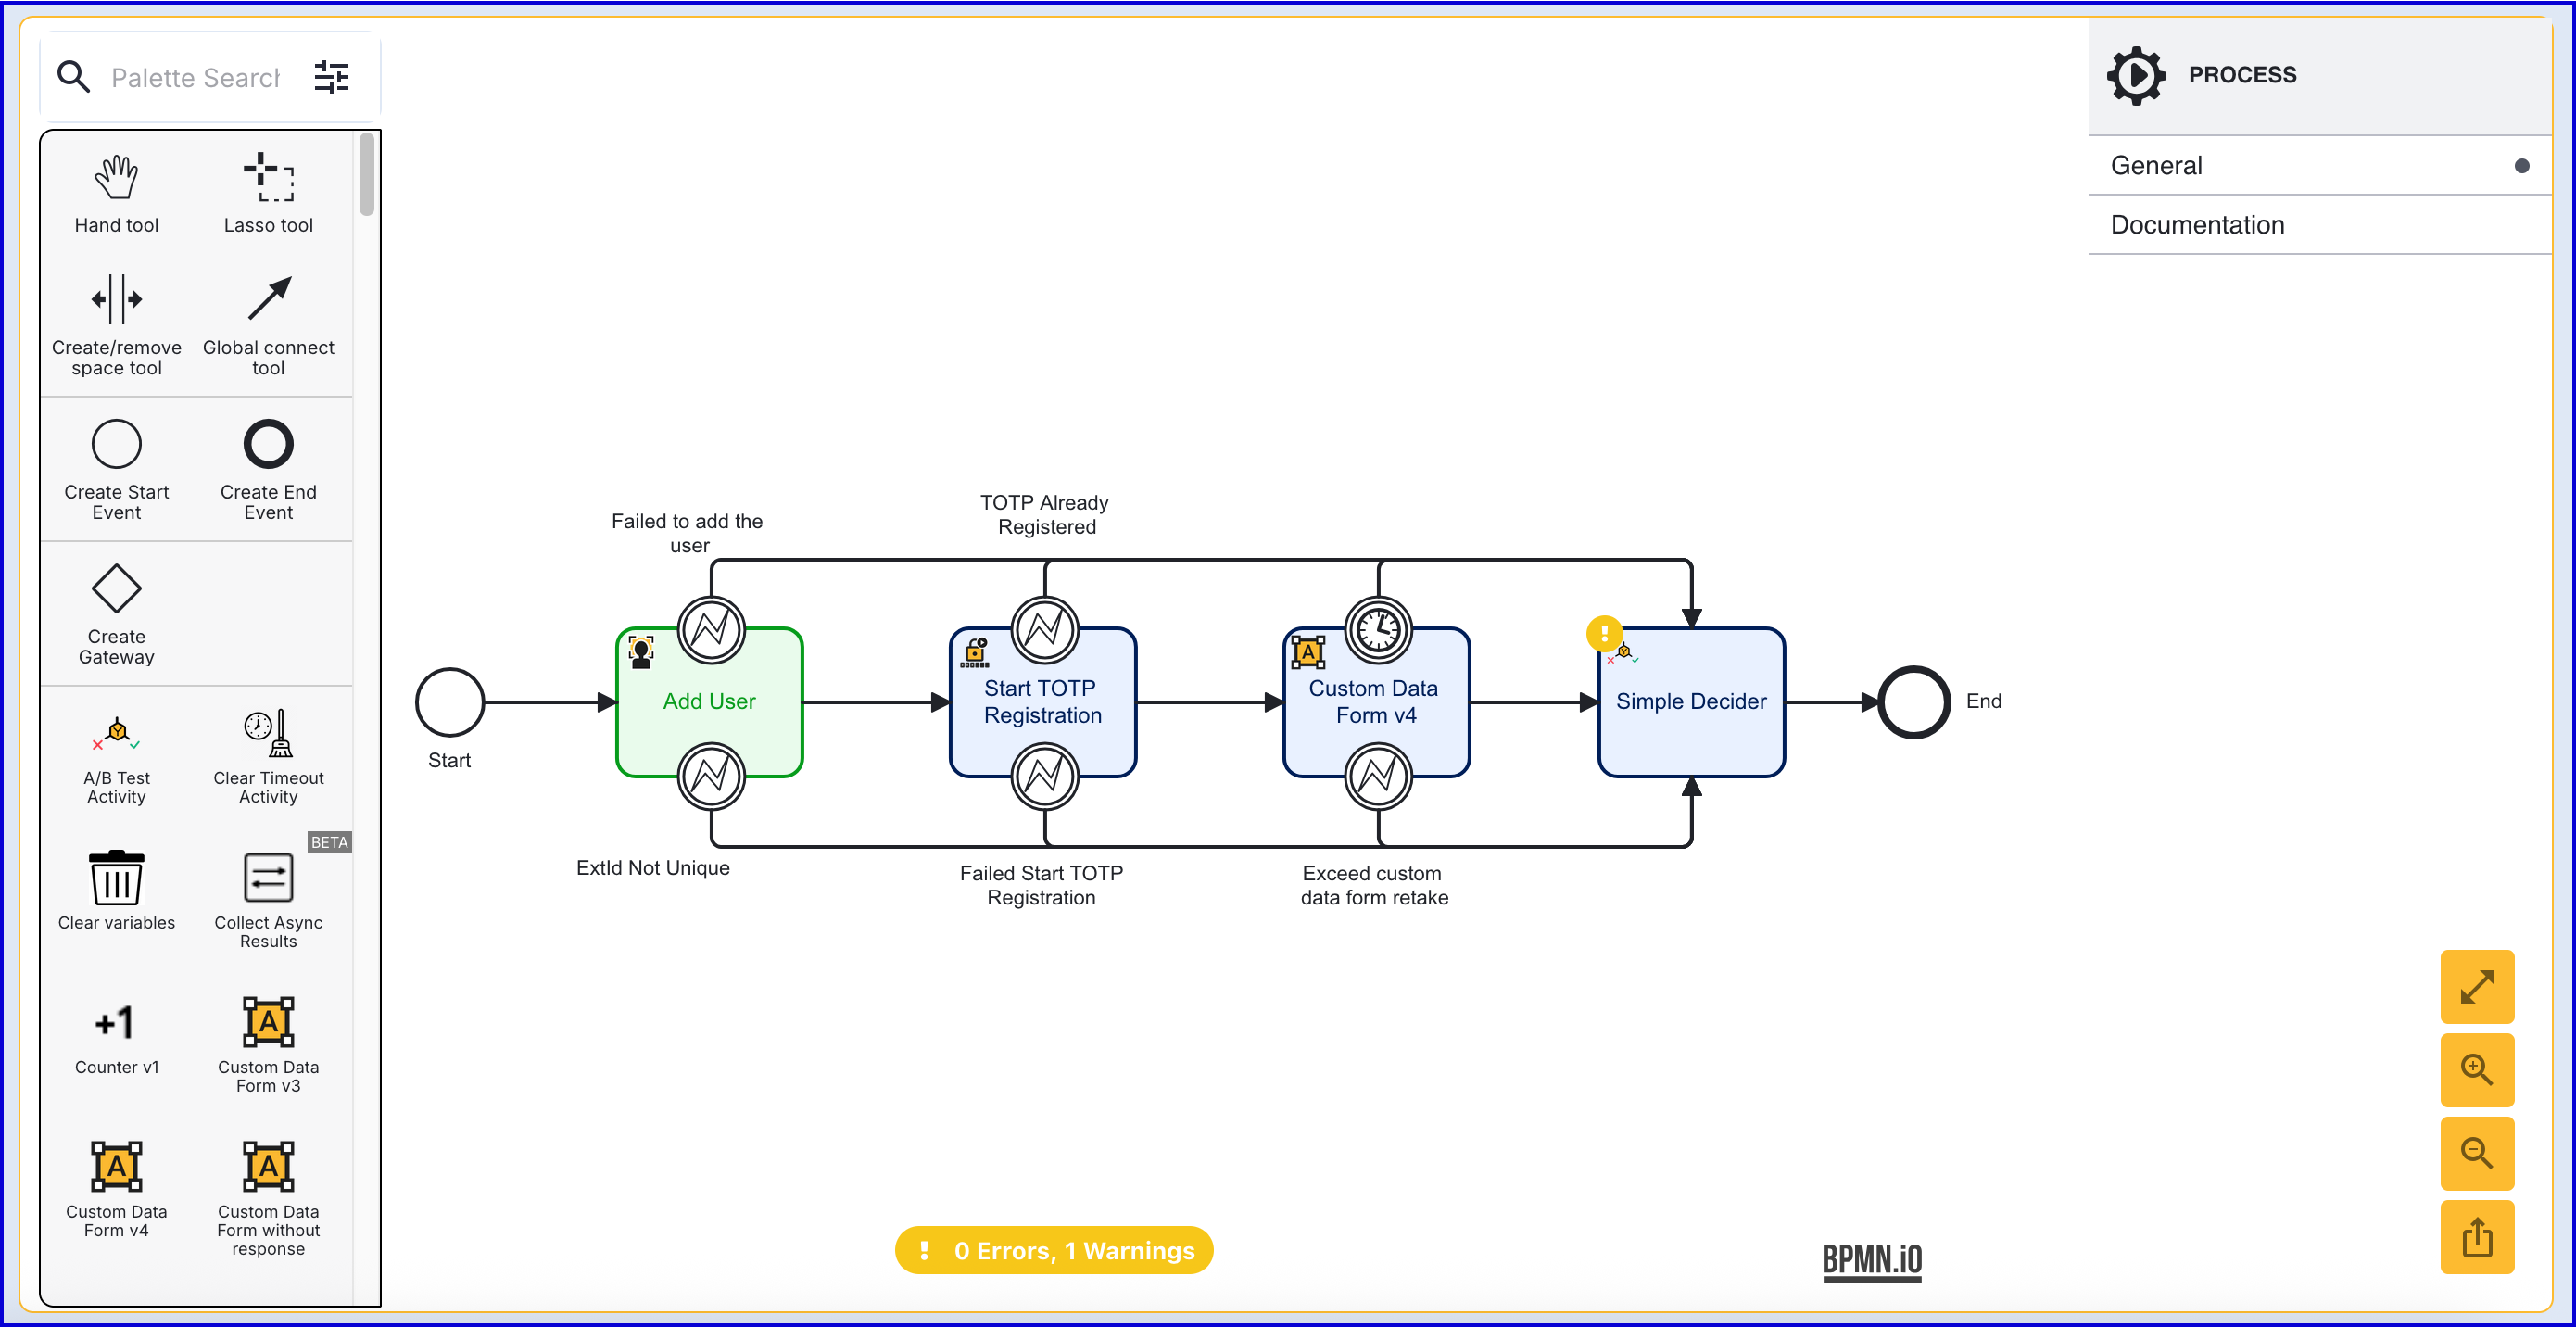
- Once the activity is configured, click the 'Save & Deploy' button to complete the Process Definition.
Test and View Results
Create a Token
This section will describe how to test the Process Definition created above by generating a Process Token. After completing the flow, results of the Process Instance can be viewed from the Process Instances page.
- To test the Process Definition, create a new Process Token by navigating to the Process Definitions > Process Tokens page.
- Click the 'New Process Token' button found on the top-right of the page to start creating a new token. A popup modal will appear where details of the token can be entered.
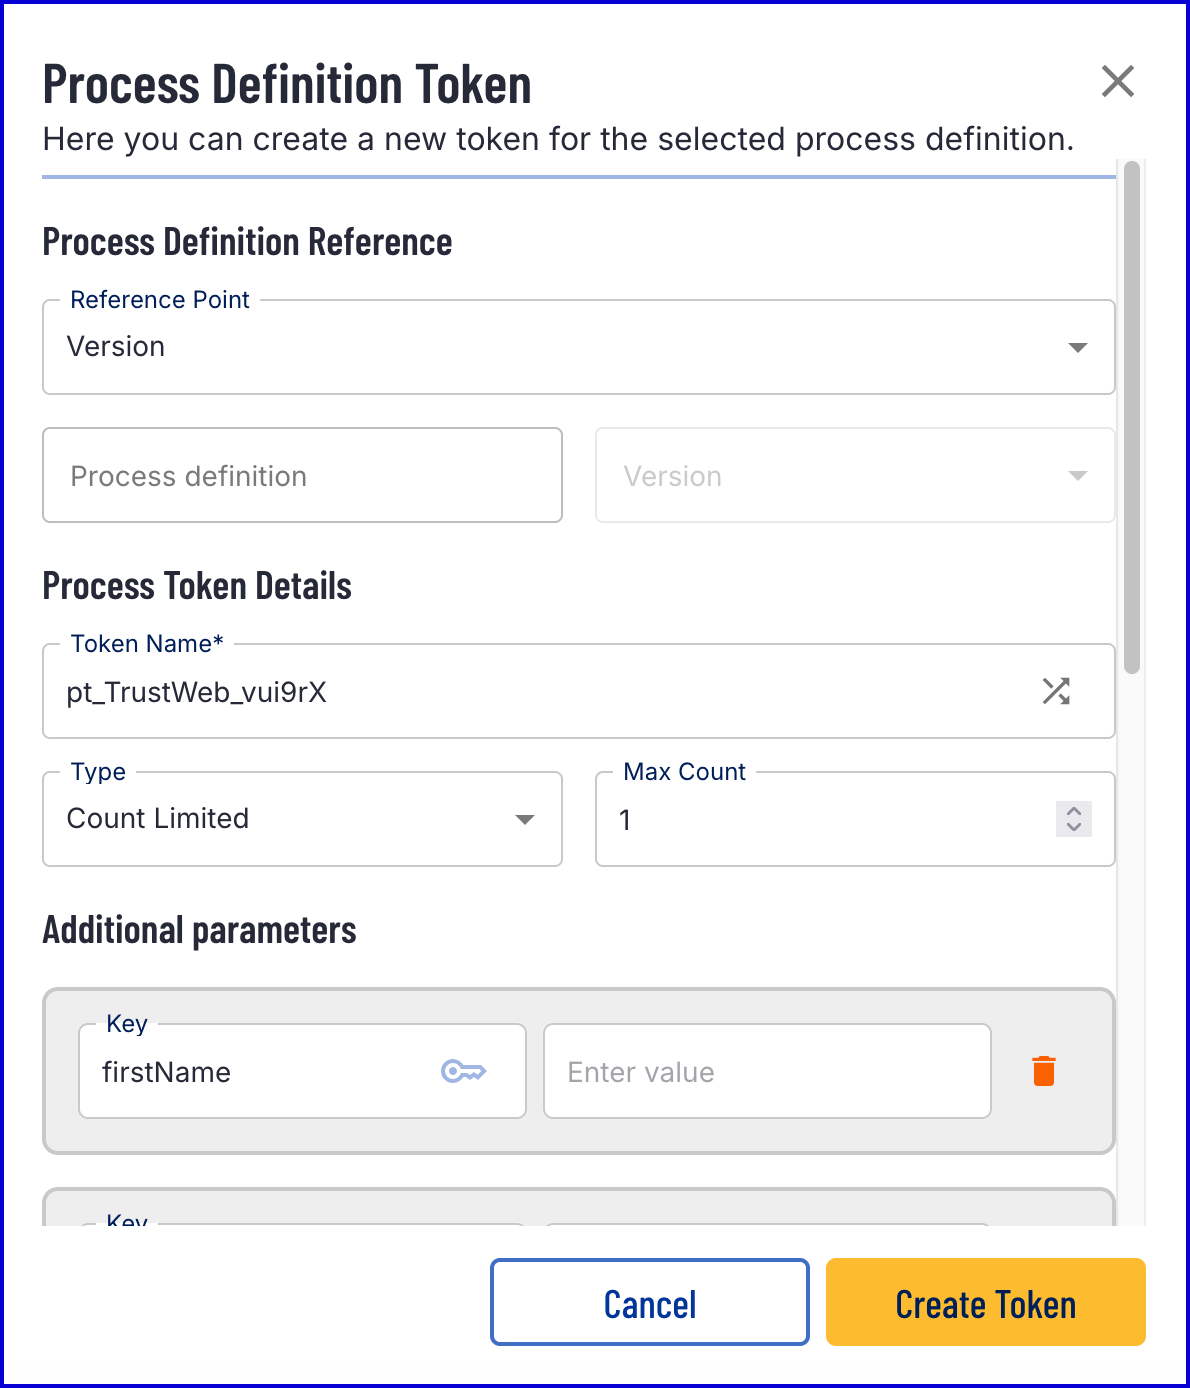
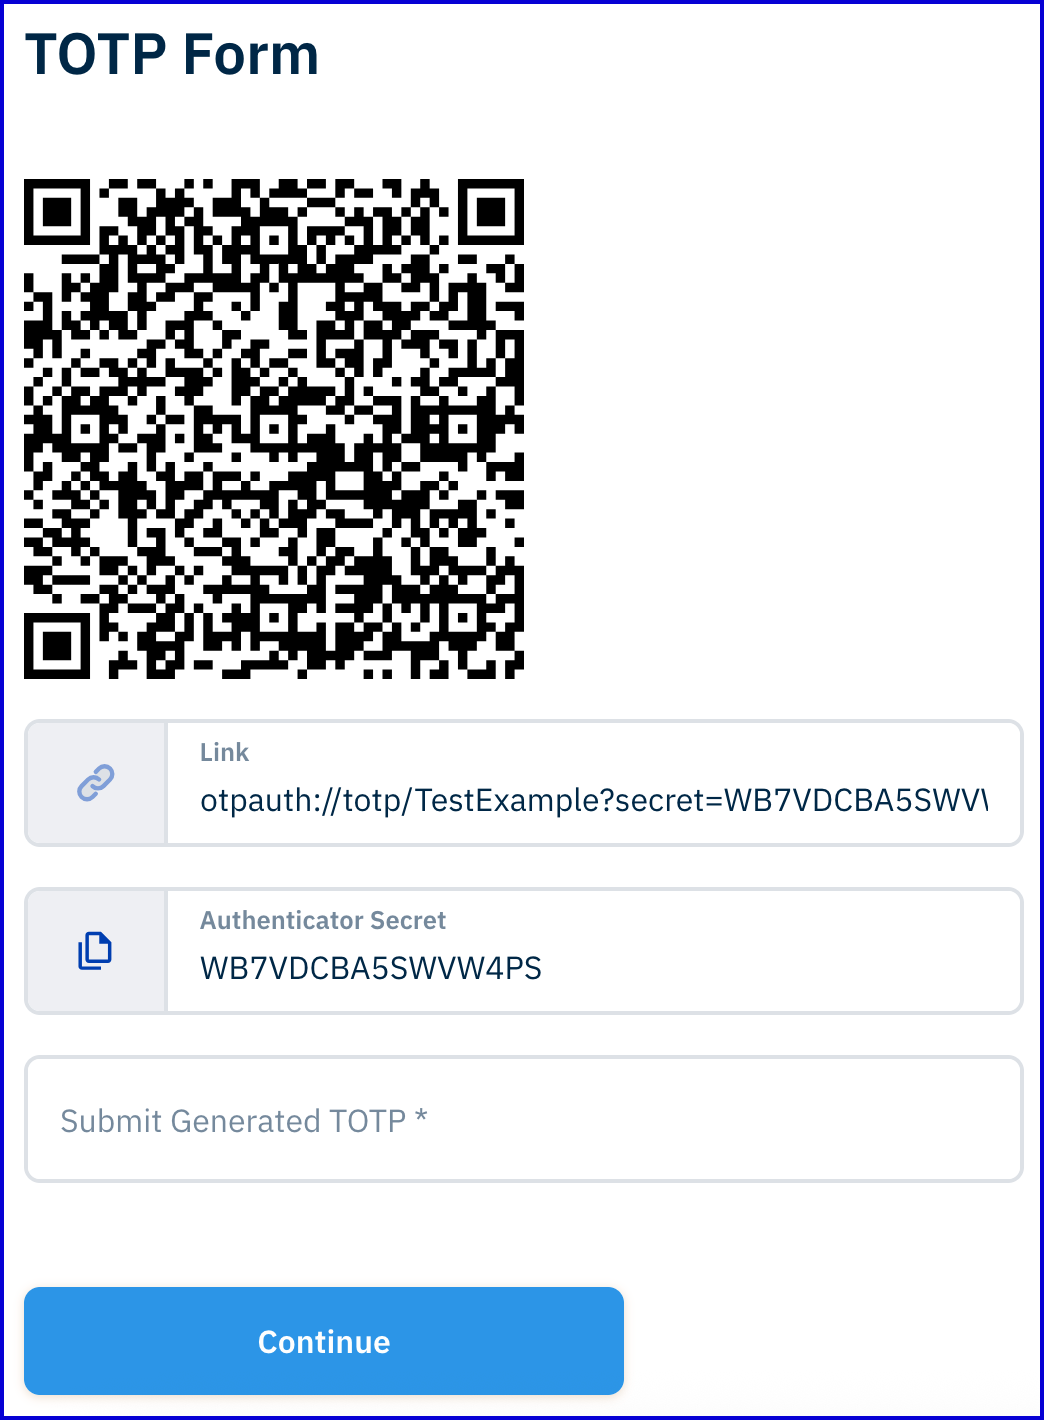
- Once the token is created, scan the QR code or follow the link to begin the flow. The TOTP form will be displayed, enabling the user to scan the QR code and submit the generated TOTP.
View Results
Process Instances
The results of a Process Instance can be found in the Process Instances page in the Backoffice.
- Navigate to the Process Instances page and use the search tools provided to find the completed Process Instance.
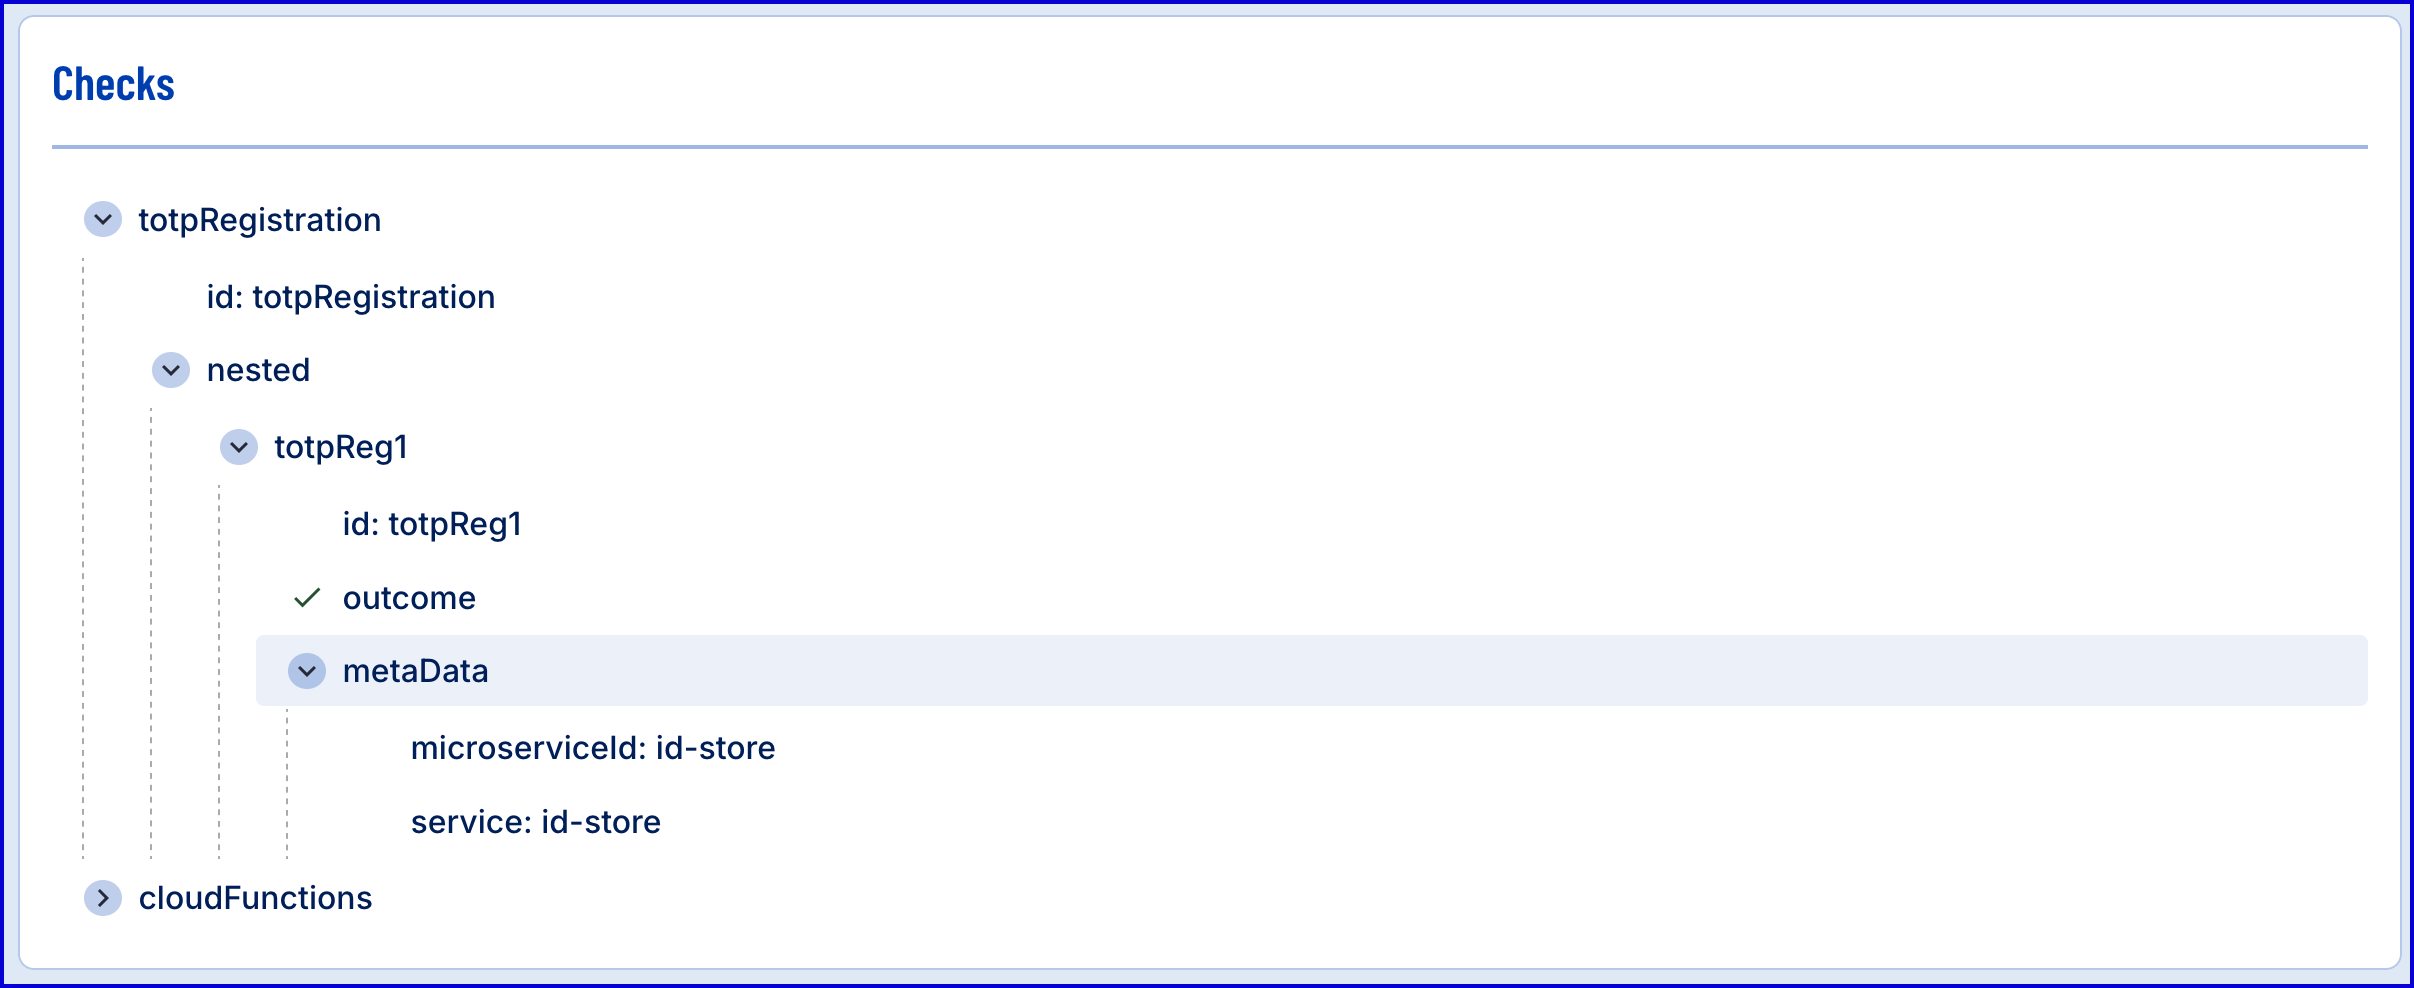
- Under the 'Checks' section of the Process Instance page, find the totpRegistration entry.
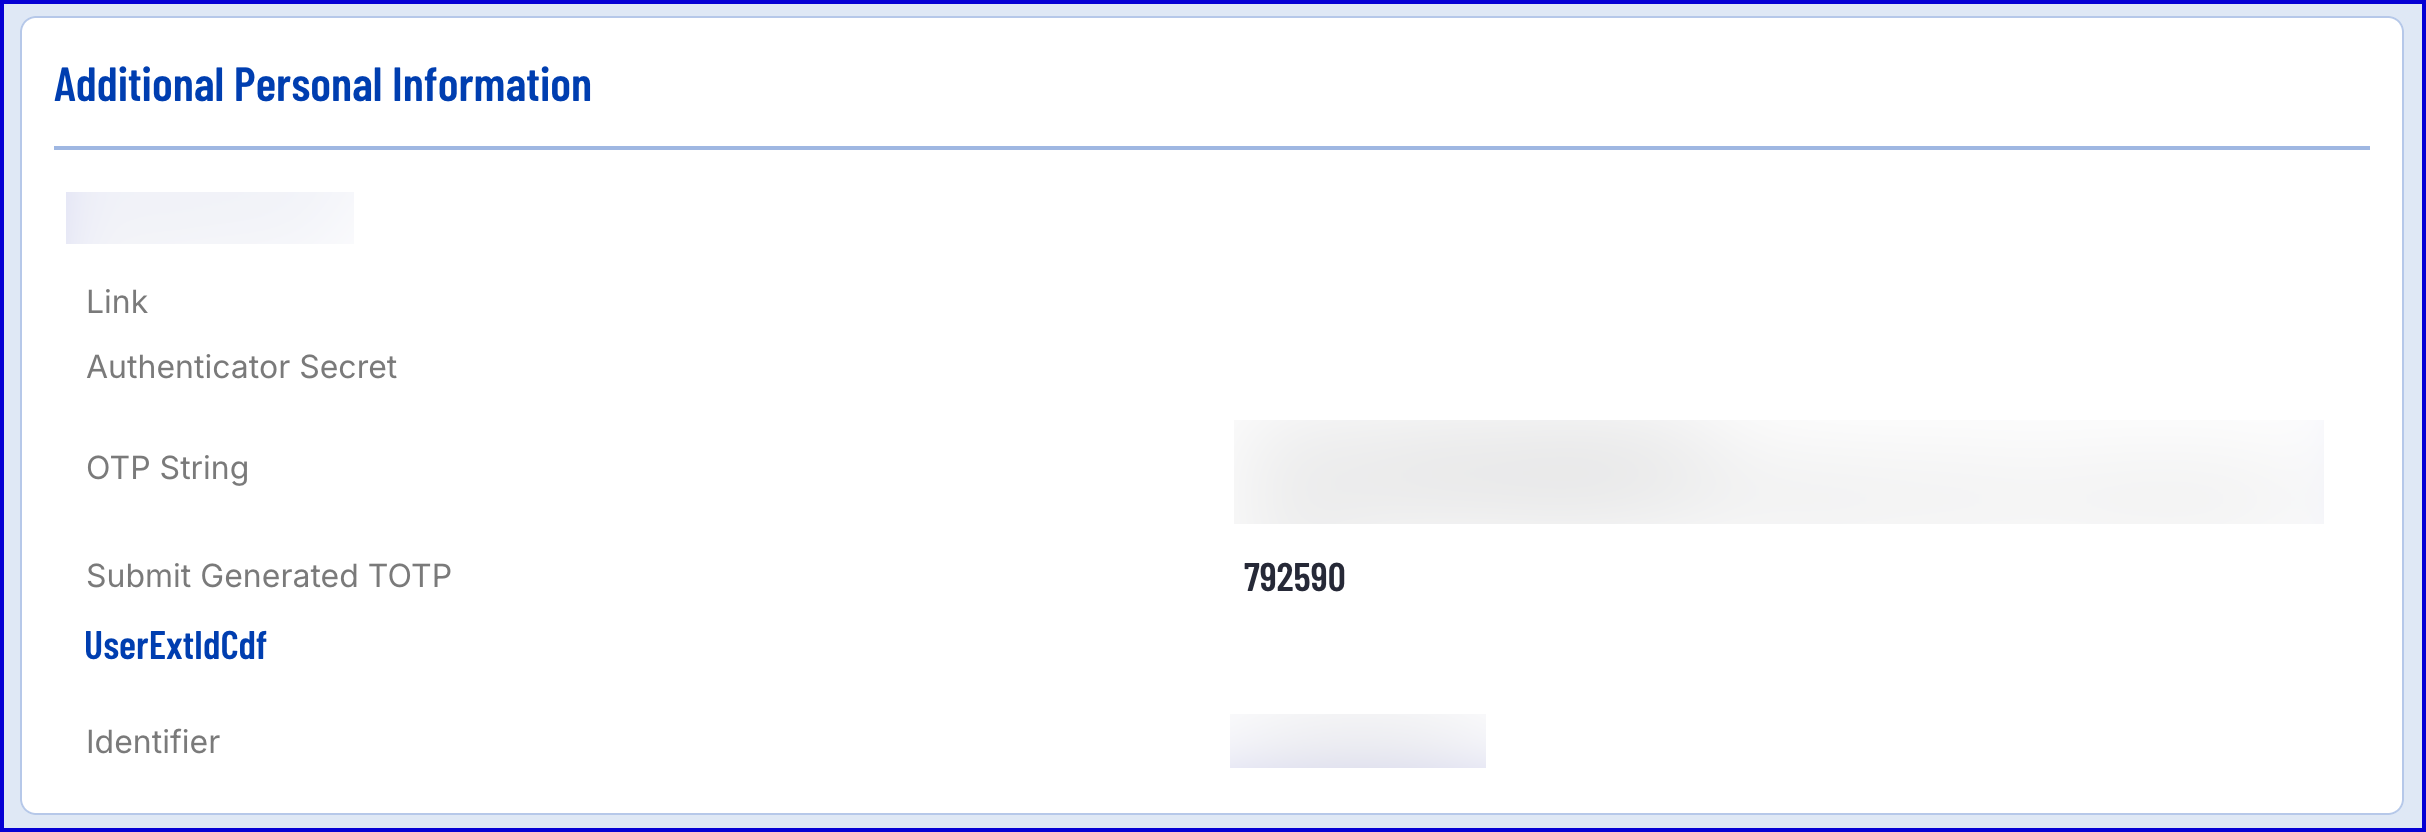
- The submitted TOTP and identifier can be found in the 'Additional Personal Information'.
User Details
Details about the registration can be found in the Users page found under the Identity Stores section of the Backoffice.
- Navigate to Identity Stores > Users in the Backoffice application.
- Search for the User that completed TOTP registration.
- In the individual Users page, details about the registration can be found in the 'Registered TOTPs' section.
