The TOTP Authentication process involves retrieving the Identity Store User before requesting they enter the generated TOTP from their authentication application. TrustX will then perform an authentication request to determine if the secret key stored in TrustX matches the secret key stored on the user's device. This is is similar to the process of completing a registration but requires an active TOTP registration first.
If an authentication fails then the User lock count is incremented. If the User is locked they cannot authenticate.
This guide will describe the steps necessary for implementing a basic authentication process. To configure a TOTP registration process, see the TOTP Registration guide.
Authenticating via Process Definition
Step 1 - Prepare the Custom Form
In this flow, a Custom Form will request the end-user to scan a QR code or enter the secret manually using a text field.
In the Backoffice application, navigate to Integration Hub > Custom Forms.
Click the 'New Custom Form' button to create a new form.
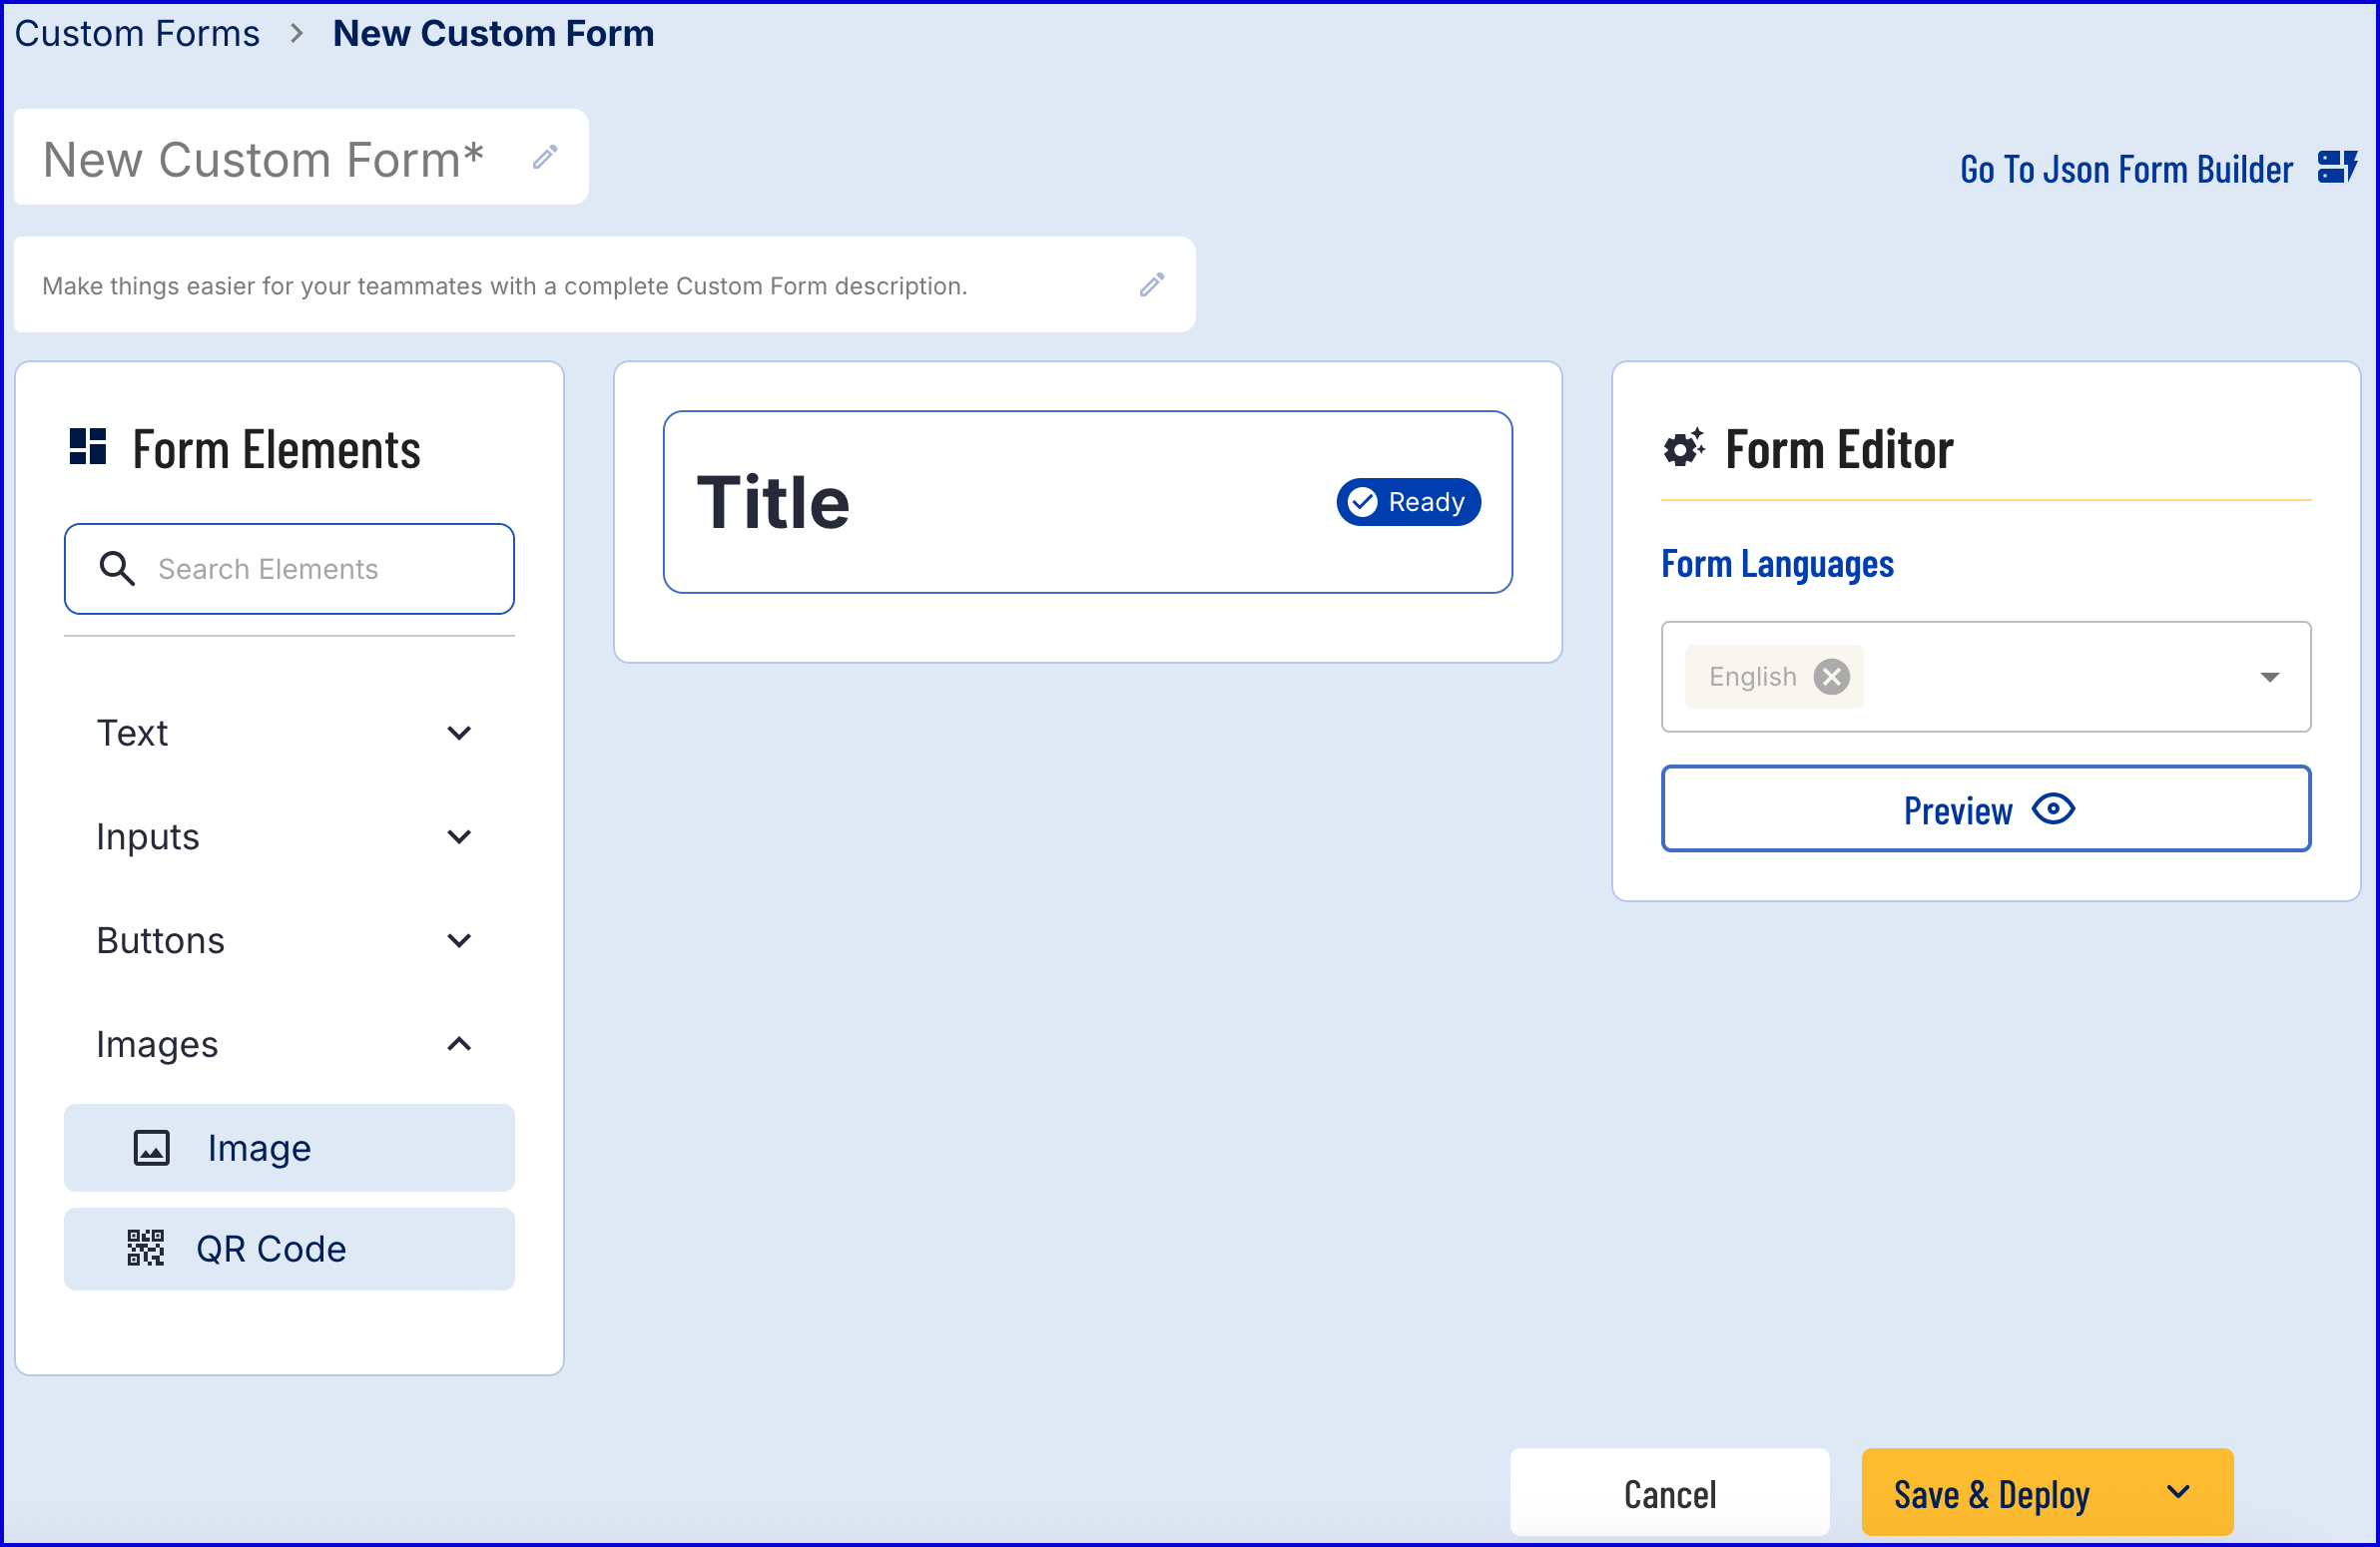
The form builder provides a drag-and-drop Visual Form Builder or a JSON Form Builder to create a new Custom Form. In this example, the Visual Form Builder will be used. For more information on using this feature, see the Custom Data Forms guide.
Add a 'Text' form element found under the the 'Inputs' dropdown menu. This text input will be used for inputting the generated TOTP retrieved from the authenticator application and is a required parameter.
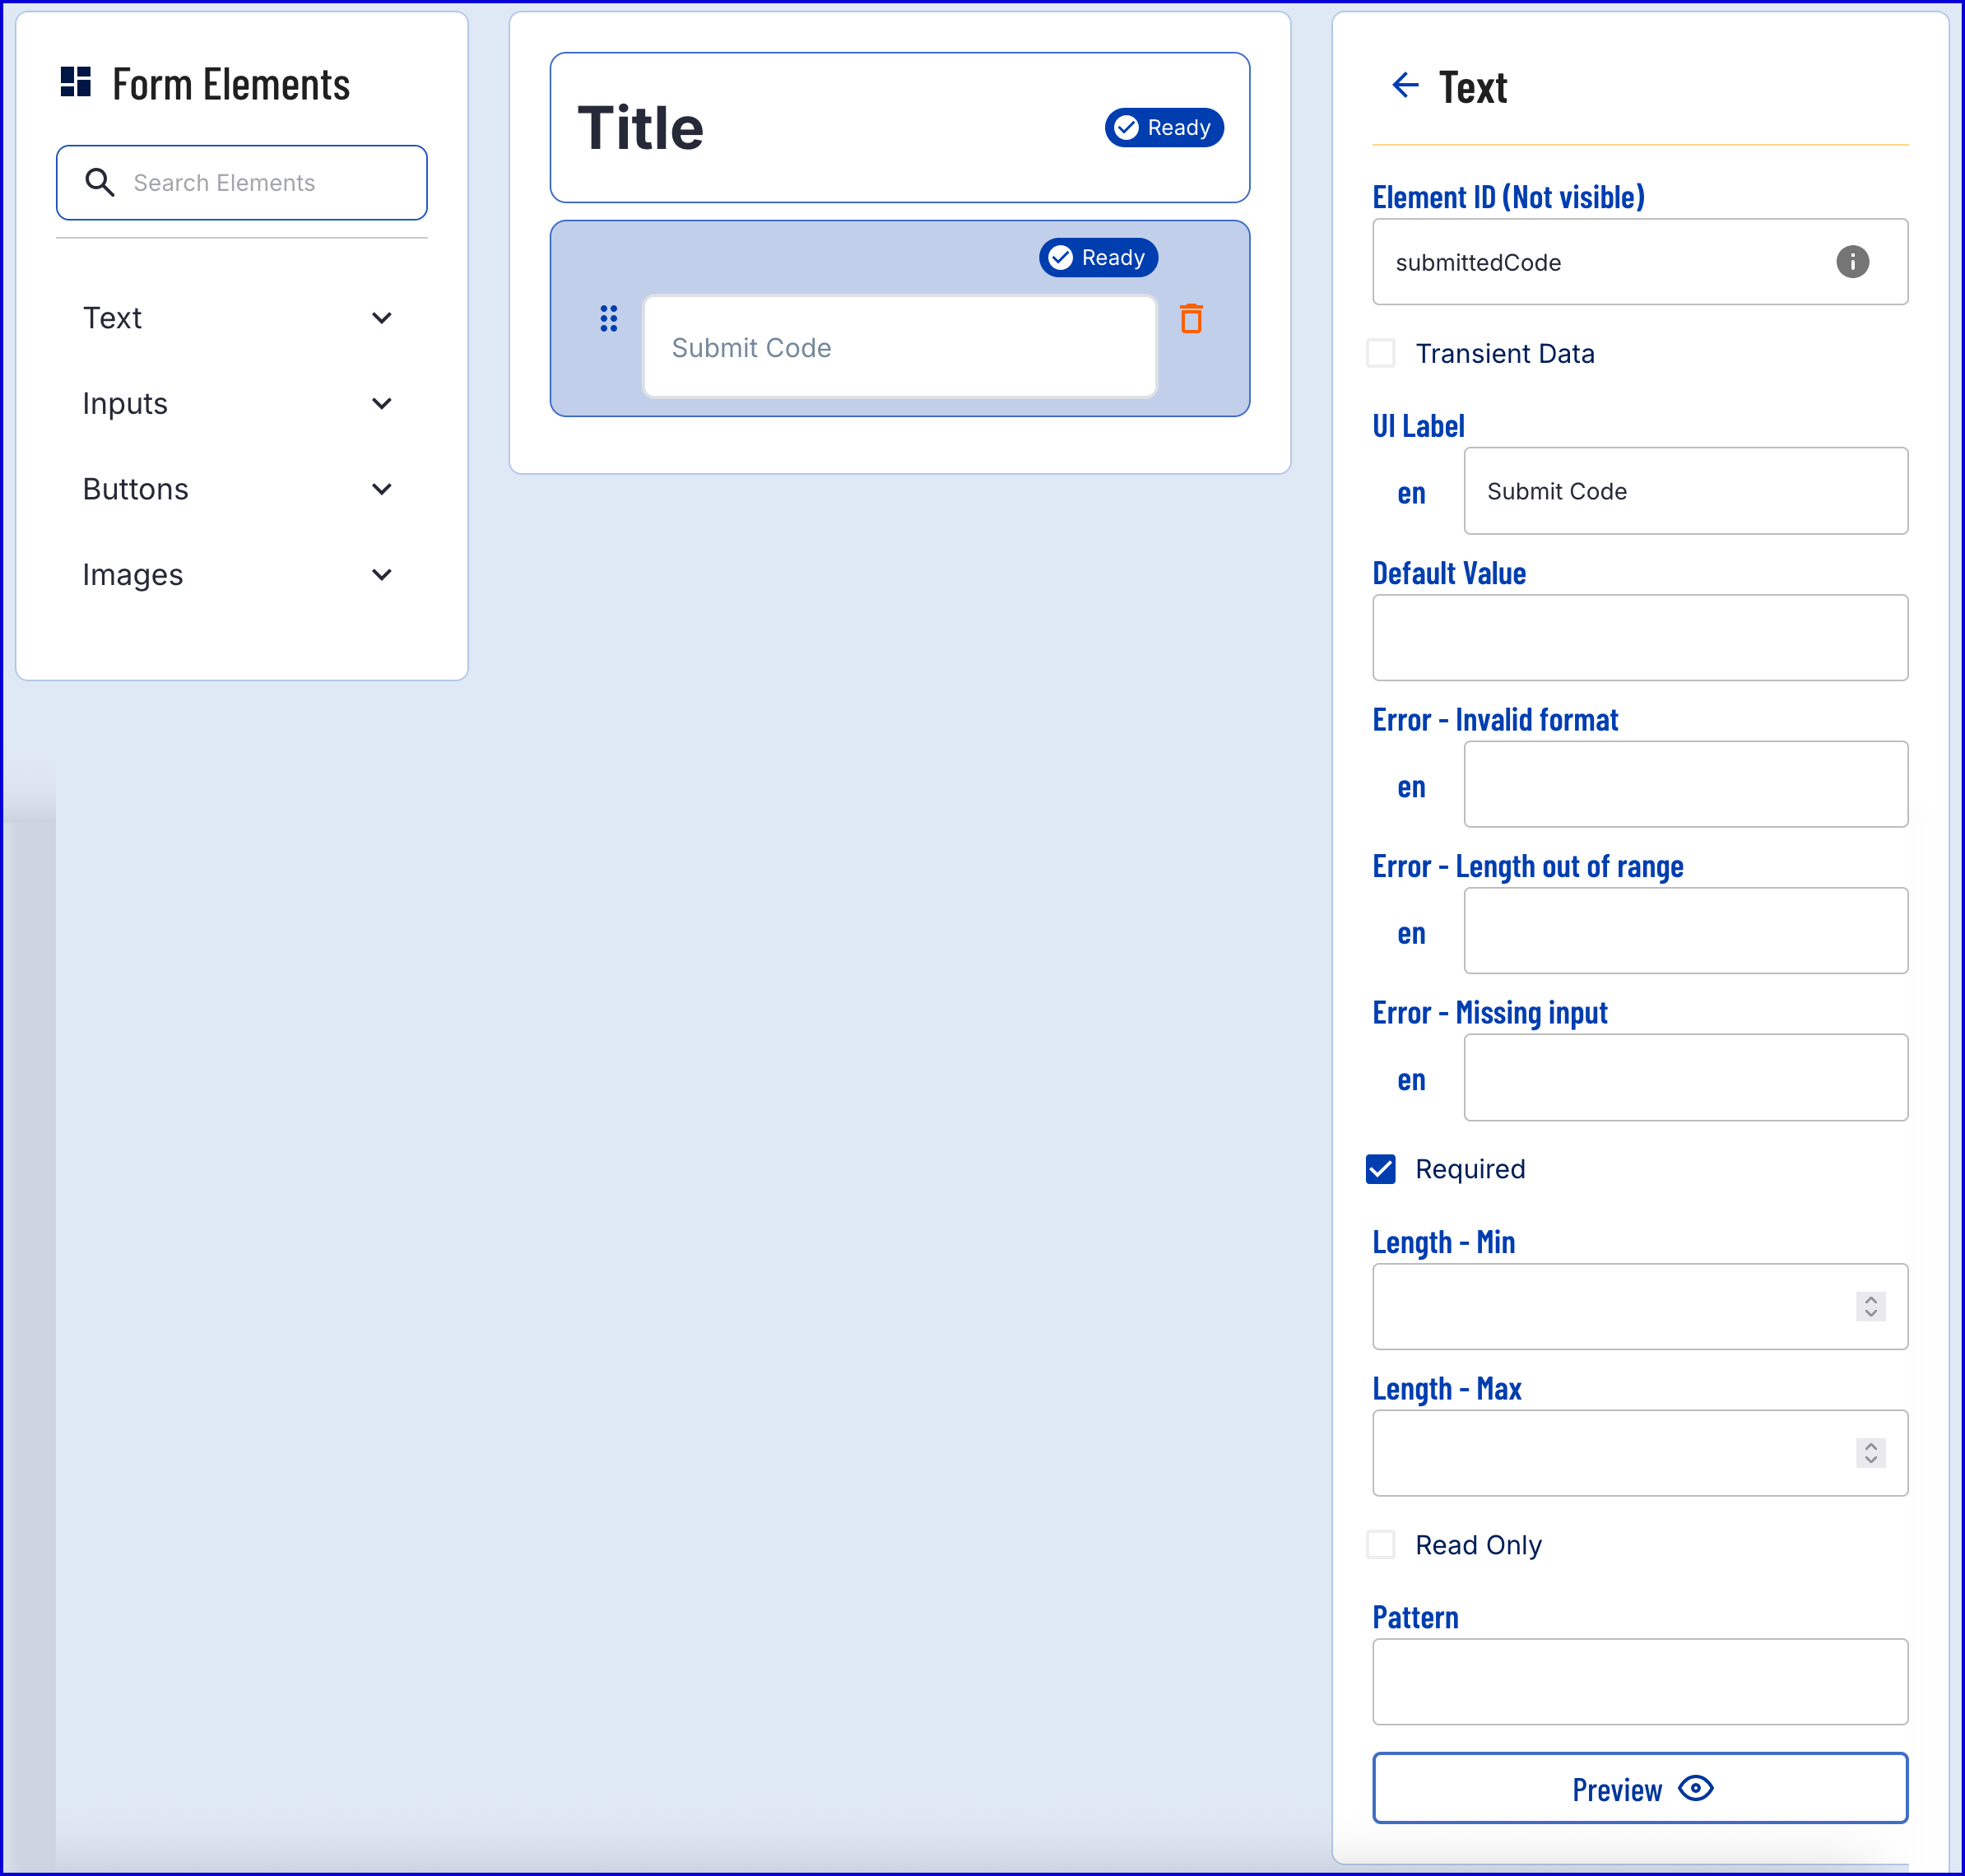
In this example, the Element ID is set to 'submittedCode'. This value will be required later when accessing the submitted form data.
Once the Custom Form is finalized, click the 'Save & Deploy' button.
Step 2 - Create a Process Definition
Create a new Process Definition by navigating to Process Definitions > New Process Definition in the Backoffice application.
Add a 'Create Start Event' to the Process Designer.
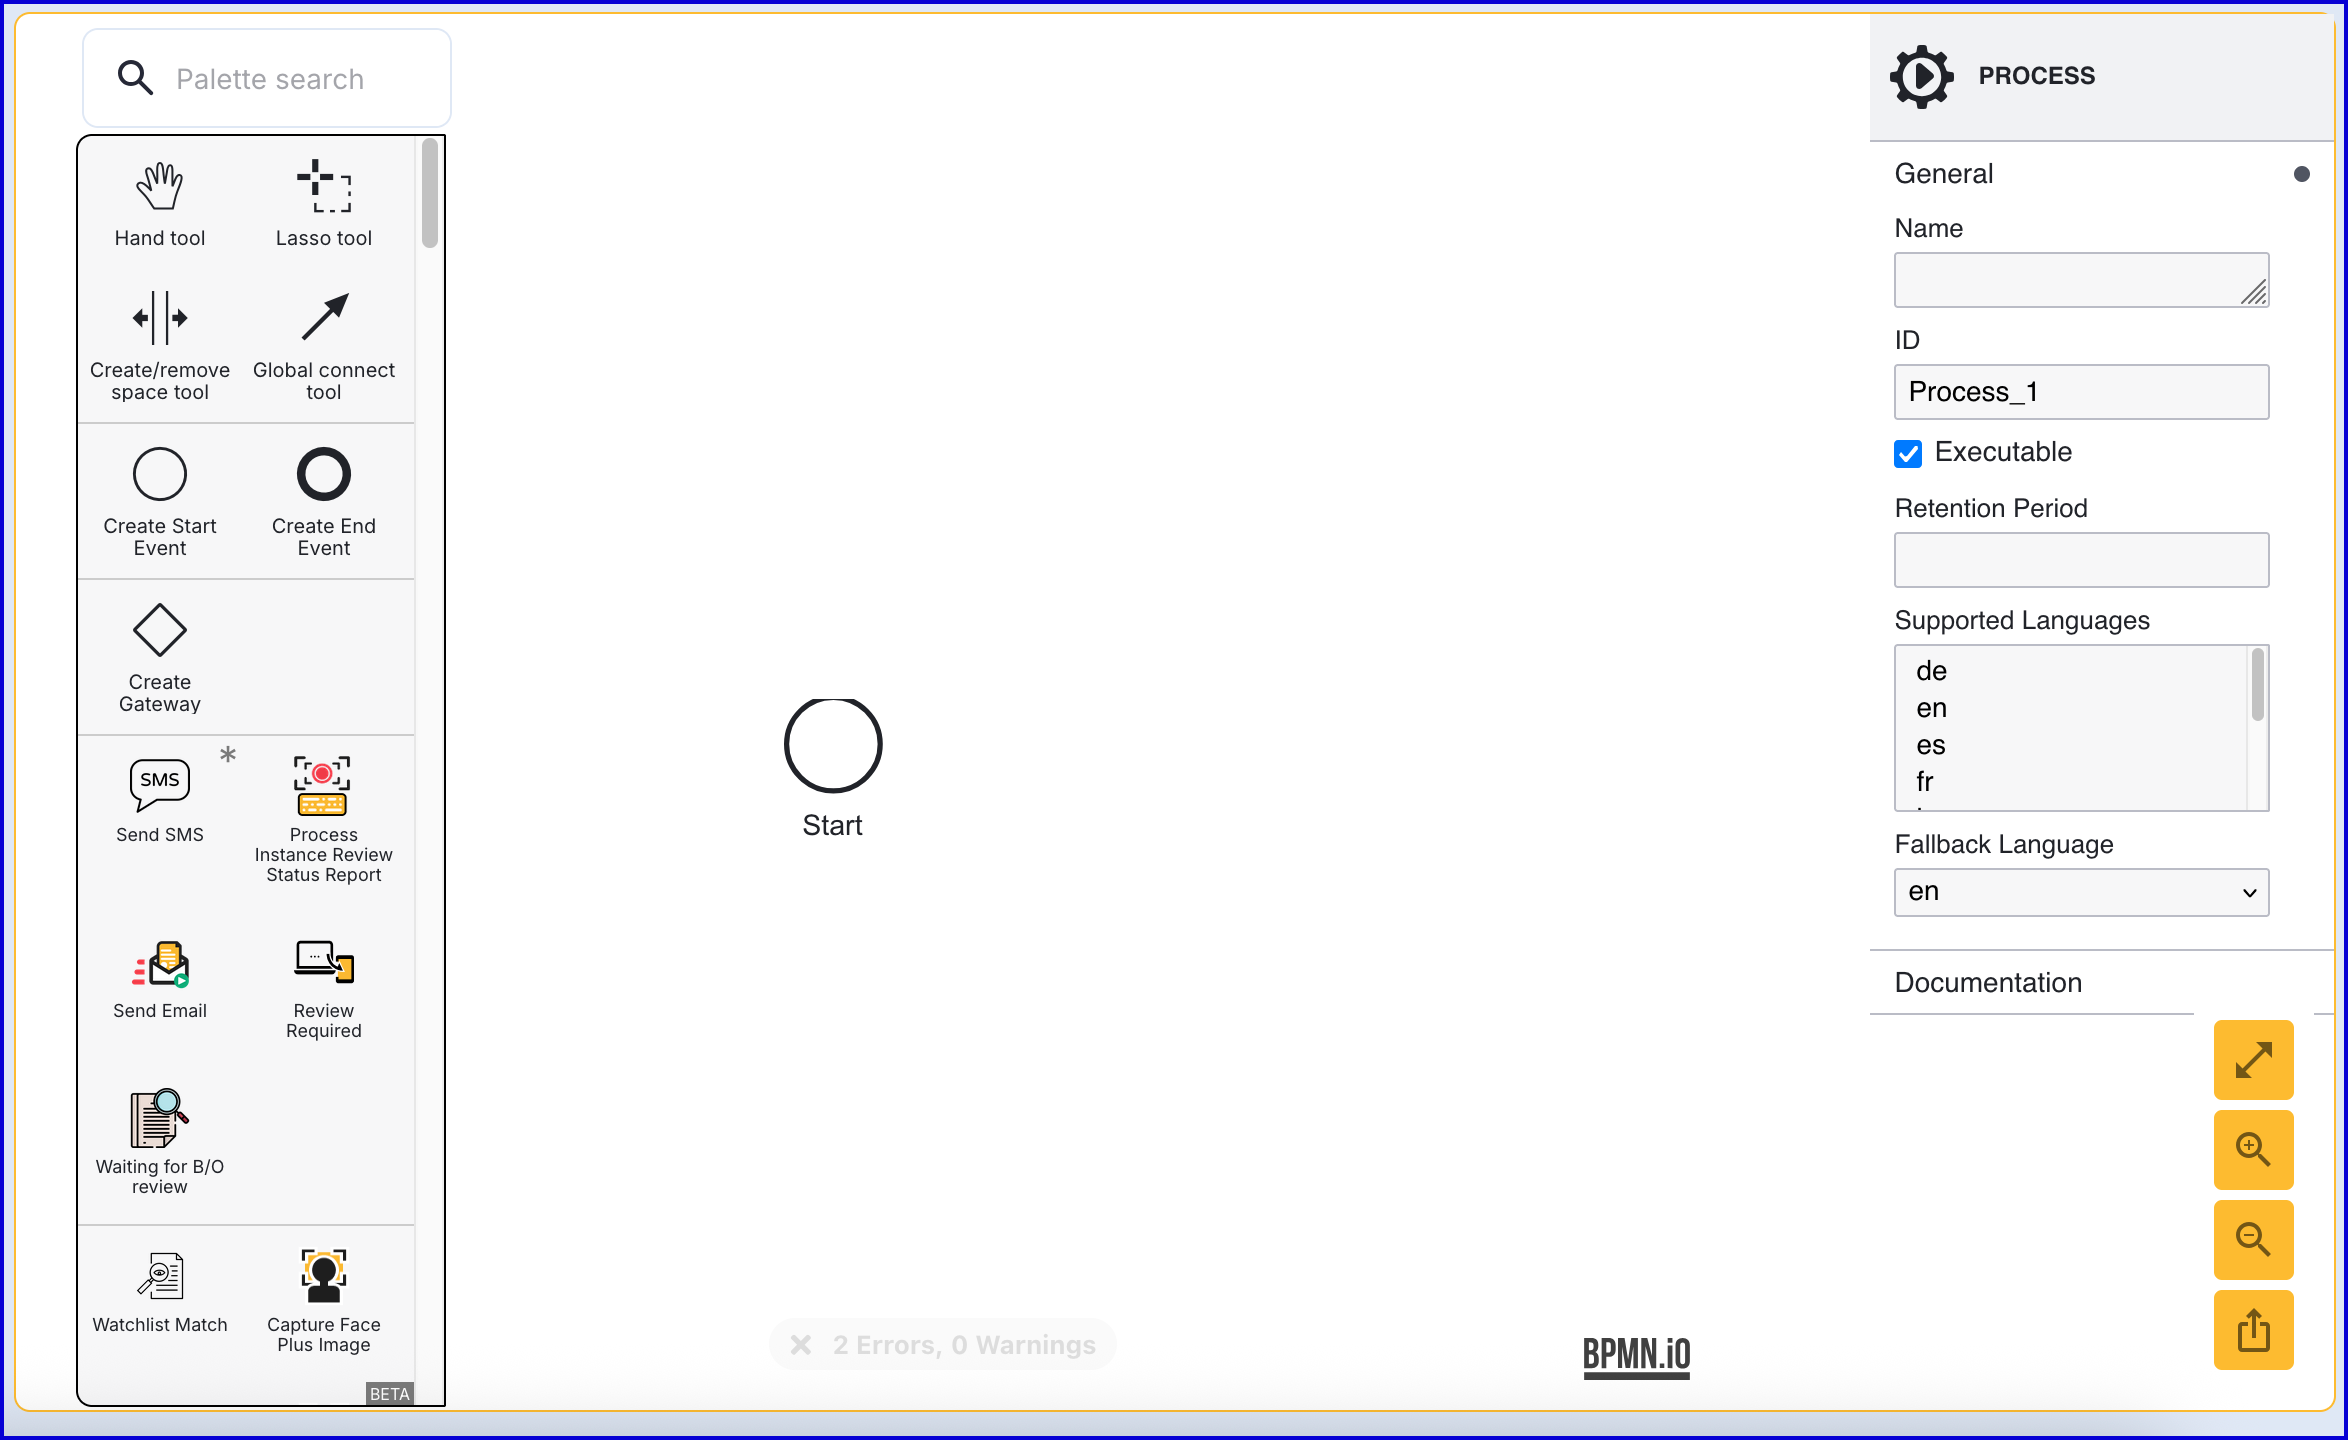
Click the 'Start' event to open the right-side contextual menu and enter a name for the 'Name' input parameter.
Add a 'Create End Event' to the Process Designer and connect it to the 'Start' event using a sequence flow arrow.
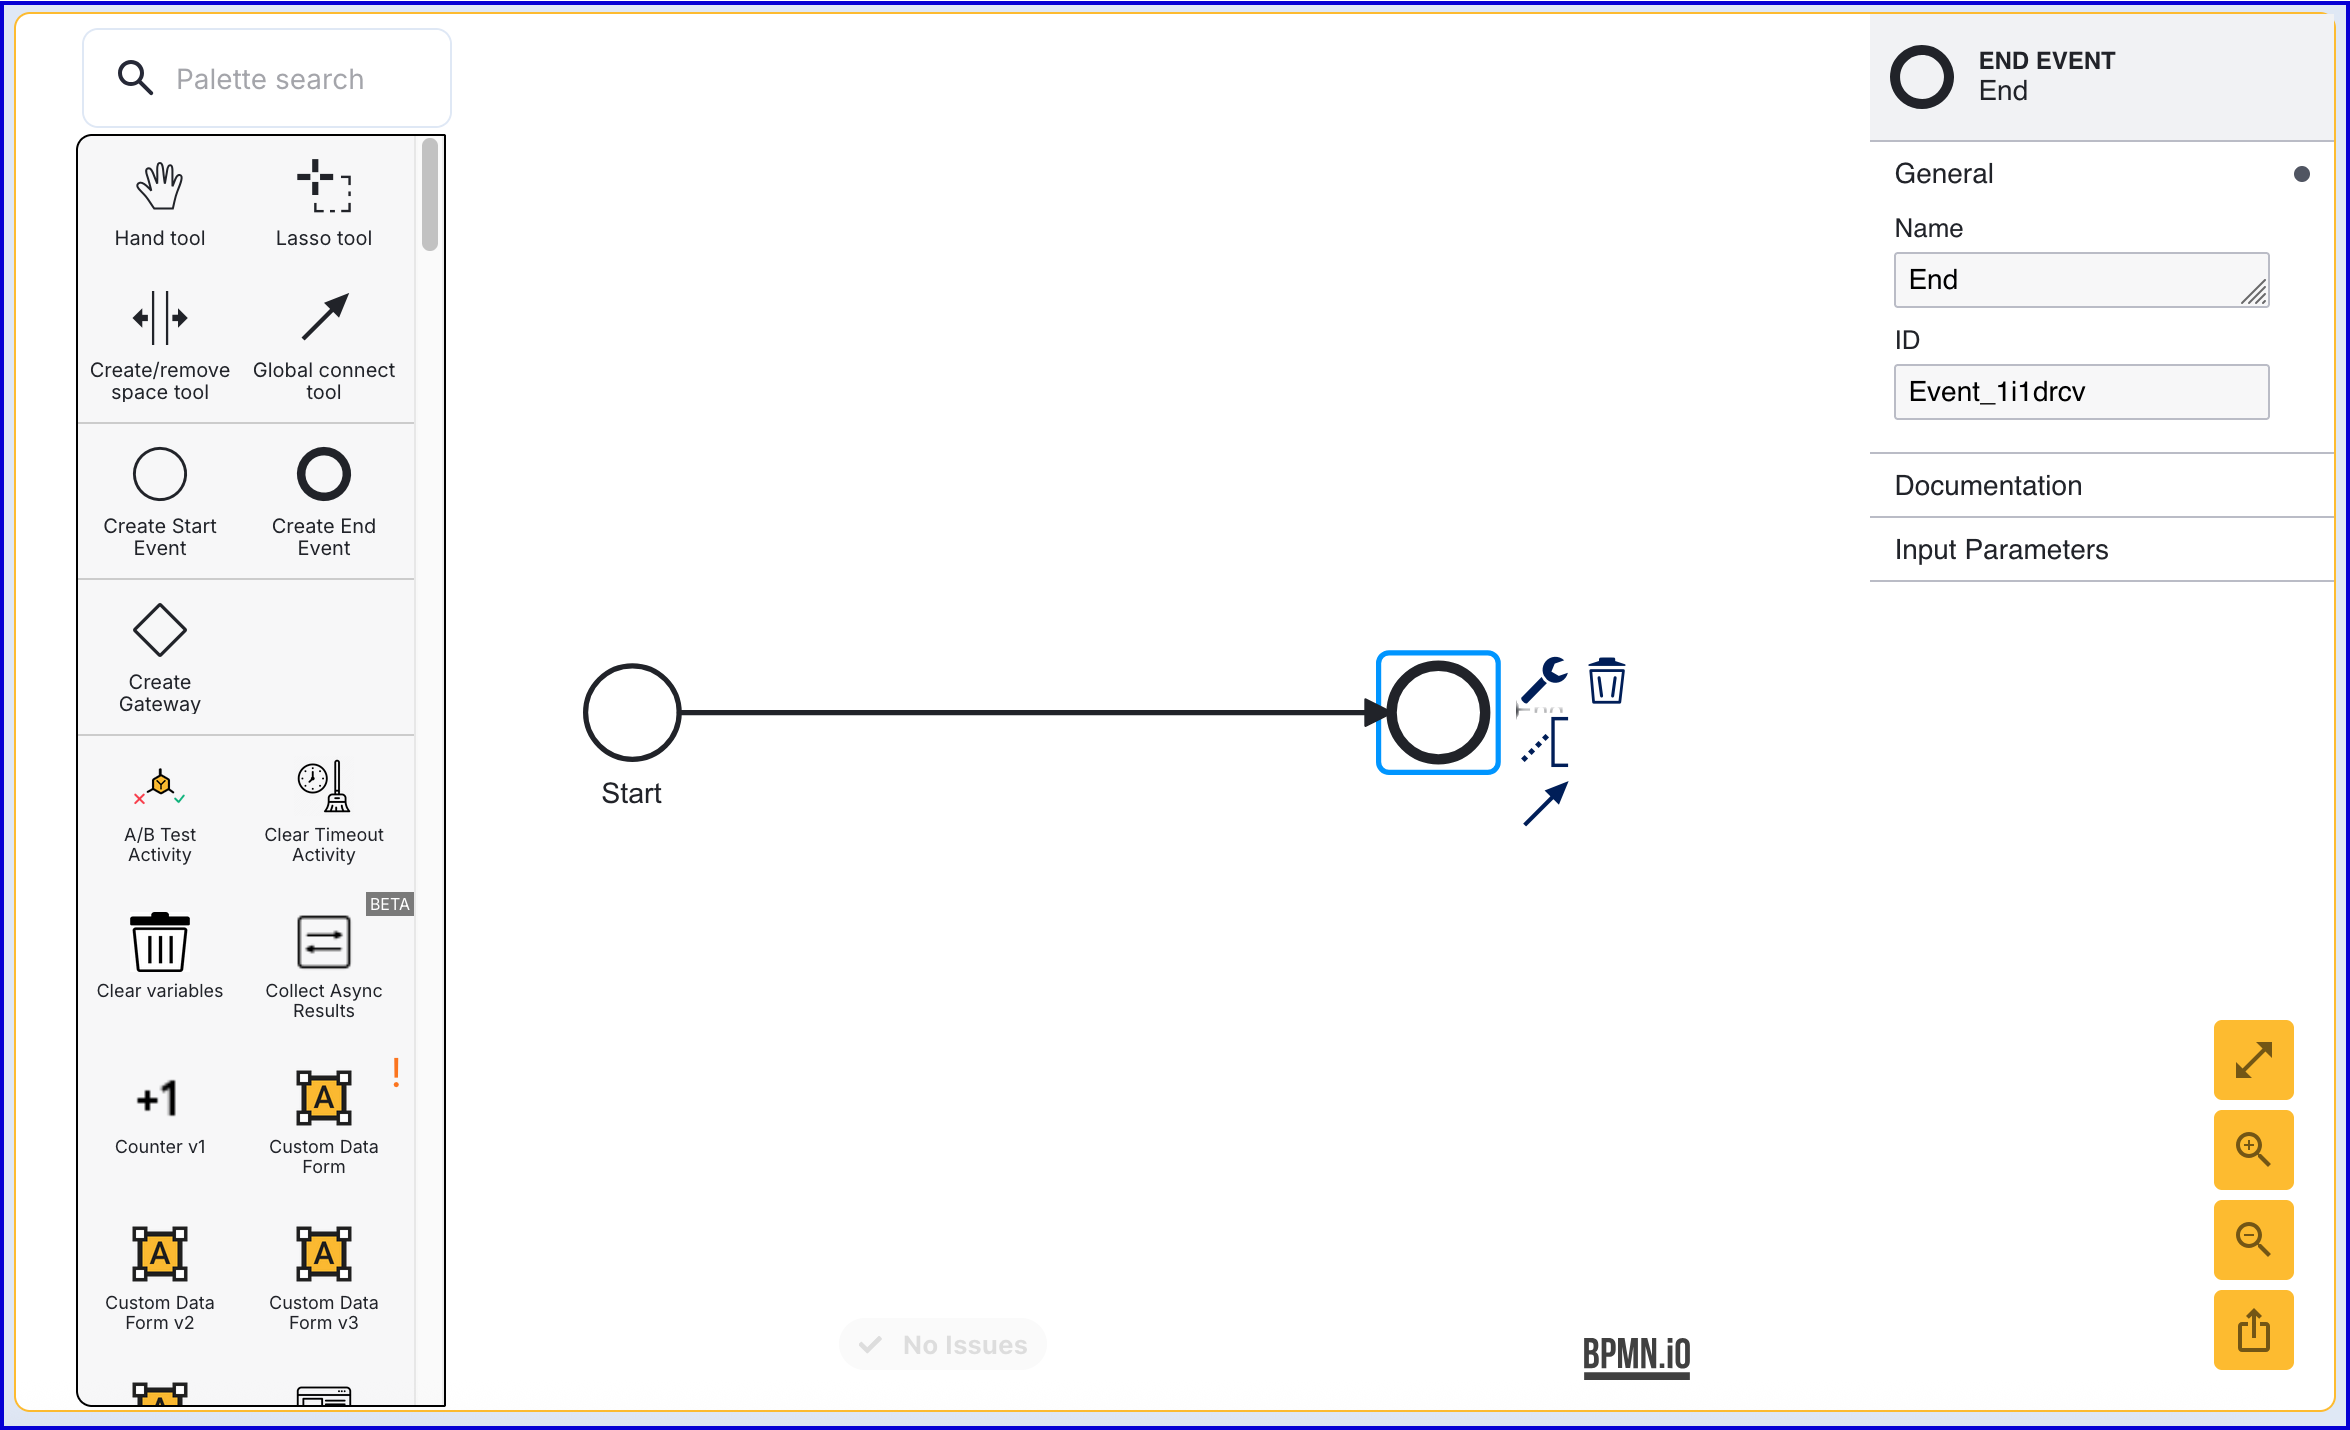
Click the 'End' event to open the right-side contextual menu and enter a name for the 'Name' input parameter.
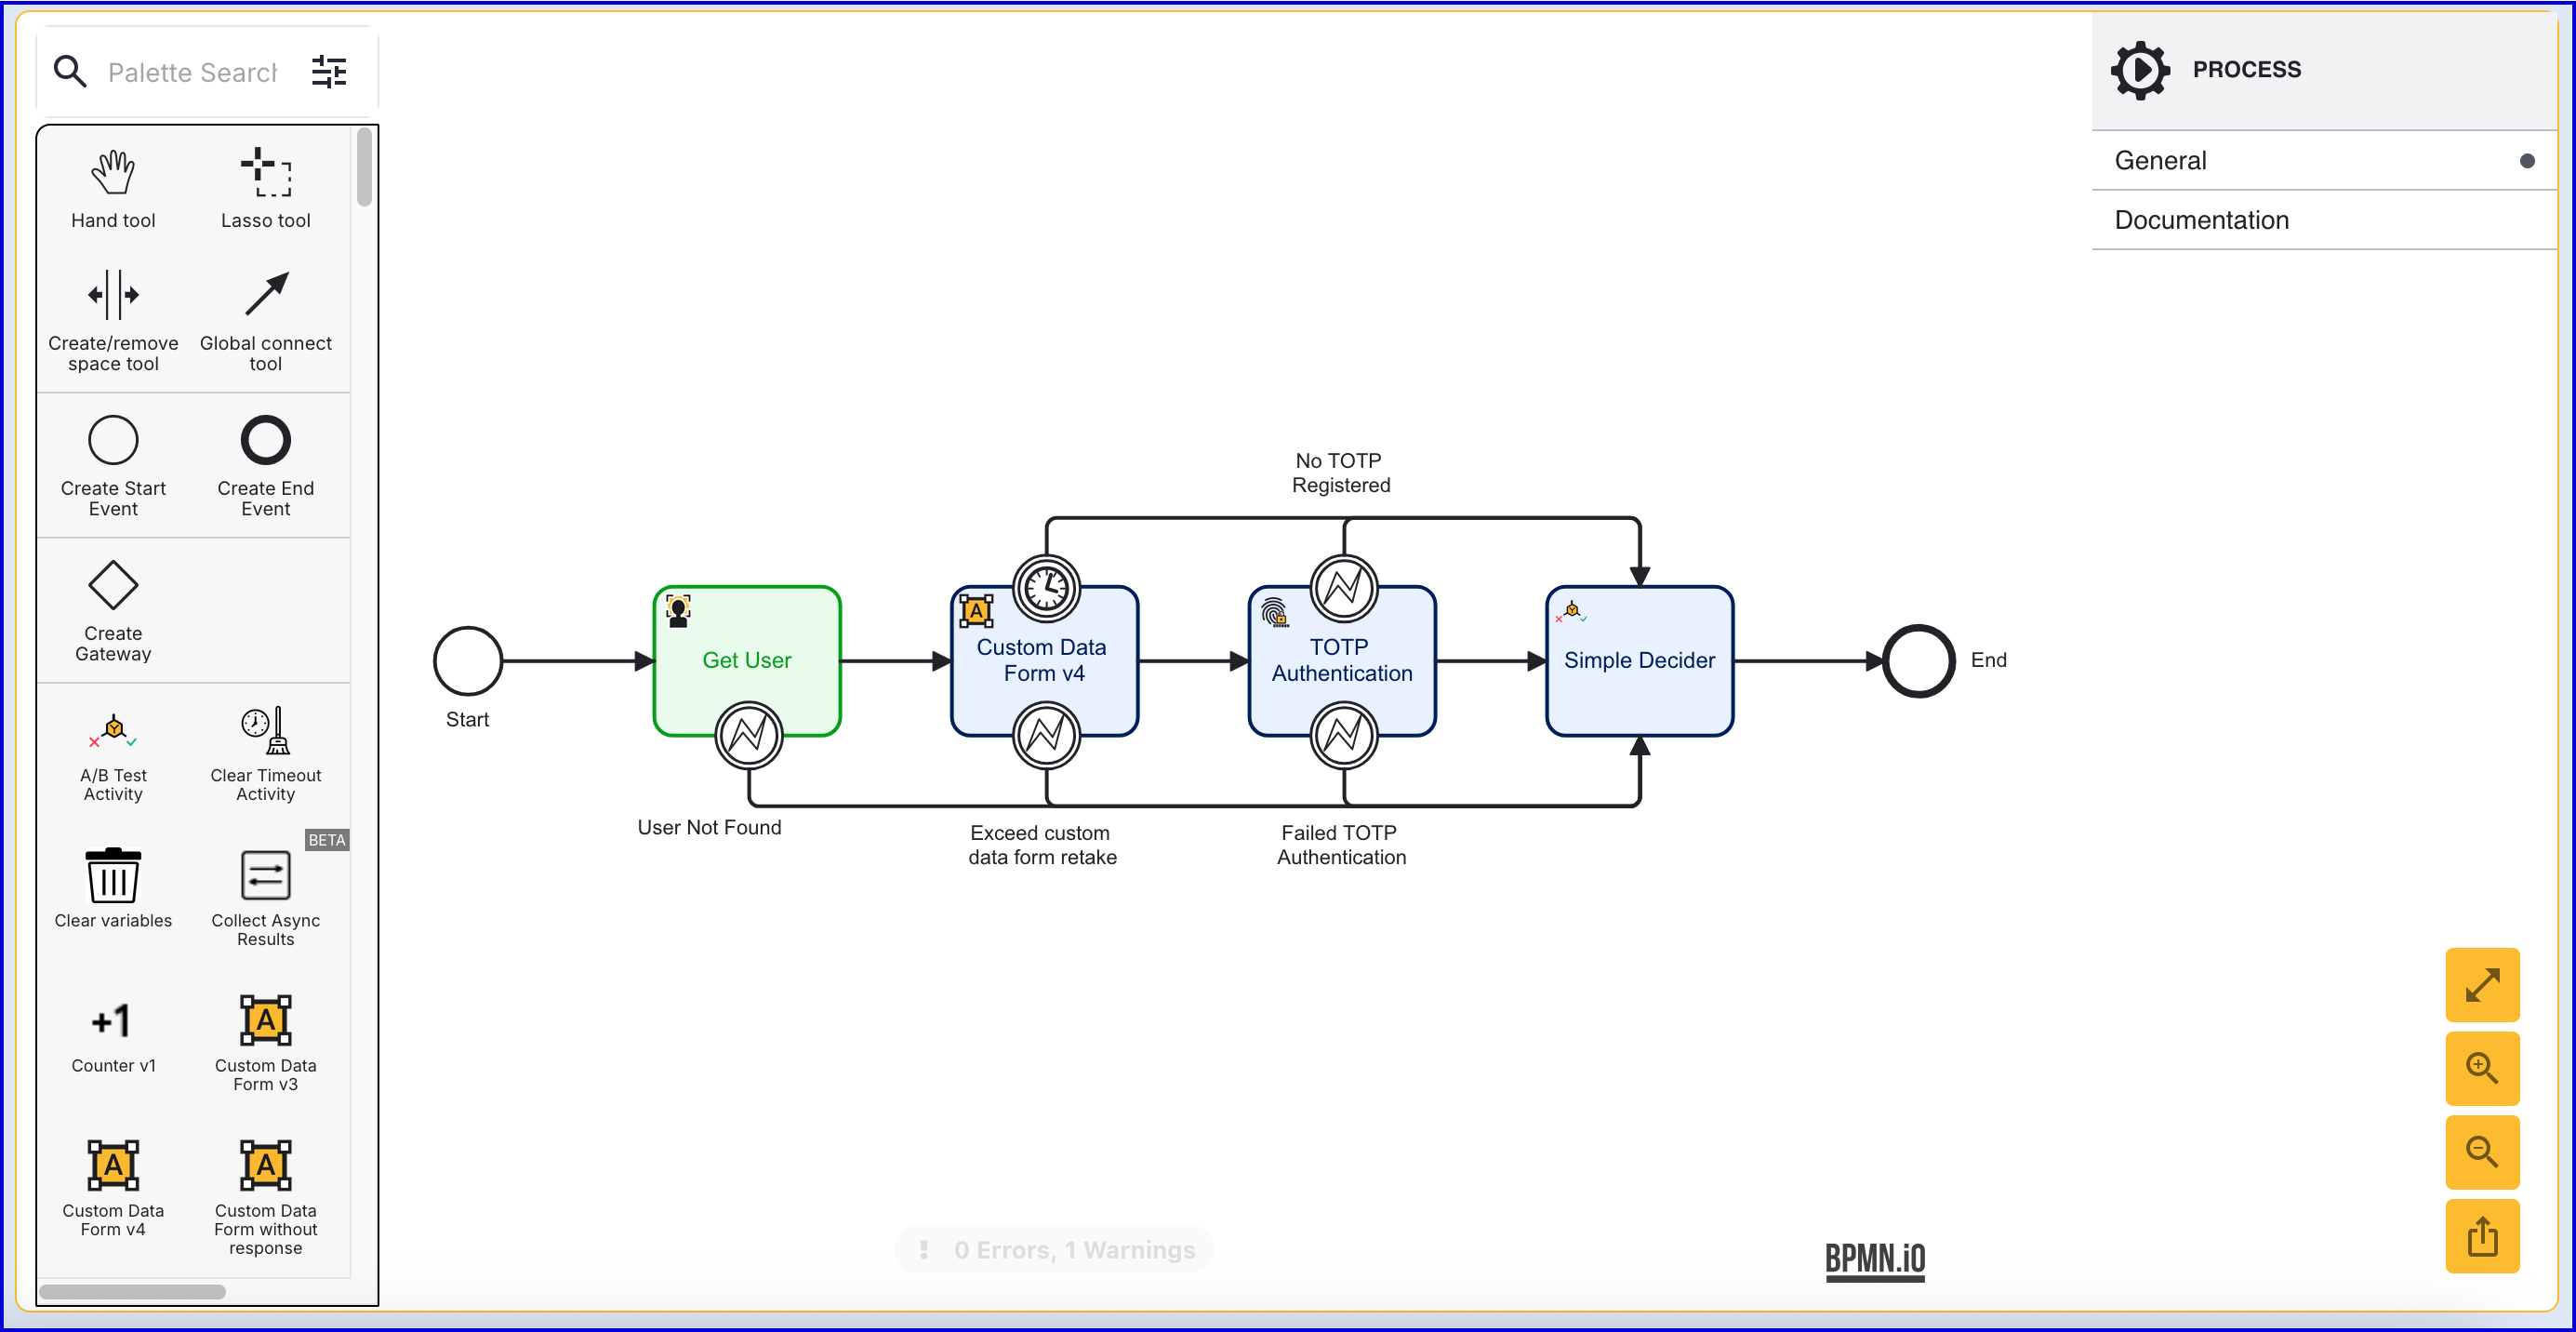
Step 3 - Get User
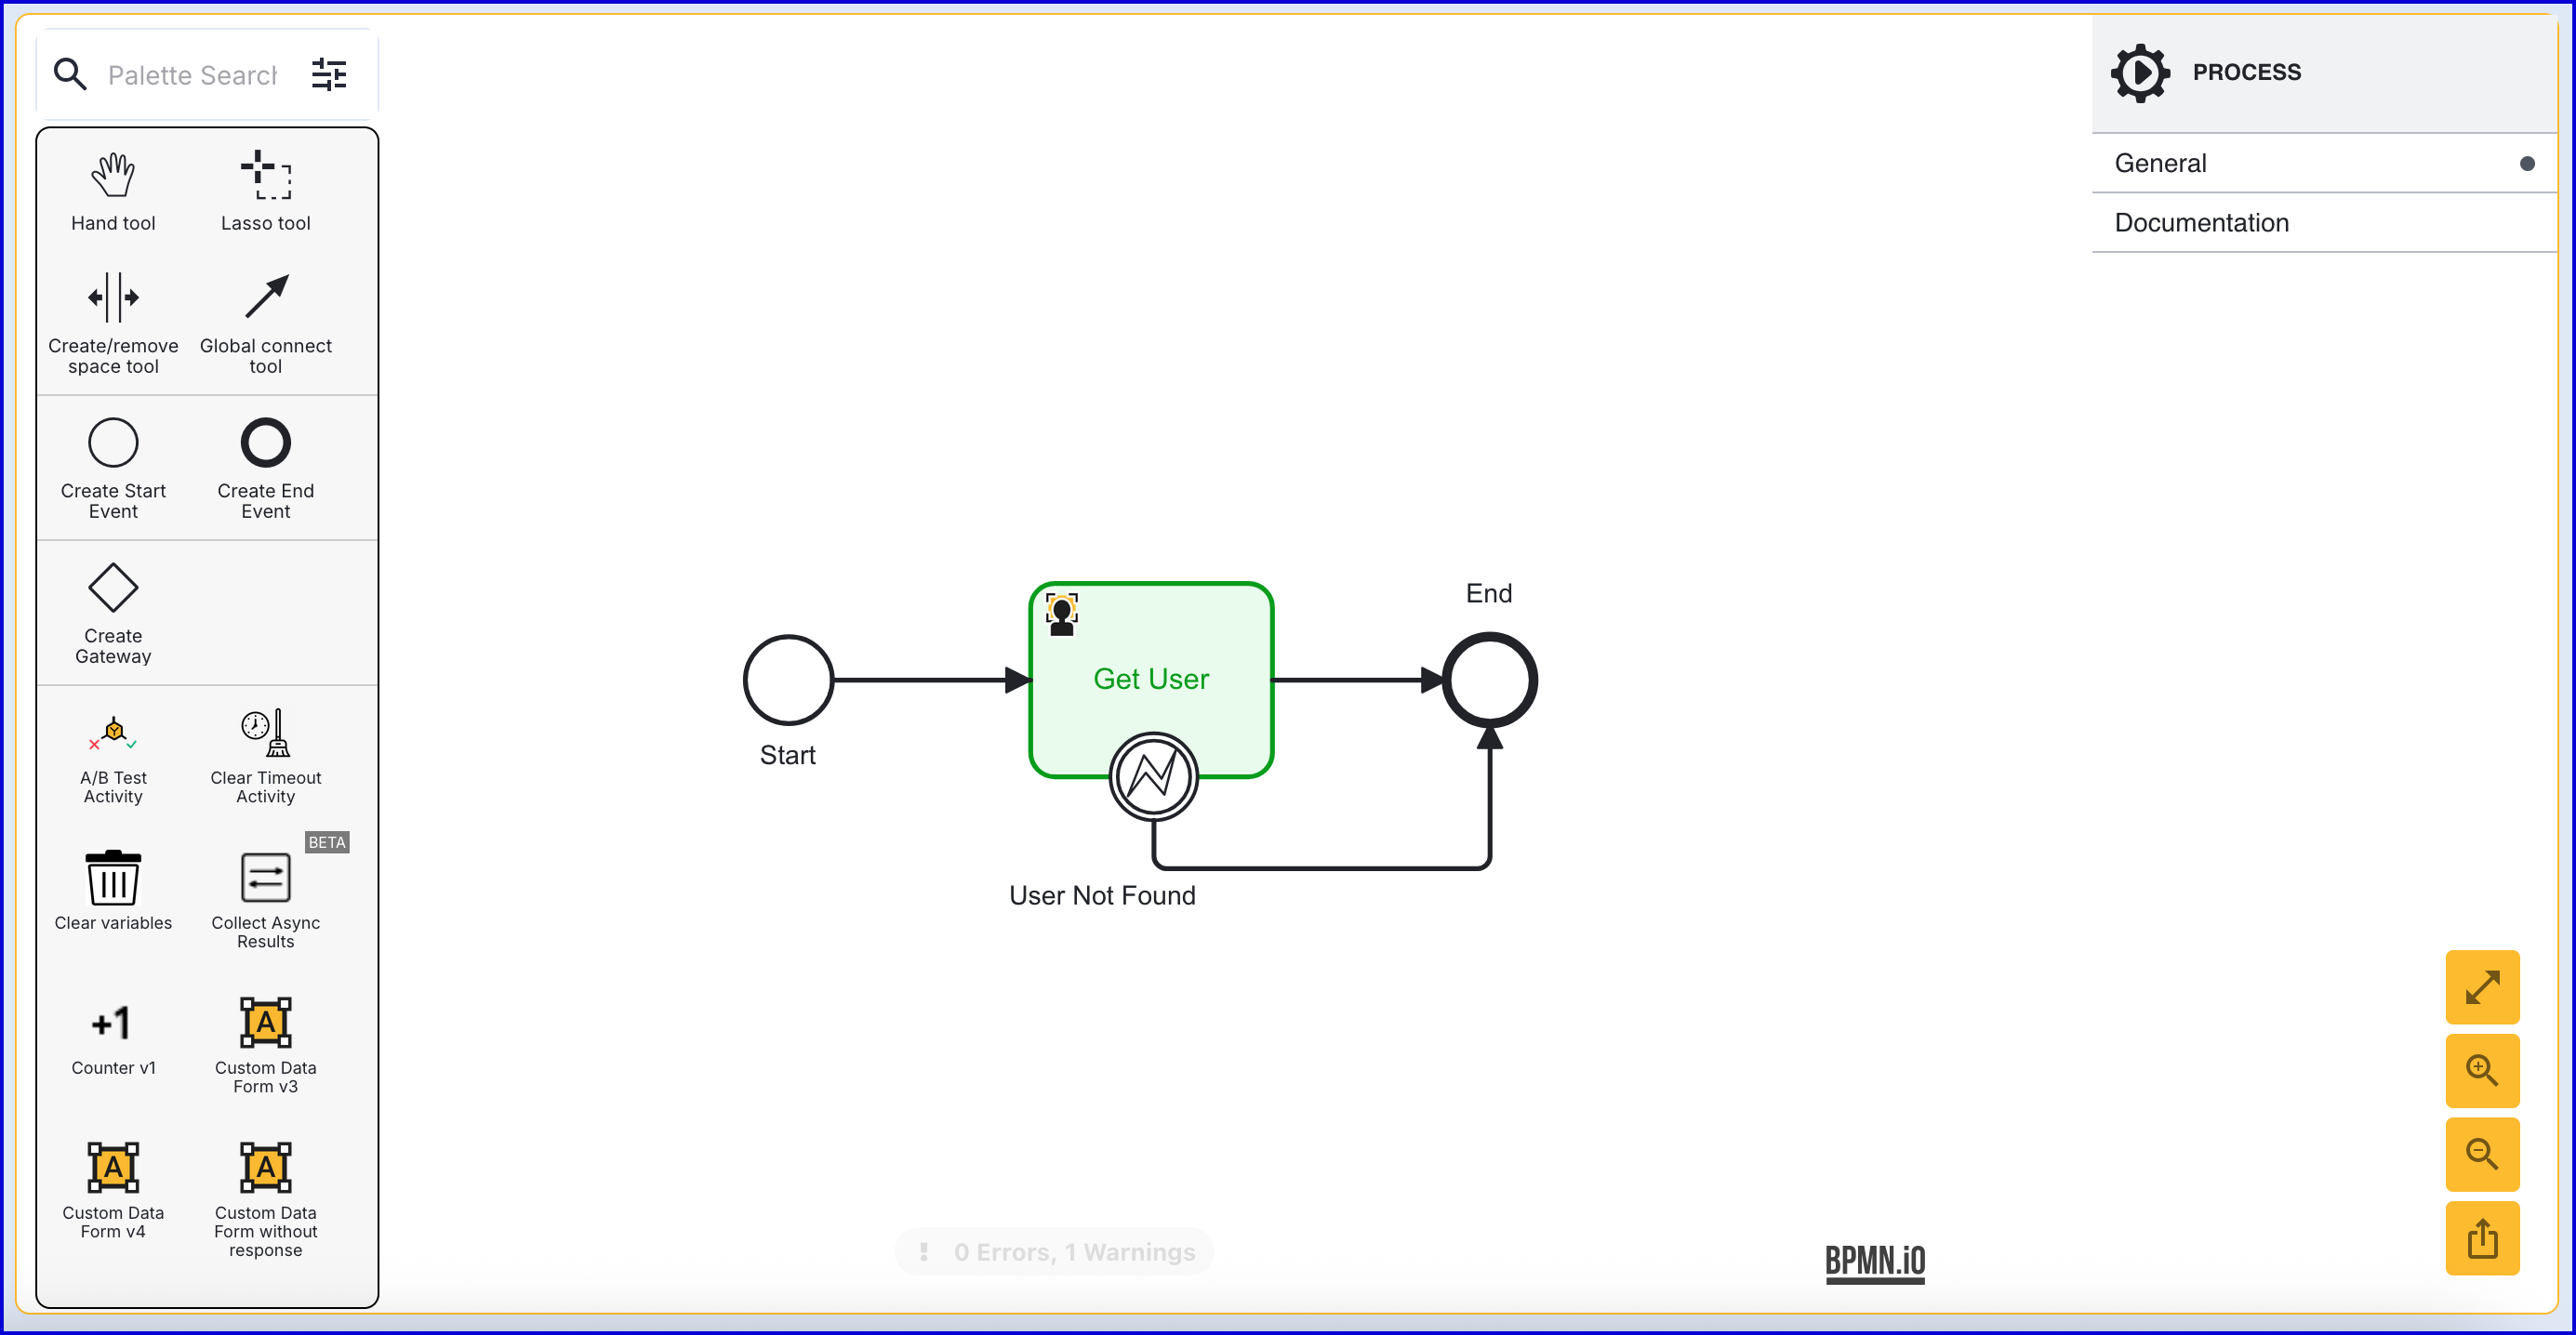
Before authenticating, the Identity Store User that will be authenticated must be retrieved using the 'Get User' activity.
Add a 'Get User' activity to the Process Designer and connect it to the 'start' event using the global connect tool.
The 'Get User' activity includes the following input parameters:
| Parameter | Description | Type | Default |
|---|---|---|---|
| Store Name | Required - Represents the Identity Store that the User belongs to. | String | |
| User External ID | The External ID of the User to be returned. | String | |
| User ID | The ID of the User to be returned. | String | |
| User Key | The User Key of the User to be returned. | String | user1 |
Step 4 - Add TOTP Form
After retrieving the Identity Store User, display the form created in Step 1 that requests the user to input the TOTP generated in their authenticator app.
Add a 'Custom Data Form' activity to the Process Designer and connect it to the 'Get User' application using the global connect tool.
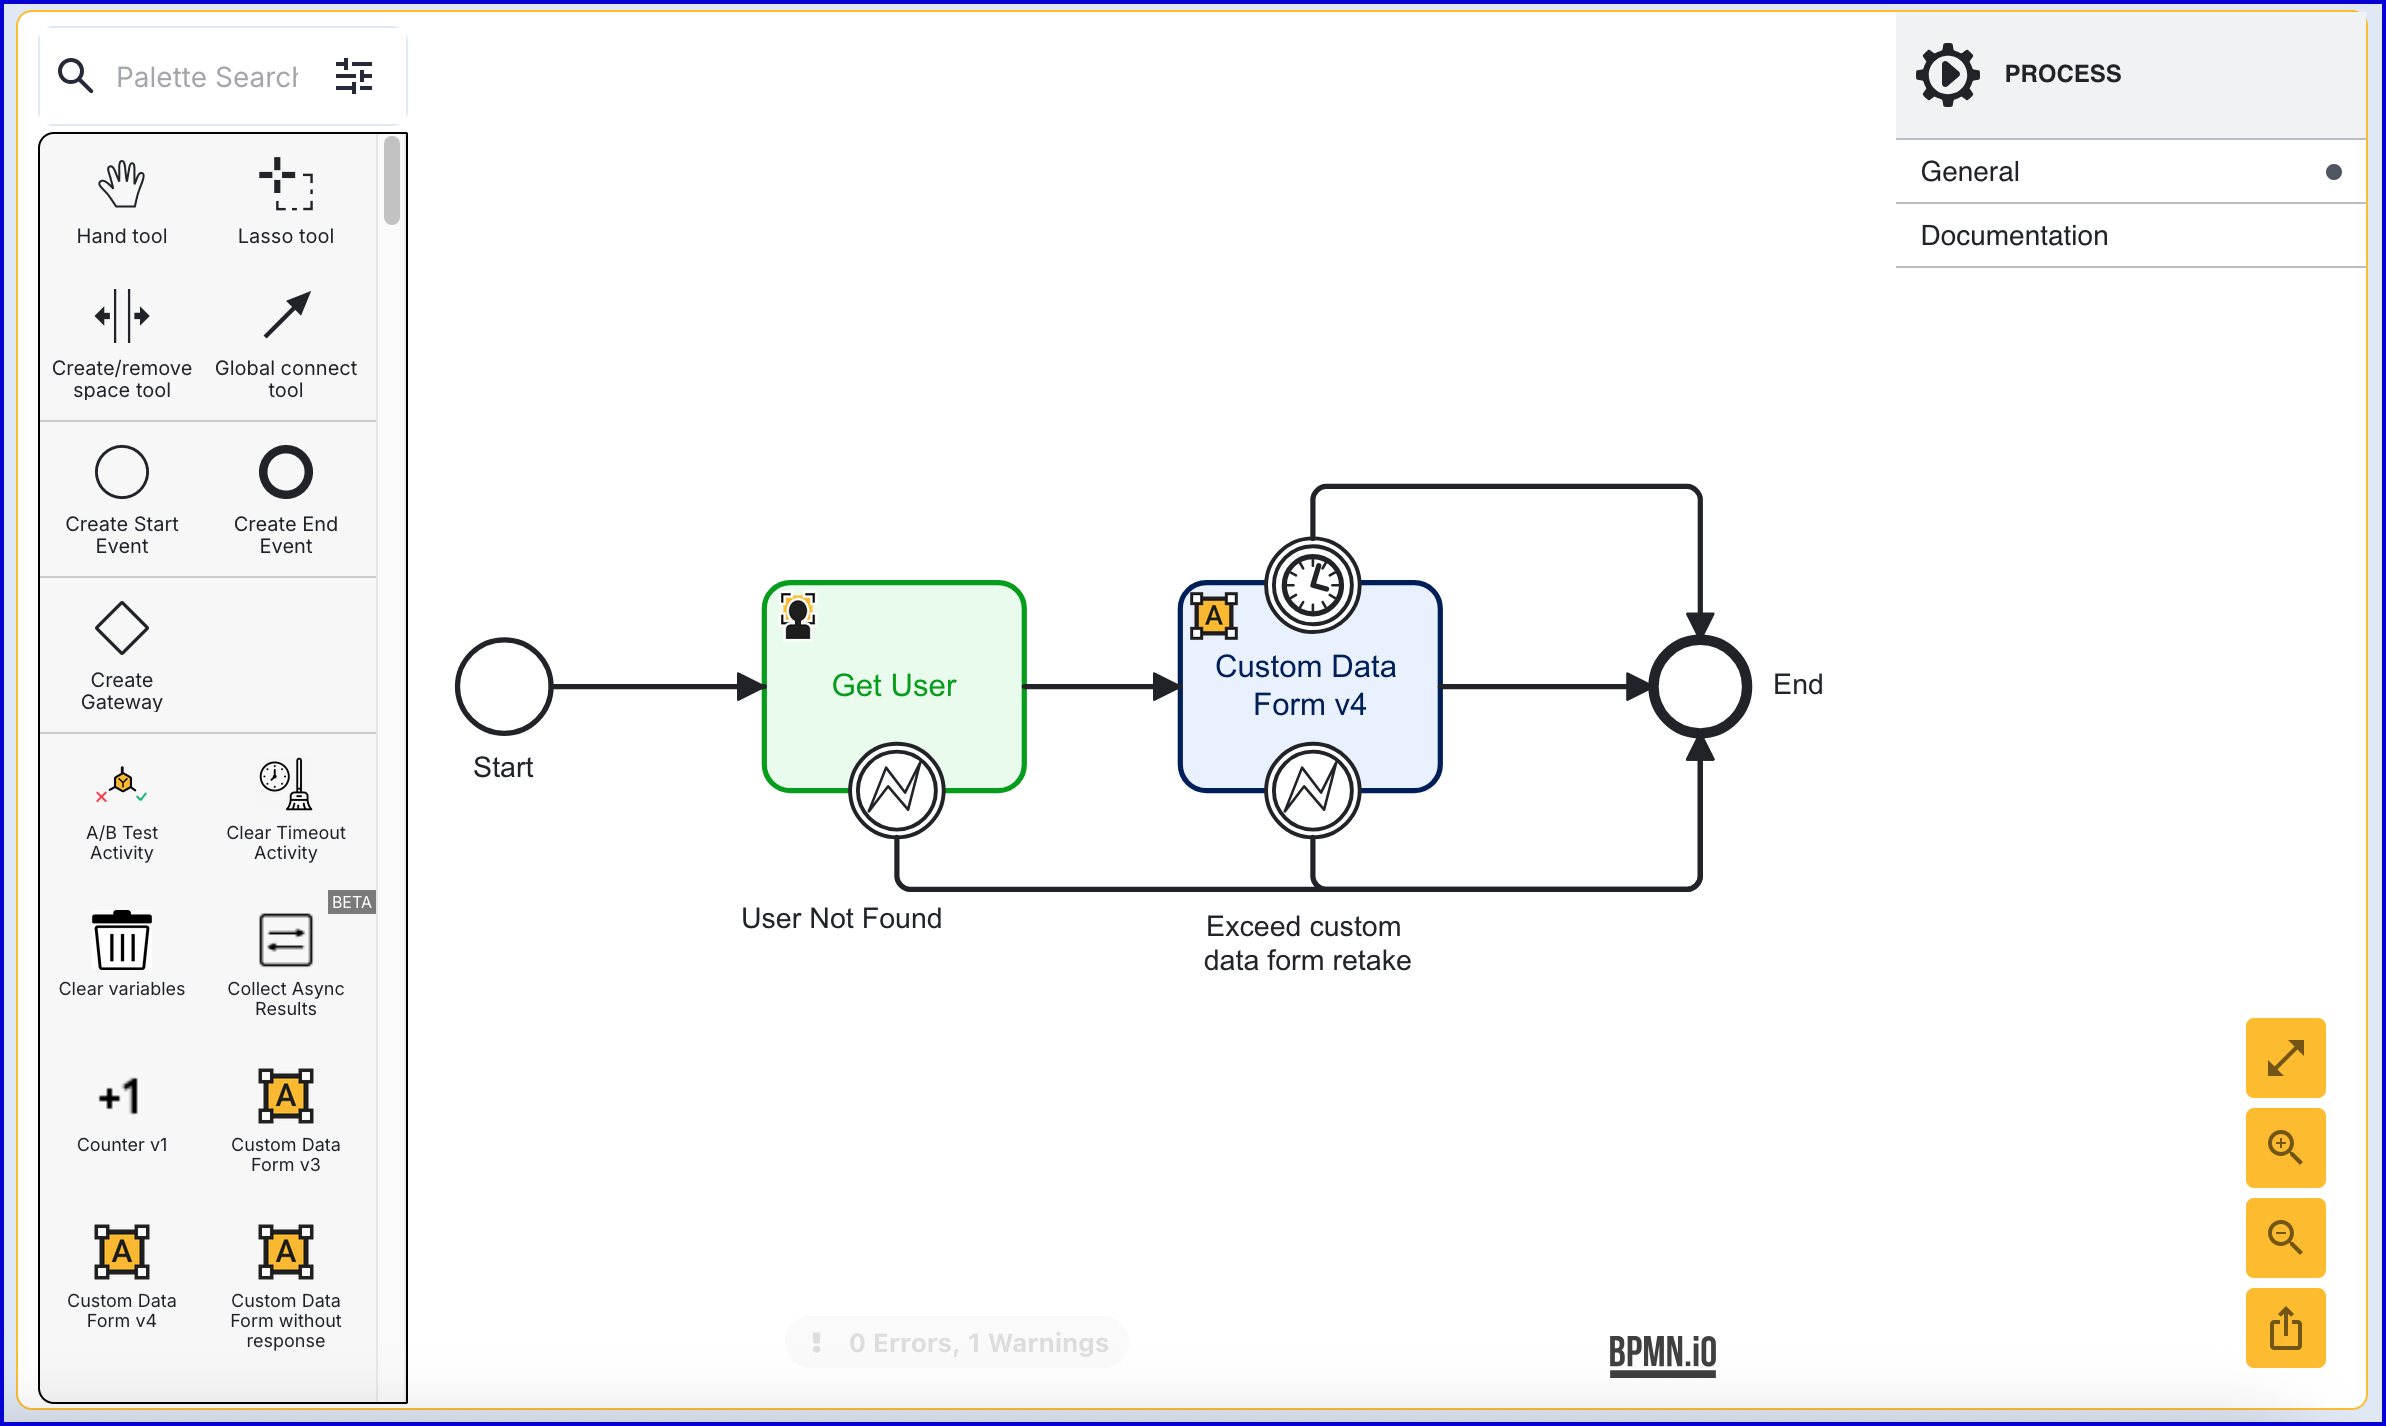
Set the the 'Data form name', 'Data form version' and 'Form data Key' input parameters to utilize the form created in Step 1. In this example, the 'Form data Key' is set to 'enterCodeForm'.
Step 5 - Perform TOTP Authentication
The 'TOTP Authentication' activity will perform authentication against an Identity Store User and submitted TOTP to determine that the user's secret key matches the secret key stored in TrustX.
Add the 'TOTP Authentication' activity to the Process Designer and connect it to the 'Custom Data Form v4' activity.
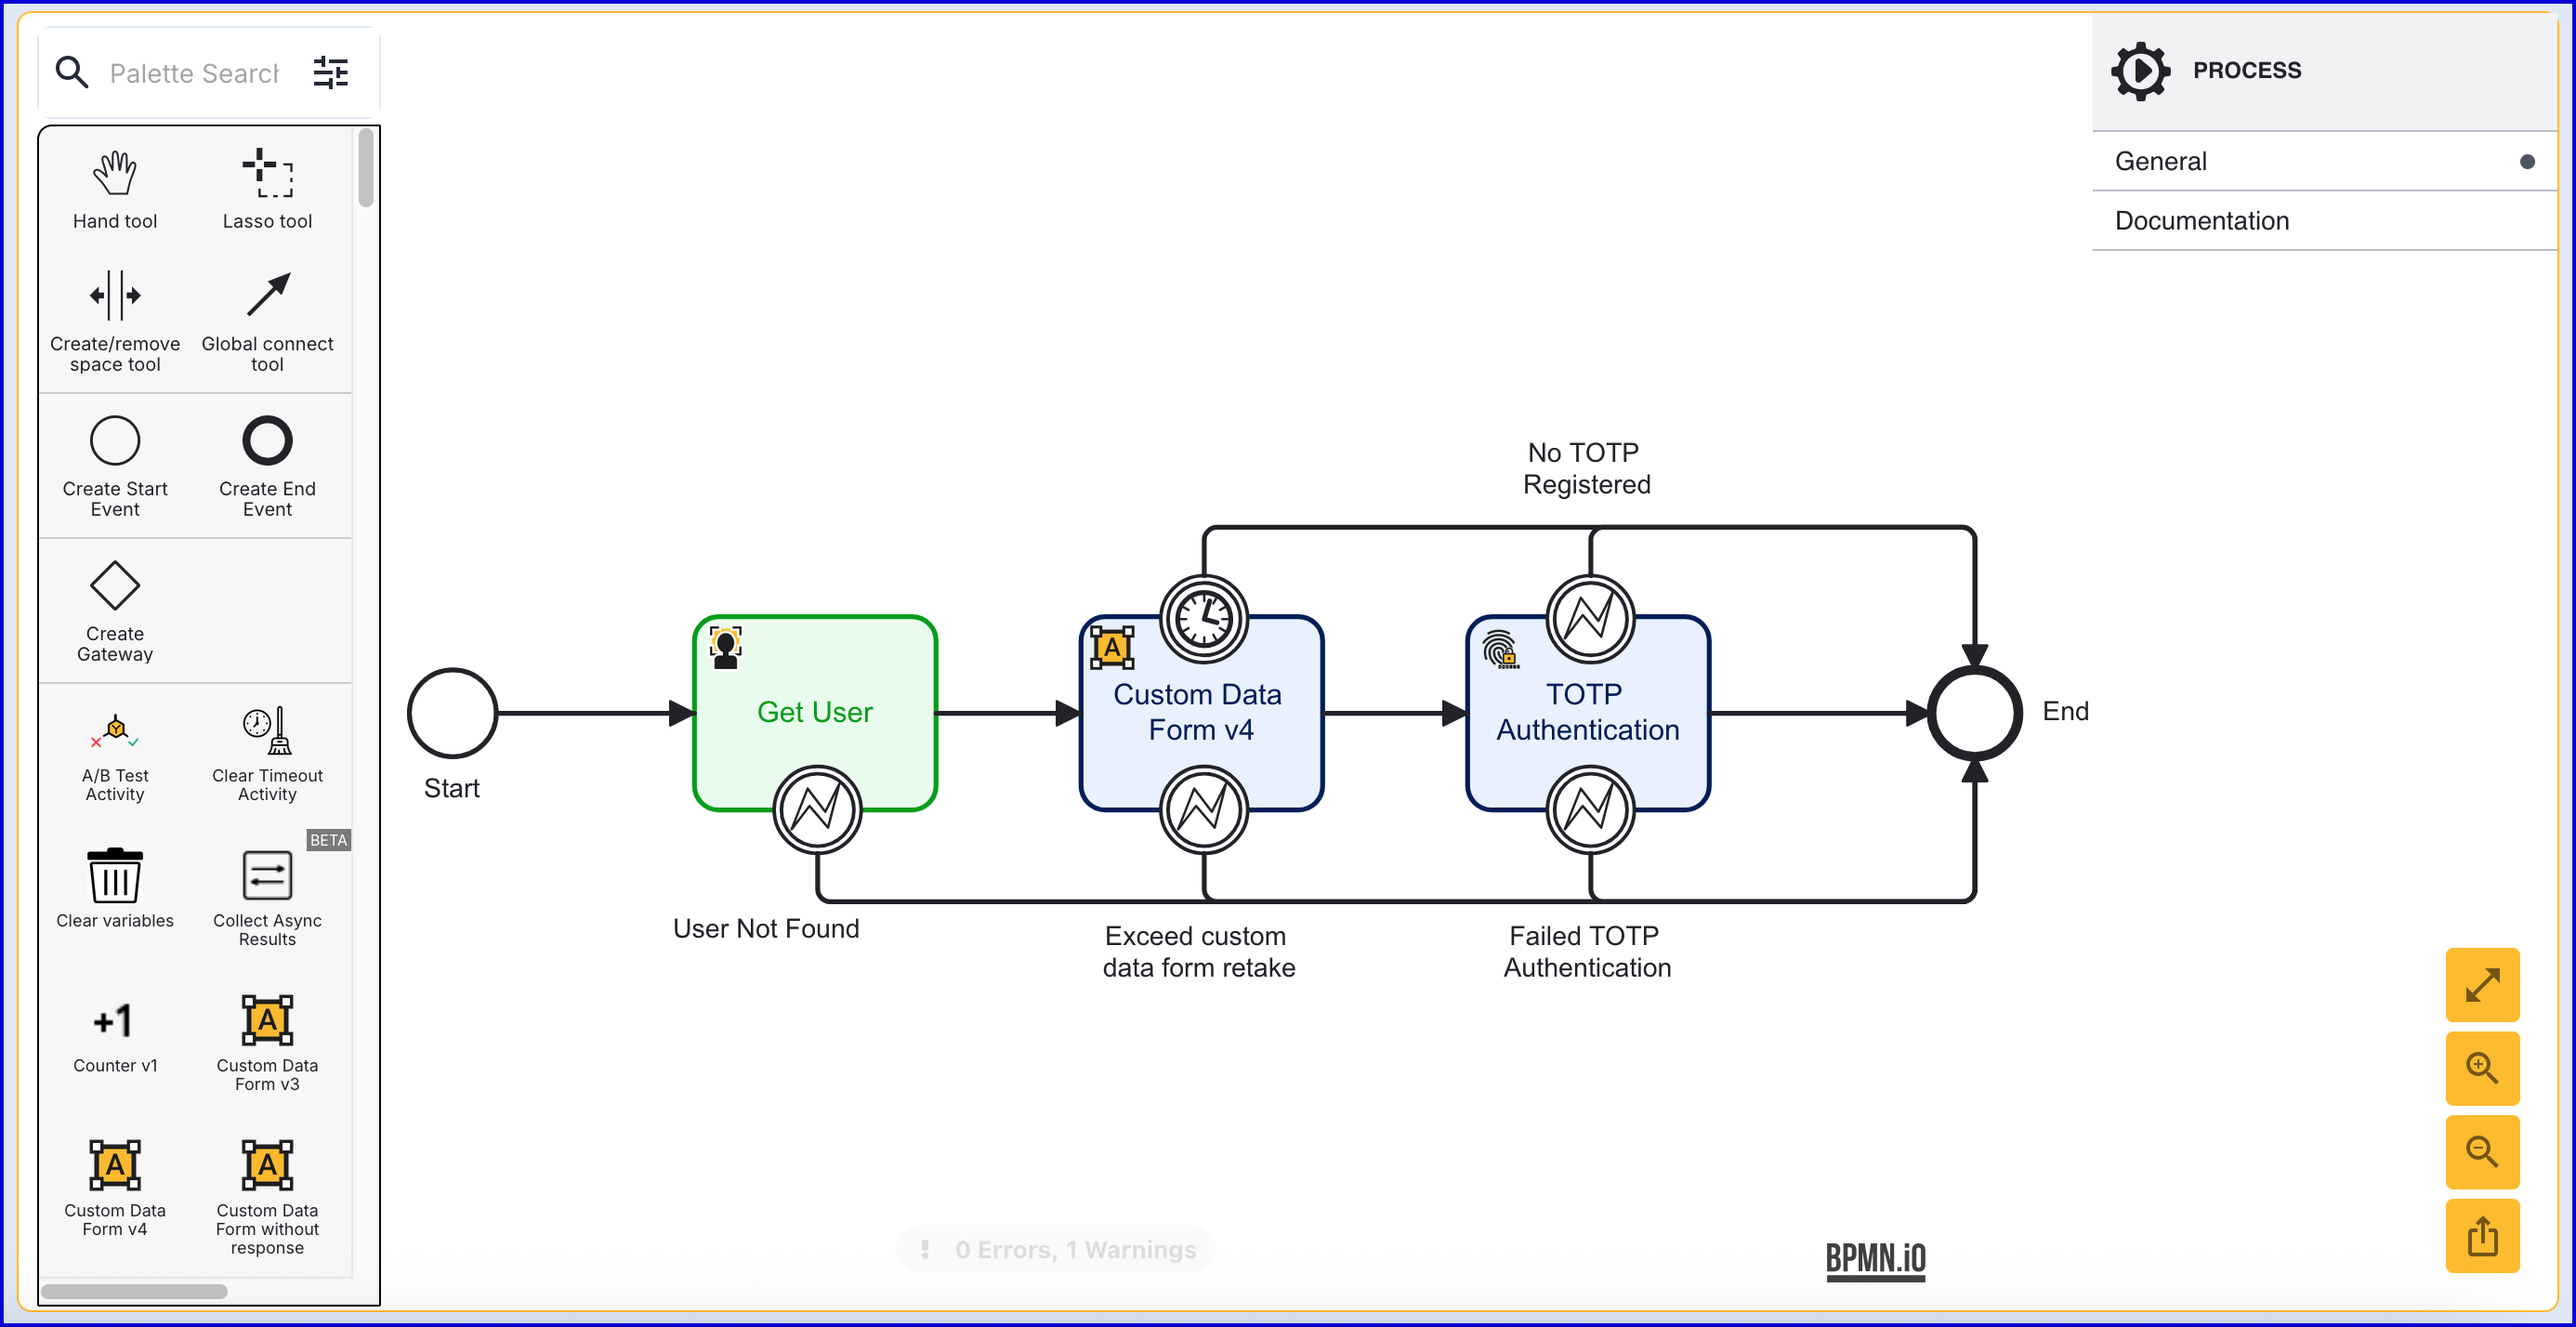
The 'TOTP Authentication' activity features the following configurable input parameters:
| Parameter | Description | Type | Default |
|---|---|---|---|
| Authentication Code | Represents the submitted TOTP code. | String | |
| Steps Allowed | The number of previously generated TOTPs that will be accepted as valid. | Integer | 1 |
| Store Name | The name of the Identity Store that the TOTP authentication attempt applies to. | String | |
| TOTP Policy | The name of the TOTP policy that will be used in the authentication attempt. | String | |
| TOTP Authentication Key | The key used to identify the TOTP authentication attempt. | String | totpReg1 |
| User External ID | This property can be used to identify the User that the TOTP authentication applies to. | String | |
| Store Name | Required - Represents the Identity Store of the User. | String | |
| User External ID | The External ID of the User. | String | |
| User ID | The unique ID automatically generated when the User is created. In the context of the 'TOTP Authentication' activity, this ID can be used to identify the User that the TOTP registration applies to. | String | |
| User Key | The User Key that can be used to identify the User that the TOTP authentication applies to. | String | user1 |
Set the 'Authentication Code' input parameter to
${_customFormData.enterCodeForm.currentCapture.customDataFormDataMap["submittedCode"]}. This represents the code submitted by the user in the Custom Data Form._customFormData- Accesses the customFormData table.enterCodeForm- Represents the 'Form data Key' set for the 'Custom Data Form v4' activity.currentCapture- Accesses the form data captured during the Process Instance.customDataFormDataMap["submittedCode"]- Access data from the 'submittedCode' form element inside the data map of the Custom Data Form.
Set the 'Store Name', 'TOTP Policy', and 'User Key' input parameters to match the Identity Store and User associated with the TOTP authentication.
Step 6 - Add a Simple Decider
Add a 'Simple Decider' activity to the Process Definition and connect it to the 'TOTP Authentication'. This activity will set the decision of the Process Instance based on the outcome of the TOTP authentication attempt.
Once the activity is configured, click the 'Save & Deploy' button to complete the Process Definition.
Test and View Results
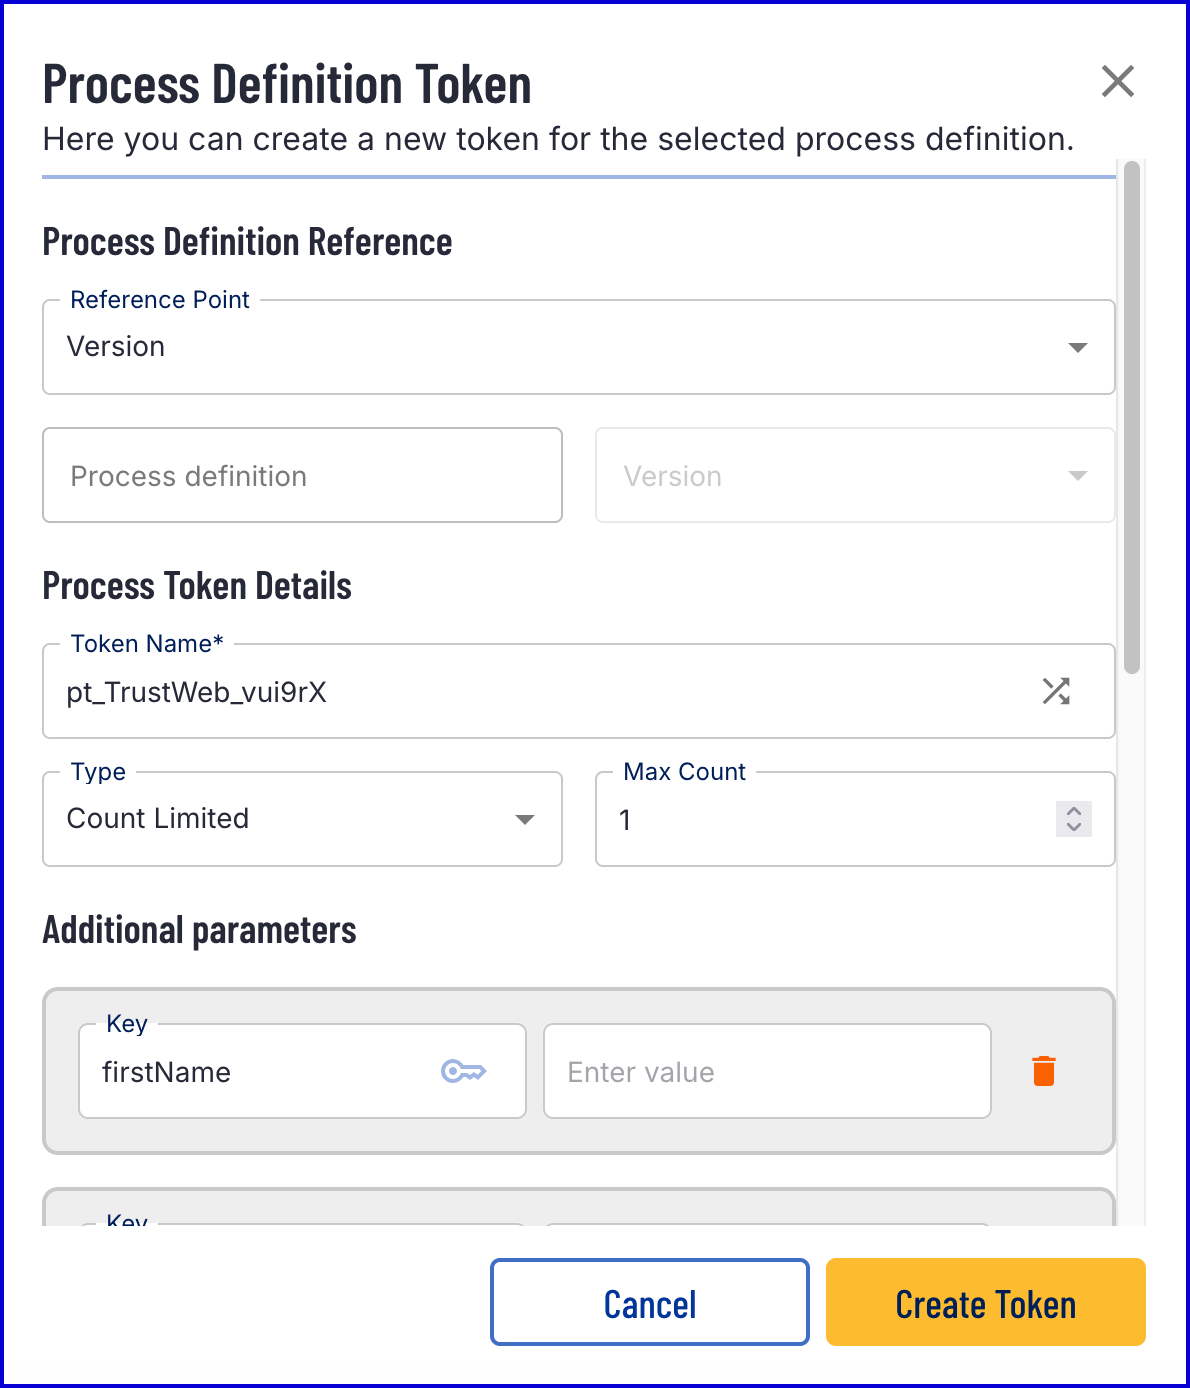
Create a Token
This section will describe how to test the Process Definition created above by generating a Process Token. After completing the flow, results of the Process Instance can be viewed from the Process Instances page.
To test the Process Definition, create a new Process Token by navigating to the Process Definitions > Process Tokens page.
Click the 'New Process Token' button found on the top-right of the page to start creating a new token. A popup modal will appear where details of the token can be entered.
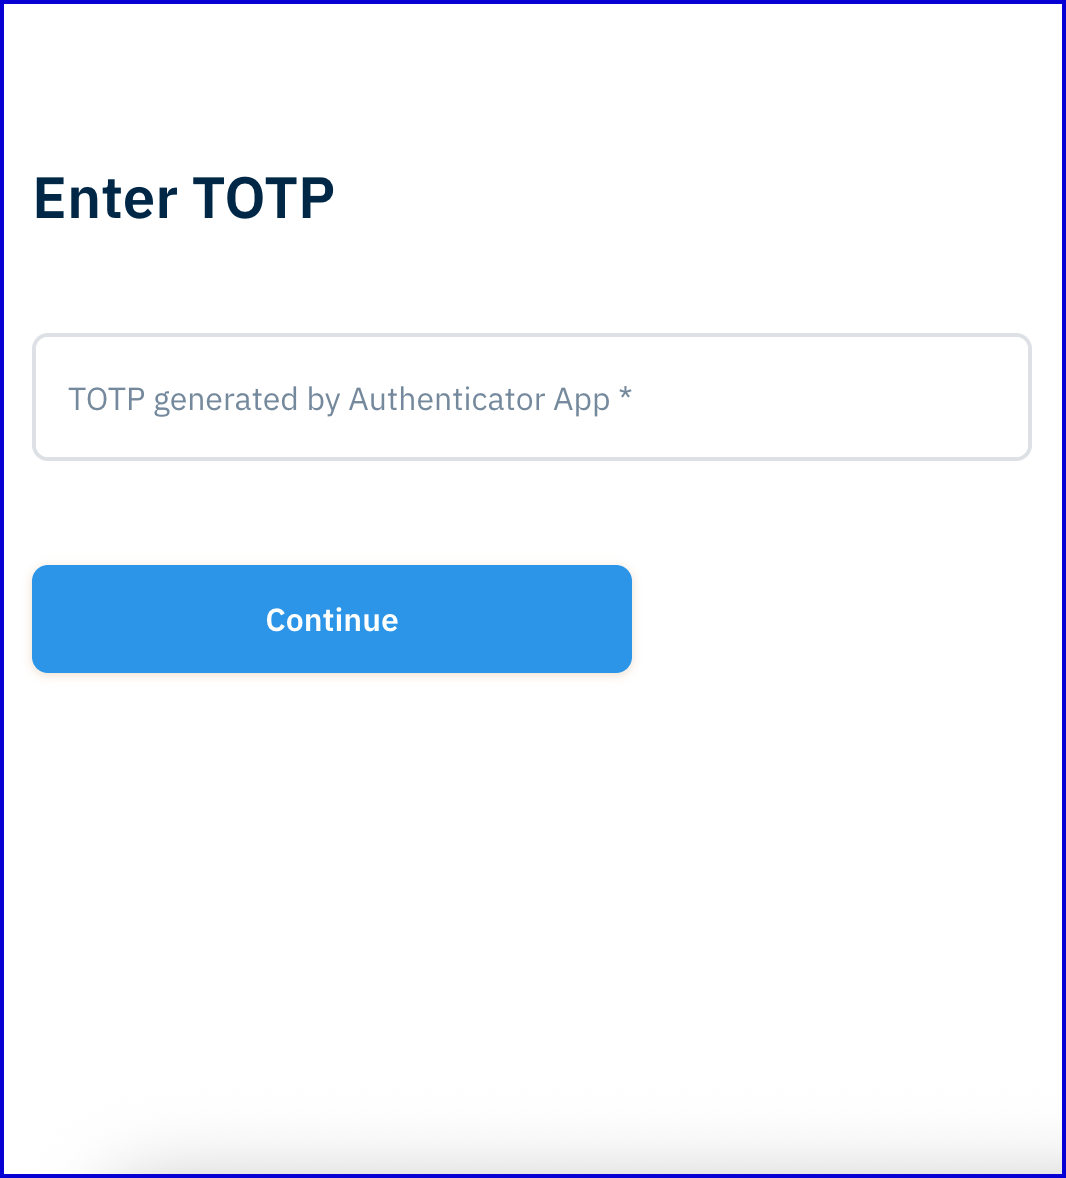
Once the token is created, scan the QR code or follow the link to begin the flow. The TOTP form will be displayed, enabling the user submit the generated TOTP password.
View Results
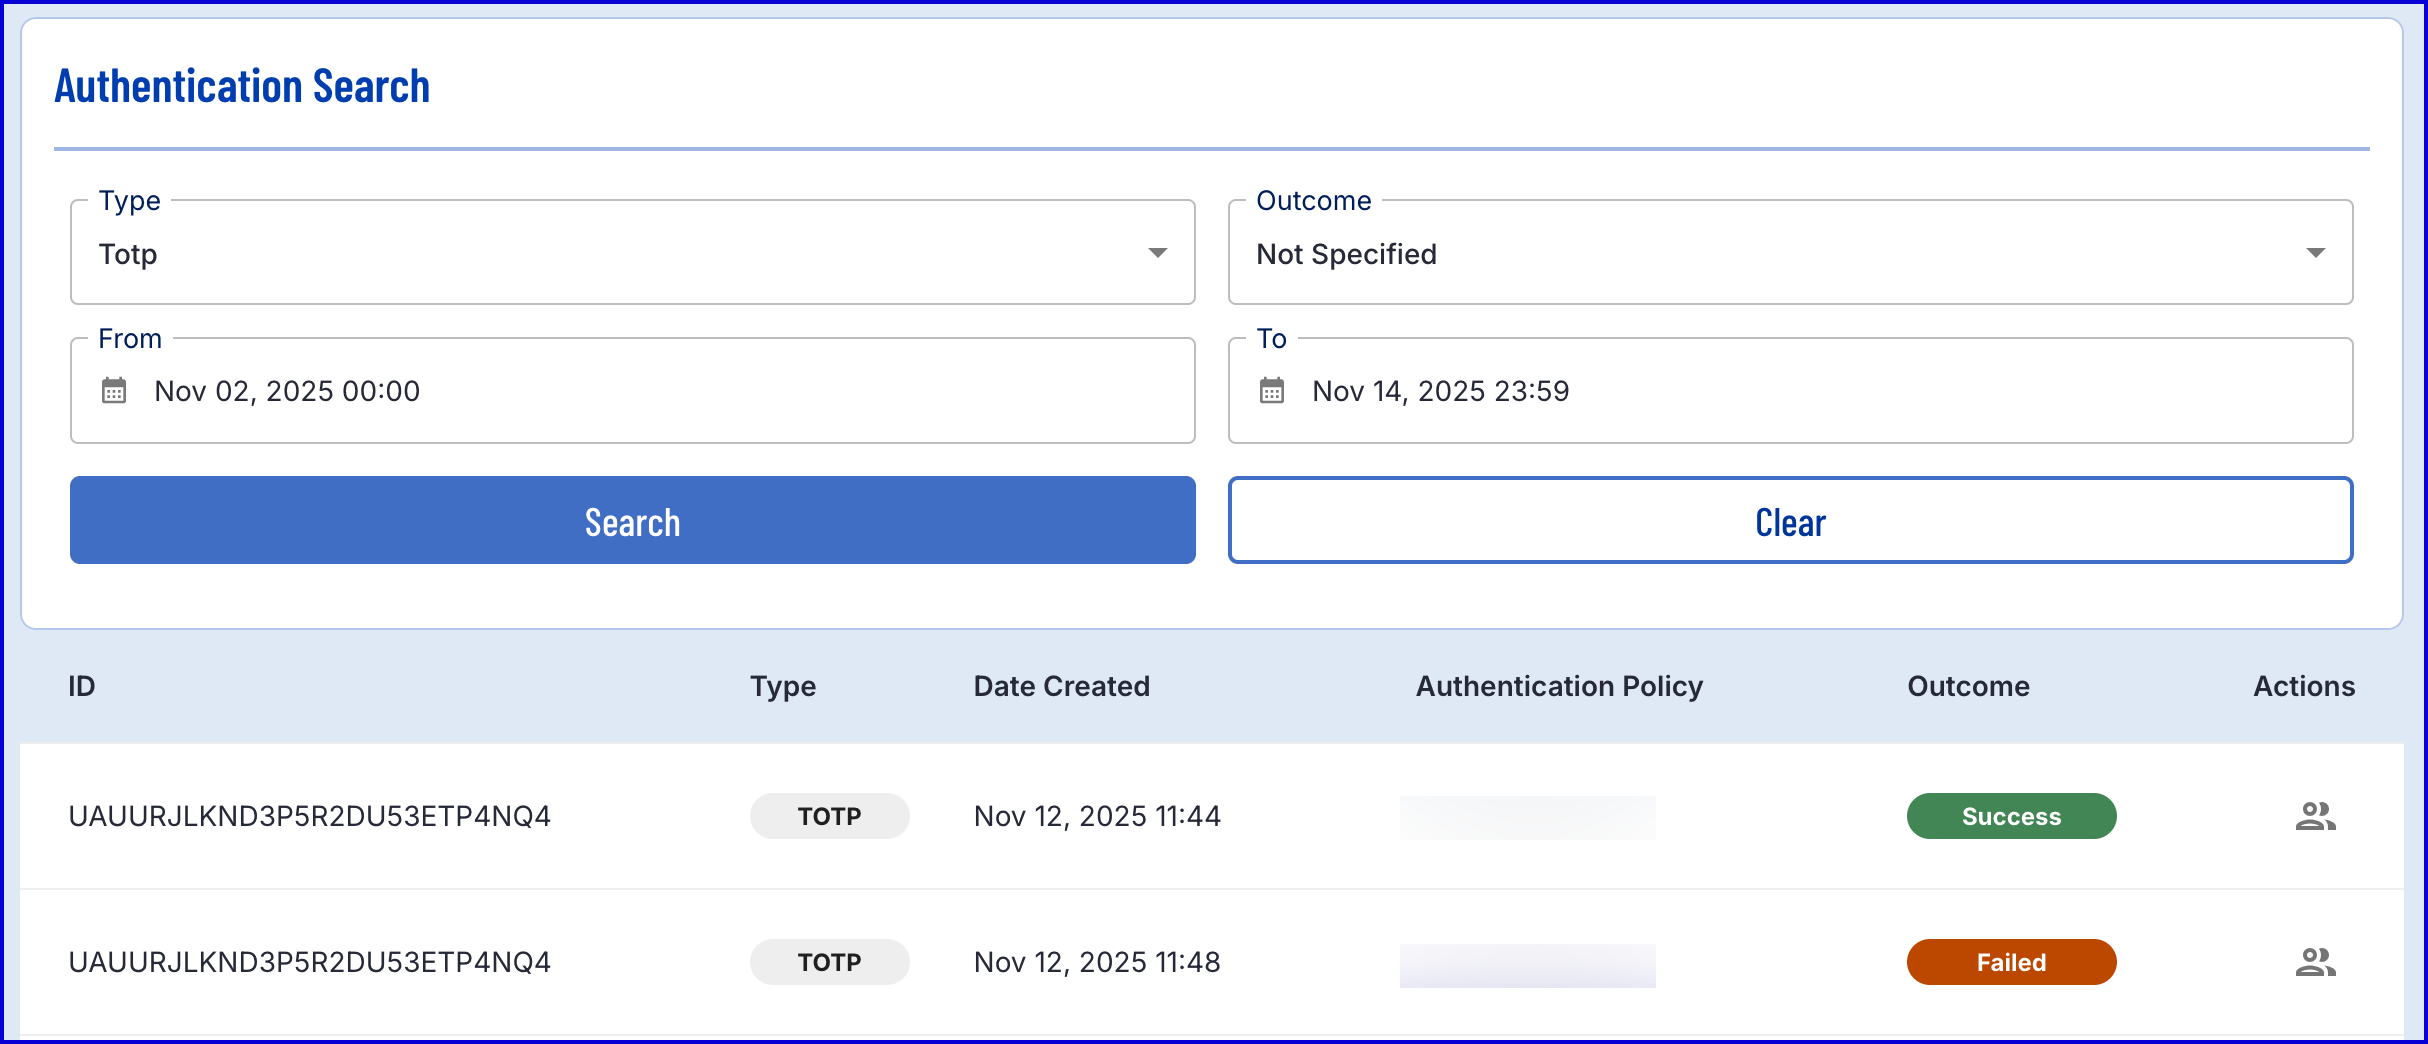
The results of a authentication attempt can be found in the Users page in the Backoffice.
Navigate to the Users page and use the search tools provided to find the Identity Store User that attempted TOTP authentication.
Under the Authentications section of the Users page, select 'Totp' and click 'Search' to view recent authentication attempts.