Early Access
A policy defines the method and rules for registration and authentication, which is used to verify the identity of a person. This page will cover the various configuration options available in the Backoffice and TrustX API.
Creating a Policy
To create a new policy from the Backoffice application,
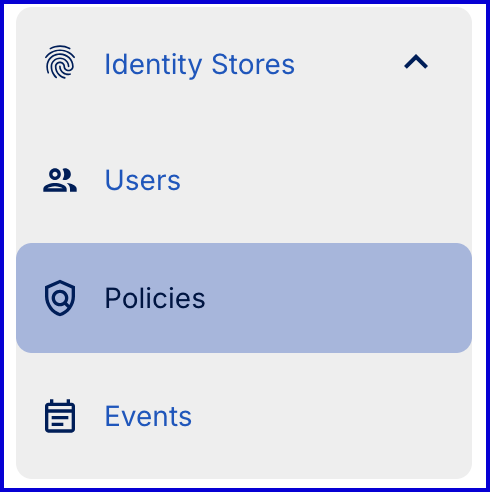
Navigate to Identity Store > Policies.
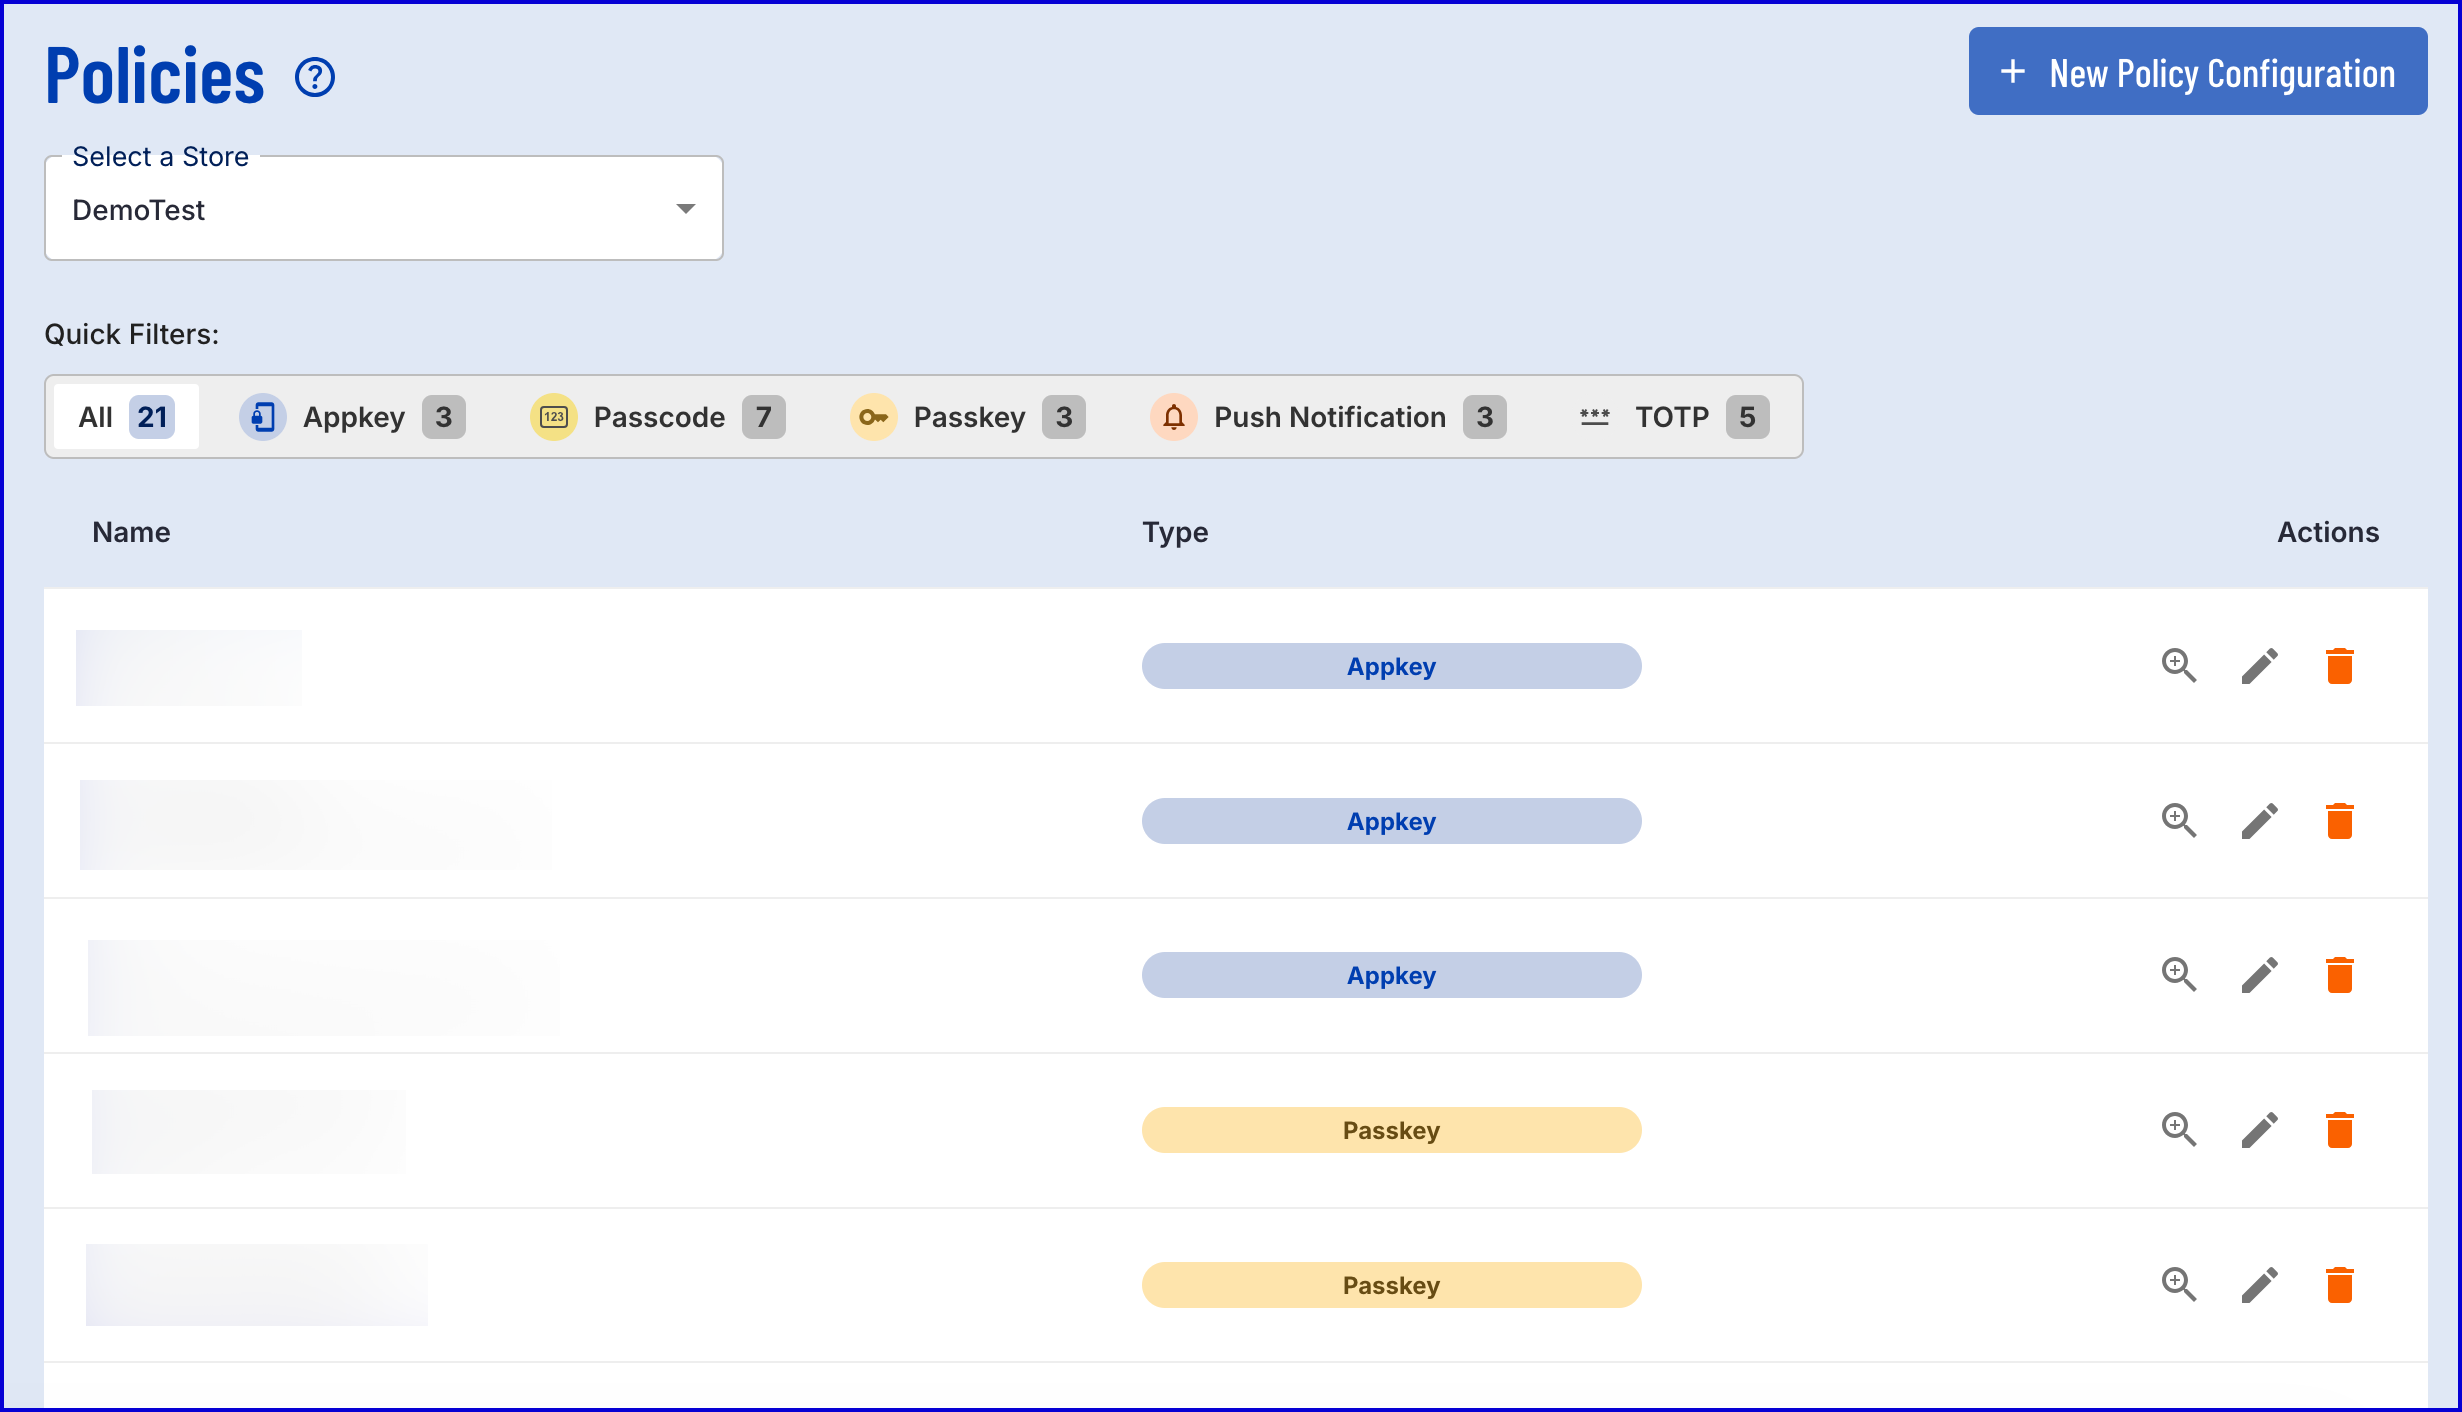
From the Policies landing page, click the 'New Policy Configuration' button.
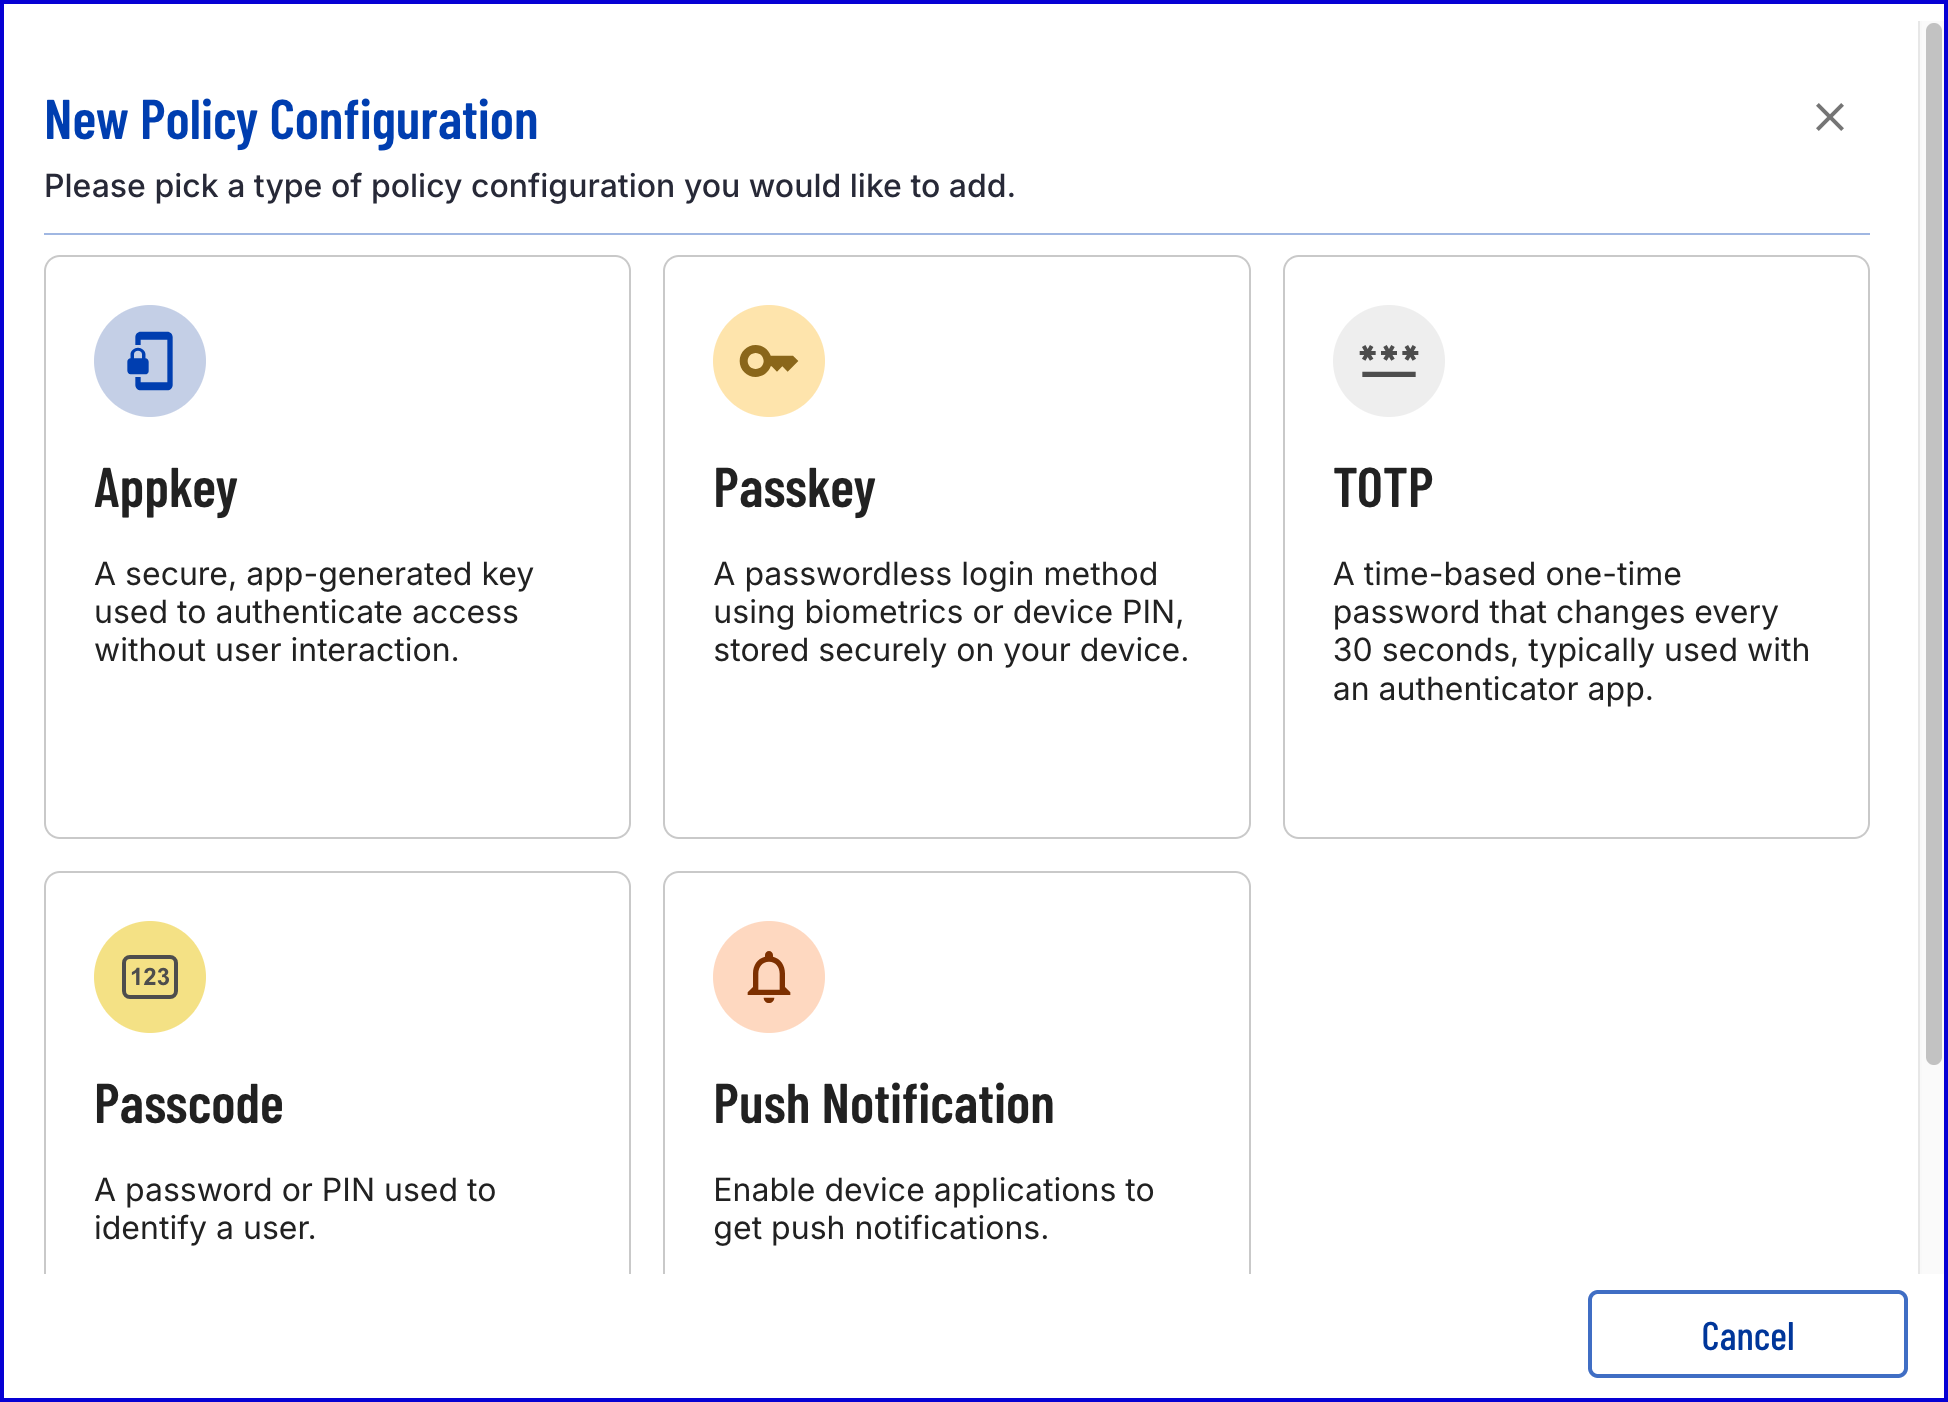
The 'New Policy Configuration' popup modal will appear where an Appkey, Passkey, TOTP, Passcode, or Push Notification policy can be created.
Appkey Configuration
This section will describe the steps required for configuring a new Appkey policy using the Backoffice application.
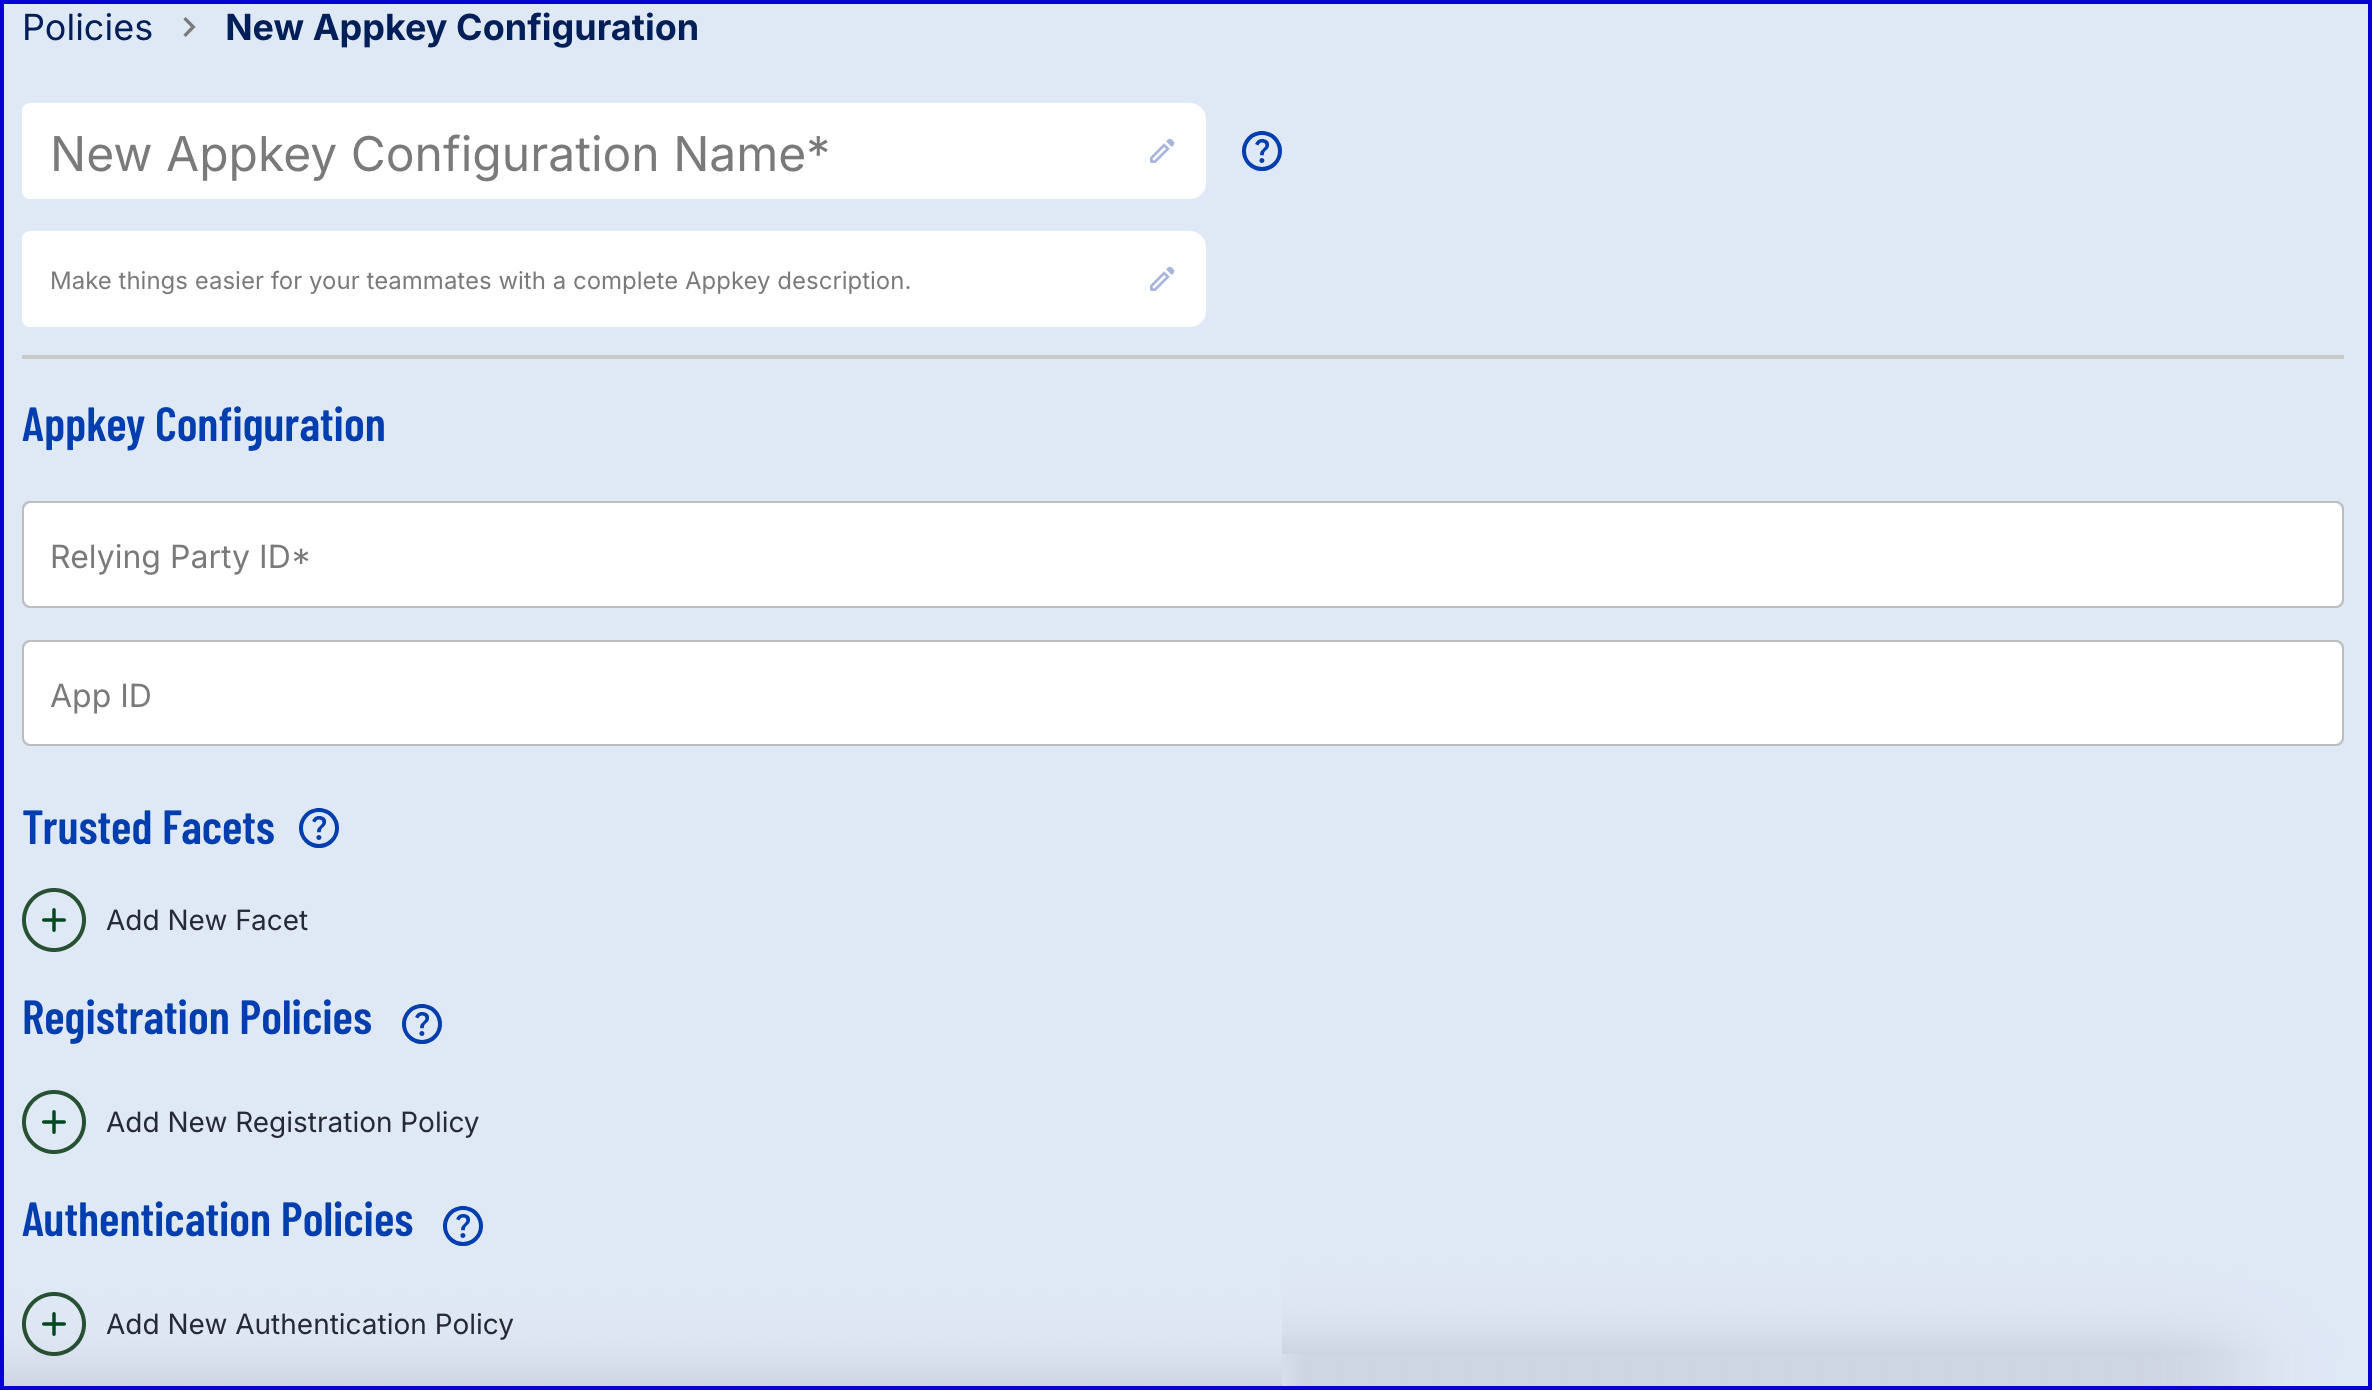
Each Appkey policy must include the following information:
Configuration Name - The name of the Appkey policy
Relying Party ID - The relying party ID.
Trusted Facets
In relation to Appkeys, a user agent represents the application or service used to initiate the authentication request. The user agent is identified by the facet ID.
The Trusted Facets contain a list of all authorized facet IDs that the relying party should trust. This ensures that only trusted applications are able to initiate an authentication request.
A facet ID is represented as a String. The format depends on the type of user agent:
Android - The facet ID is derived from a Base64-encoded SHA-1 or SHA-256 hash of the APK signing certificate.
iOS - The facet ID is represented as a URI that is formed using the app's bundle ID.
Web - The facet ID is represented by the origin of the web page that triggered the request. For example,
https://daon.com

When adding a trusted facet for web, make sure there is not a trailing backslash (/) at the end of the origin page.
For example, use
https://daon.com
not
https://daon.com/
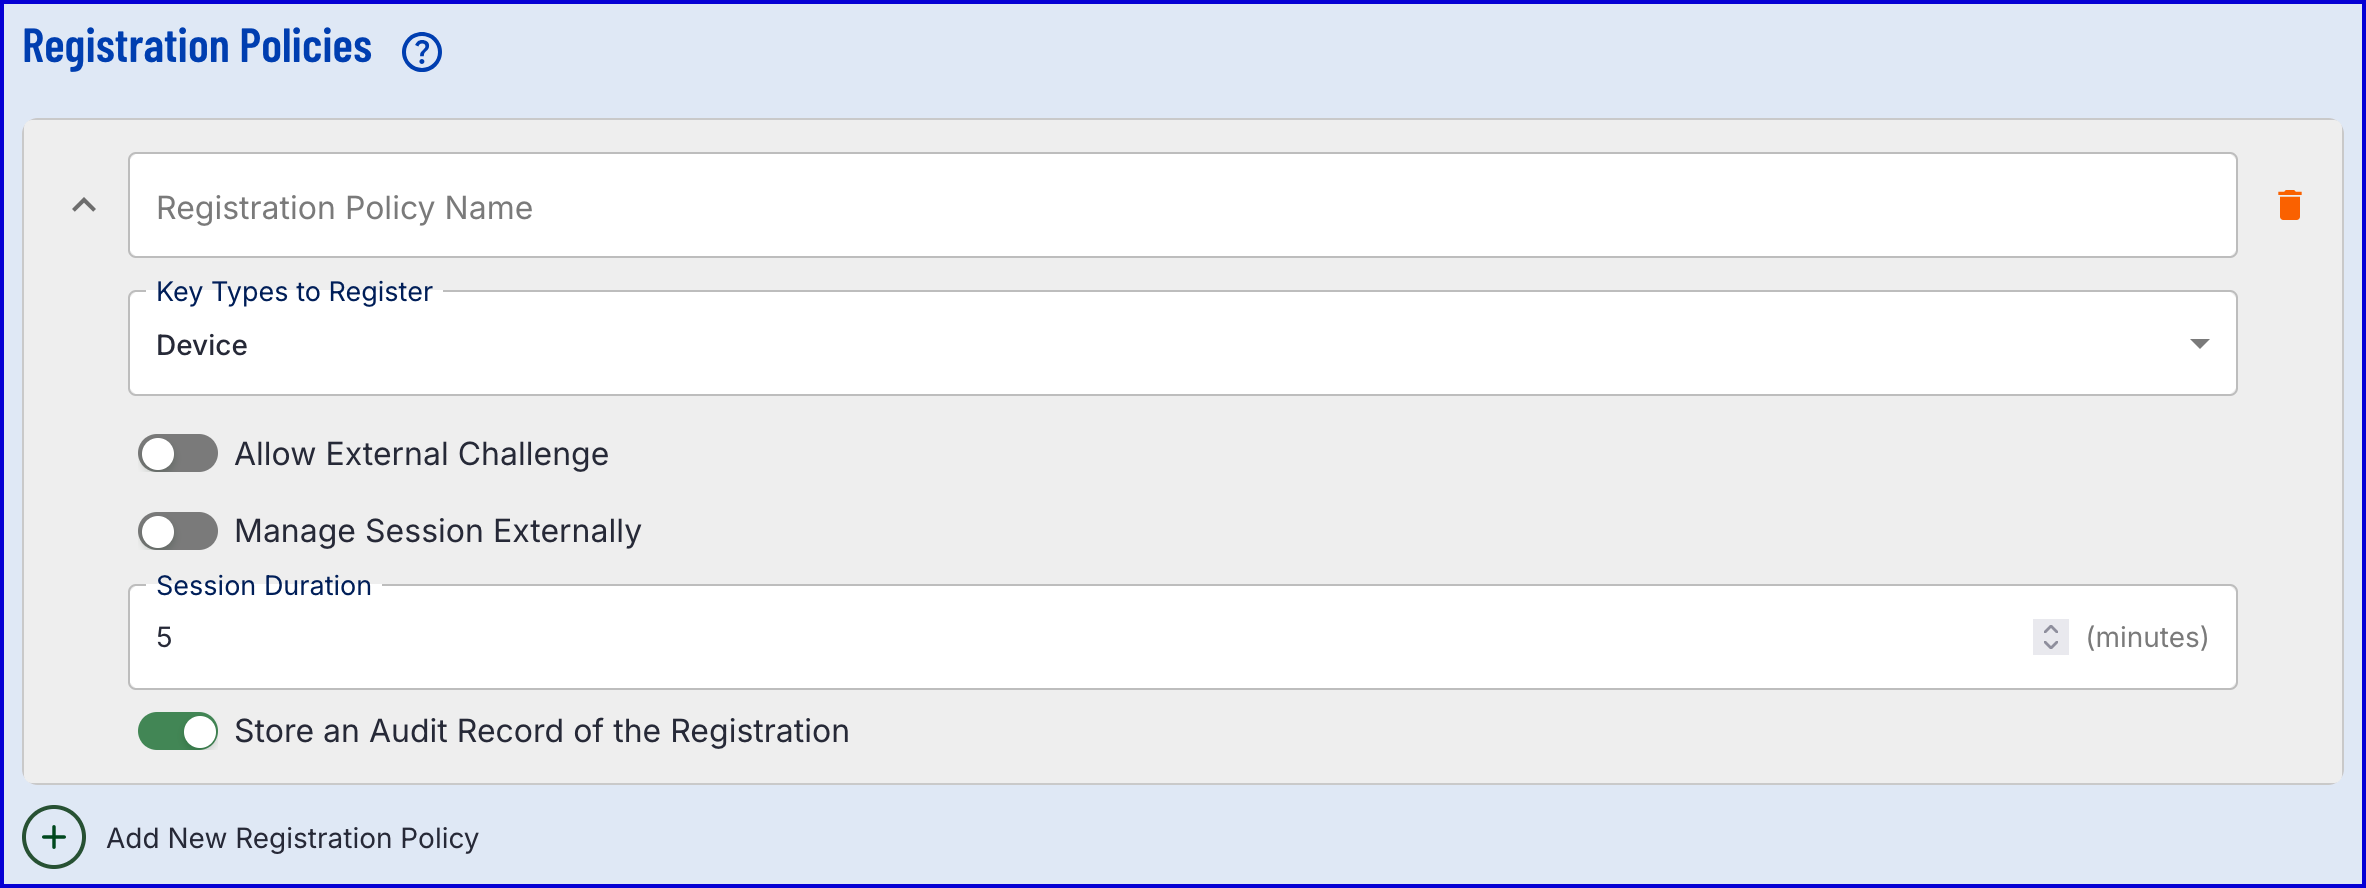
Registration Policies
This section enables the configuration of new registration policies. Multiple configurations can be made by clicking the 'Add New Registration Policy' button.
Parameter | Type | Description |
|---|---|---|
Registration Policy Name | String | The name of the registration policy. |
Key Types to Register | String | Determines what type of registration will be used.
|
Allow External Challenge | Boolean | Determines whether the registration challenge is performed externally or by TrustX. If enabled, the registration challenge is performed externally. |
Manage Session Externally | Boolean | If enabled, the session duration will be managed externally. If disabled, the session duration will be managed and set within TrustX. |
Session Duration | Integer | Determines how long the session will be alive, defined in minutes. |
Store and Audit Record of the Registration | Boolean | If enabled, an audit record will be stored of the registration. |
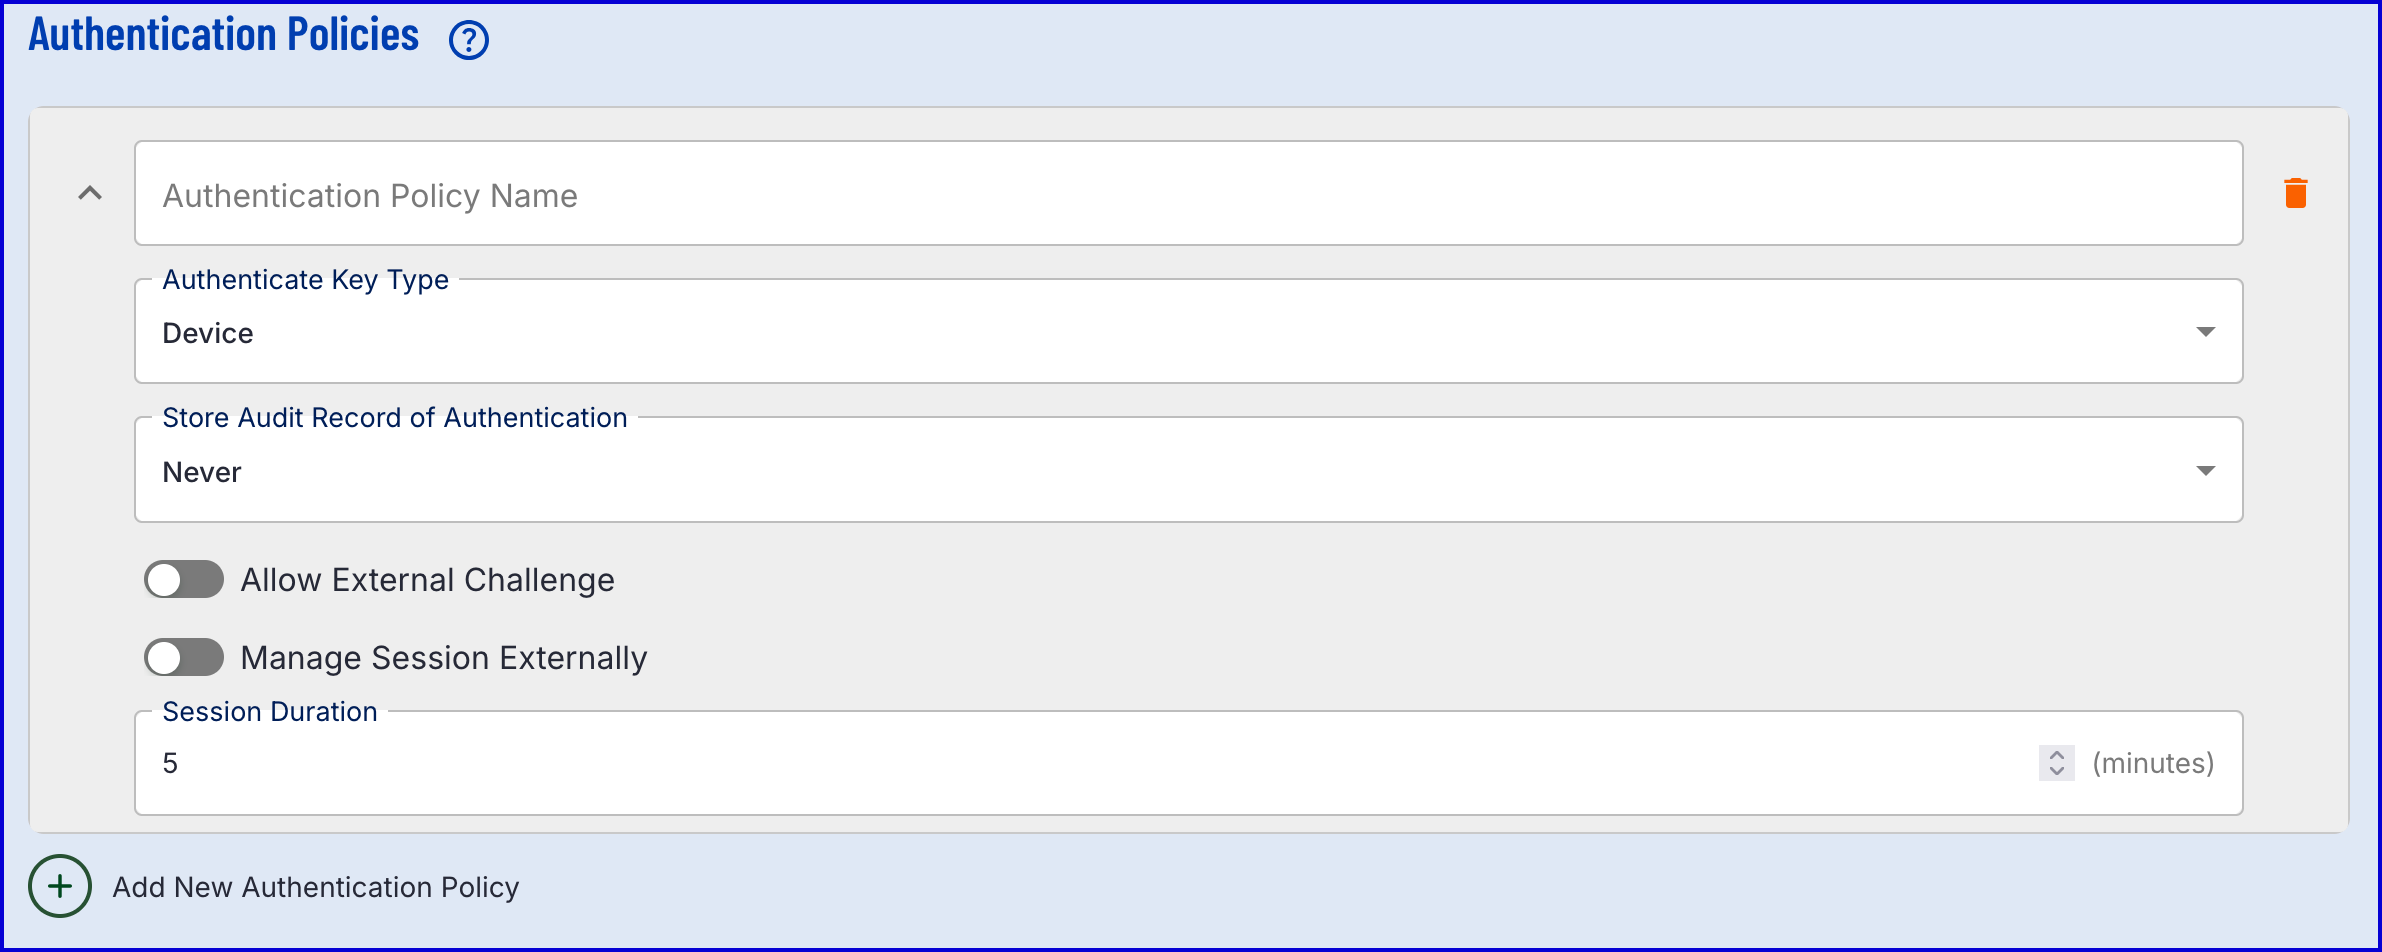
Authentication Policies
This section enables the configuration of new authentication policies. Multiple configurations can be made by clicking the 'Add New Authentication Policy' button.
Parameter | Type | Description |
|---|---|---|
Registration Policy Name | String | The name of the authentication policy. |
Authentication Key Type | String | Determines what type of authentication will be used.
|
Allow External Challenge | Boolean | Determines whether the authentication challenge is performed externally or by TrustX. If enabled, the authentication challenge is performed externally. |
Manage Session Externally | Boolean | If enabled, the session duration will be managed externally. If disabled, the session duration will be managed and set within TrustX. |
Session Duration | Integer | Determines how long the session will be alive, defined in minutes. |
Store and Audit Record of the Authentication | Boolean | If enabled, an audit record will be stored of the authentication. |
Passkey Configuration
This section will describe the steps required for configuring a new Passkey policy using the Backoffice application.
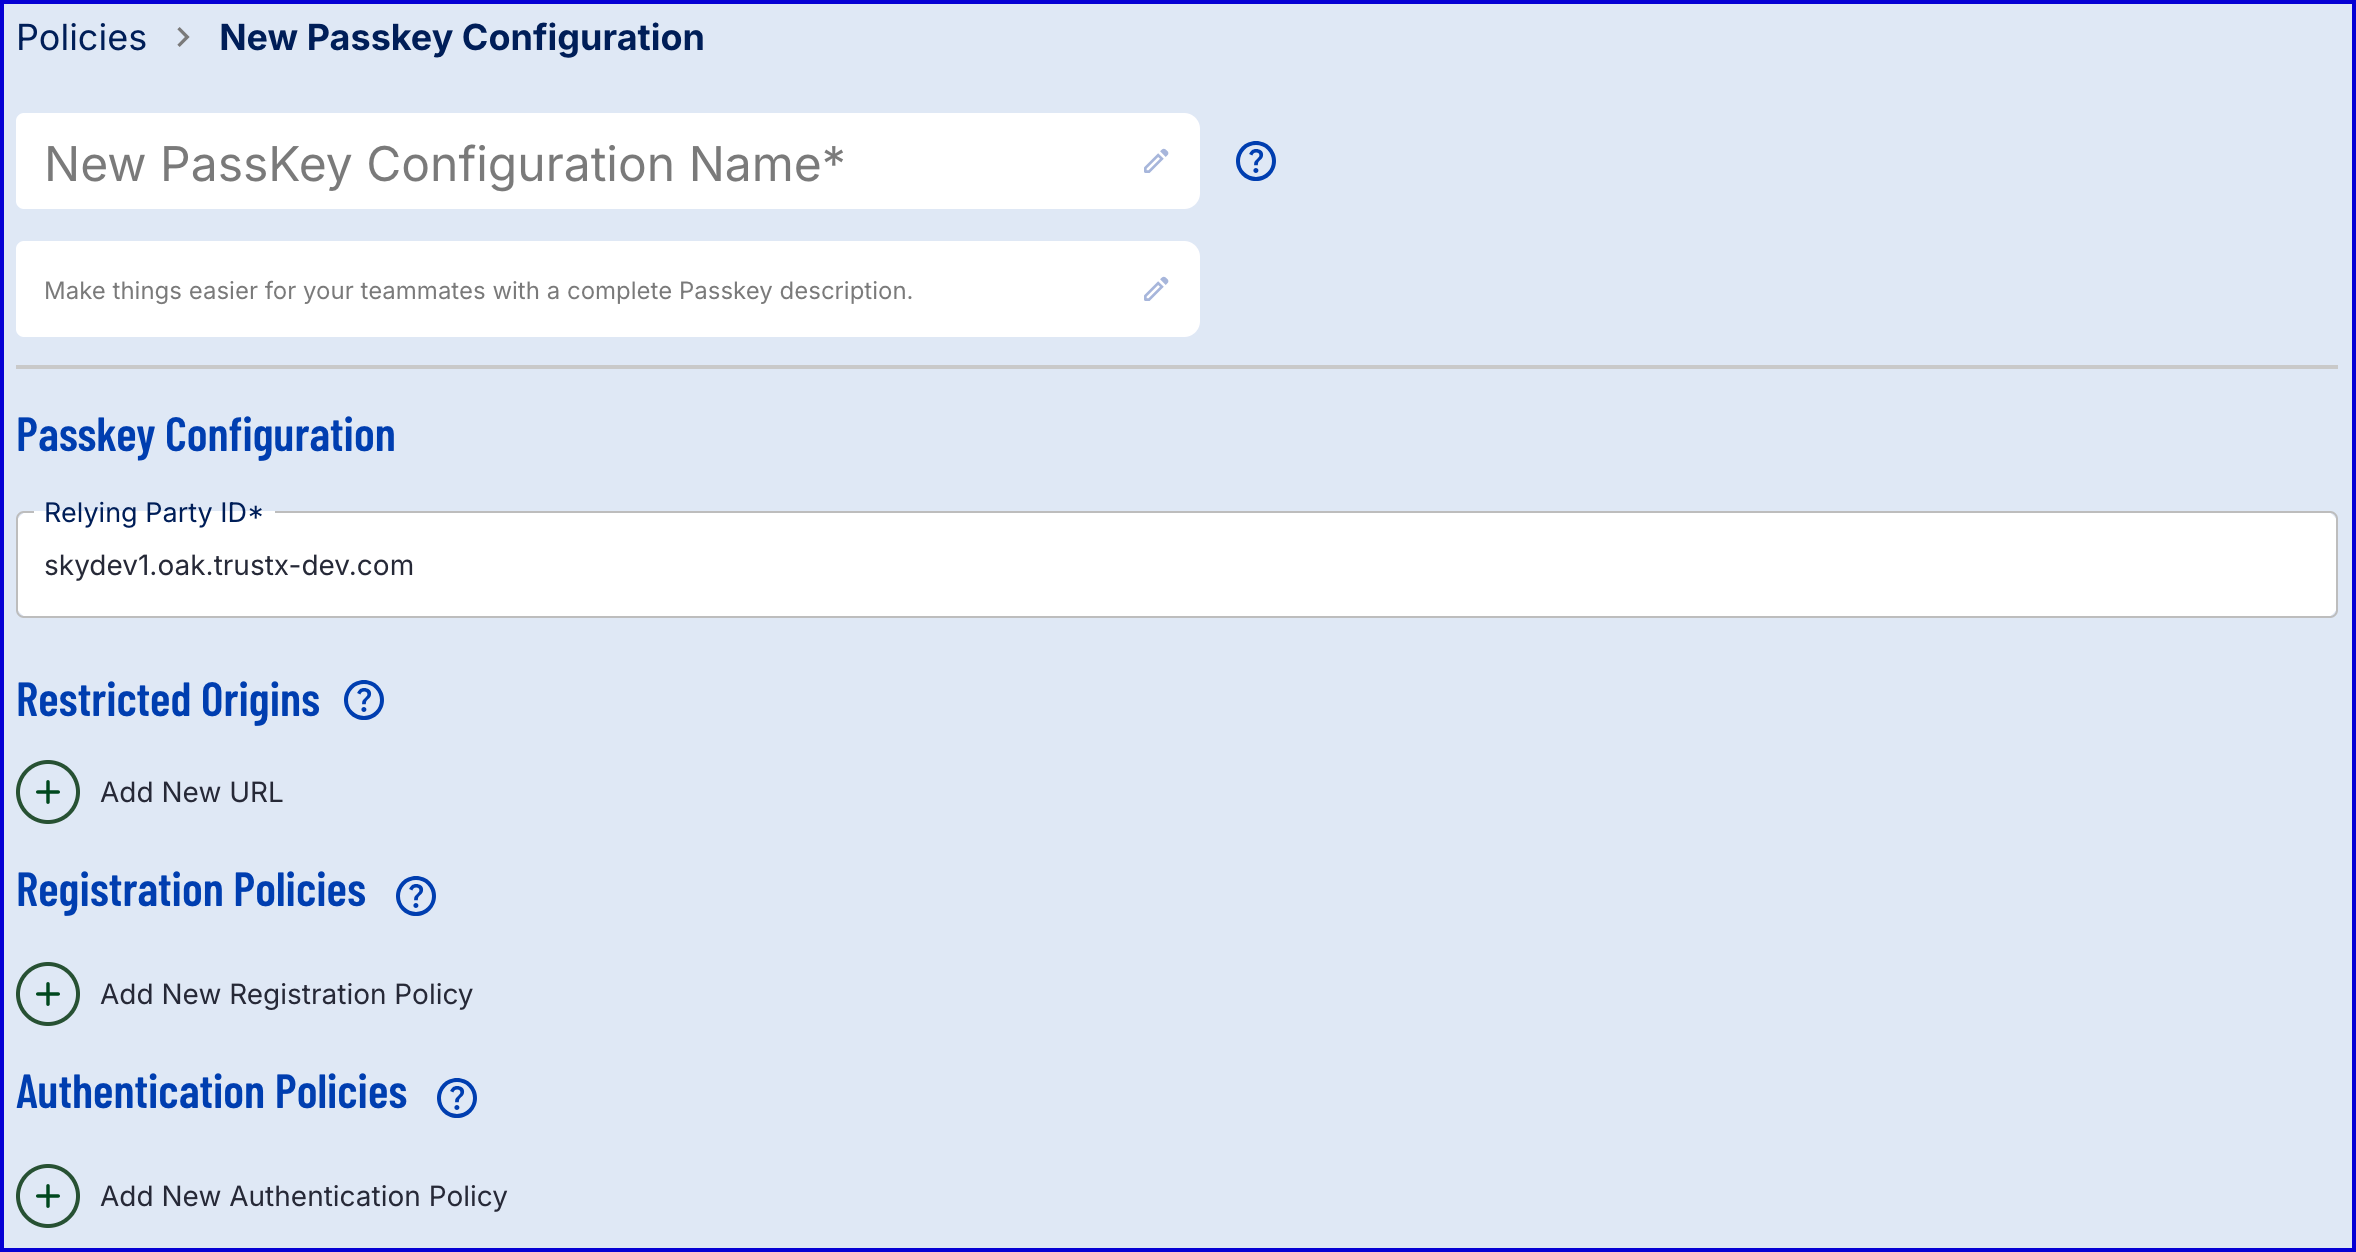
Each Passkey policy must include the following information:
Configuration Name - The name of the Passkey policy.
Relying Party ID - The relying party ID.
Restricted Origins
The Restricted Origins section defines a list of acceptable origins. If supplied, passkey authentications will be restricted to the URLs defined in this section. If not supplied, passkey authentications are restricted to the relying party ID domain.

Registration Policies
This section enables the configuration of new registration policies. Multiple configurations can be made by clicking the 'Add New Registration Policy' button.

Parameter | Type | Description |
|---|---|---|
Registration Policy Name | String | The name of the registration policy. |
Key Types to Register | String | Determines what type of registration will be used. Currently only 'Platform' is supported, meaning the registration is embedded in the User's device and comprising of biometric and hardware chips for protecting Passkeys. |
Allow External Challenge | Boolean | Determines whether the registration challenge is performed externally or by TrustX. If enabled, the registration challenge is performed externally. |
Manage Session Externally | Boolean | If enabled, the session duration will be managed externally. If disabled, the session duration will be managed and set within TrustX. |
Session Duration | Integer | Determines how long the session will be alive, defined in minutes. |
Attestation Mode | String | Accepts None (default) or Direct. If set to 'None', no identity information is returned. If set to 'Direct', the browser requests a raw attestation statement from the authenticator and passes this information back to the server unchanged. This lets the server verify exactly which authenticator device was used. |
Passkey Location Hint | Optionally guide browsers on where users are most likely to have a passkey. Select one or more options and arrange them by preference. Three options are available: Client Device - Passkey operation satisfied by a platform authenticator attached to the client device. Security Key - Passkey operation satisfied by a physical security key. Hybrid - Passkey operation satisfied by a 'general-purpose' authenticator such as smartphones. | |
Store an Audit Record of the Registration | Boolean | If enabled, an audit record will be stored of the registration. |
Authentication Policies

Parameter | Type | Description |
|---|---|---|
Authentication Policy Name | String | The name of the authentication policy name |
Authenticate Key Type | String | Determines what type of authenticator will be used. Currently only 'Platform' is supported, meaning the authenticator is embedded in the User's device and comprising of biometric and hardware chips for protecting Passkeys. |
Store an Audit Record of the Registration | Boolean | If enabled, an audit record will be stored of the registration. |
Allow External Challenge | Boolean | Determines whether the authentication challenge is performed externally or by TrustX. If enabled, the authentication challenge is performed externally. |
Manage Session Externally | Boolean | If enabled, the session duration will be managed externally. If disabled, the session duration will be managed and set within TrustX. |
Session Duration | Integer | Determines how long the session will be alive, defined in minutes. |
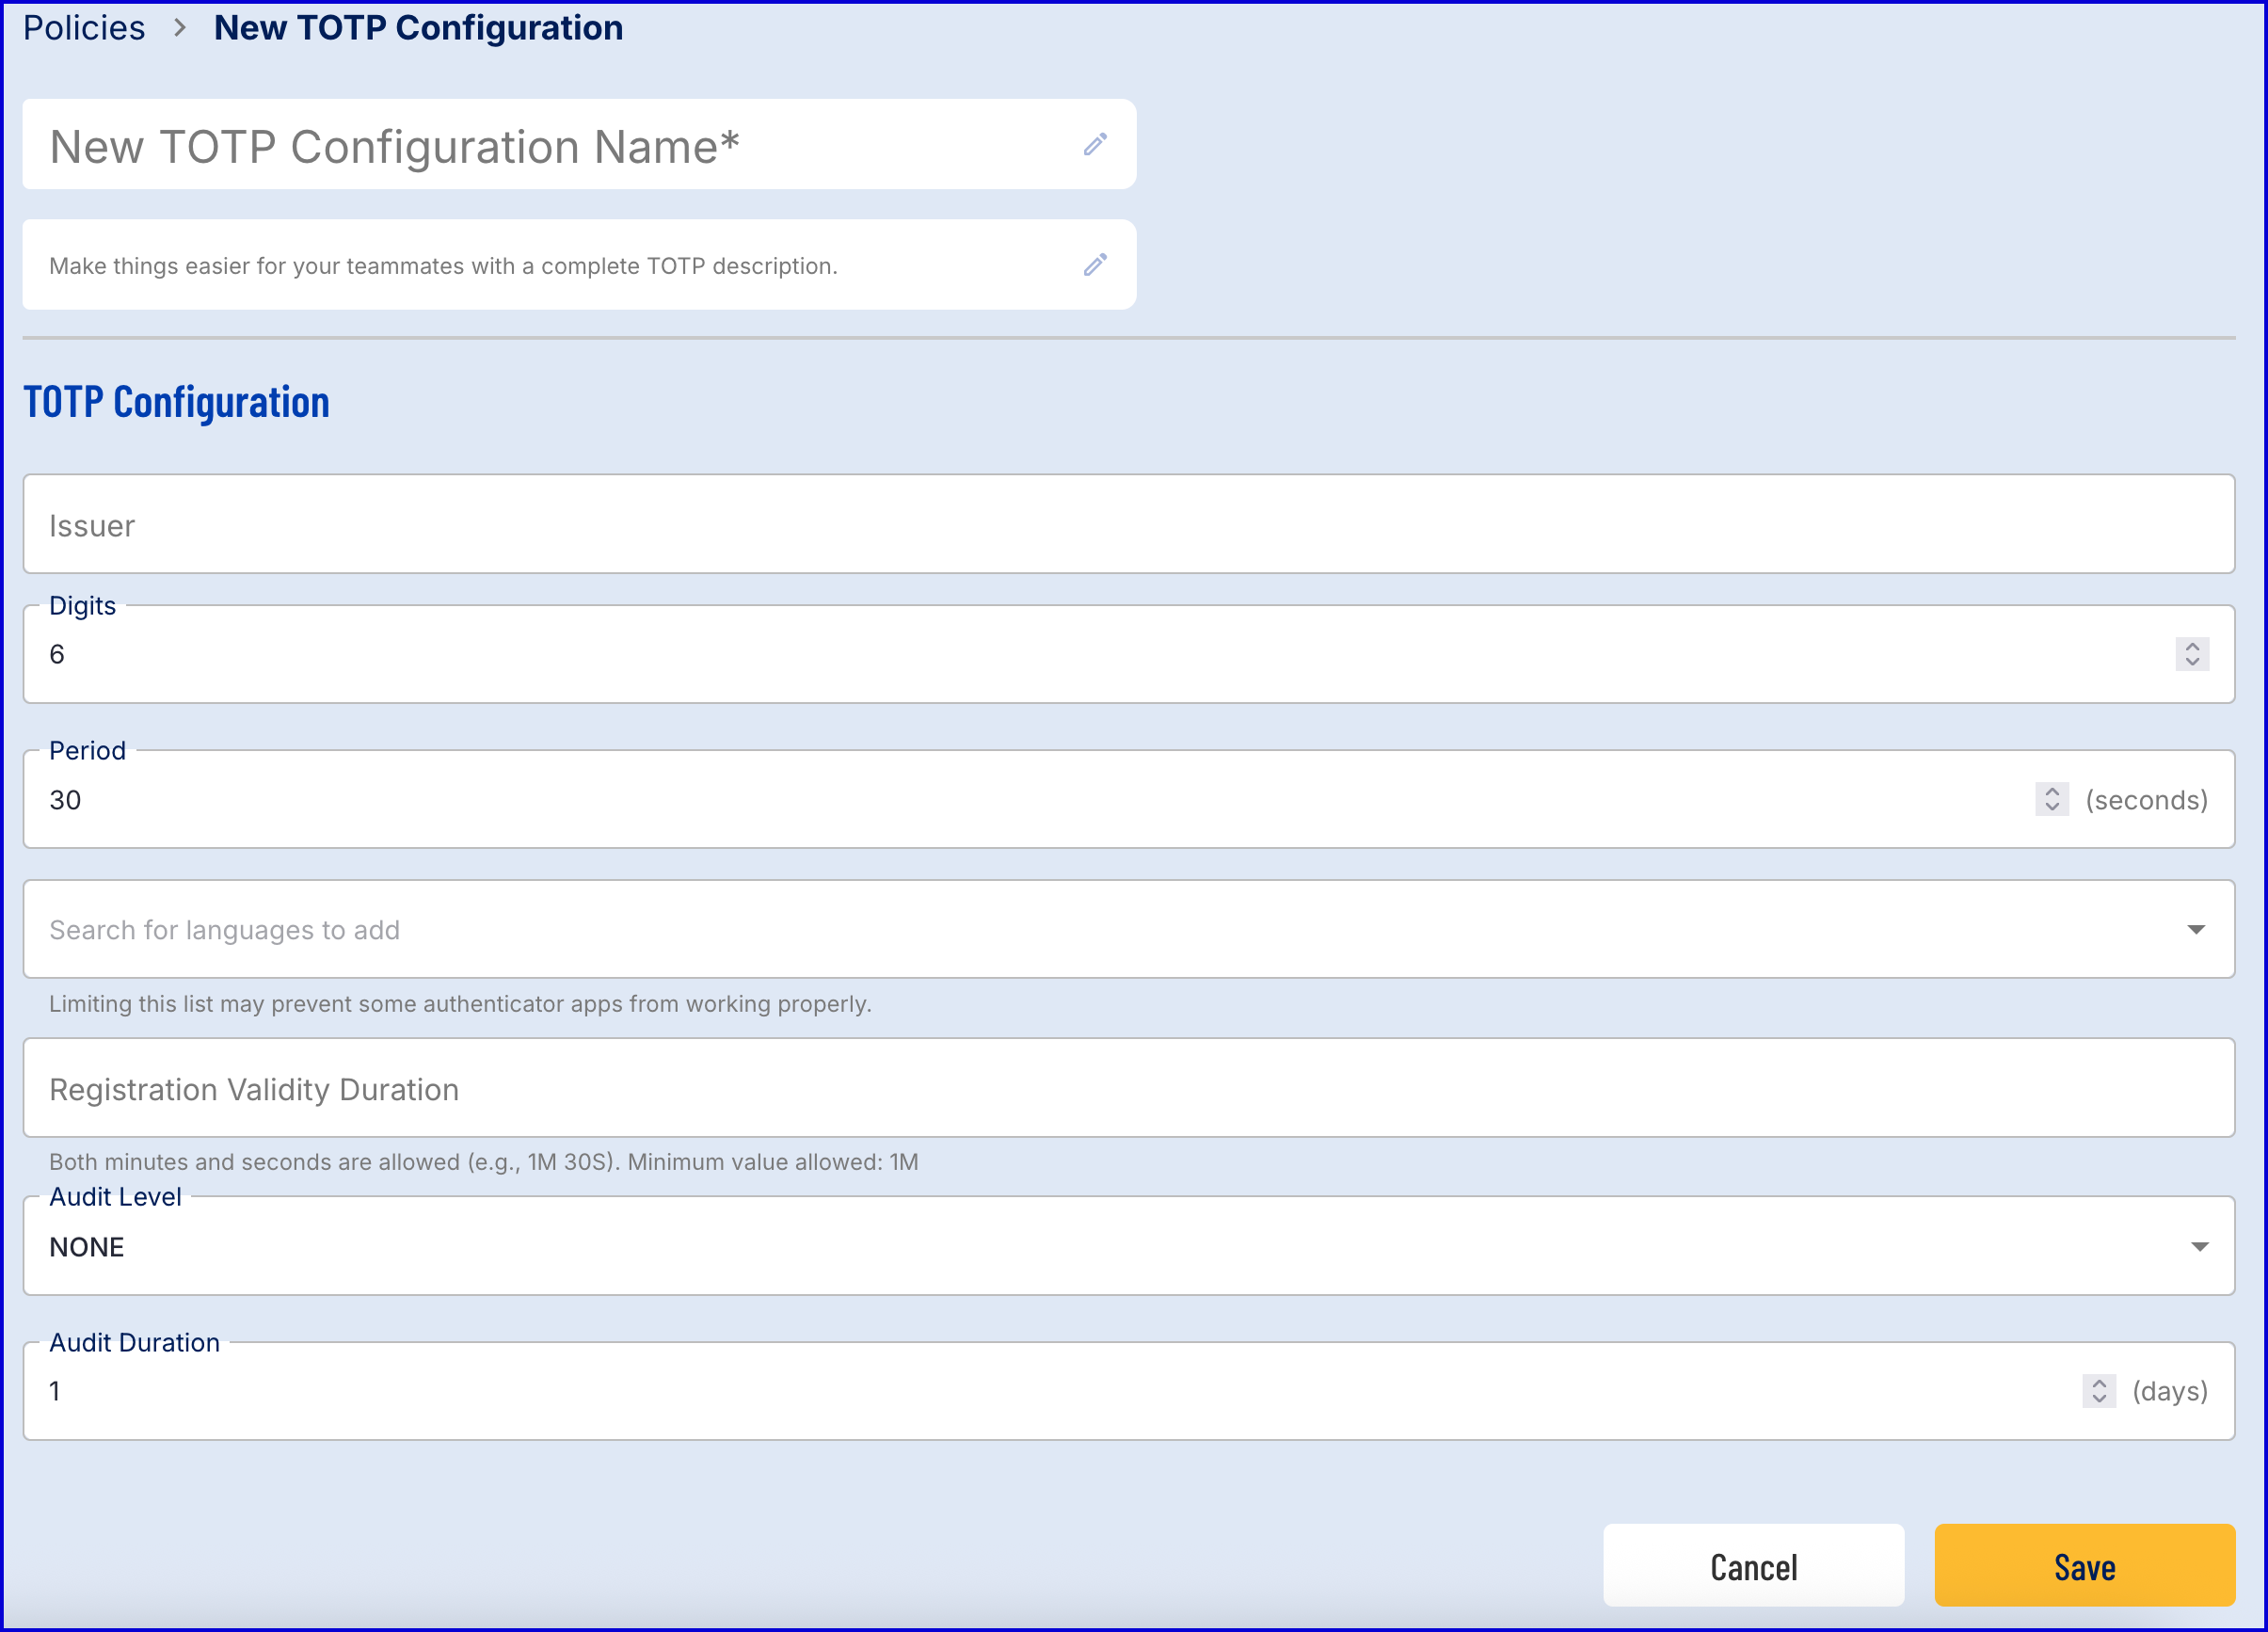
TOTP Configuration
This section will describe the steps required for configuring a new TOTP policy using the Backoffice application.
Parameter | Type | Description |
|---|---|---|
Issuer | String | The name of the issuer of the authentication code, this name will appear in the authenticator app to identify the authenticator when the QR-code is scanned. |
Digits | Integer | The length of the generated password in digits. |
Period | Integer | The period in seconds that the generated password will be valid before a new password is generated. |
Languages | List [String] | The list of supported algorithms that can be used to complete TOTP registration and authentication. |
Registration Validity Duration | DateTime | Determines how long a pending registration attempt will be valid before expiring. This field is defined in the format D H M. For example: 2D 5H 30M |
Audit Level | String | Whether TOTP authentications are audited.
|
Audit Duration | Integer | Number of days that audit data will be retained. |
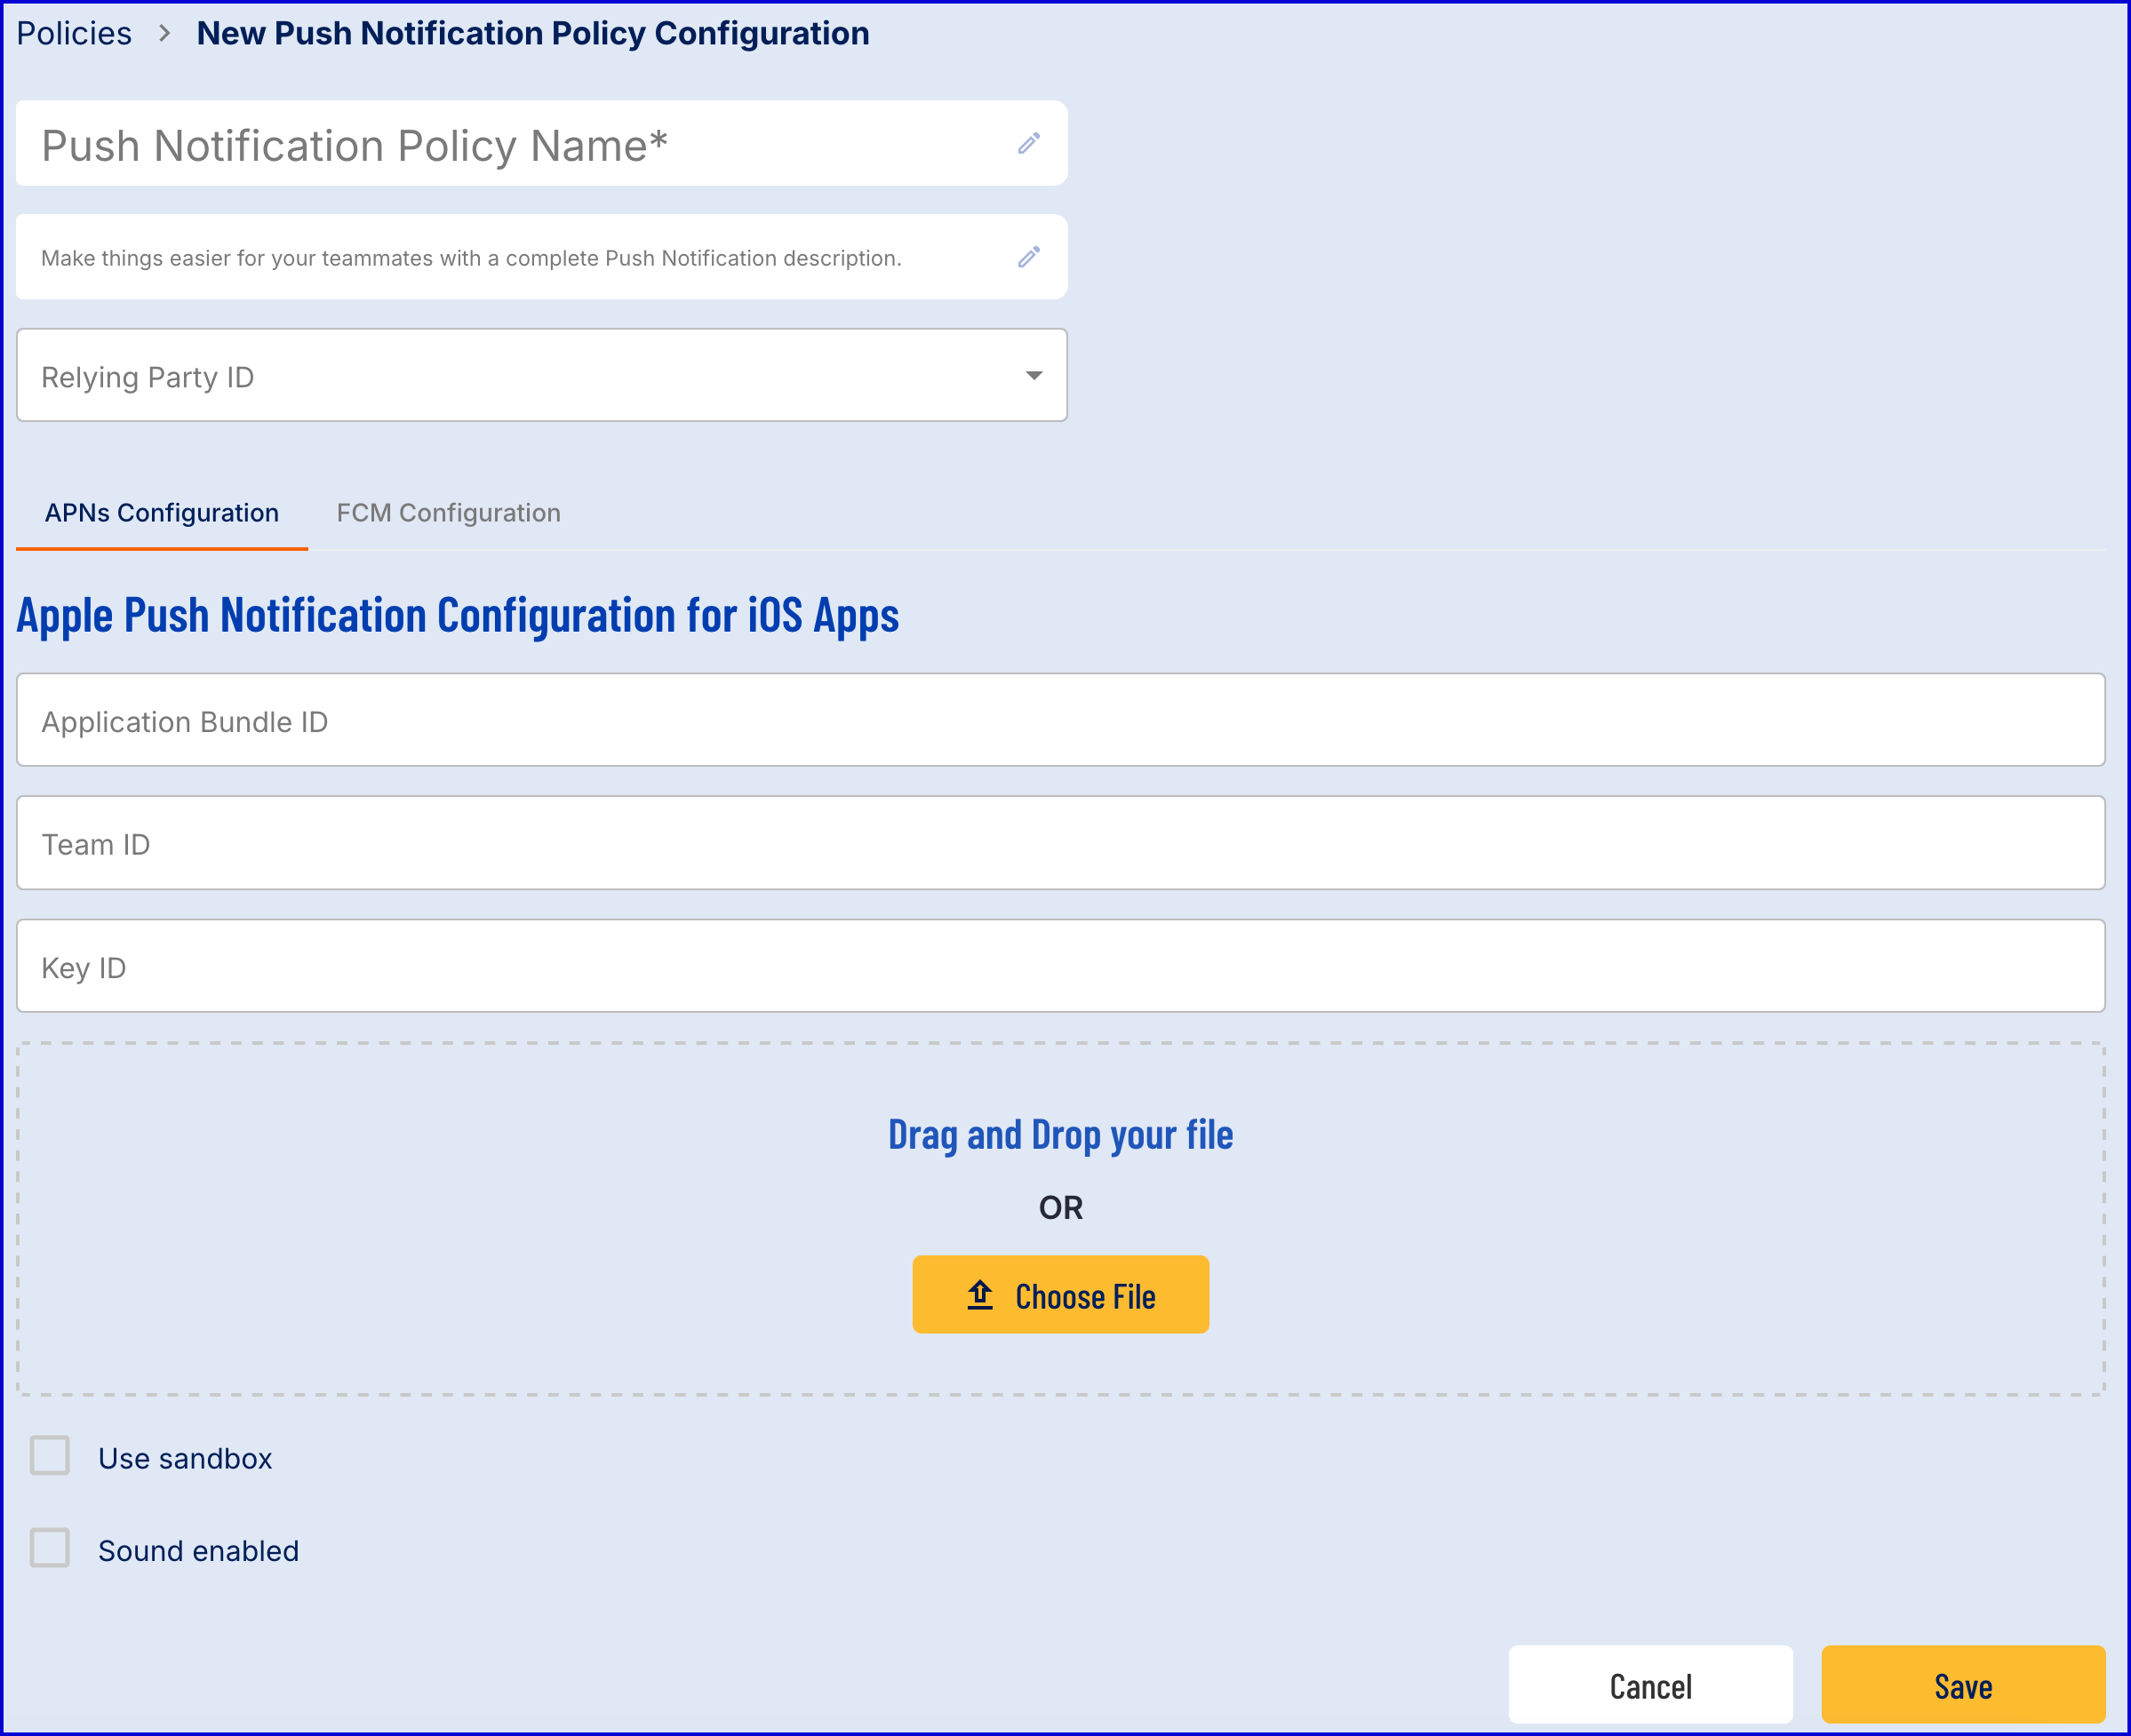
Push Notification Configuration
This section will describe the various configuration options available when defining a push notification policy.
Configuration Option | Description |
|---|---|
Push Notification Policy Name | Mandatory. The name given to the push notification policy. |
Description | Optional. An optional description for the push notification policy. |
Relying Party ID | Mandatory. The Appkey relying party. Push notifications are only supported for device applications configured for Appkeys. |
APNs Configuration | |
Application Bundle ID | The Bundle ID that uniquely identifies your App, for example com.daon.trustx. To avoid conflicts, Apple encourages developers to use reverse domain name notation for choosing an application's bundle identifier. Must contain only alphanumeric characters (A–Z, a–z, and 0–9), hyphens (-), and periods (.) |
Team ID | The issuer key, the value for which is the 10-Character Team ID you use for developing your company apps. Obtain this value from your developer.apple.com account. |
Use Sandbox | Optional. Enable APN sandbox environment. |
Sound Enabled | Optional. Whether to enable ping sound when notification is sent. |
FCM Configuration | |
FCM URL | The FCM URL - available from https://fcm.googleapis.com/v1/projects/my_project_id/messages:send |
APN Configuration
To configure iOS push notifications, you’ll need four pieces of information from your Apple Developer account.
Application Bundle ID
Go to https://developer.apple.com/account/resources/identifiers/list.
Under Identifiers, find your app.
Copy the Bundle ID (e.g., com.yourcompany.yourapp).
Team ID
Log in to https://developer.apple.com/account/.
Click [Account Name] → Membership Details. in the top-right corner.
Copy the Team ID listed there.
Key ID
In your Apple Developer account, navigate to Certificates, Identifiers & Profiles → Keys
Create a new key (or select an existing one) and enable Apple Push Notifications service (APNs).
After creating the key, copy the Key ID.
Token Signing Key
When you create the key, download the .p8 file immediately (Apple only allows one download).
Open the .p8 file in a text editor.
Copy the entire content (including -----BEGIN PRIVATE KEY----- and -----END PRIVATE KEY-----) and paste it into the Token Signing Key field.
You must have an Apple Developer Program membership.
Keep your .p8 file secure—Apple does not allow re-downloading.
If you lose the file, you will need to create a new key.
FCM Configuration
To configure Android push notifications, you’ll need two pieces of information from your Firebase project.
FCM URL
Select your project.
Navigate to Project Settings → Cloud Messaging.
Copy the FCM endpoint URL (usually https://fcm.googleapis.com/fcm/send).
Paste it into the FCM URL field.
Google Application Credentials
In the same Cloud Messaging section, click Manage Service Accounts or go to https://console.cloud.google.com/.
Create a Service Account for your Firebase project if one does not exist.
Generate a JSON key for the service account.
Open the downloaded .json file in a text editor.
Copy the entire JSON content and paste it into the Google Application Credentials field.
You must have a Firebase project linked to your Android app.
Keep your service account JSON secure—do not share it publicly.
If compromised, revoke the key and generate a new one.
Passcode Configuration
This section will describe the various configurations available when creating a passcode policy in the Backoffice.
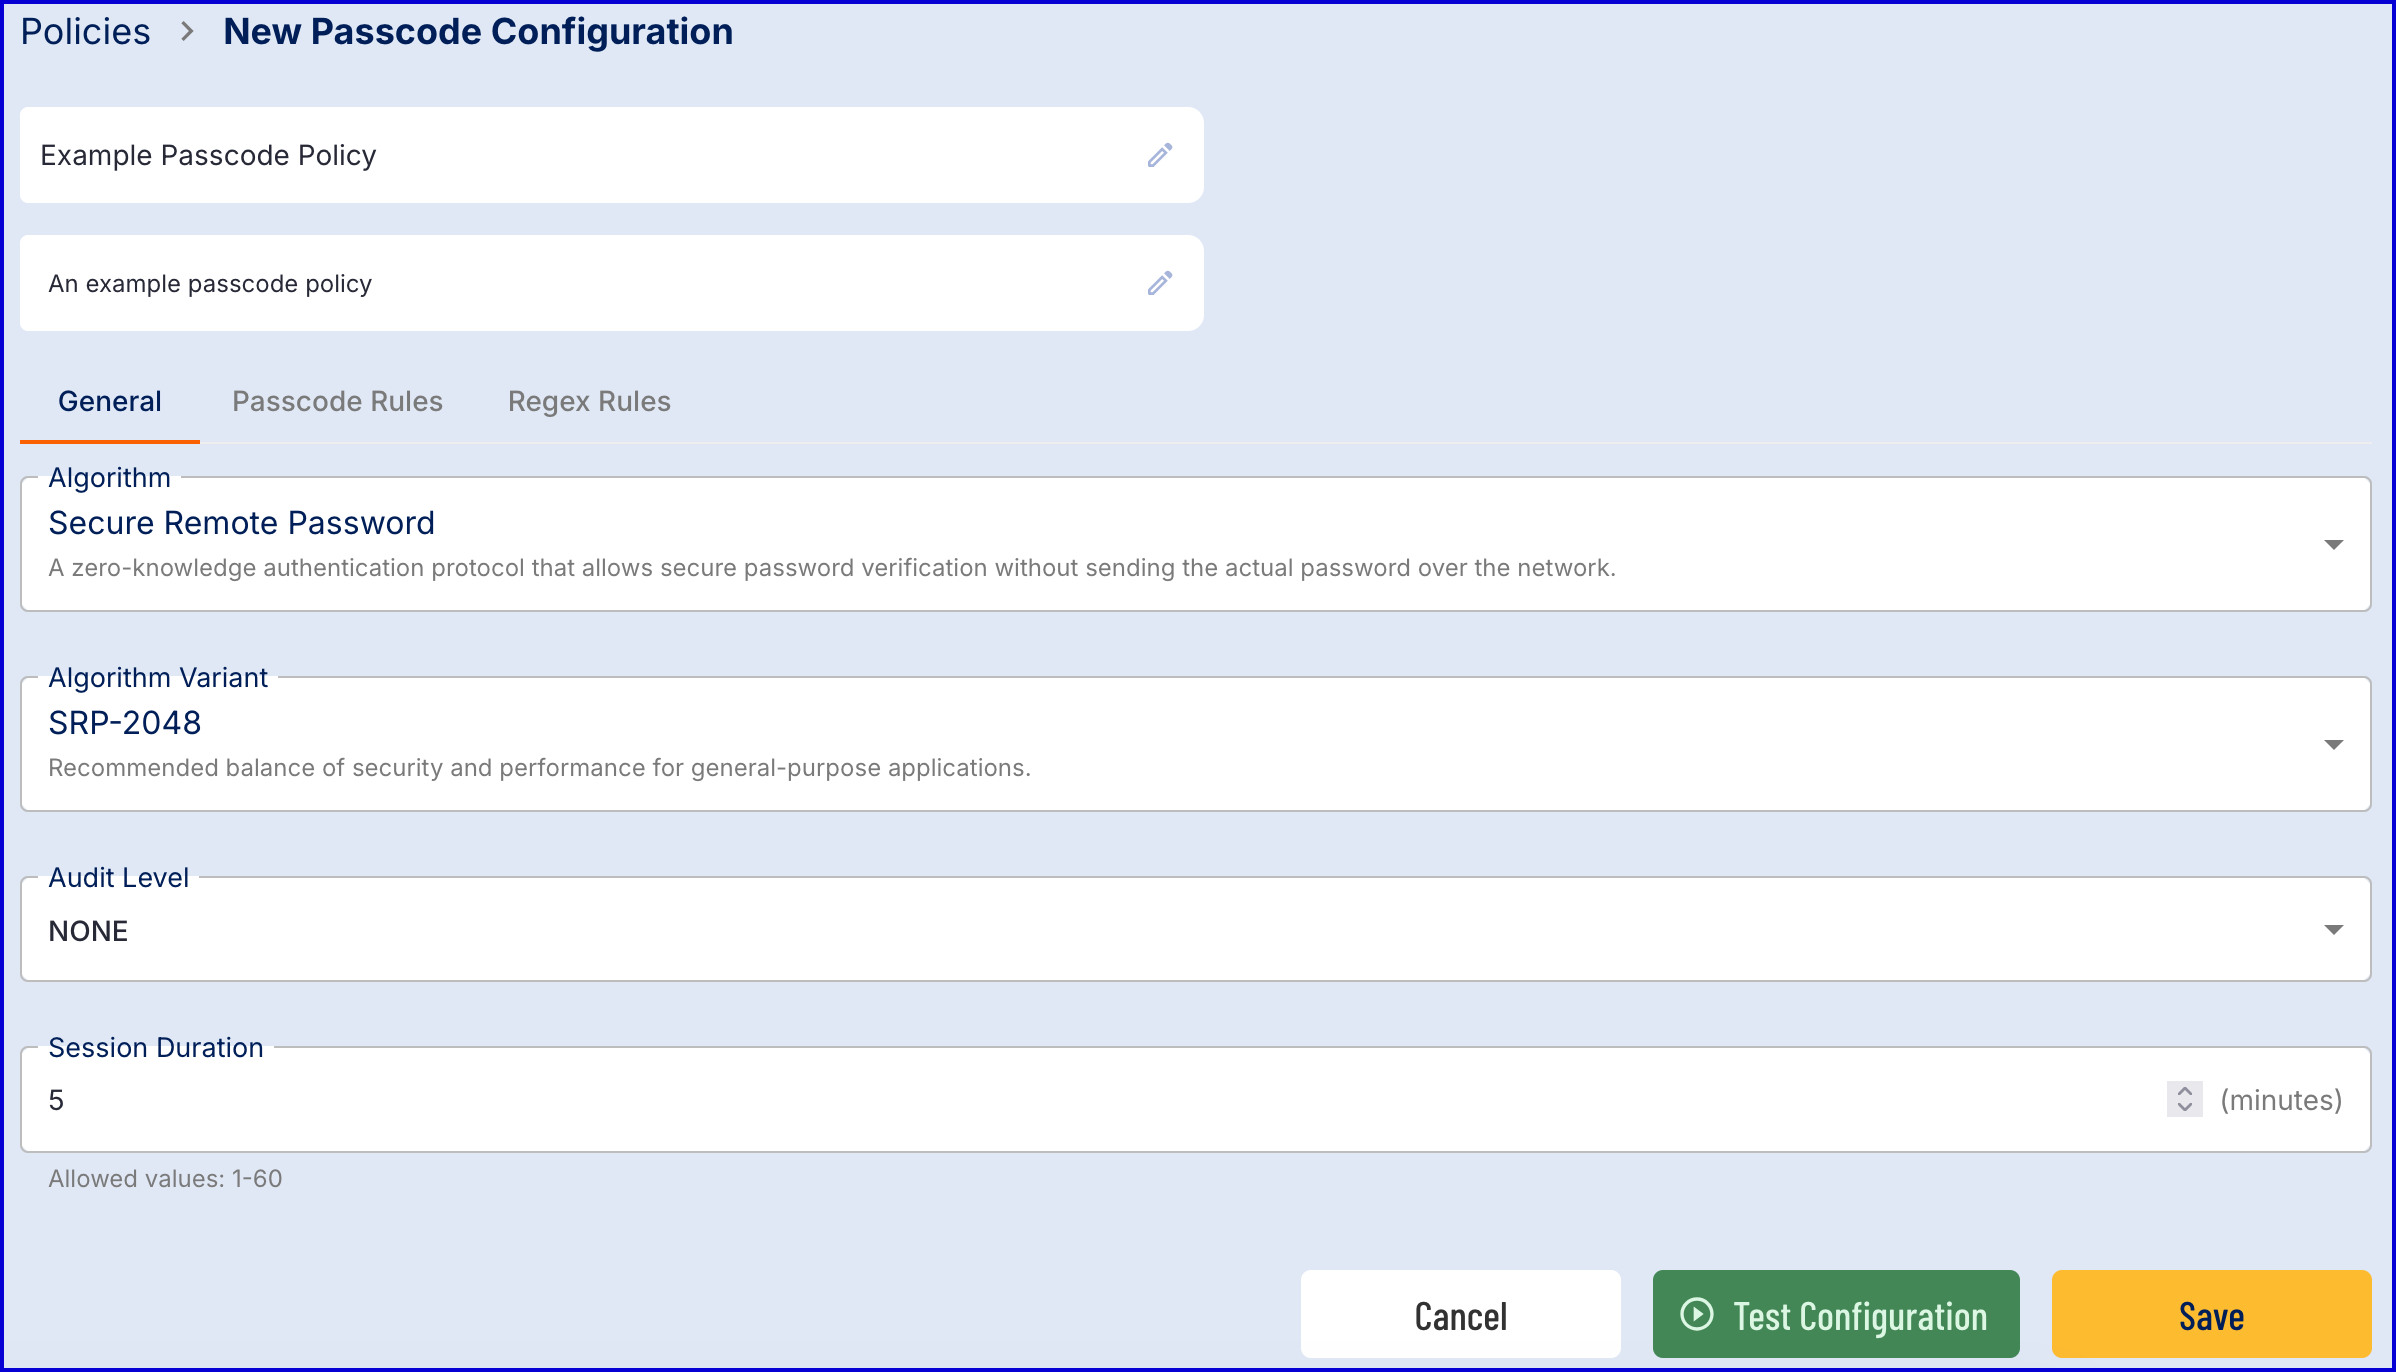
General
The 'General' settings tab provides configuration options relating to the algorithm and audit level. The table below describes each field and the options available.
Field | Description |
|---|---|
Algorithm | Currently only Secure Remote Password (SRP) is supported. The SRP algorithm a zero-knowledge authentication protocol that allows secure password verification without sending the actual password over the network. |
Algorithm Variant | The algorithm variant provides a list of options related to the security and performance strength of the algorithm. For a recommended balance of security and performance, Daon recommends the SRP-2048 variant. |
Audit Level | Determines whether passcode authentications will be audited. Possible values include:
|
Audit Duration | Defines for how long audit data is retained. The default is 30 days. This option is only available if passcode authentications are audited. |
Session Duration | The amount of time in minutes to store the session data. The default value is 5 minutes. |
Passcode Rules
The 'Passcode Rules' tab provides options to define various rules that the system will accept as a valid passcode. The table below describes each of the available fields:
Field | Description |
|---|---|
Minimum Length | Defines the minimum number of characters that must be present in the passcode. Must be at least 4 characters long. |
Maximum Length | Defines the maximum number of characters that must be present in the passcode. Must be equal to or under 64 characters long. |
Digit Count | Optional. The minimum number of digits that much be present in the passcode. |
Symbol Count | Optional. The minimum number of symbols that much be present in the passcode. |
Lower Case Count | Optional. The minimum number of lower case letters that much be present in the passcode. |
Upper Case Count | Optional. The minimum number of upper case letters that much be present in the passcode. |
Character Variety | Optional. The maximum number of repeated characters that are allowed in the passcode. |
Passcode History | Optional. The submitted passcode will be checked against a configurable number of previously submitted passcodes. Matching passcodes will not be allowed. |
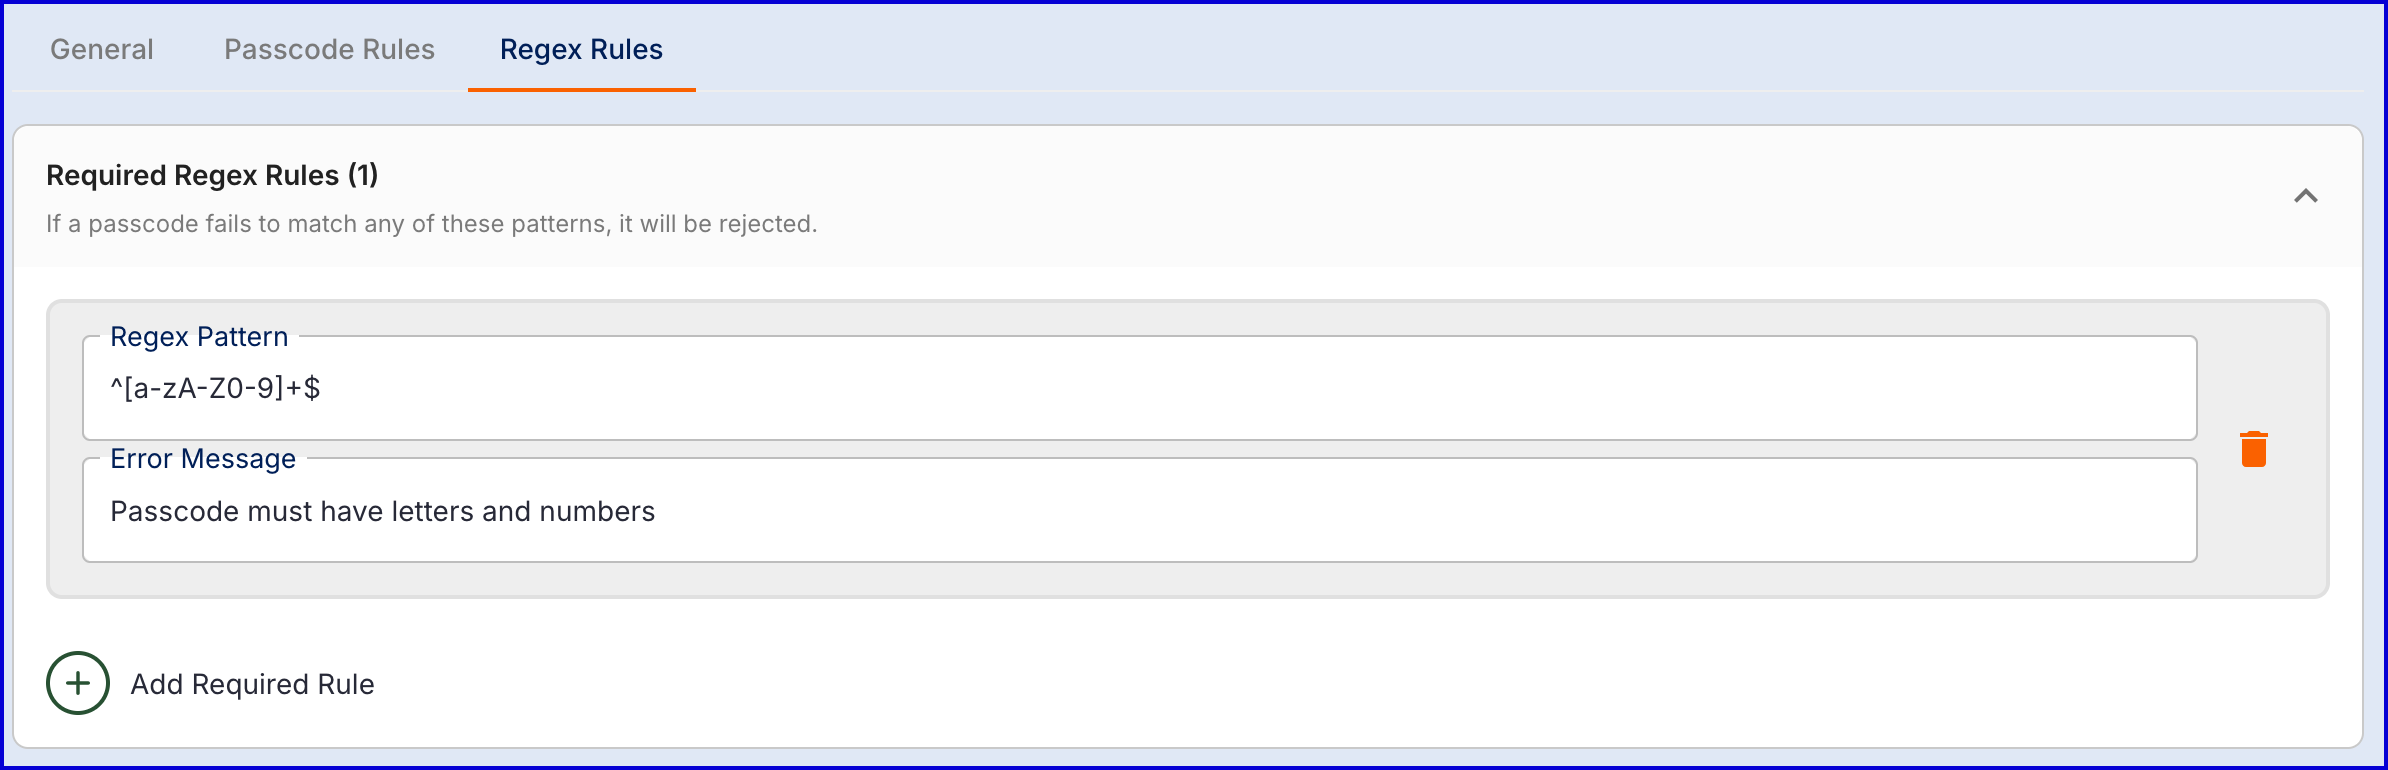
Regex Rules
This tab enables integrators to define regular expressions (regex) that can set further rules that the passcode is required to meet for registration and renewal. Regex rules support the following categories:
Required Regex Rules - If a passcode fails to match any of these patterns, it will be rejected.
Allowed Regex Rules - If a passcodes fails to match at least one of these patters, it will be rejected.
Disallowed Regex Rules - If a passcodes matches any of these patterns, it will be rejected.
Example: