Early Access
Introduction
Identity Store users can be managed through the Backoffice application or programmatically using the TrustX API. This document will describe how to create and view registered Users in the Backoffice and update their status.
To access the Users page in the Backoffice, visit Identity Stores > Users from the left-side navigation bar.

Searching Users
Registered Identity Store Users can be viewed in the Backoffice application or TrustX API.
Backoffice Search
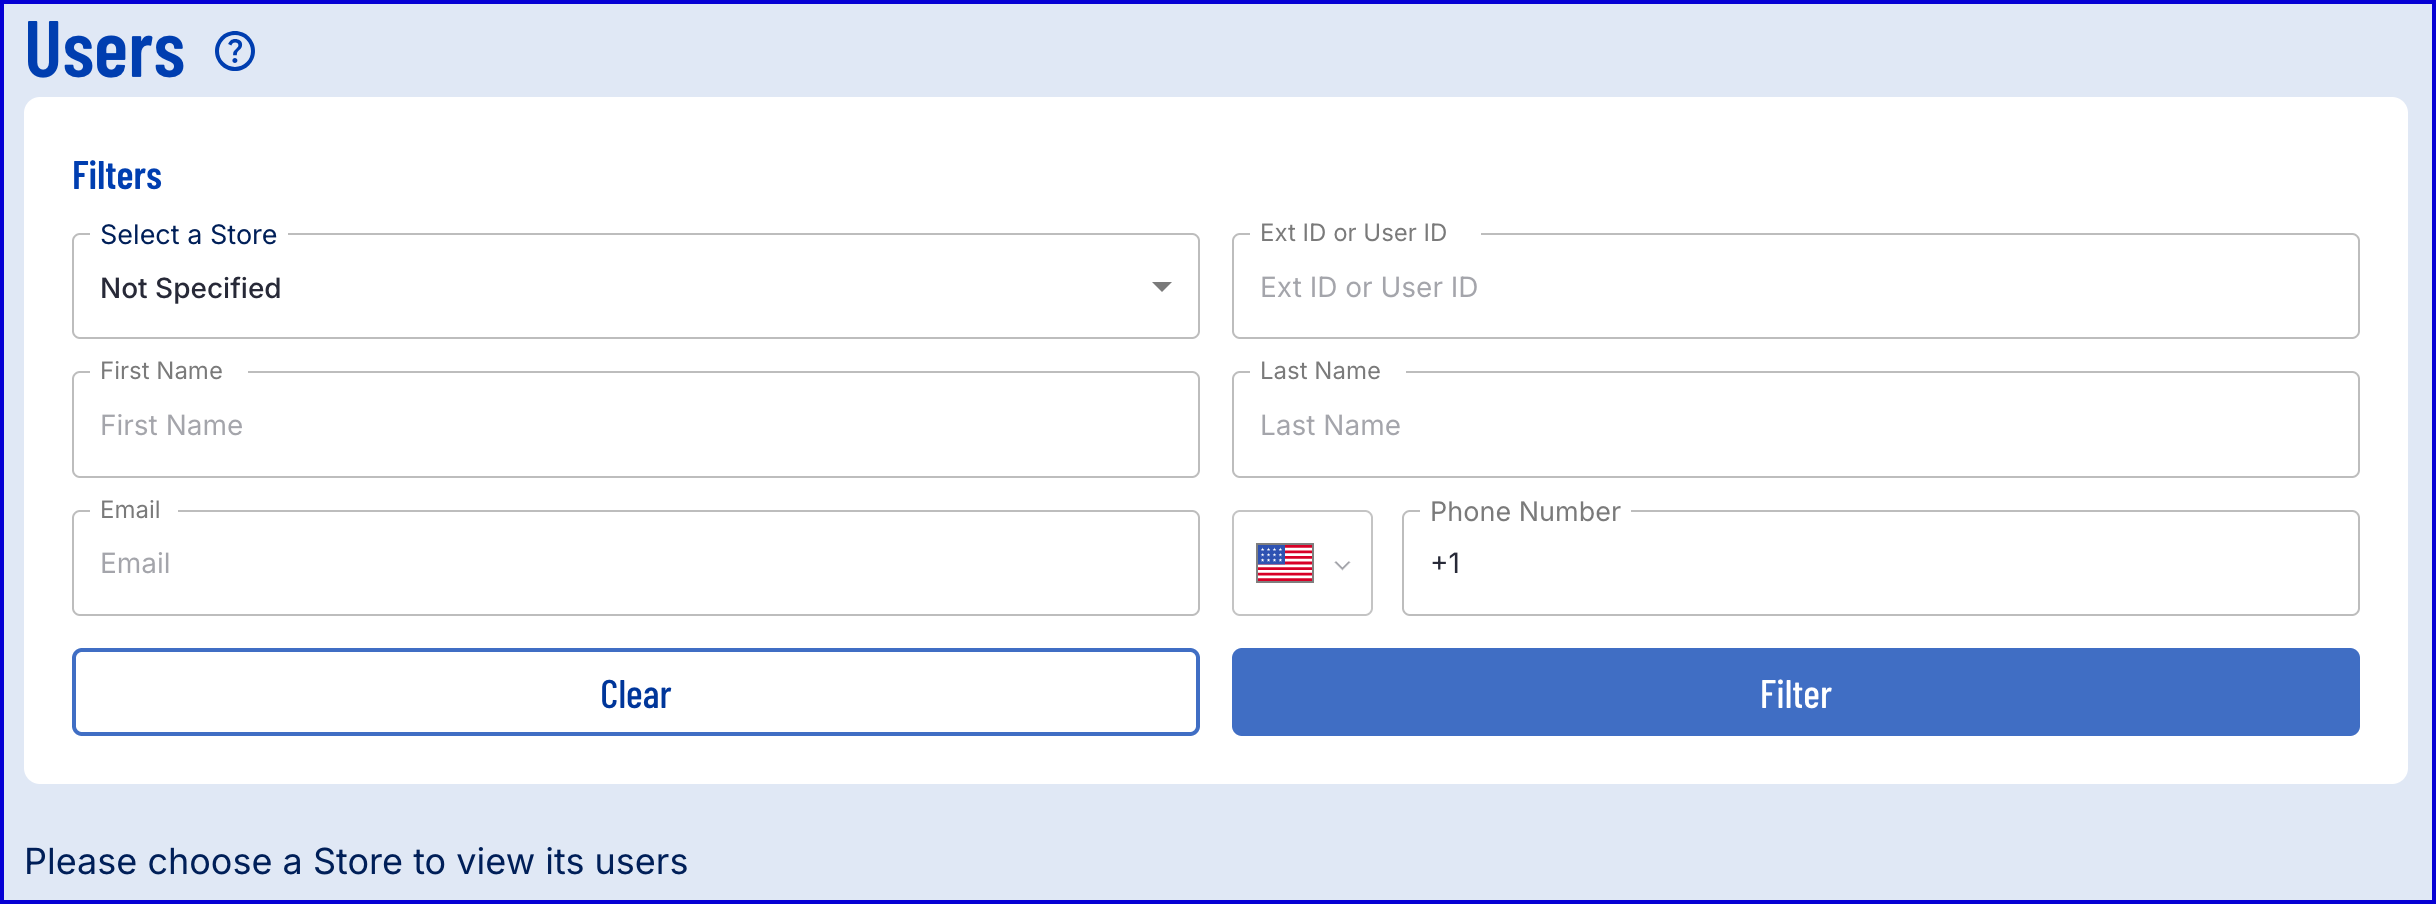
To search for users in the Backoffice, use the search field and filters provided on the Users page. By default, the Backoffice will not return any results on page load; a search must be performed to see users.
API Search
The /api/identity-store/stores/{storeName}/users endpoint will return a list of all Users in the specified Identity Store.
Permissions: TNT#{tenant}#IdentityStore:listUsers
Example Request:
Example Response:
Viewing Users
Details about a User can be viewed via the Backoffice application by selecting the 'users' icon under the 'Actions' column in the search results.

Selecting this icon will redirect to the User Details page where various information about a User can be found.
User Overview
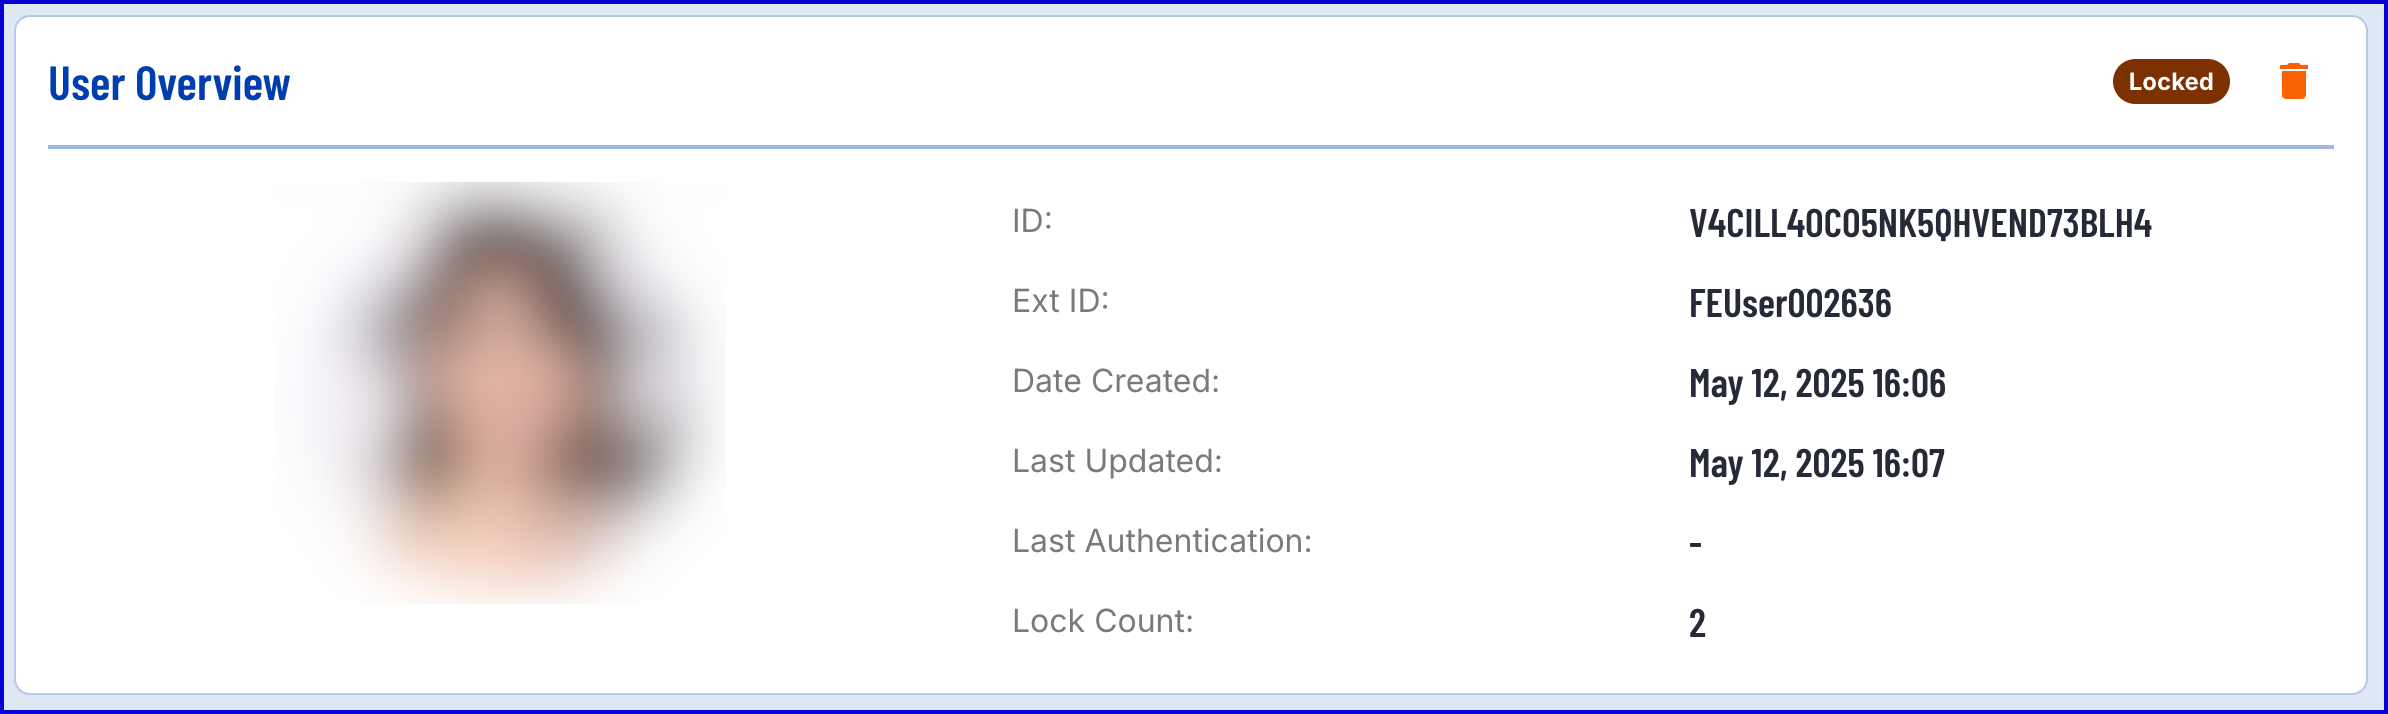
The User Overview section provides the status User ID, External ID, the date of the last successful authentication and the number of times the User has been locked. If a face image has been added to the User, this information will be filled on the left-side portrait.
ID - Represents the User ID
Ext ID - Represents the External ID
Date Created - The date the User was created
Last Updated - The date the User was last updated
Last Authentication - the date of the last successful authentication
Lock Count - the number of times the User has entered a temporary or hard lock.
Additional User Information
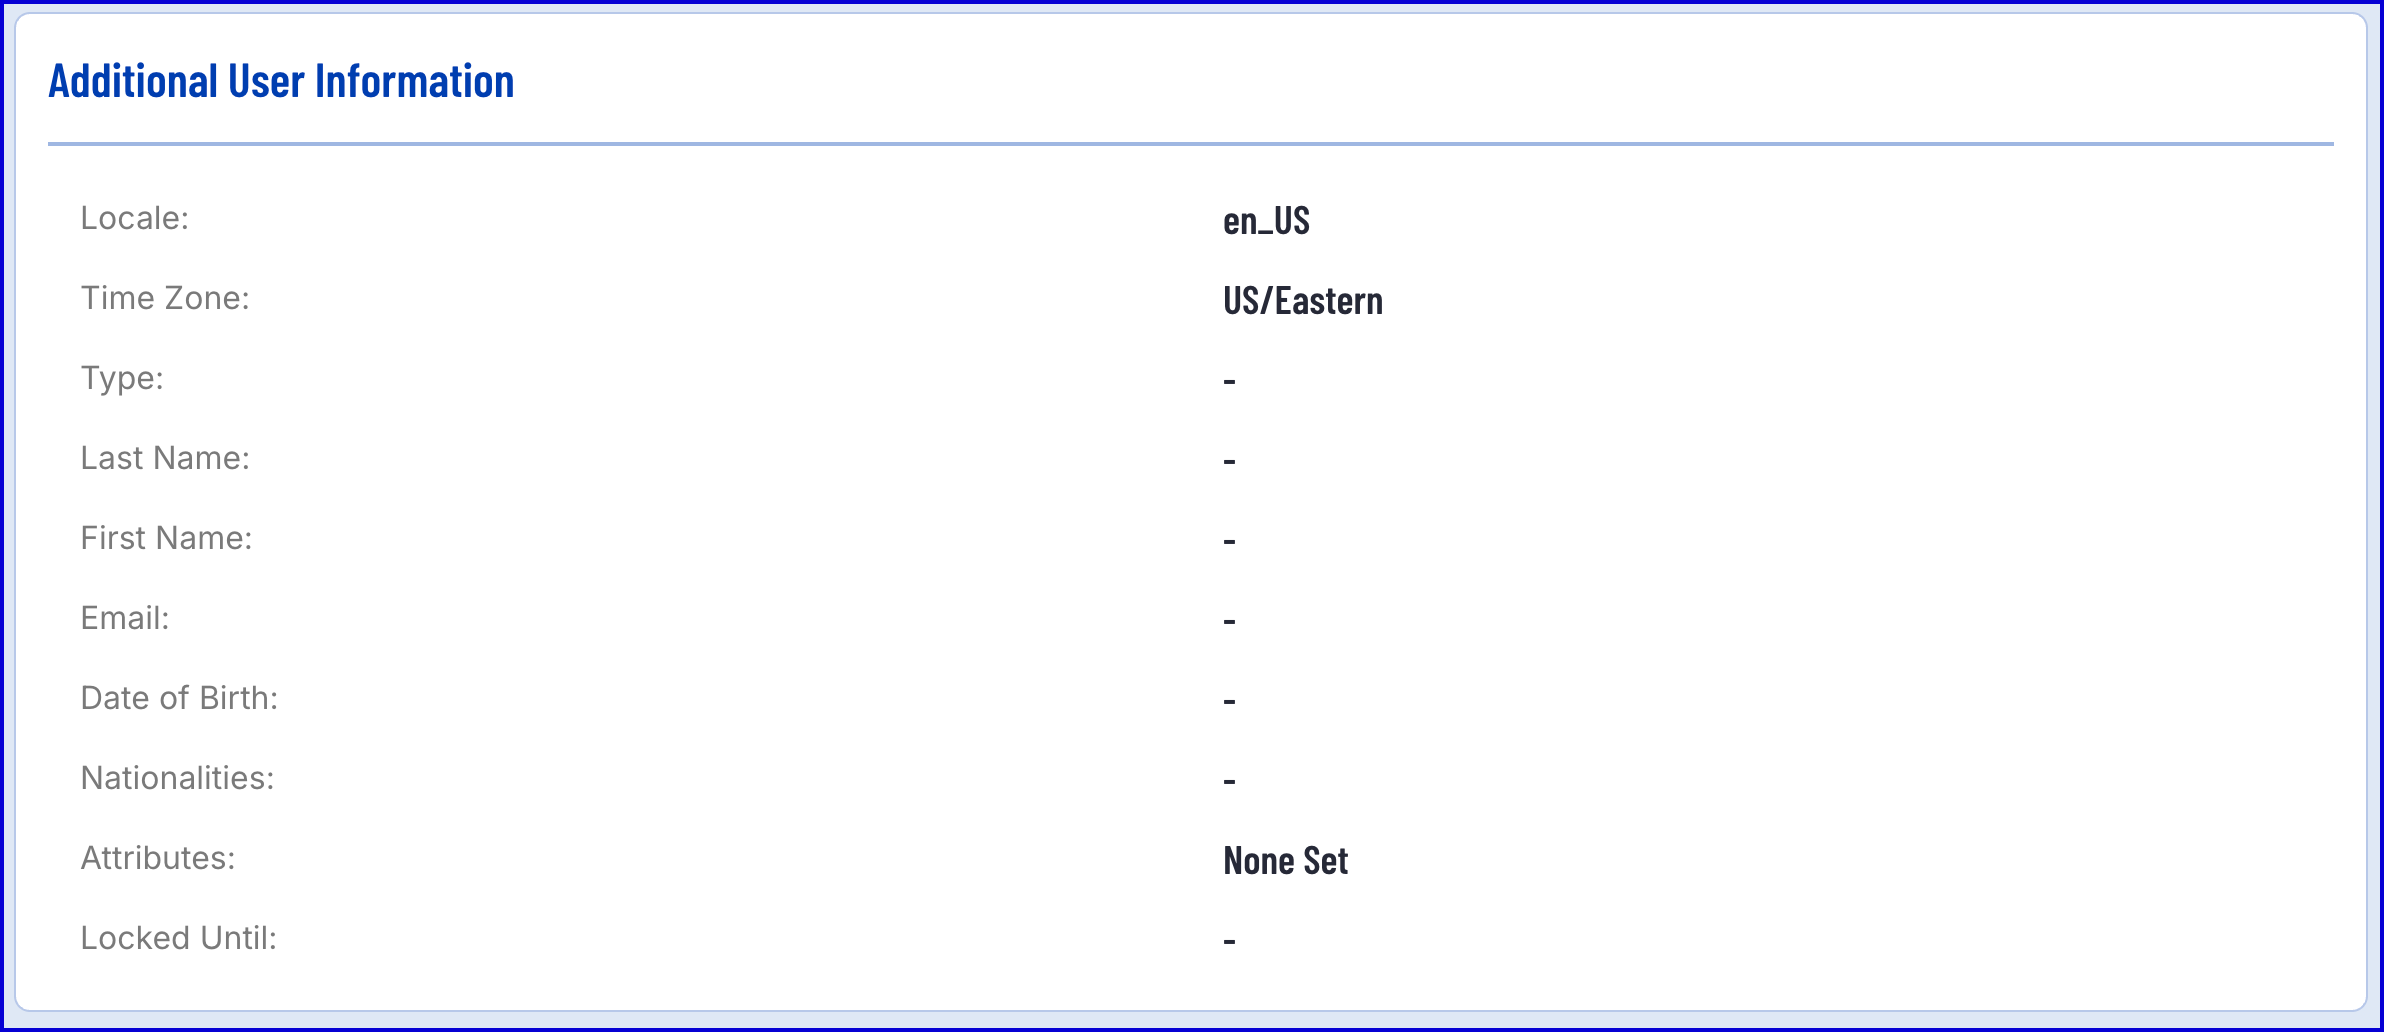
This section contains additional information about the User.
Locale - The User location
Time Zone - The timezone of the User
Type - The type of User. This is an optional value that is used to further group Users.
Last Name - The User's last name
First Name - The User's first name
Email - The email of the User
Date of Birth - The User's date of birth
Nationalities - The nationalities of the User
Attributes - A list of additional attributes that can be optionally assigned to a User upon creation or update.
Locked Until - The date in which the User will become unlocked if in the temporary lock status.
Registered Biometrics
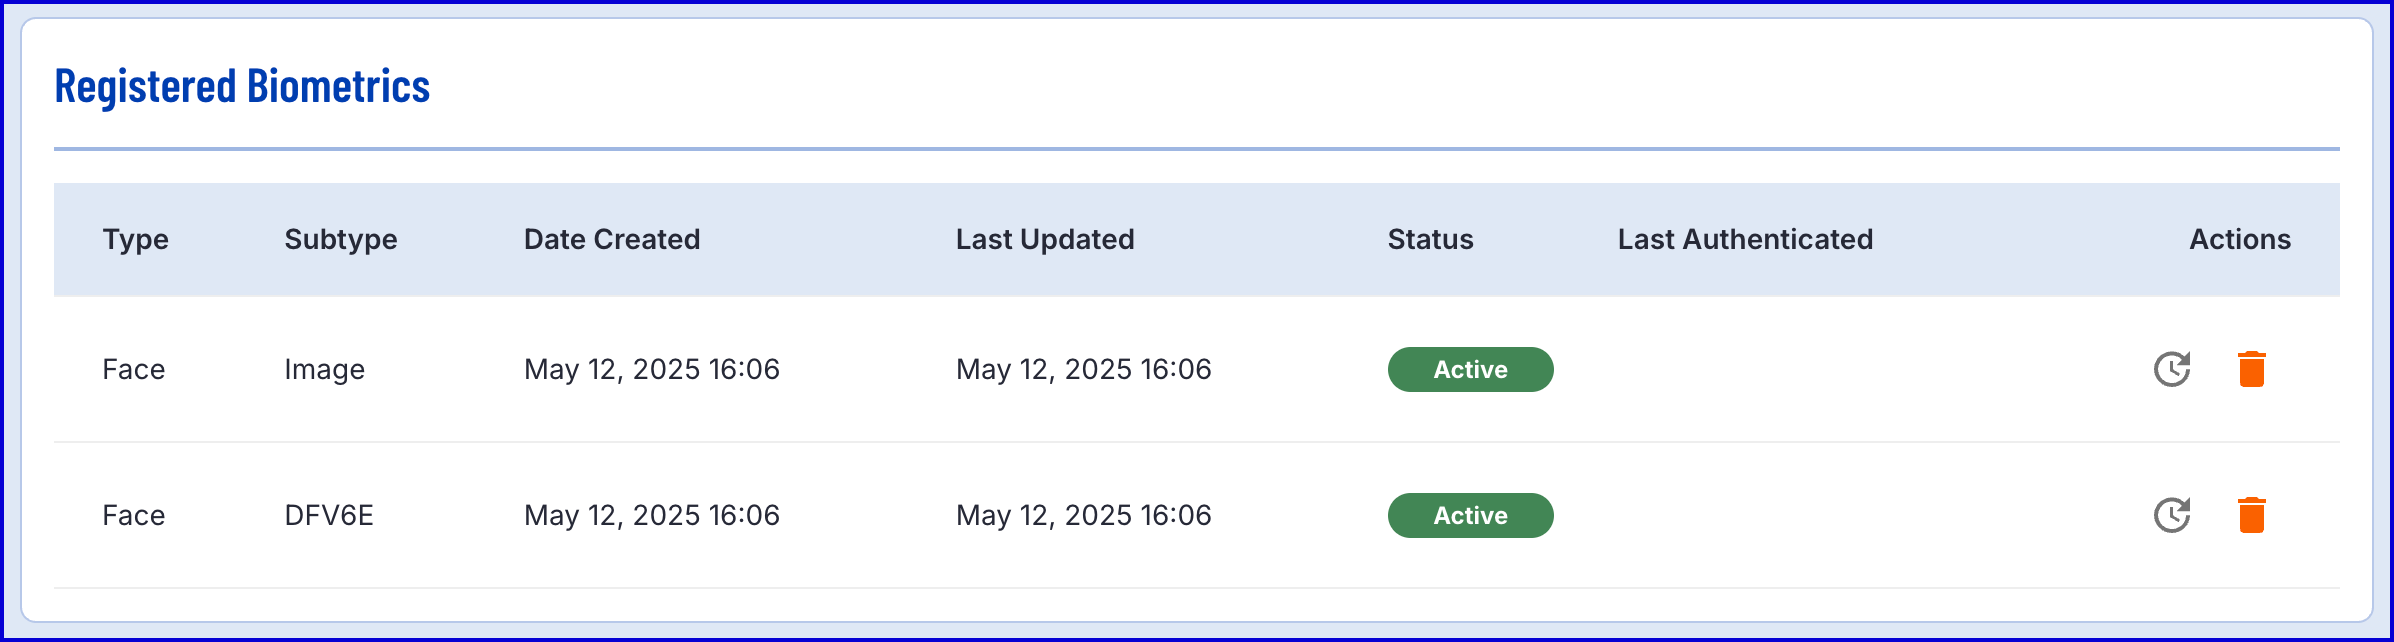
This section will list any registered biometrics associated with a User. To add a face image to a User, see the Adding Face Image via Process Definition section.
Each biometric entry contains the following information:
Type - The type of biometric. Currently only 'Face' is supported.
Subtype - The biometric Subtype. Each face biometrics contains an image and DFV6E template.
Date Created - The date the biometric was added to the User.
Last Updated - The date the biometric was last updated.
Status - The current status of the biometric.
Last Authenticated - The date of the last successful authentication using the listed face image.
Authentications
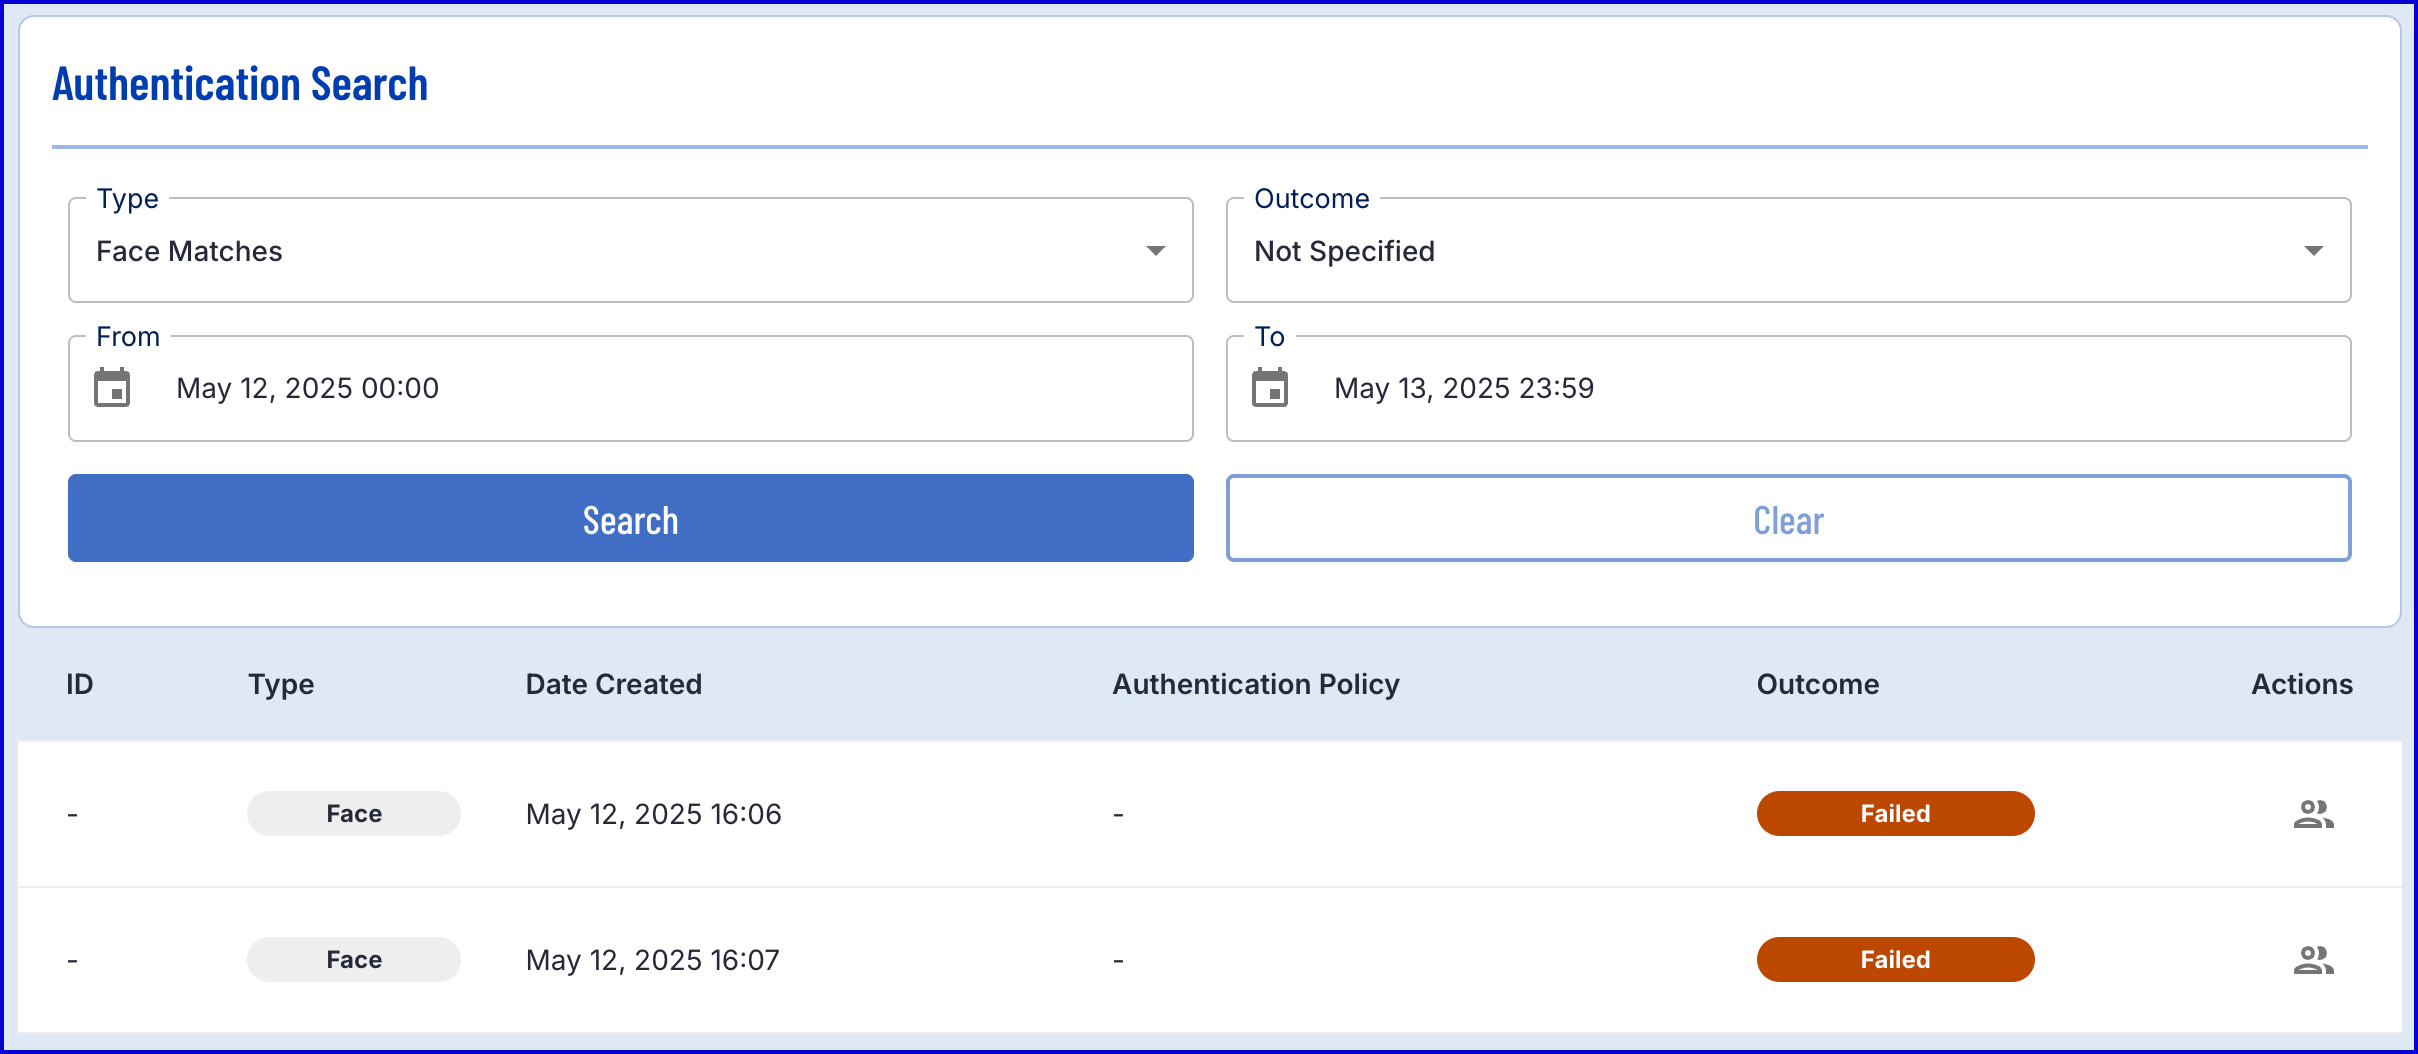
This section provides a list of all authentication attempts performed by the User. Search results can be filtered by type and outcome.
Adding Users
Users can be added to an Identity Store from a Process Definition or via the TrustX API. This section will demonstrate how to add and remove Users from an Identity Store.
Adding User via Process Definition
The TrustX Processor Designer provides a suite of activities that can be used to add and modify Identity Store Users during a Process Instance.
Step 1 - Create a new Process Definition
Create a new Process Definition by navigating to Process Definitions > New Process Definition in the Backoffice application.
Add a 'Create Start Event' to the Process Designer.
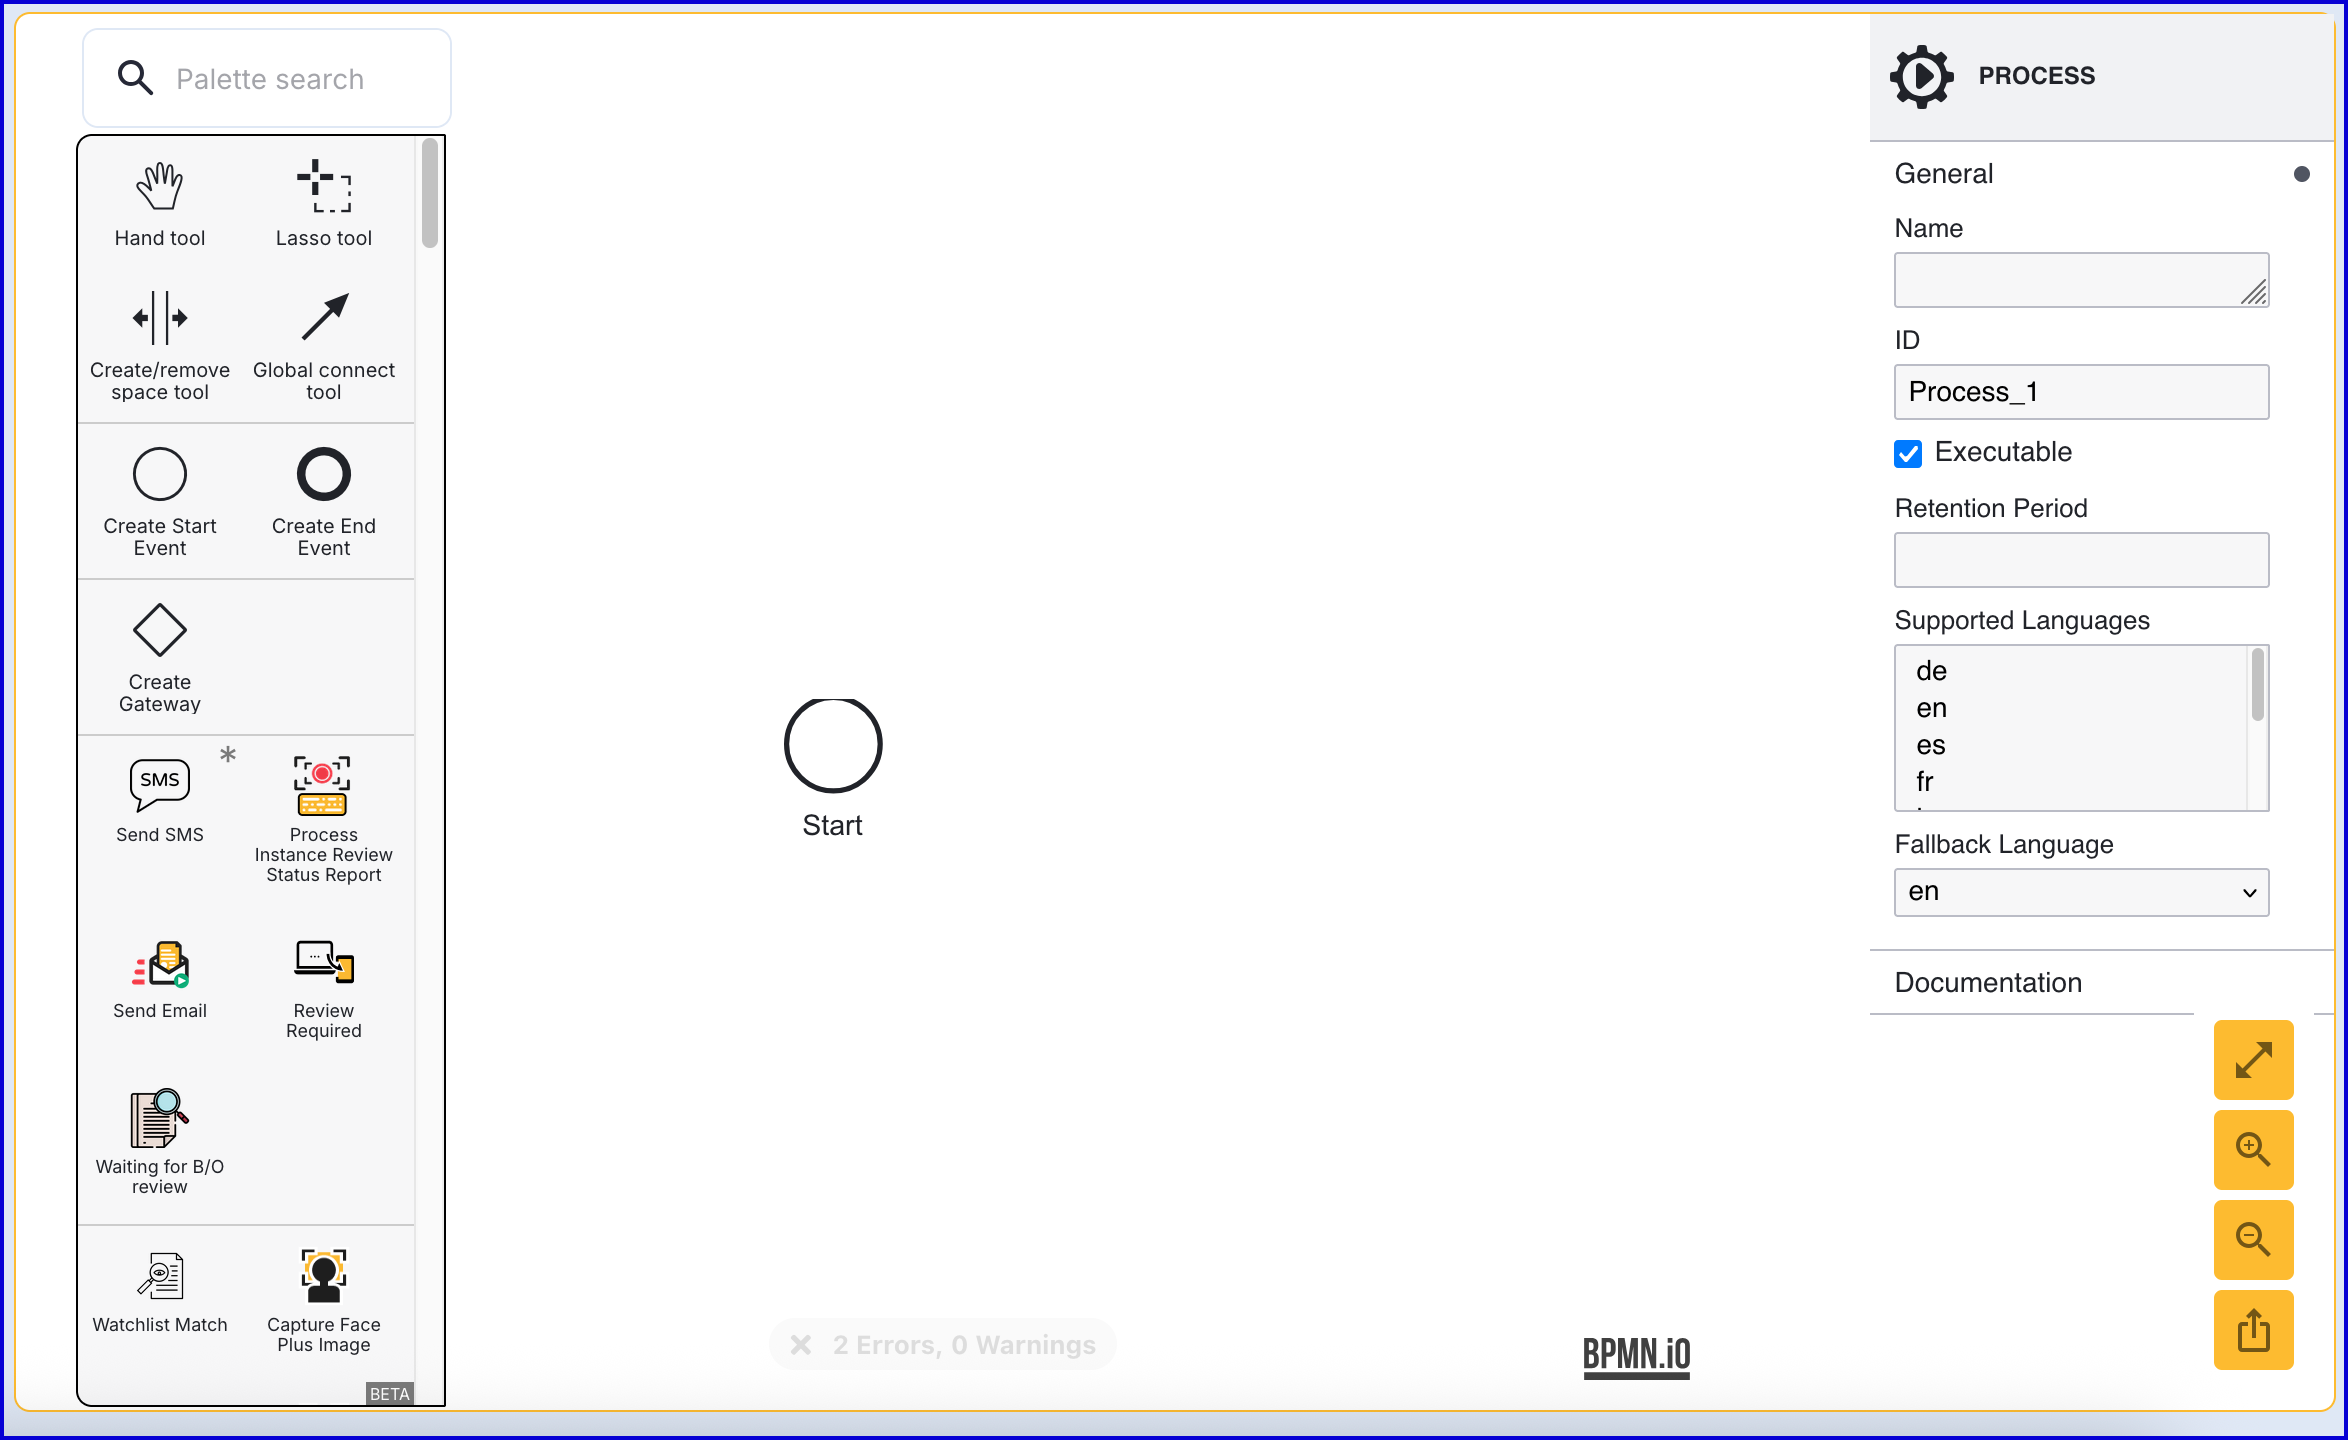
Click the 'Start' event to open the right-side contextual menu and enter a name for the 'Name' input parameter.
Add a 'Create End Event' to the Process Designer and connect it to the 'Start' event using a sequence flow arrow.
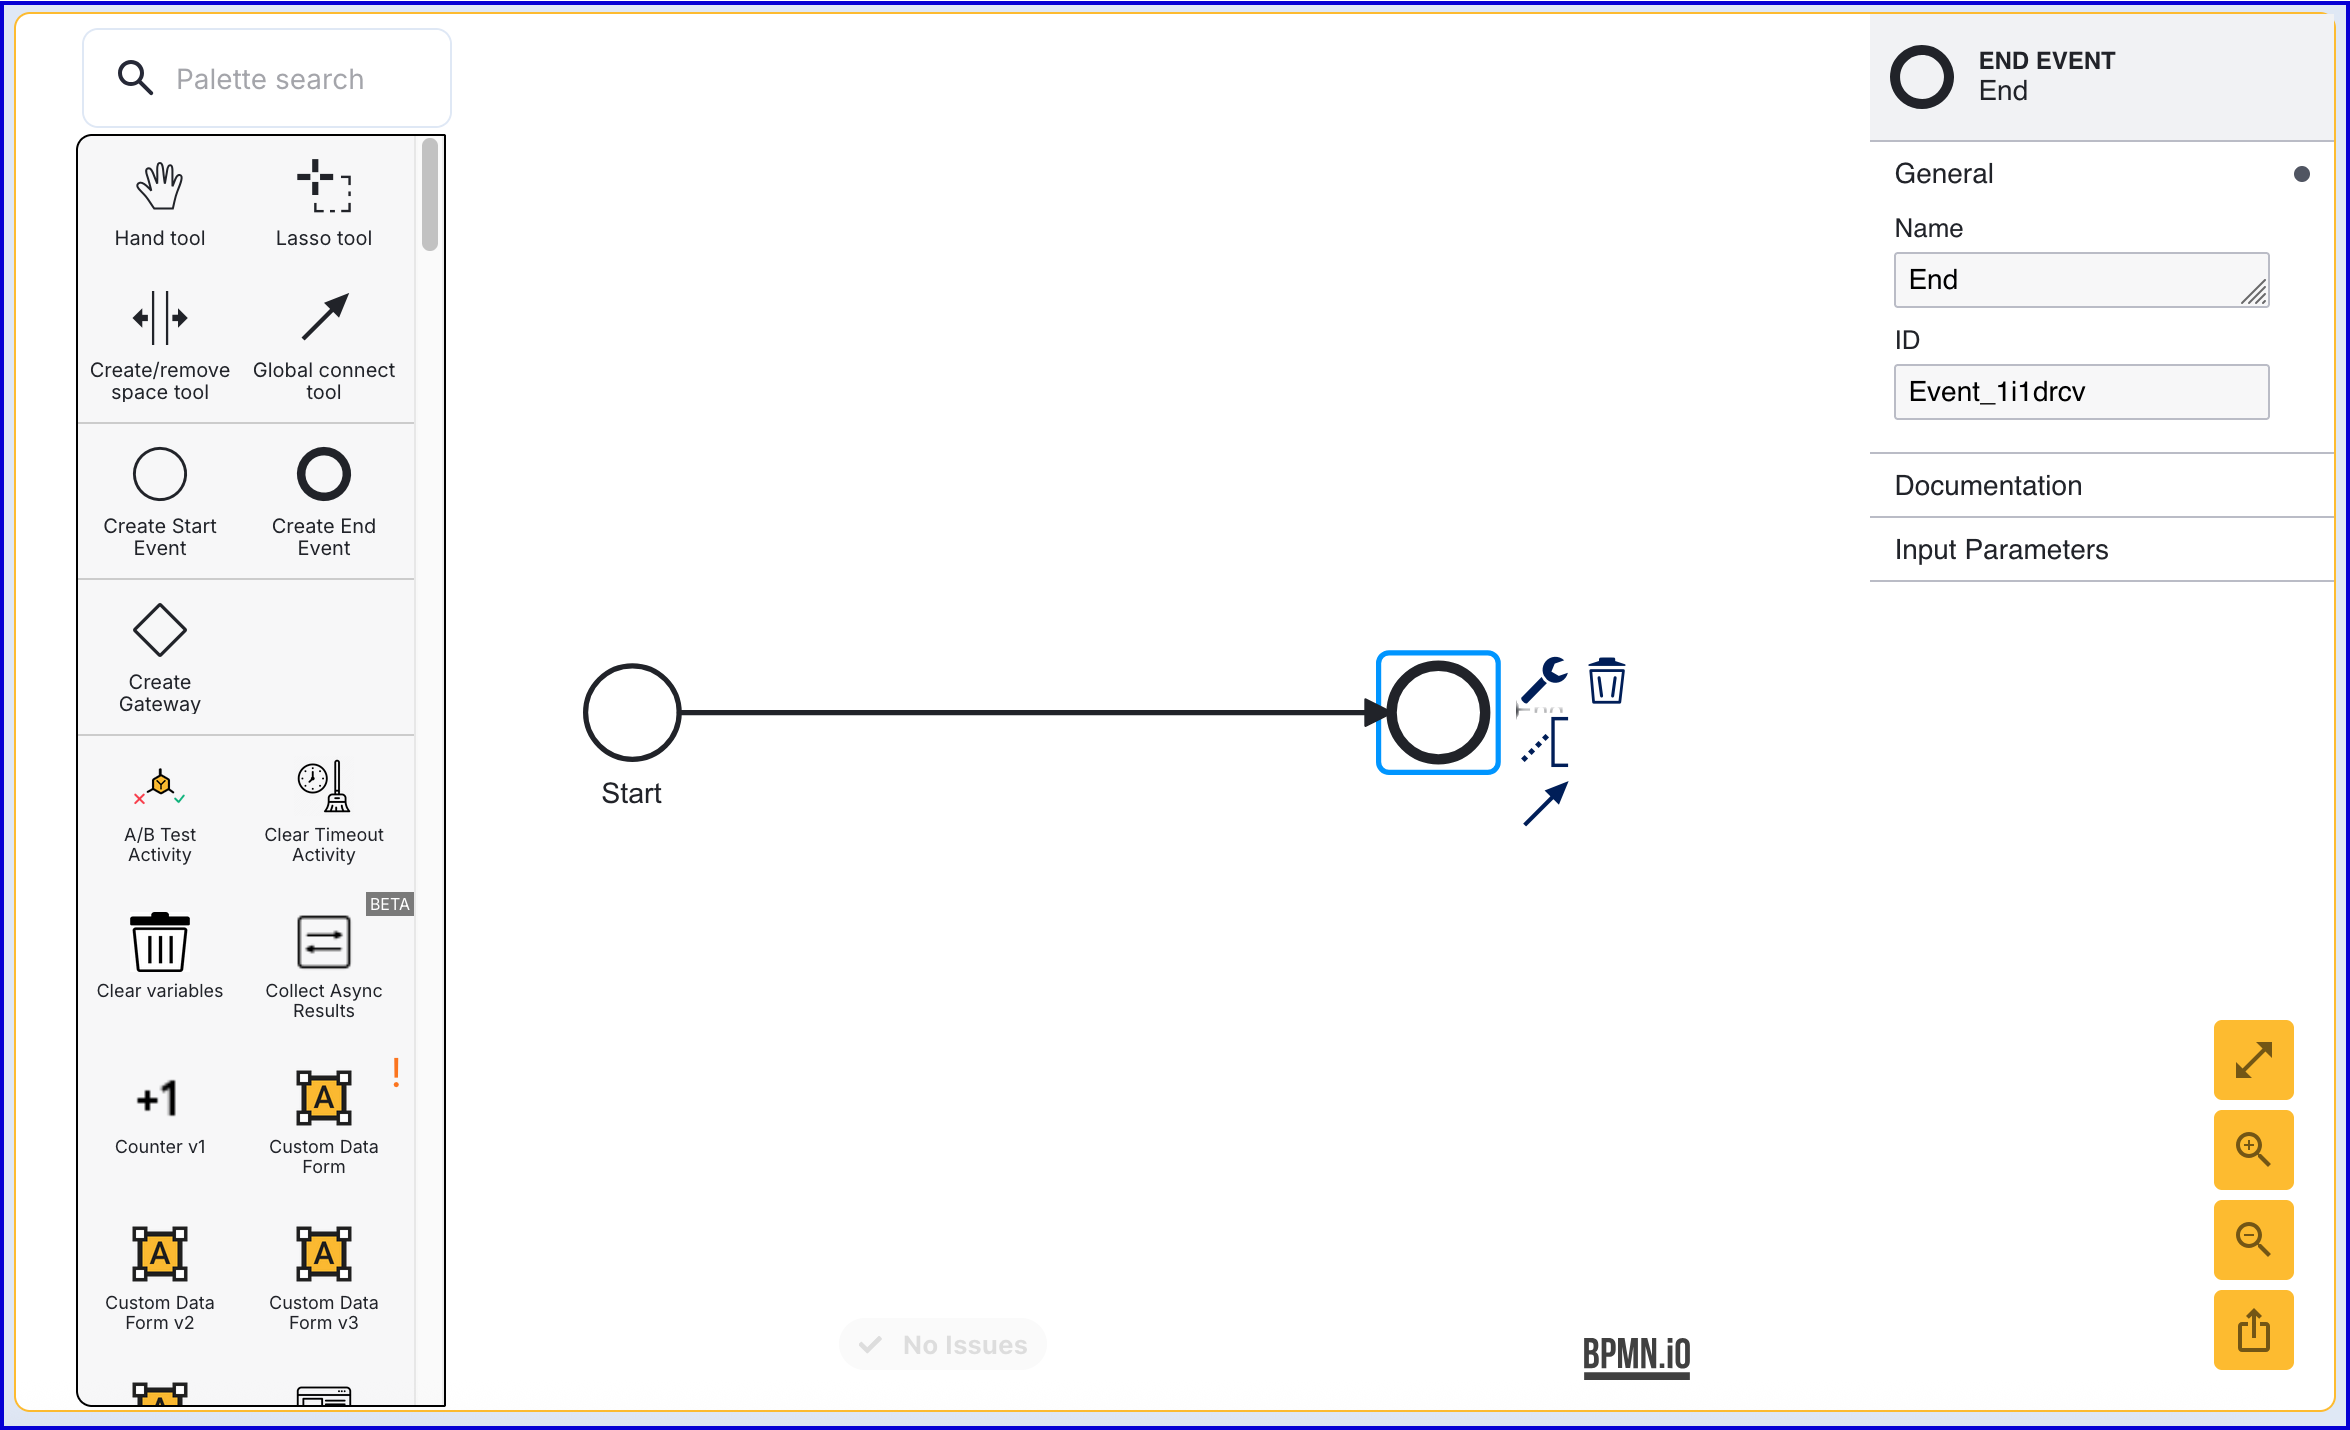
Click the 'End' event to open the right-side contextual menu and enter a name for the 'Name' input parameter.
Step 2 - Configure the 'Add User' Activity
The 'Add User' activity is used to add a new User to an Identity Store. Find the activity and connect it to the 'Start' and 'End' events using a sequence flow arrow.
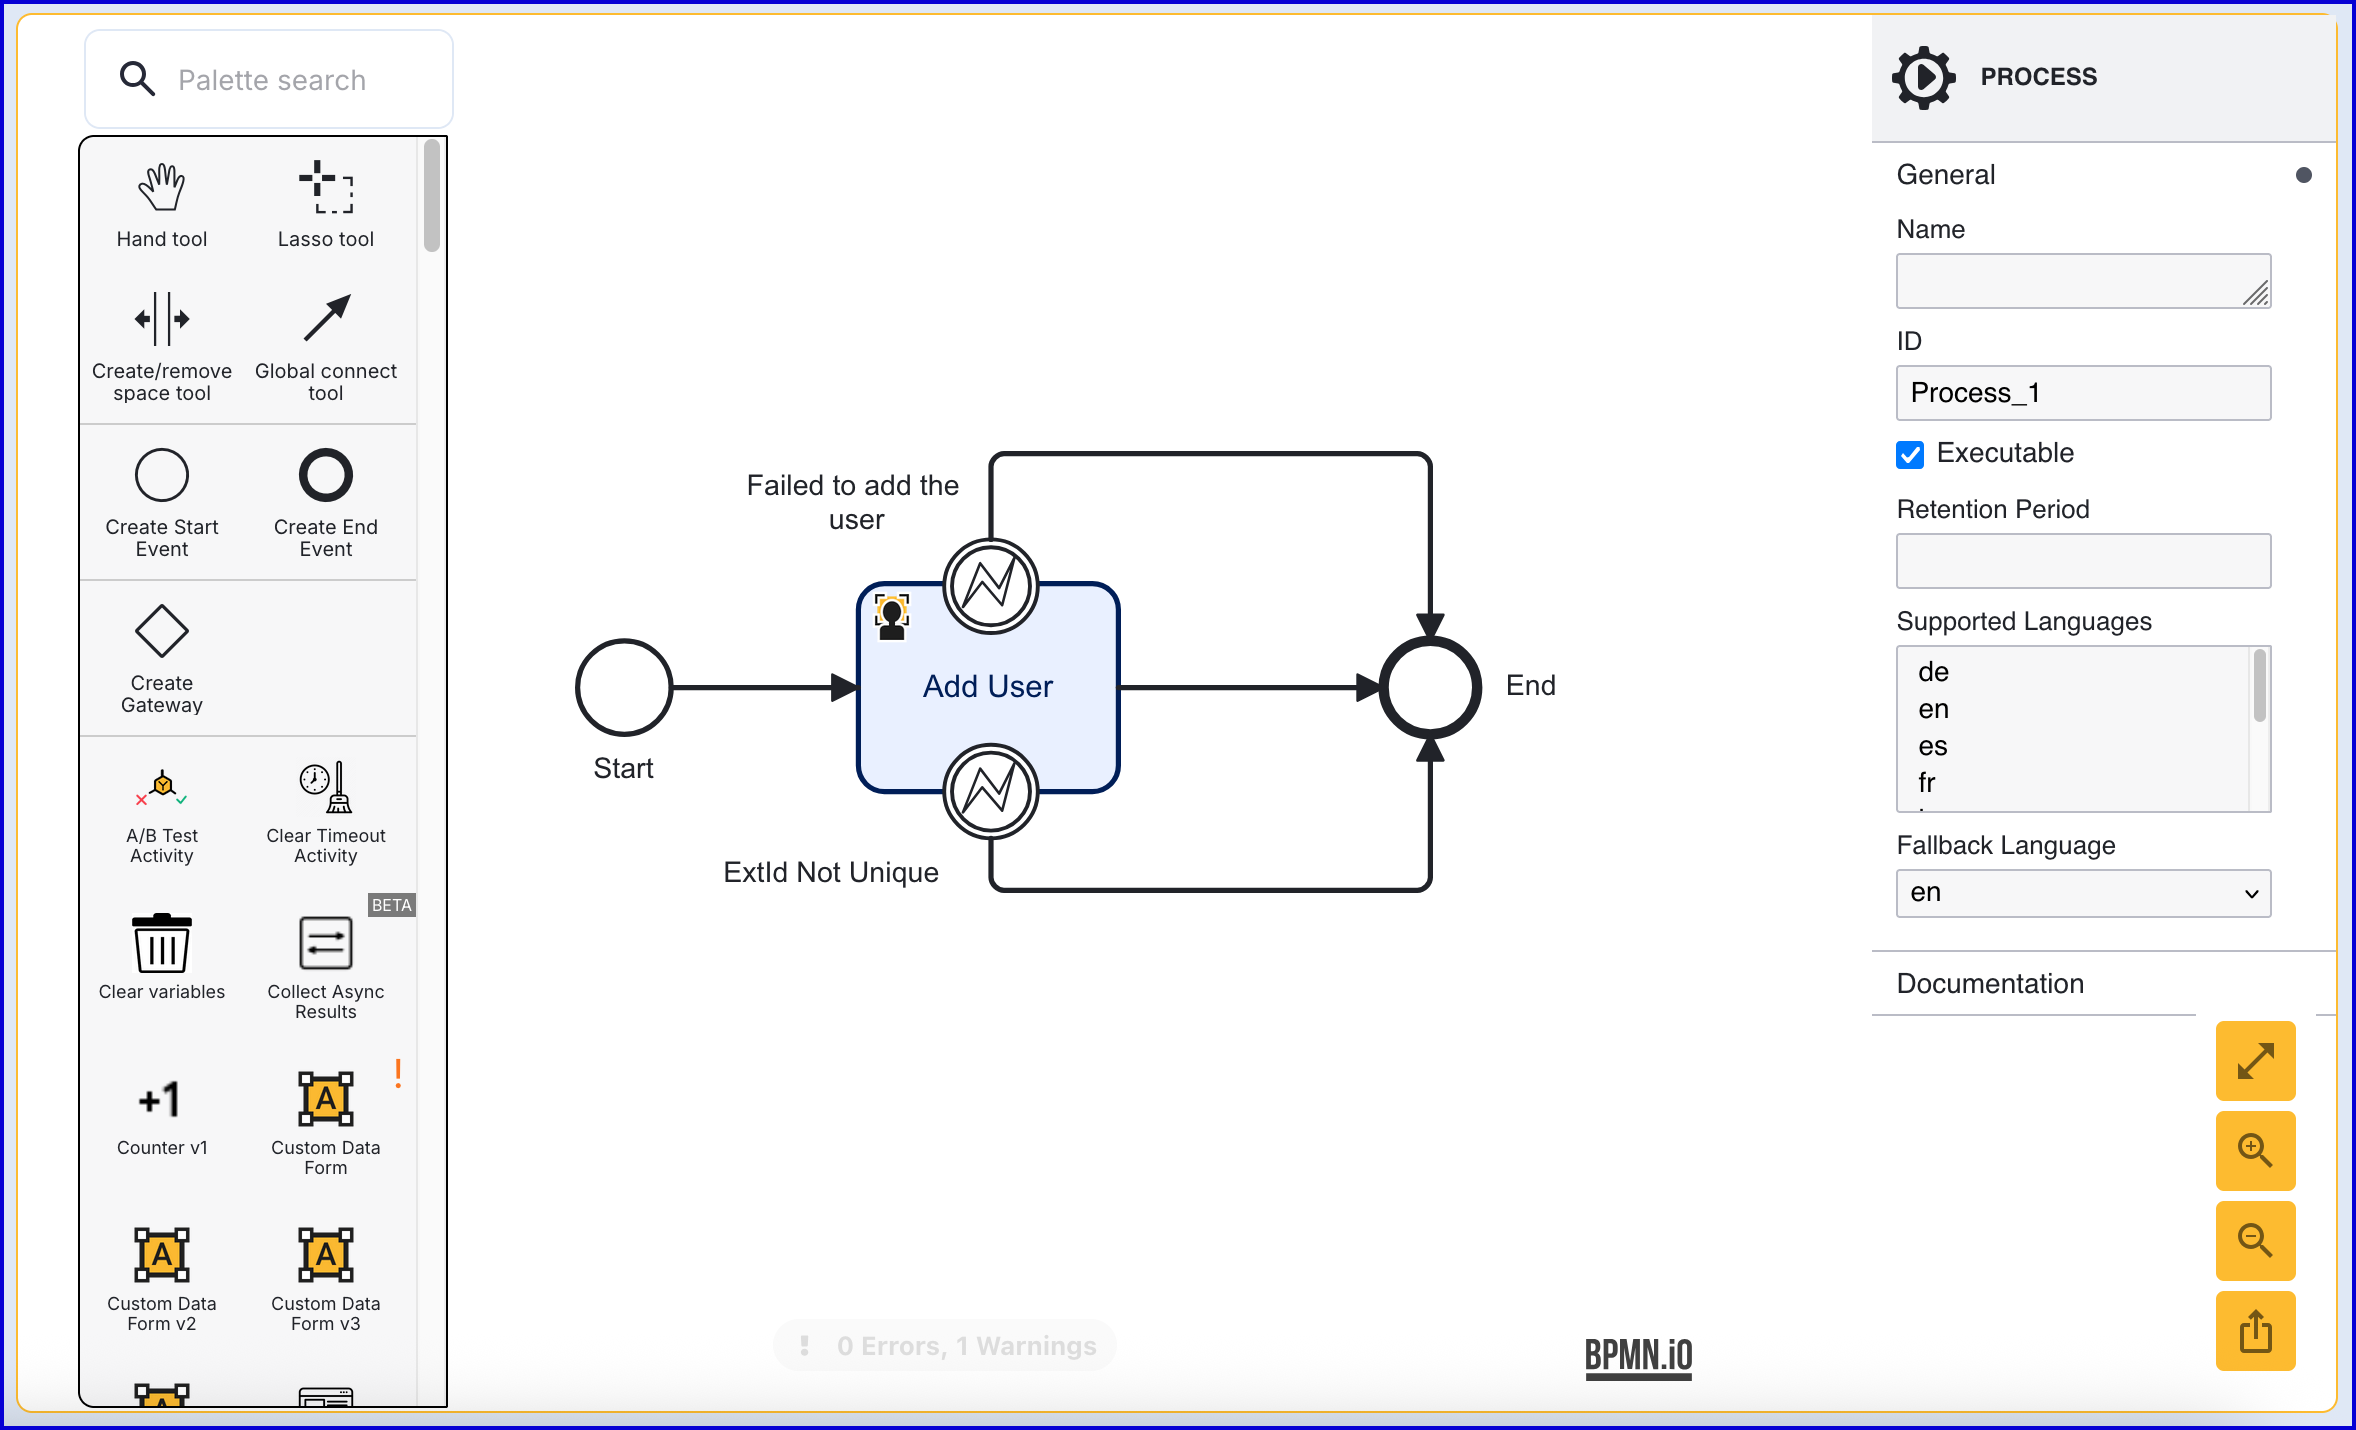
The 'Add User' activity includes two error events. In this example, the error events have been connected to the 'End' event.
Failed to add the user - This event is triggered when an error occurs adding the User to the Identity Store.
ExtId Not Unique - This event occurs if the External ID provided is not unique.
Click the 'Add User' activity to open the right-side contextual menu. Using the available input parameters, information about the User can be defined, including the External ID and which Identity Store the user will be added to.
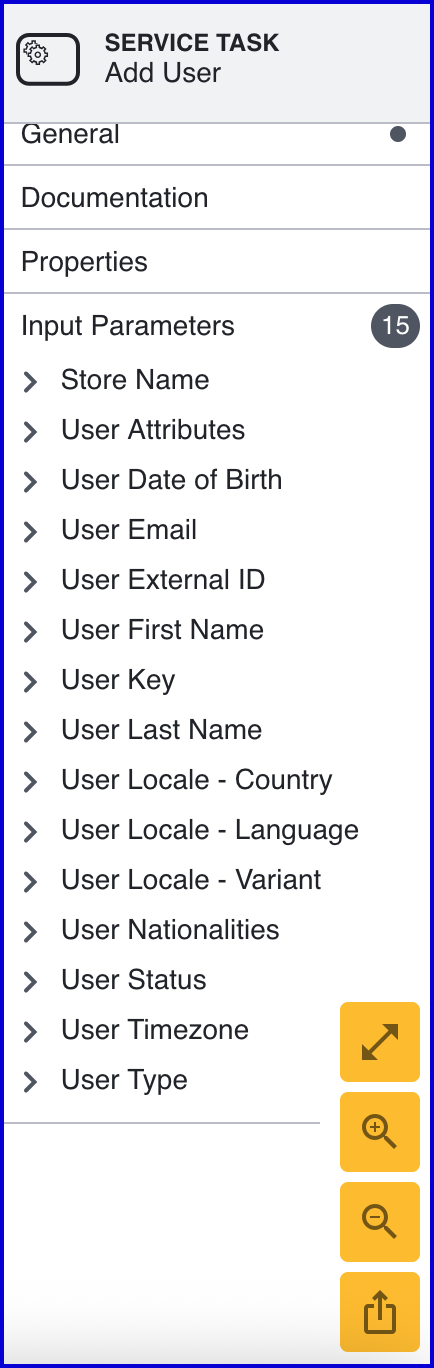
When creating a User, the following input parameters are available:
Input Parameter | Type | Description |
|---|---|---|
Store Name* | String | Required - Represents the Identity Store that the User will be added to. |
User Attributes | <String, String> | A key-value pair of additional optional attributes used to describe the User. |
User Date of Birth | Date | The User's date of birth in the format: "yyyy-mm-dd" |
User Email | String | The User's email address in the format: "example@domain.com" |
User External ID | String | A unique User ID. If no ID is required, an external ID will be generated automatically by TrustX. |
User First Name | String | The first name of the User. |
User Key | String | Required - A key used to identify the User within the Process Definition execution. |
User Last Name | String | The last name of the User. |
User Locale - Country | String | The User country. |
User Locale - Language | String | A two-letter ISO-639 formatted language tag. |
User Locale - Variant | String | A variant subtag of the User country. 5-8 letters or 4 characters starting with a digit, separated by hyphens. |
User Nationalities | String | The nationality of the User. |
User Status | String | The User status indicates whether the User is in a pending, active, locked or disabled state. |
User Timezone | String | The timezone of the User Country. This value must be in line with TZDB code format. Example: EST. |
User Type | String | An optional parameter used for organizing Users into different types. A maximum of 64 characters is allowed. |
Adding User via TrustX API
A User can be added to an Identity Store by calling the /api/identity-store/stores/{storeName}/users endpoint.
Permisions: TNT#{tenant}#IdentityStore:createUser
Example Request:
Example Response:
Deleting a User
There are a number of ways to remove Users from an Identity Store. This section will describe three methods for deleting a User from an Identity Store.
Deleting a User from the Backoffice
To delete a User directly from an Identity Store in the Backoffice, follow the steps below:
Navigate to Identity Stores > Users in the Backoffice application.
Use the search filters provided to find the User that will be removed.
In the list of the results, find the User that will be removed and click the orange dustbin icon under the 'Actions' column.

Deleting a User Via Process Definition
To delete a User via Process Definition, use the 'Delete User' activity.
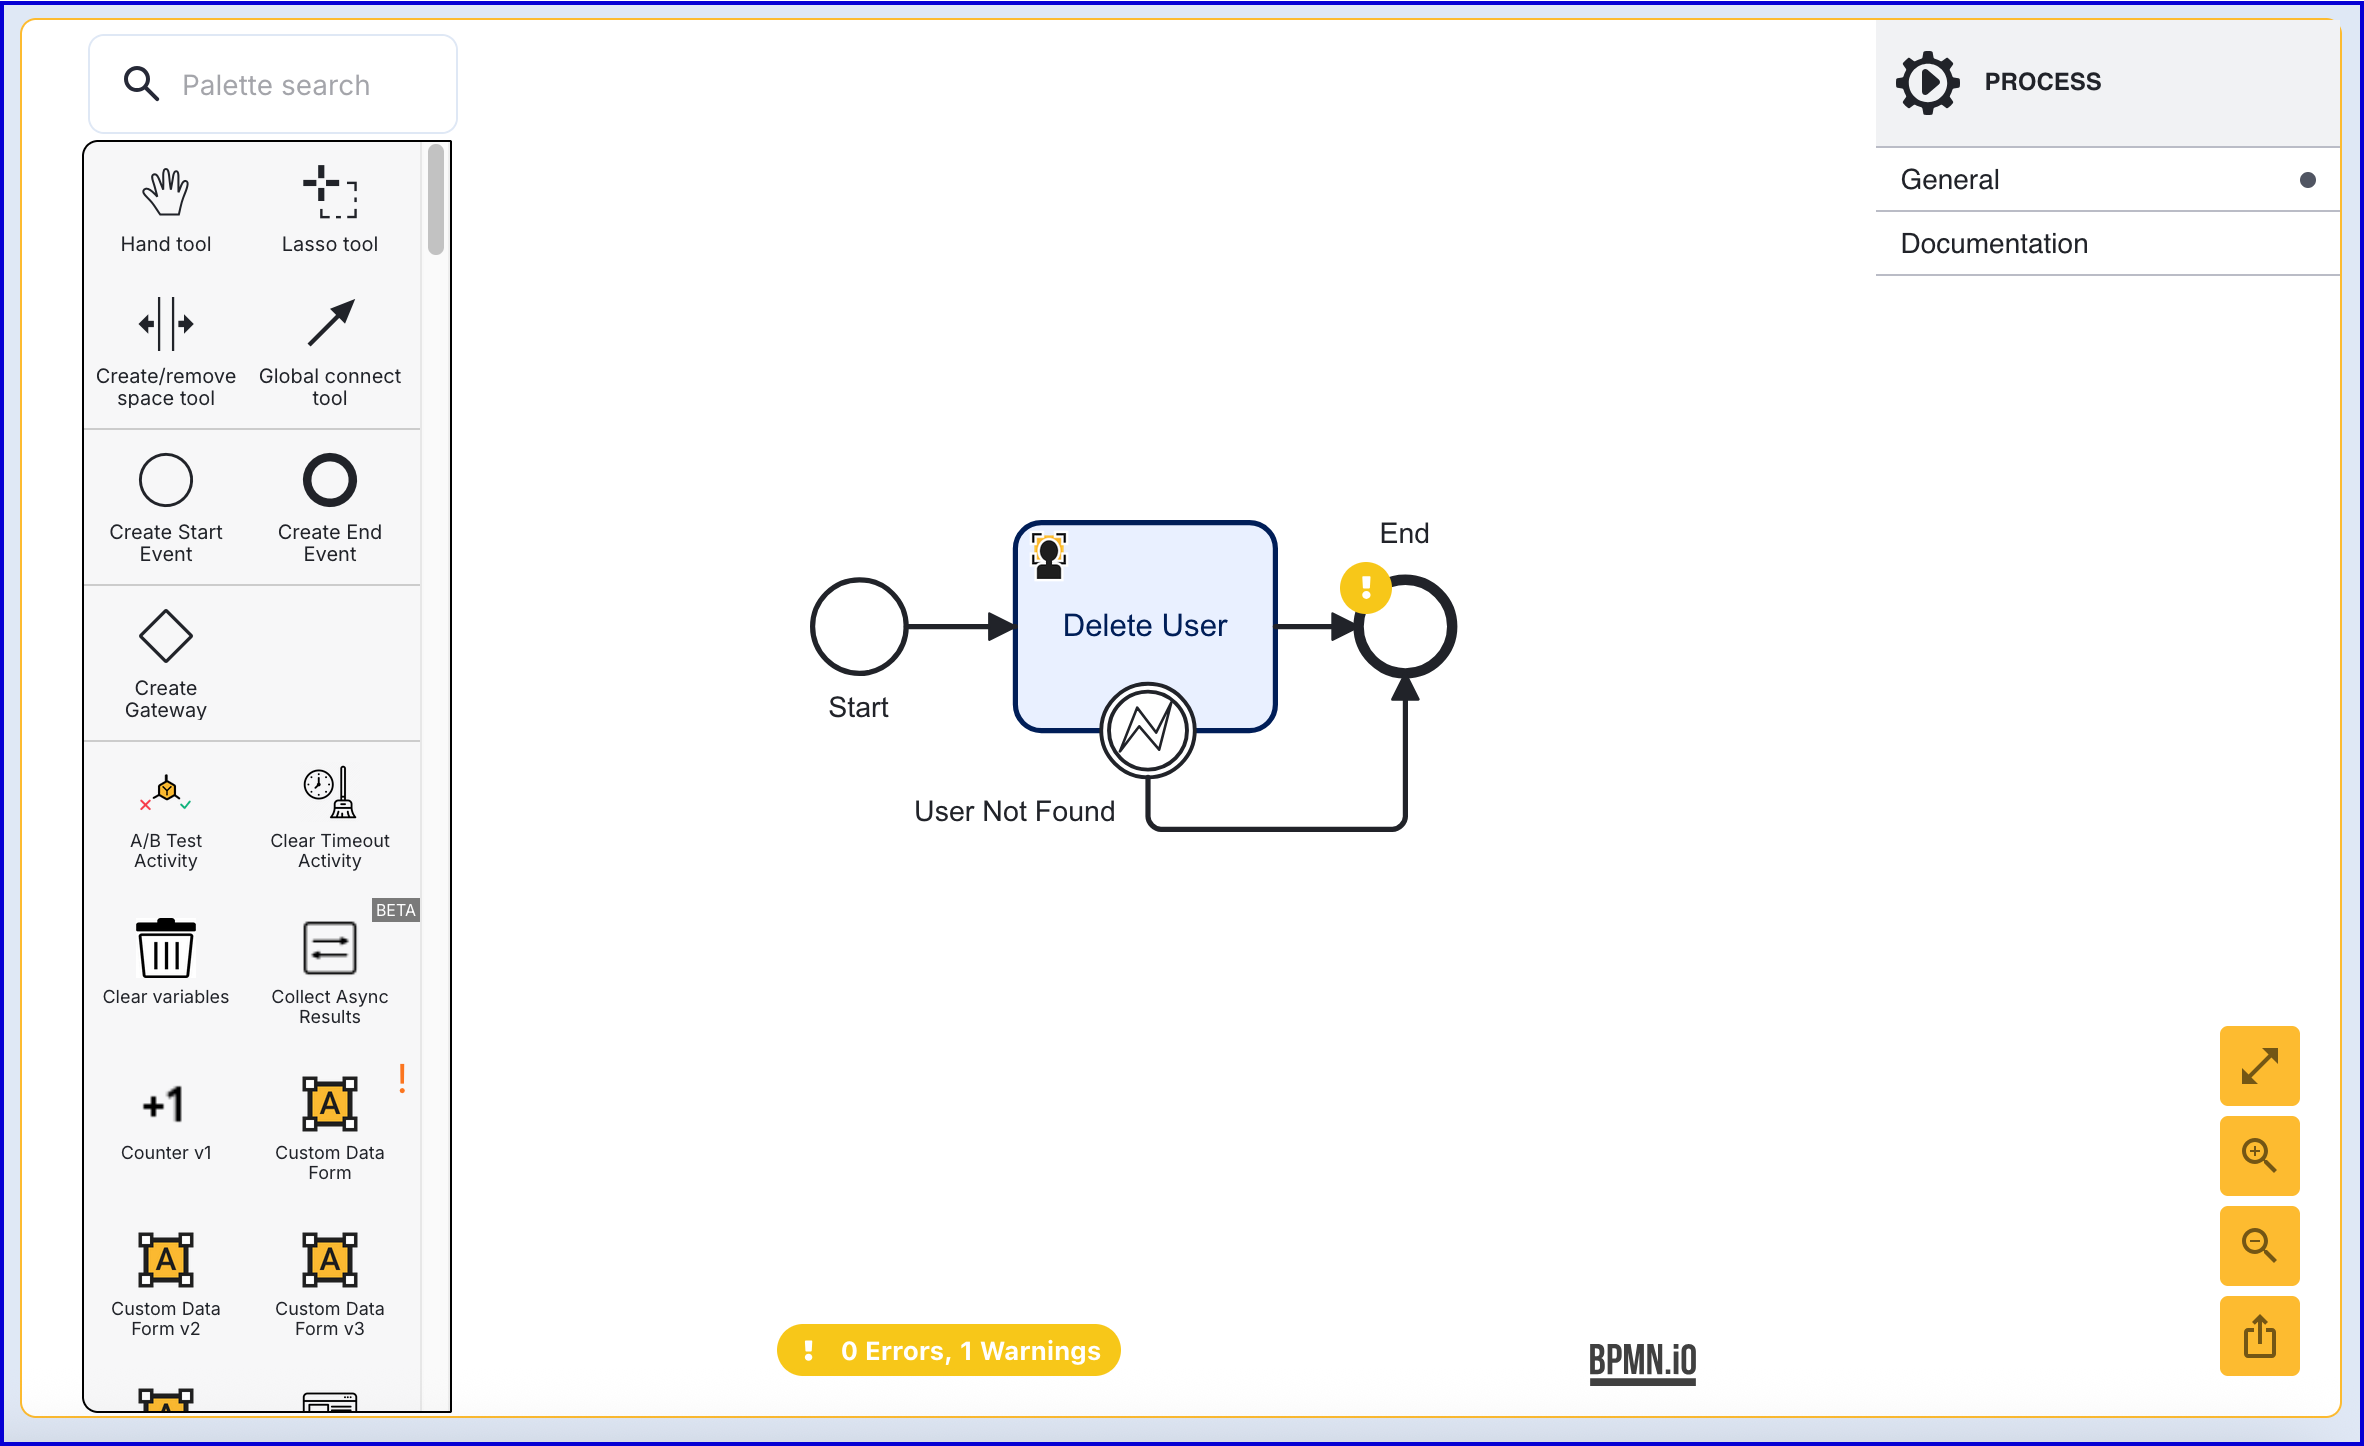
The 'Delete User' activity has the following input parameters:
Input Parameter | Type | Description |
|---|---|---|
Store Name | String | Required - Represents the Identity Store that the User belongs to. |
User External ID | String | The External ID of the User to be deleted. |
User ID | String | The ID of the User to be deleted. |
User Key | String | The User Key of the User to be deleted. |
Deleting a User Via API
A User can be deleted via the TrustX API using the /api/identity-store/stores/{storeName}/users/{userId} or /tenants/api/identity-store/stores/{storeName}/users/{extId}/ext endpoints.
Permissions: TNT#{tenant}#IdentityStore:deleteUser, TNT#{tenant}#IdentityStore:deleteUserByExtId
Example Request:
Updating a User
Details about a User can be updated using the 'Update User' activity in a Process Definition or using the the /api/identity-store/stores/{storeName}/users/{extId}/ext or /api/identity-store/stores/{storeName}/users/{userId} endpoints.
It is not possible to update the locking status of a User using the 'Update User' activity. For lock management, use the 'Lock User' and 'Unlock User' activities.
Updating a User via Process Definition
The 'Update User' activity can be used to update various properties associated with an Identity Store User.
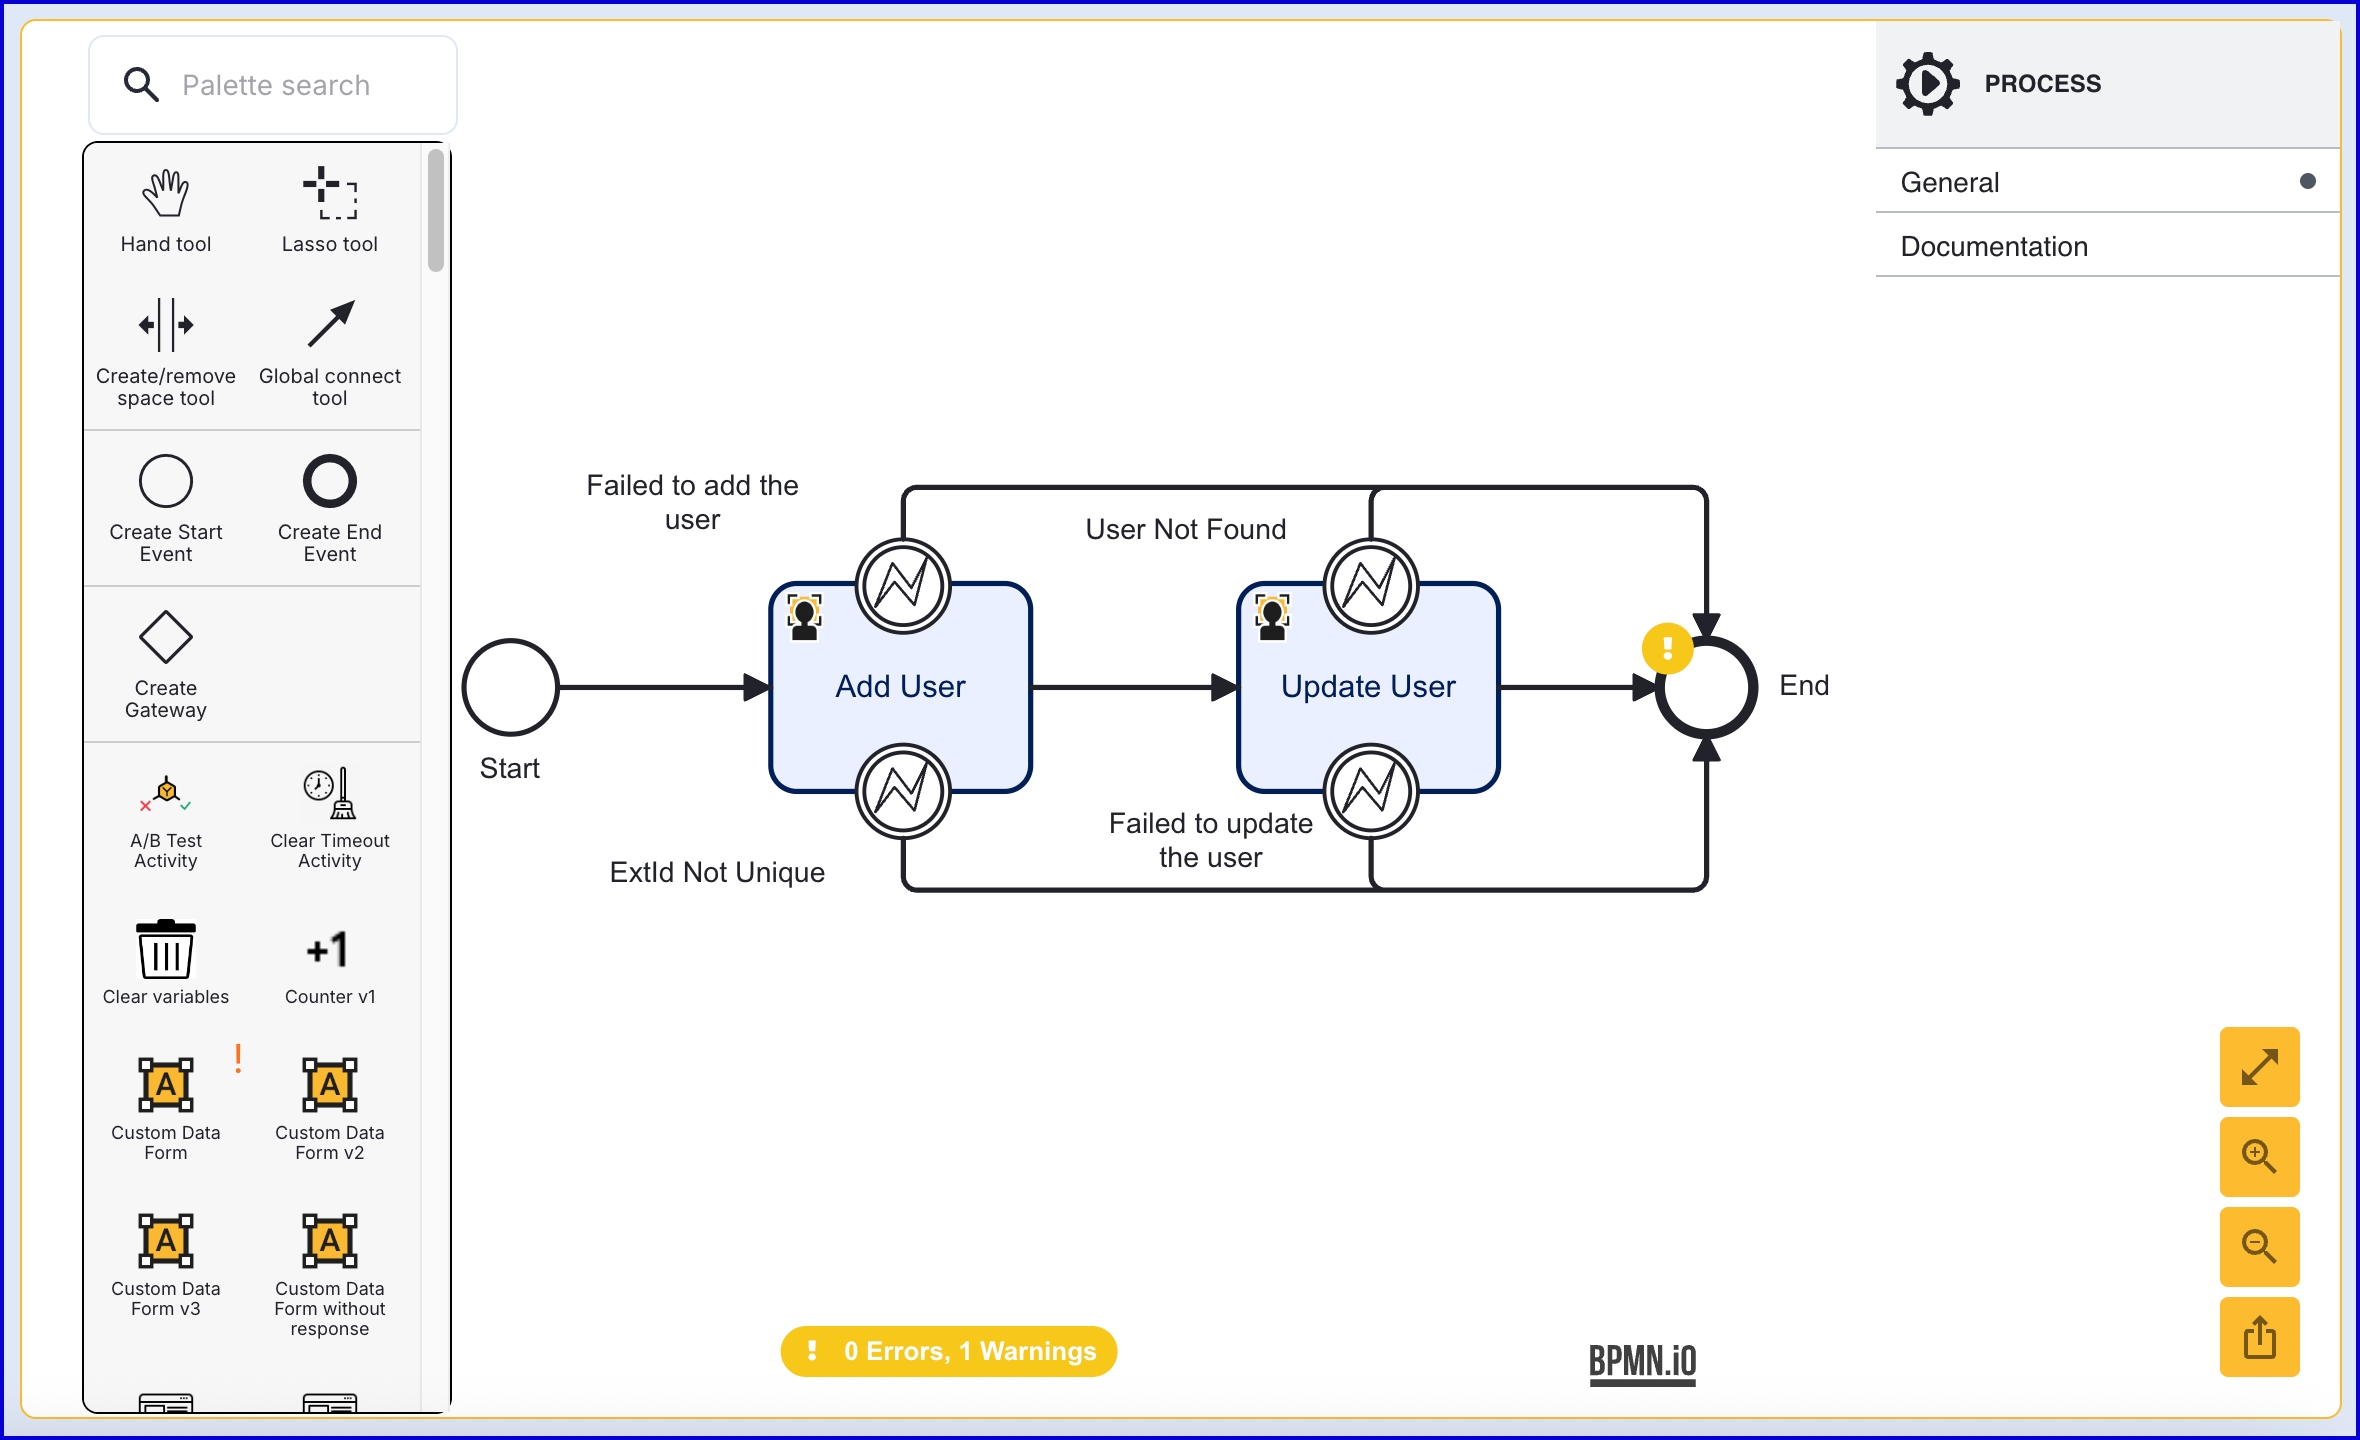
The example above demonstrates the use of the 'Update User' activity which is used to update the User added via the 'Add User' activity. This activity provides the following configurable input parameters:
Input Parameter | Type | Description |
|---|---|---|
Store Name* | String | Required - Represents the Identity Store that the User will be added to. |
User Attributes | <String, String> | A key-value pair of additional optional attributes used to describe the User. |
User Date of Birth | Date | The User's date of birth in the format: "yyyy-mm-dd" |
User Email | String | The User's email address in the format: "example@domain.com" |
User External ID | String | This field can be used to update the External ID of the User. |
User ID | String | An ID used to identify the User to be updated. |
User First Name | String | The first name of the User. |
User Key* | String | Required - A key used to identify the User within the Process Definition execution. |
User Last Name | String | The last name of the User. |
User Locale - Country | String | The User country. |
User Locale - Language | String | A two-letter ISO-639 formatted language tag. |
User Locale - Variant | String | A variant subtag of the User country. 5-8 letters or 4 characters starting with a digit, separated by hyphens. |
User Nationalities | String | The nationality of the User. |
User Status | String | The User status indicates whether the User is in a pending, active, locked or disabled state. |
User Timezone | String | The timezone of the User Country. This value must be in line with TZDB code format. Example: EST. |
User Type | String | An optional parameter used for organizing Users into different types. A maximum of 64 characters is allowed. |
Updating a User Via TrustX API
A user can be updated using either the 'User ID' or 'External User ID' by calling the /api/identity-store/stores/{storeName}/users/{extId}/ext or /api/identity-store/stores/{storeName}/users/{userId} endpoints.
This example demonstrates updating the 'firstName' and 'lastName' using the 'External User ID'.
Permissions: TNT#{tenant}#IdentityStore:updateUserByExtId , TNT#{tenant}#IdentityStore:updateUser
Example Request:
Example Response:
Locking a User via TrustX API
A User may be locked via the API using the same query. This example will demonstrate how to apply a temporary lock to a User. Note that the same endpoint and permissions are required.
Example Response:
As seen in the example response, details of the lock and when the lock will be removed are added to the User.
Adding a Face Image to a User
A face image can be added to a User during a Process Instance using the 'Add Face Image to User' activity in a Process Definition or using the /api/identity-store/stores/{storeName}/users/{userId}/biometrics endpoint.
This section will demonstrate how to capture a face image and add the image to an Identity Store User.
Adding Face Image via Process Definition
Step 1 - Configure the Face Capture Process
This sample uses a standard face capture process to capture a face image from the end-user. To configure this, navigate to Process Definitions > New Process Definition. In this example, the 'Face capture example' template will be used.
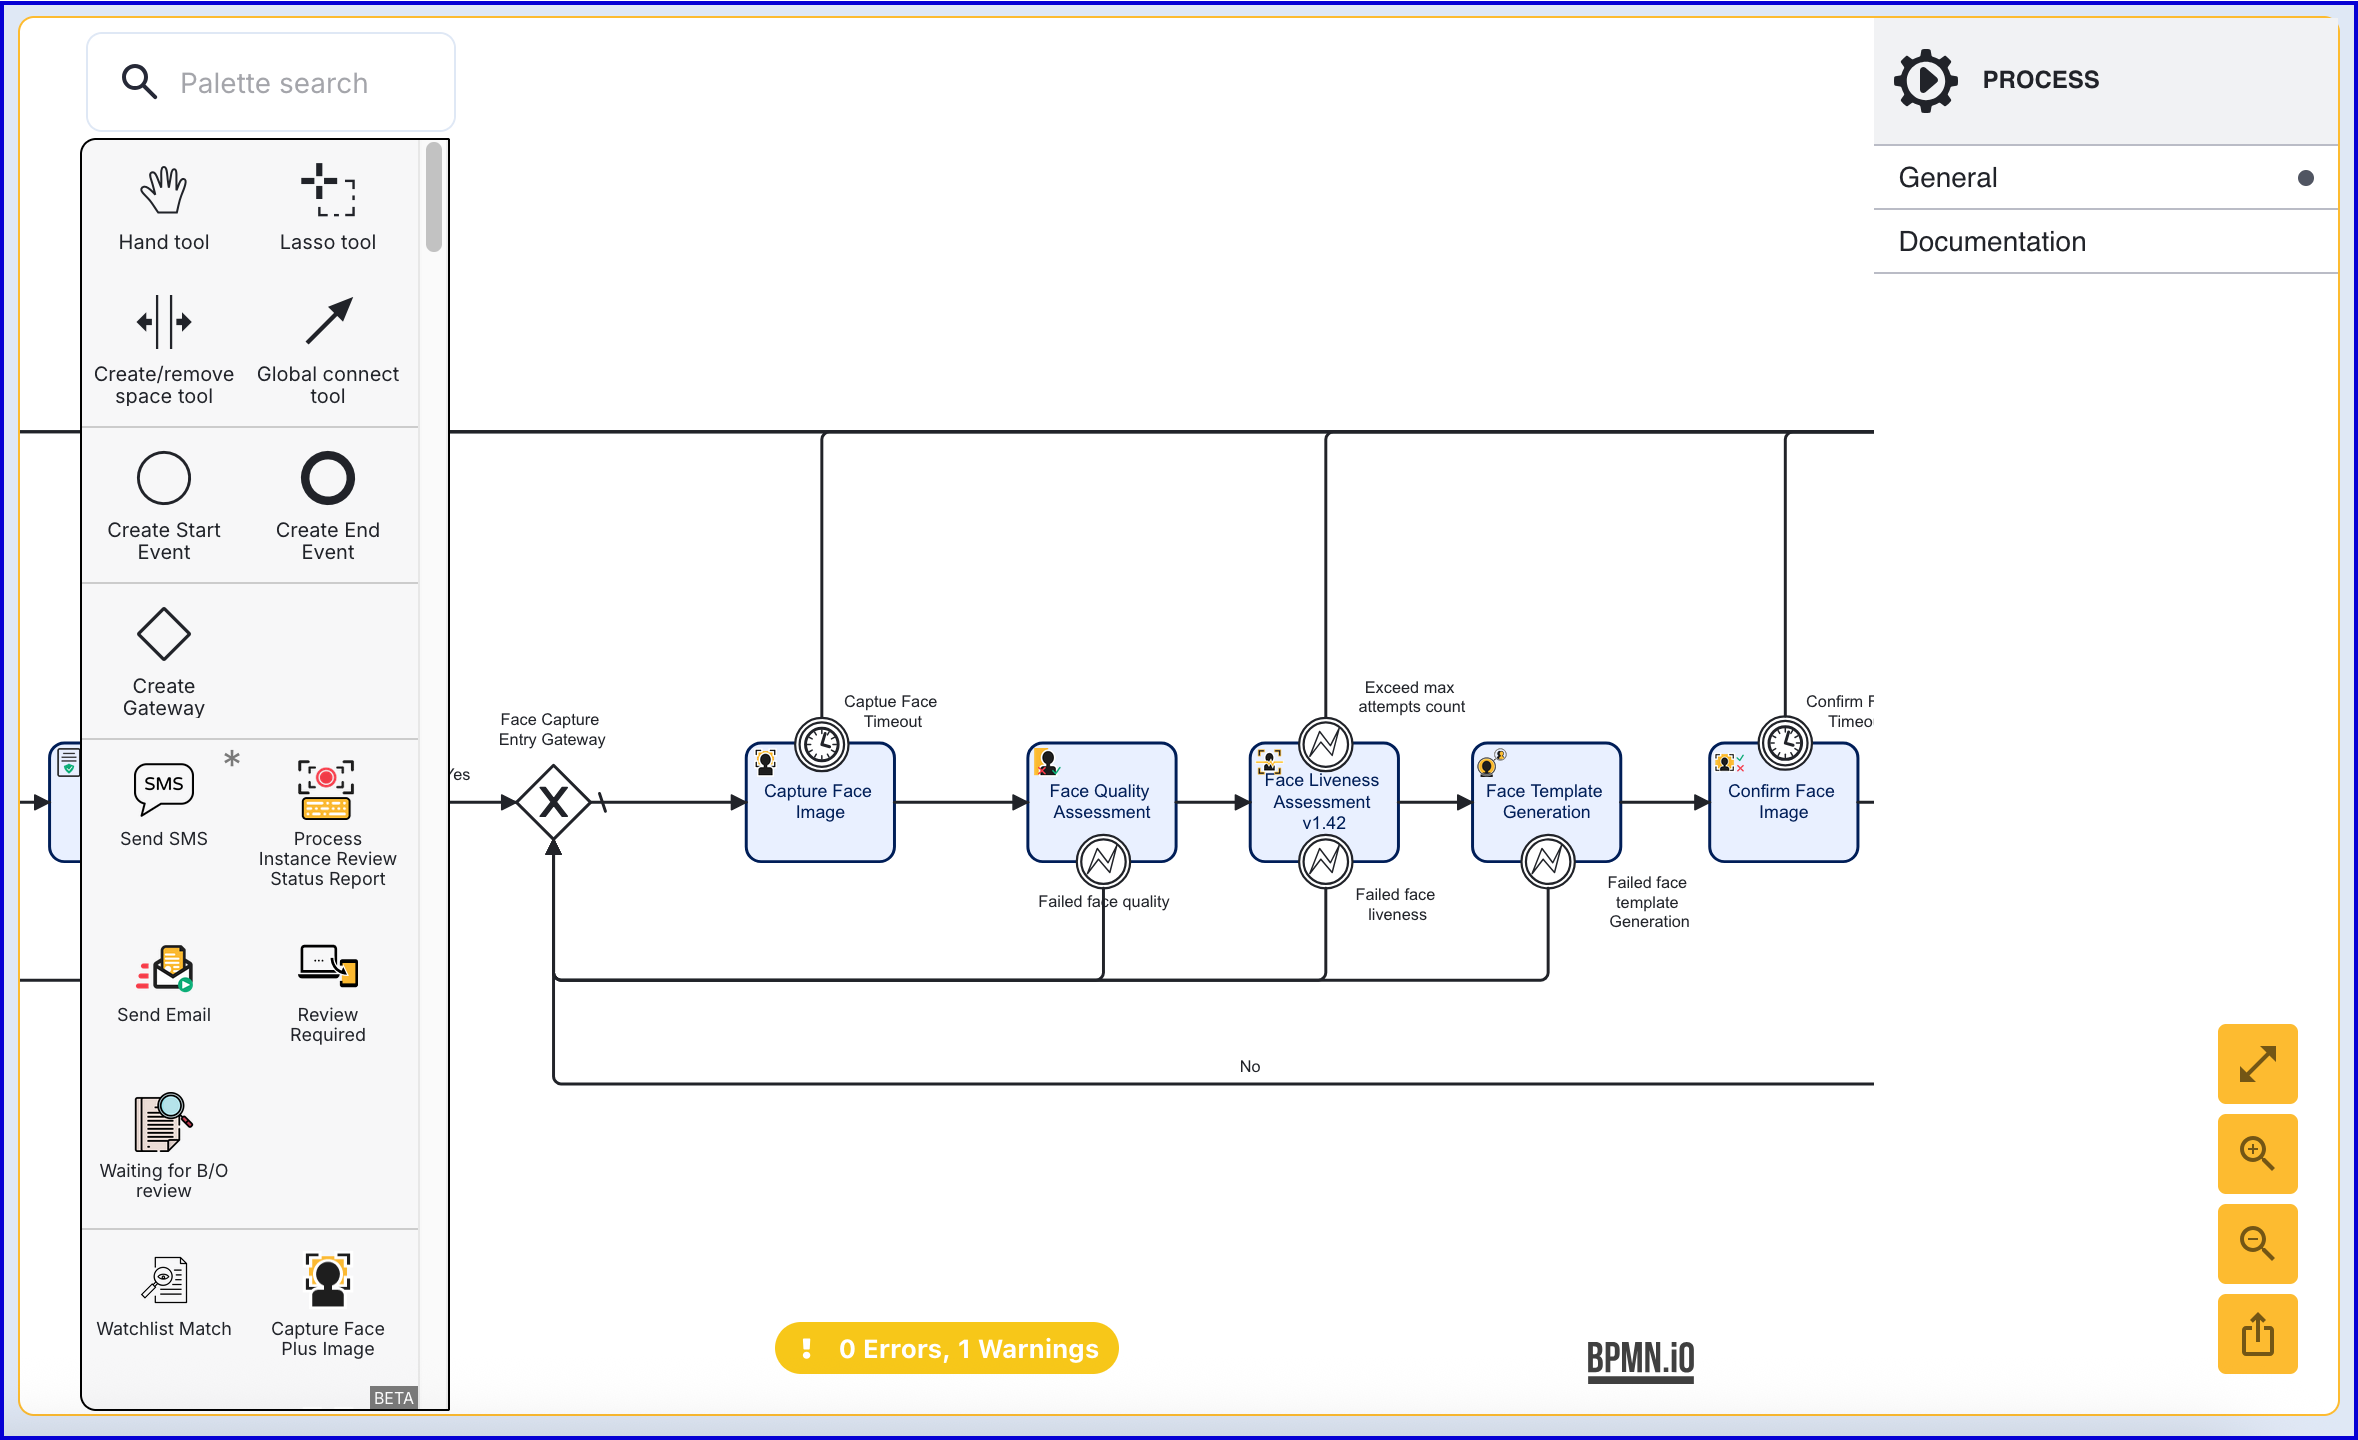
Step 2 - Add Face Image to User Activity
After the face image has been confirmed via the 'Confirm Face Image' step, add the 'Add Face Image to User' activity and connect them using a sequence flow arrow.
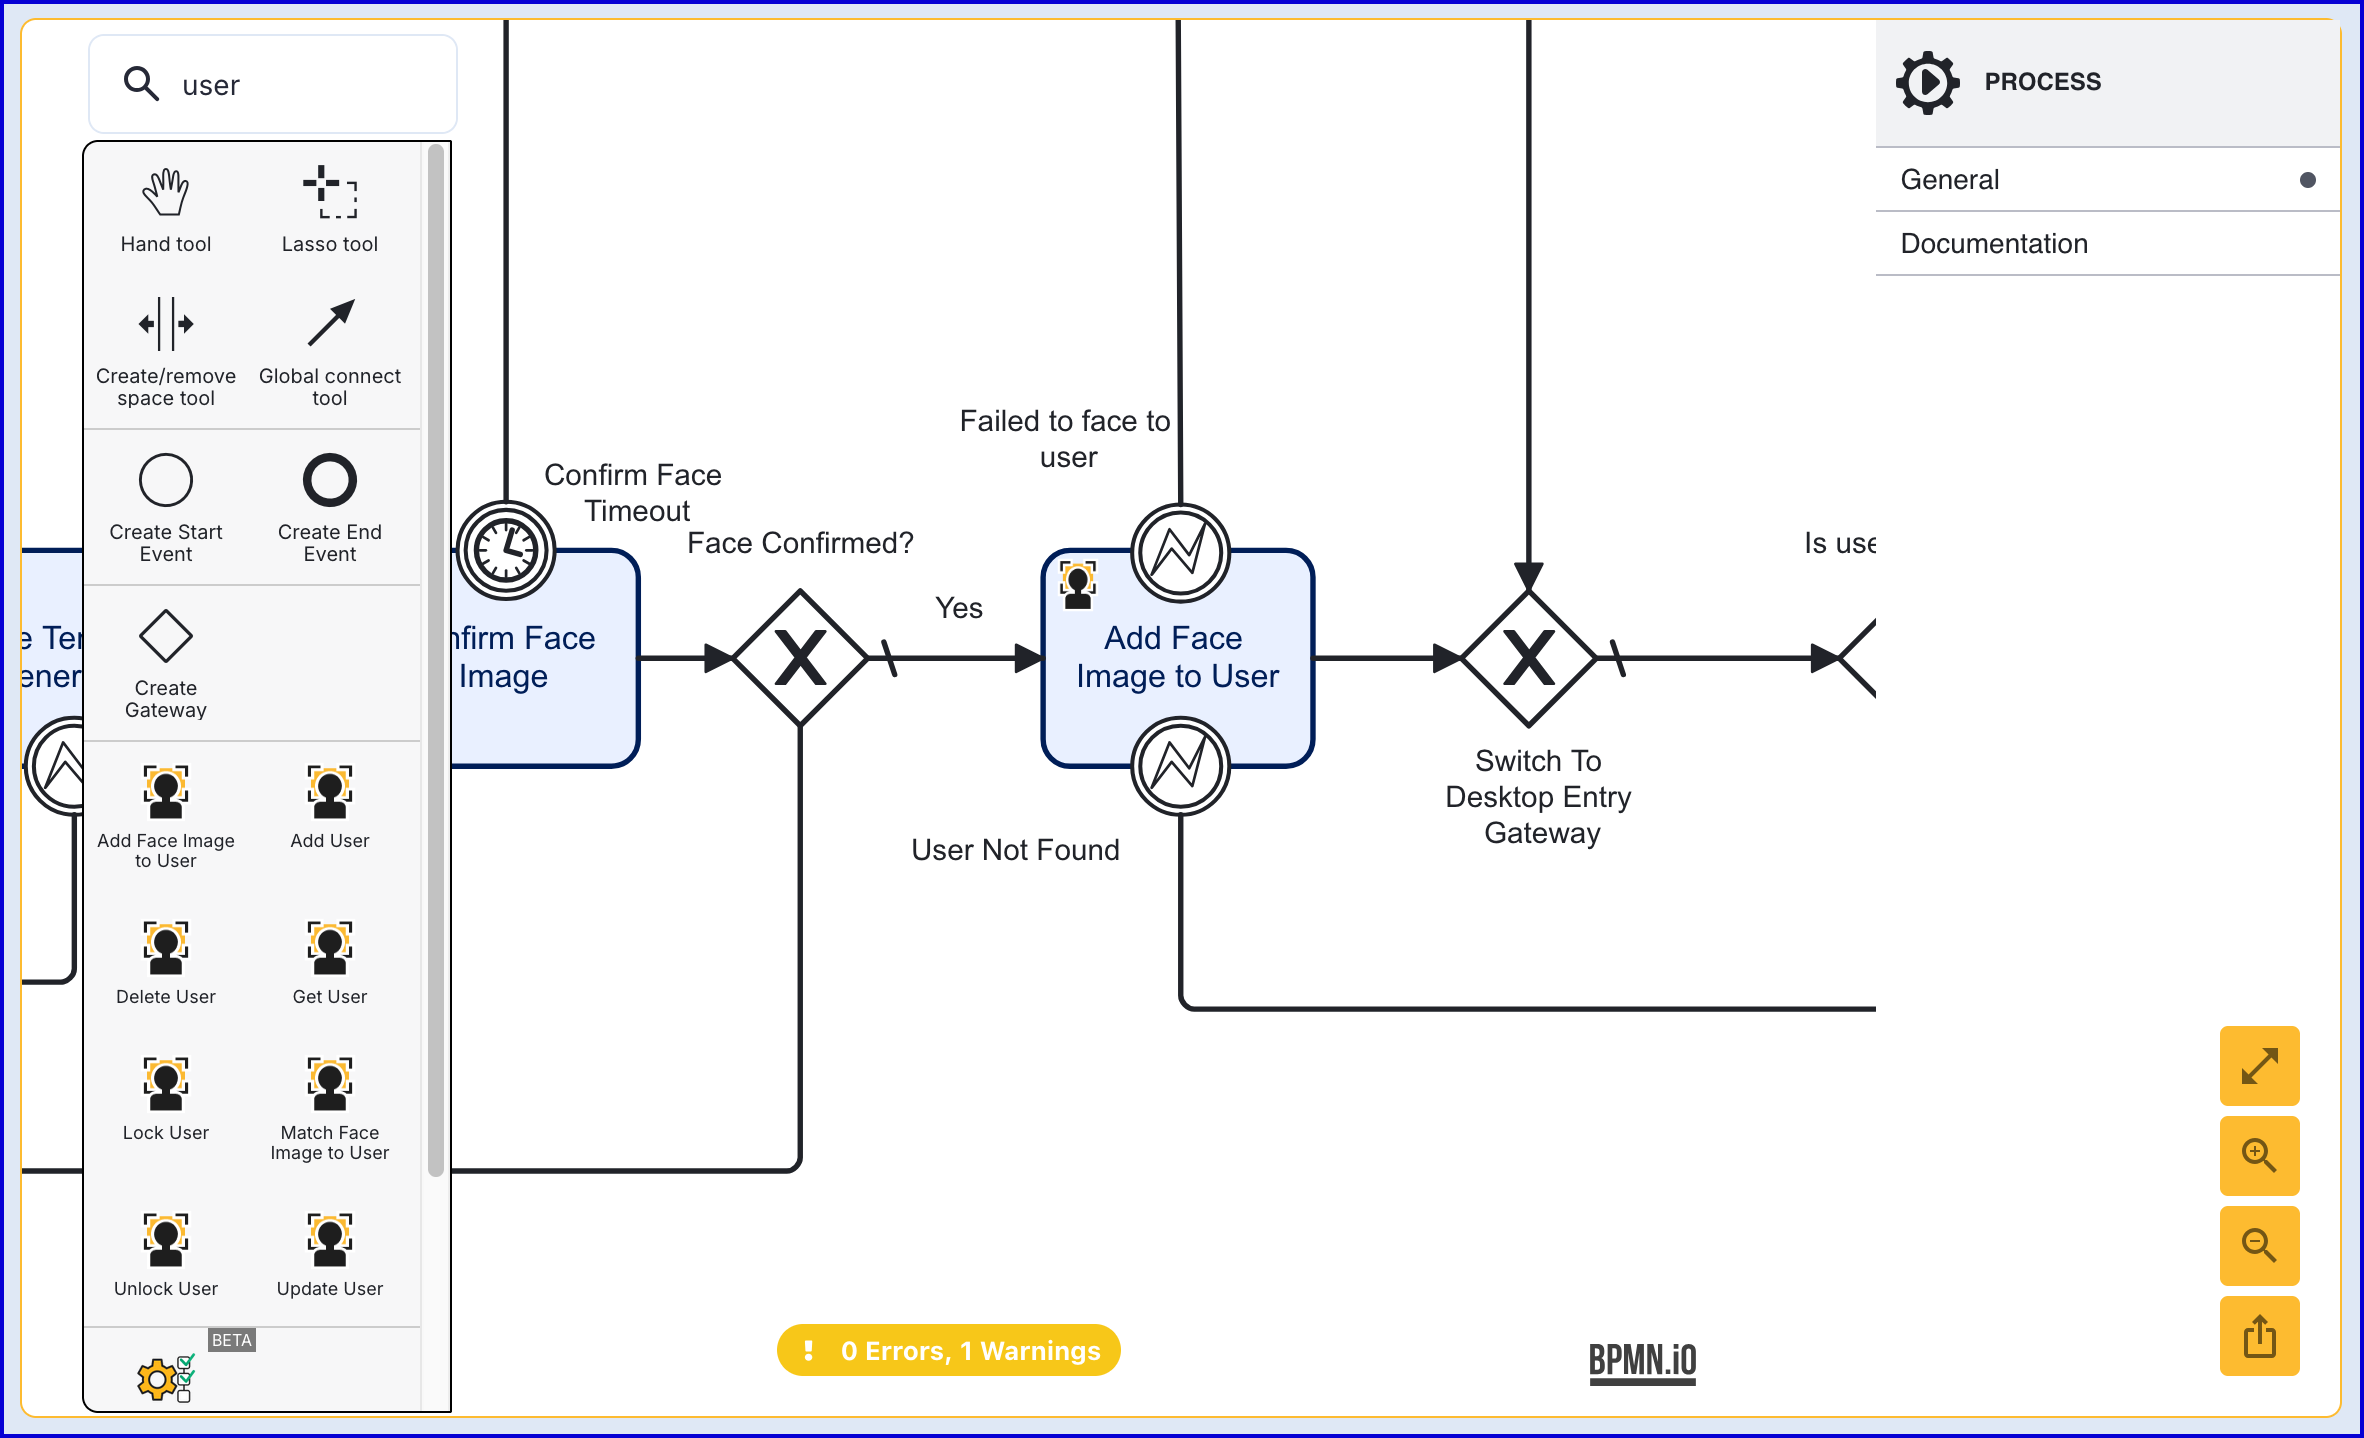
Click the 'Add Face Image to User' activity to open the right-side contextual menu to configure the input parameters.
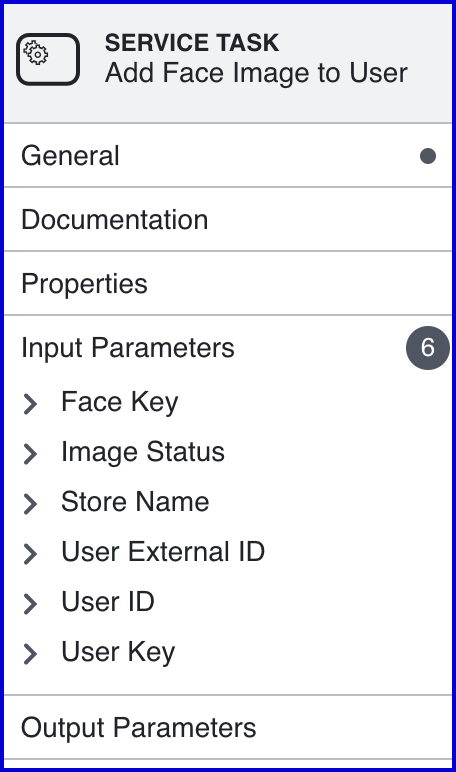
The table below describes each of the configurable input parameters:
Input Parameter | Type | Description |
|---|---|---|
Face Key | String | Required - A key used to identify the Face within the Process Definition execution. This should match with the face captured during the Process Instance. |
Store Name | String | Required - The name of the Identity Store that contains the User |
User External ID | String | This property can be used to identify the User that the face image will be added to. One of User External ID or User ID is required. |
User ID | String | The unique ID automatically generated when the User is created. In the context of the 'Start Passkey Registration' activity, this ID can be used to identify the User that the face image will be added to. One of User External ID or User ID is required. |
User Key | String | Required - A key used to identify the User within the Process Definition execution. |
When defining which User the the face image will be added to, only one of the User ID input parameters is required.
Adding Face Image via API
A face image can be added to a User using the /api/identity-store/stores/{storeName}/users/{userExtId}/biometrics/ext or /api/identity-store/stores/{storeName}/users/{userId}/biometrics endpoints.
This query can be used to add or update an existing face biometric associated with a User.
The type, subtype and data fields of the biometric object are mandatory and the data must match the subtype .
Permissions: TNT#{tenant}#IdentityStore:addUserBiometricByExtId , TNT#{tenant}#IdentityStore:addUserBiometric
Example Request: