Title
Create new category
Edit page index title
Edit category
Edit link
xFace Injection Attack Detection Integration
Introduction
TrustX supports a new xFace Injection Attack Detection (IAD) capability for face capture. Through integration with xFace IAD, TrustX provides improved support for face capture verification that ensures the captured face image is an authentic, genuine face.
This document will describe the necessary steps to integrate xFace IAD within a Process Definition and view the results of the capture process.
Configuring xFace IAD
xFace IAD can be integrated with any Process Definition using the 'Capture xFace IAD v2.3.1 Image' activity found in the Process Designer. This section will describe how to configure the Process Designer to include this activity as part of a Process Definition.
Step One - Create a Process Definition
to create a new Process Definition:
- Login to the Backoffice application.
- Click the 'Process Definitions' tab from the left-side vertical menu, then click the 'New Process Definition' button from the top -right of the page.
- A pop-up will appear where users can choose to create a Process Definition from scratch or from a template. In this example, a Process Definition with face capture only will be used.
Step Two - Add the xFace IAD Activity
A standard face capture flow will include a 'Capture xFace IAD v2.3.1 Image' activity where the face capture is performed. In this document, the standard Capture Face Image activity will be replaced with the 'Capture xFace IAD v2.3.1 Image' activity, where the captured face image will undergo checks from the injection attack detection service before being sent for quality and liveness assessment.

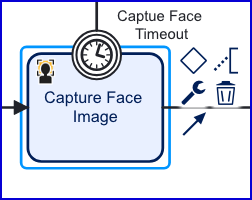
The Capture Face Image activity that will be replaced
- Click the Capture Face Image activity within the Process Designer and find the 'bin' icon to remove the activity from the flow.
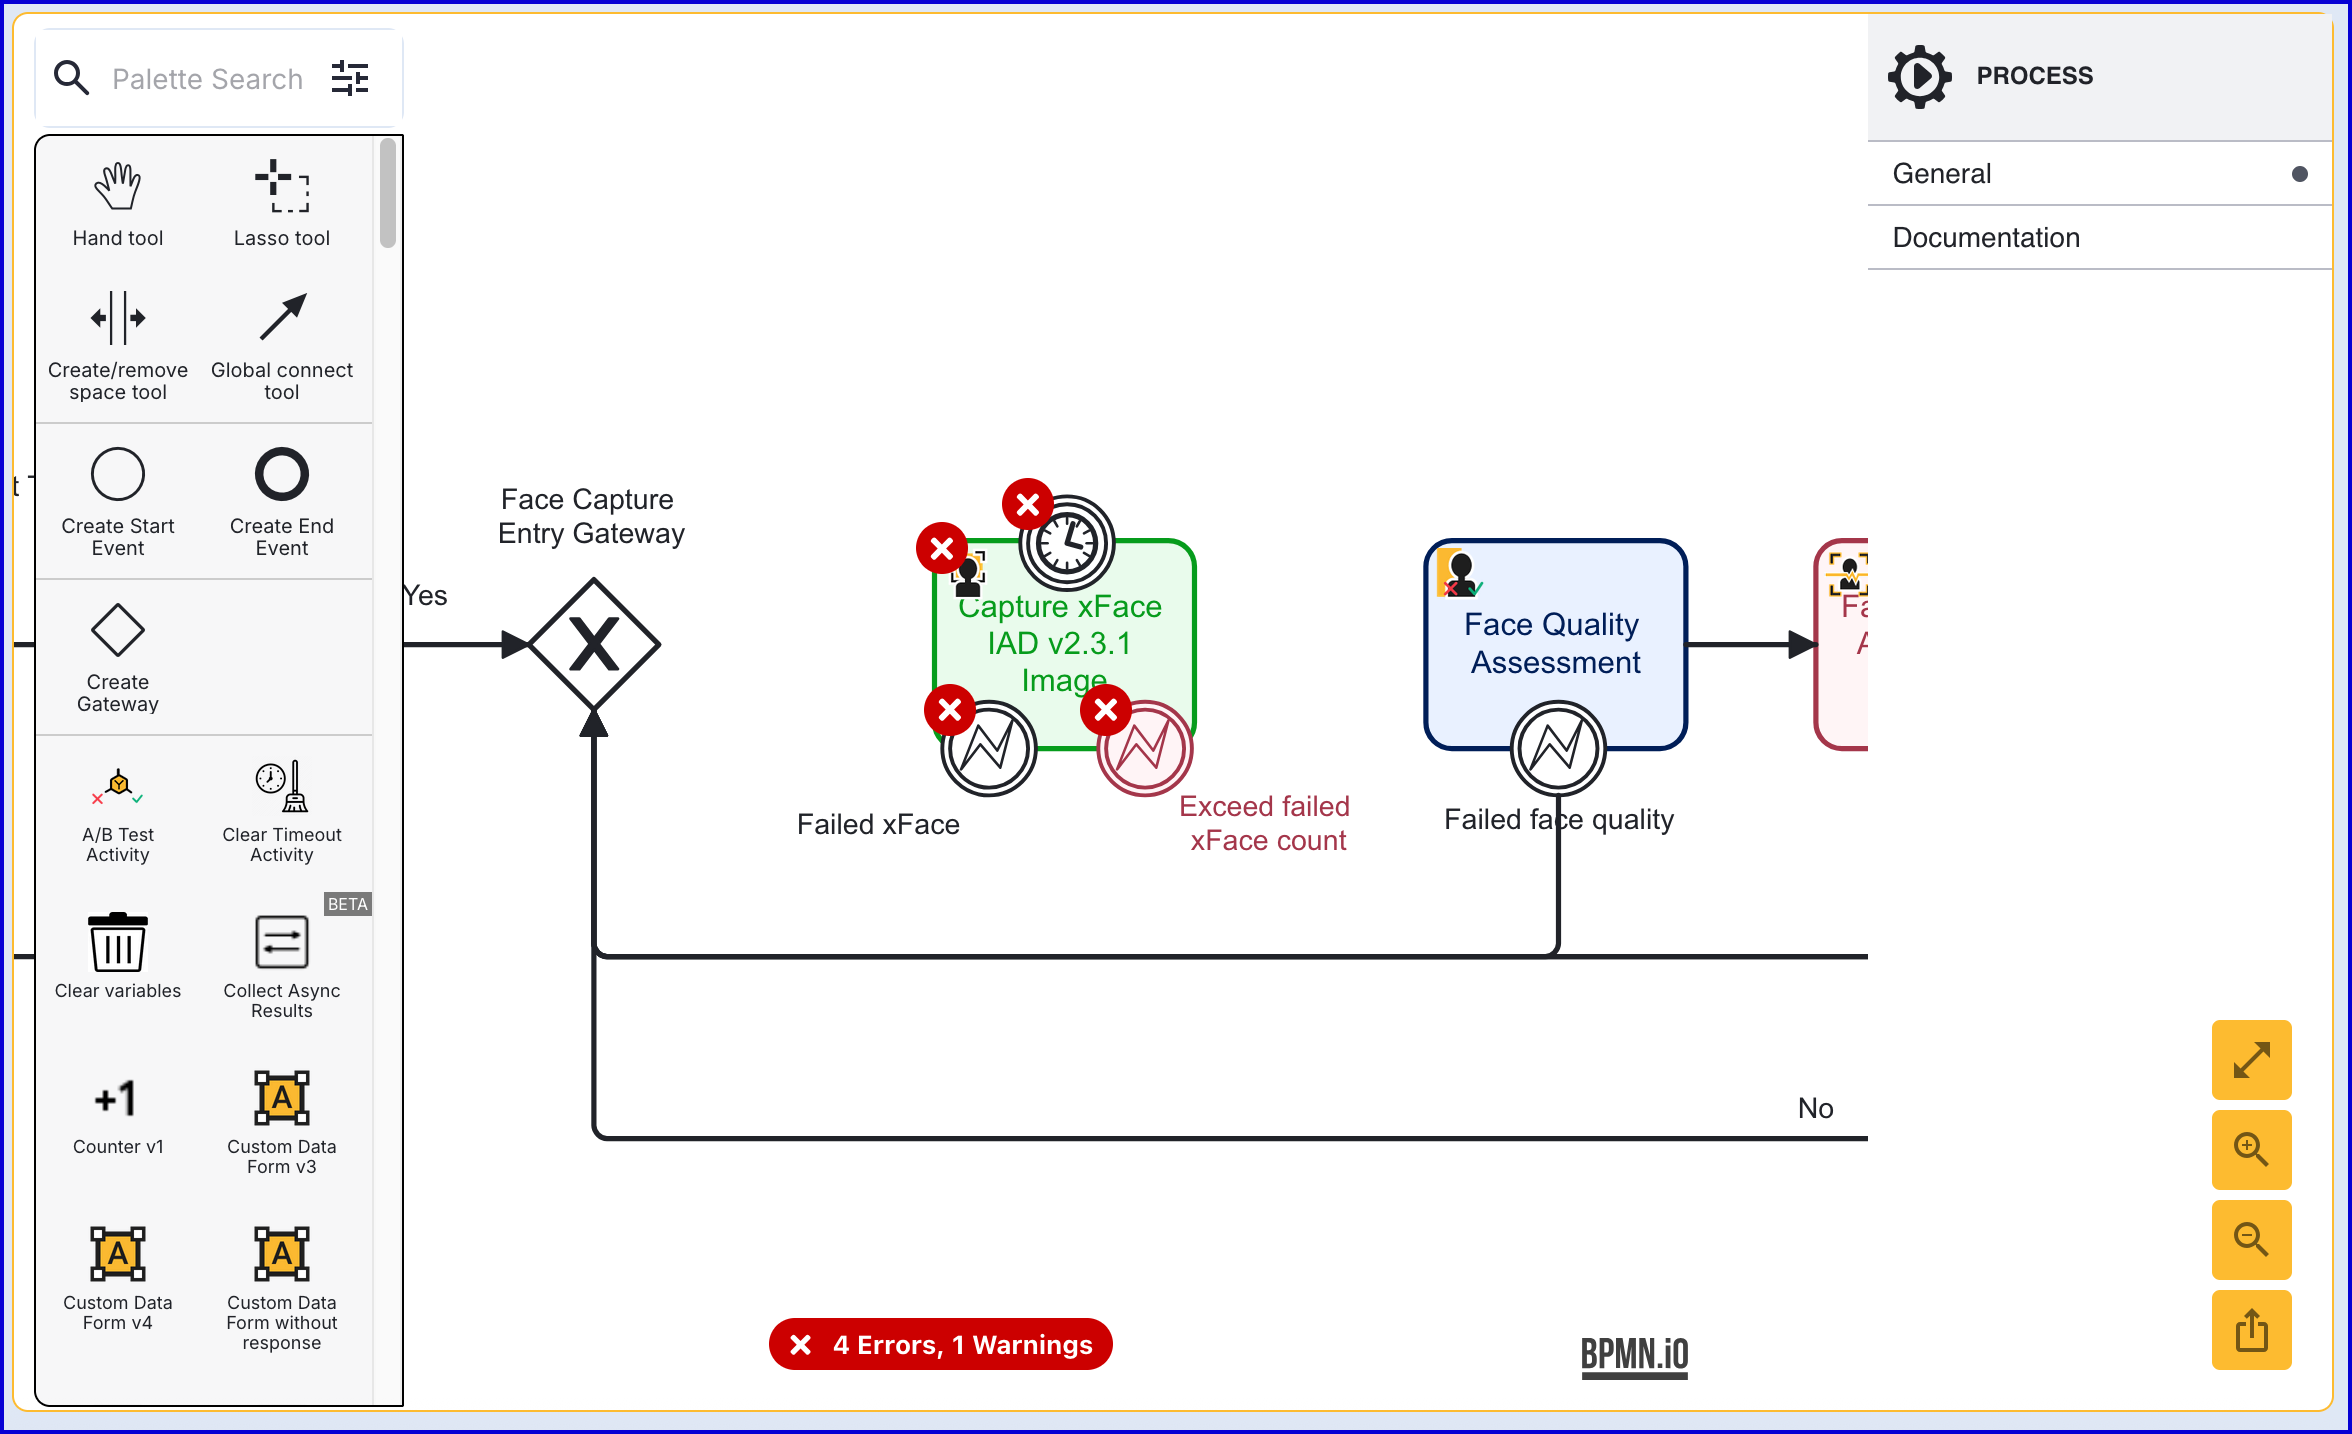
- Once the old activity is deleted, it can be replaced with the 'Capture xFace IAD v2.3.1 Image' activity. Find the activity in the Process Designer pallet, or search using the search field, then drag the new activity into place where the previous activity was found.
Step Three - Connect xFace Activity
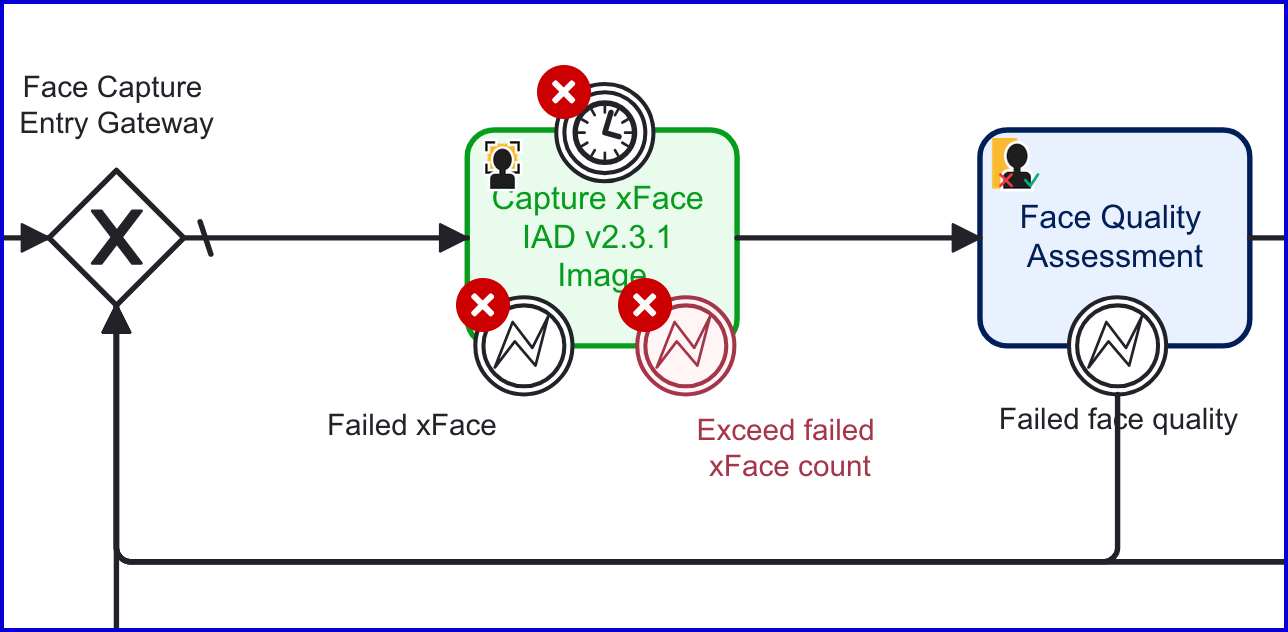
The activity provides three boundary events by default.
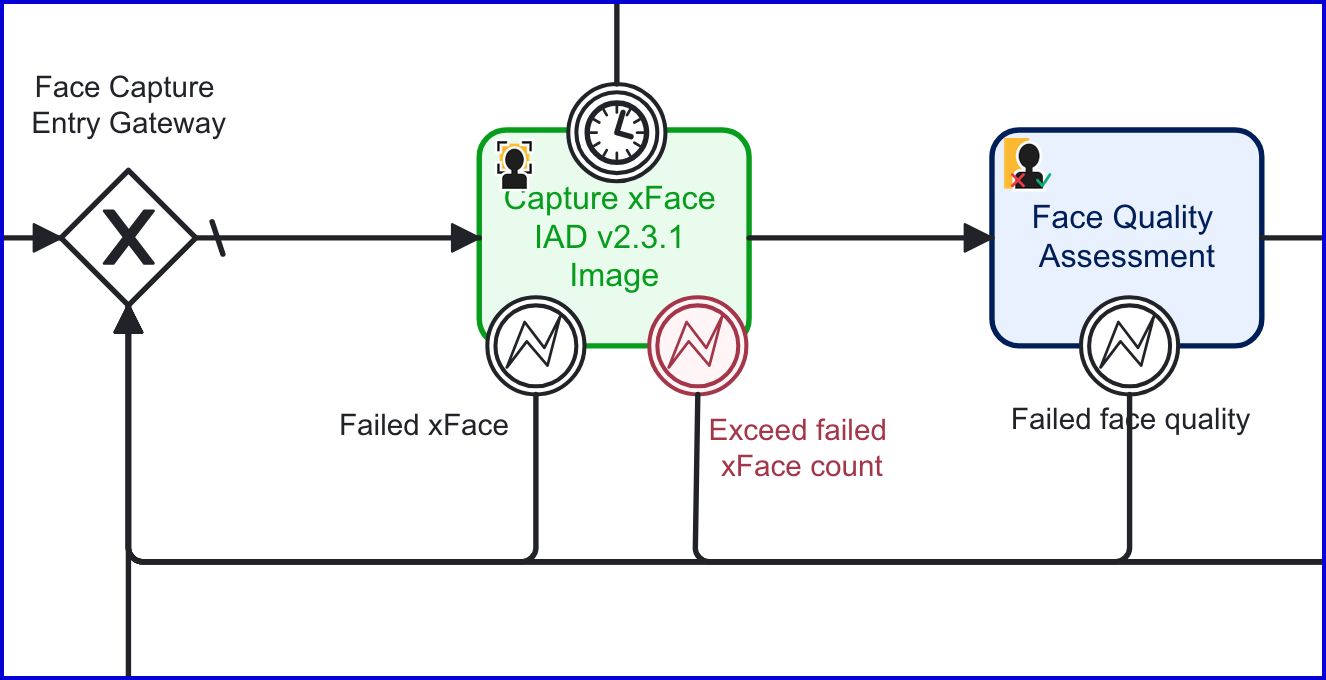
- Failed xFace - Triggers when the captured face image fails the injection attack detection check.
- Exceed Failed xFace Count - Triggers when the number of capture attempts fails the count set within the activity input parameters.
- Timer Boundary Event - Triggers when the end-user exceeds the allotted time required to capture a face image.
- To begin, connect the Face Capture Entry gateway to the 'Capture xFace IAD v2.3.1 Image' activity using a sequence flow arrow. Additionally, connect the activity to the Face Quality Assessment activity.
- Connect the 'Capture xFace IAD v2.3.1 Image' boundary events. In this example, the Failed xFace event has been connected to the Face Capture Entry gateway, while the Timer and Exceed Failed xFace Count events are connected to the Write Summary Report activity.
Step Four - Configure the xFace IAD Activity
The 'Capture xFace IAD v.2.3.1' activity provides input parameters that enable users to update various configuration options of the activity.
To access the parameters, click the activity to open the right-side contextual menu.
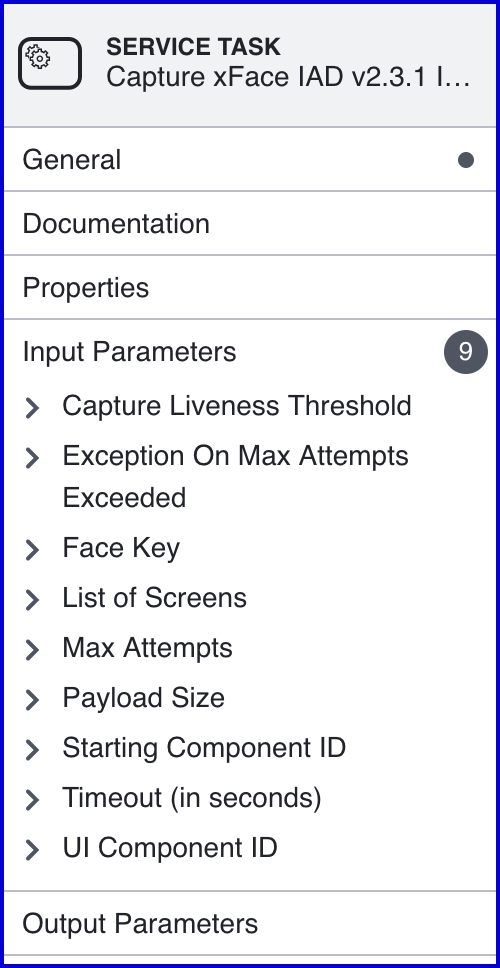
| Parameter | Description | Type | Default |
|---|---|---|---|
| Capture Liveness Threshold | The threshold value used to determine the strictness of the Face Plus check. The default value is 0.5. | DOUBLE | ${0.5} |
| Exception on Max Attempts Exceeded | Determines whether to throw an exception if the maximum number of capture attempts are exceeded. This is enabled by default. | BOOLEAN | ${true} |
| Face Key | The unique identifier of the captured face image. | STRING | face1 |
| List of Screens | The list of screens to be shown to the end-user. | STRING_LIST | {instructions, capture} |
| Max Attempts | The maximum number of attempts allowed. | INTEGER | ${3} |
| Payload Size | Contains the encrypted image of the face. Possible values include "normal" and "small". A small payload means faster but less secure processing. | STRING | normal |
| Starting component ID | The unique identifier of the activity. | STRING | face-capture-plus-v2 |
| Timeout (in seconds) | The amount of time before a timeout will occur. This value is represented in seconds. | INTEGER | ${60} |
| UI Component ID | The name of the screen used in the capture UI. | STRING | instructions |
Viewing xFace IAD Results
xFace injection attack detection results can be viewed from the Backoffice application, TrustX API, and retrieved from session data. This section will describe how to view and retrieve results from each of these options.
Backoffice Results
Results for xFace IAD can be found in the individual Process Instance page where an xFace IAD image was captured as part of the Process Definition.
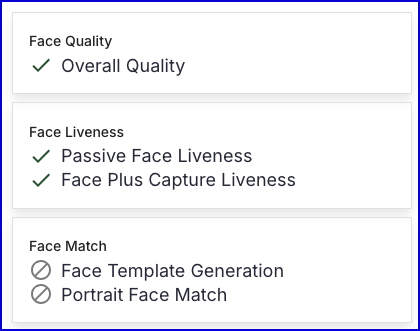
Under the Verification section, the Face Plus Captured Liveness will be listed as part of the completed verification tests.
Under the Checks section, facePlusCapturedLiveness will provide results for Face Plus checks.
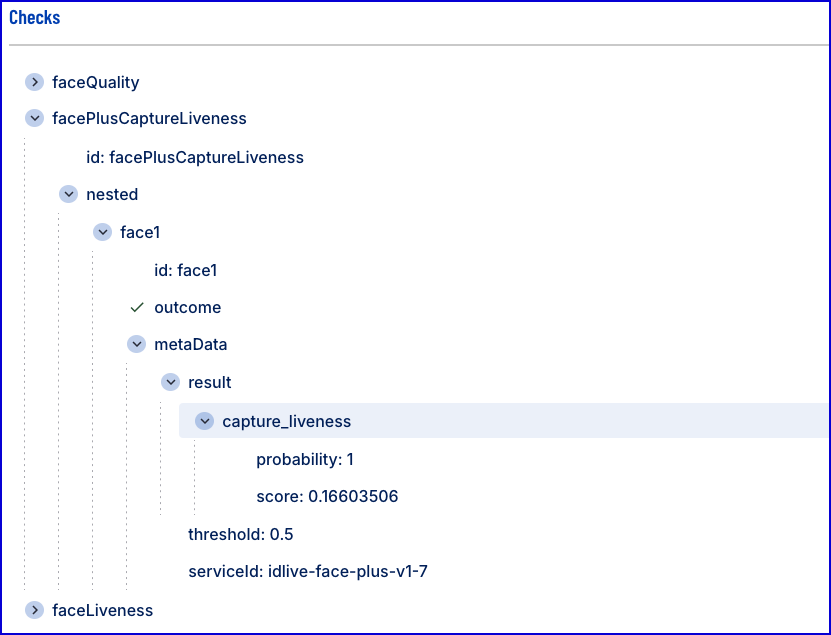
The results returned can be described as follows:
- probability - Represents the likelihood that the captured face image is a genuine face image.
- score - The score returned from the injection attack detection check. The lower the value, the more likely the captured face is a genuine face image.
- threshold - The threshold value used to determine the strictness of the xFace IAD check. The default value is 0.5.
- serviceId - The ID of the service used during xFace IAD capture.
Retrieving Results as Session Data
xFace IAD session data can be found in the _checks session data tables. As one example, users can view and change the outcome of a check using session data within a Cloud Function.
Example Cloud Function:
import jsonfrom cfresults import Outcome, OverallResult, OverallResultEncoderoverallResult = OverallResult(Outcome.DECLINE, {})cfResults = json.loads(OverallResultEncoder().encode(overallResult))results["cfResults"] = cfResultschecks = params["vars"]["_checks"]def change_outcome(checks): checks["facePlusCaptureLiveness"]["face1"]["outcome"]= "FAIL"change_outcome(checks) pvars = {"_checks": checks}results["executionVariables"] = pvarsFrom the example above, the _checks table is retrieved and stored in the checks variable. In the change_outcome function, the outcome of xFace IAD is retrieved from the checks variable using the following line:
checks["facePlusCaptureLiveness"]["face1"]["outcome"] - this represents the outcome of the xFace IAD checks. This can be manually configured and set to any outcome desired. In this case, the outcome is set to "FAIL" regardless of the xFace IAD result.
The function is run using change_outcome(checks) where checks contains the _checks session data from the current ID&V flow.
Finally, the _check results are updated by setting it to the modified checks variable.
pvars = {"_checks": checks}
results["executionVariables"] = pvars
Configure the Process Definition
When configuring the Process Definition, it is important that the Cloud Function activity is placed after the xFace IAD activity within the Process Designer. In the example below, the Cloud Function is executed after the user returns to the desktop to resume the flow.
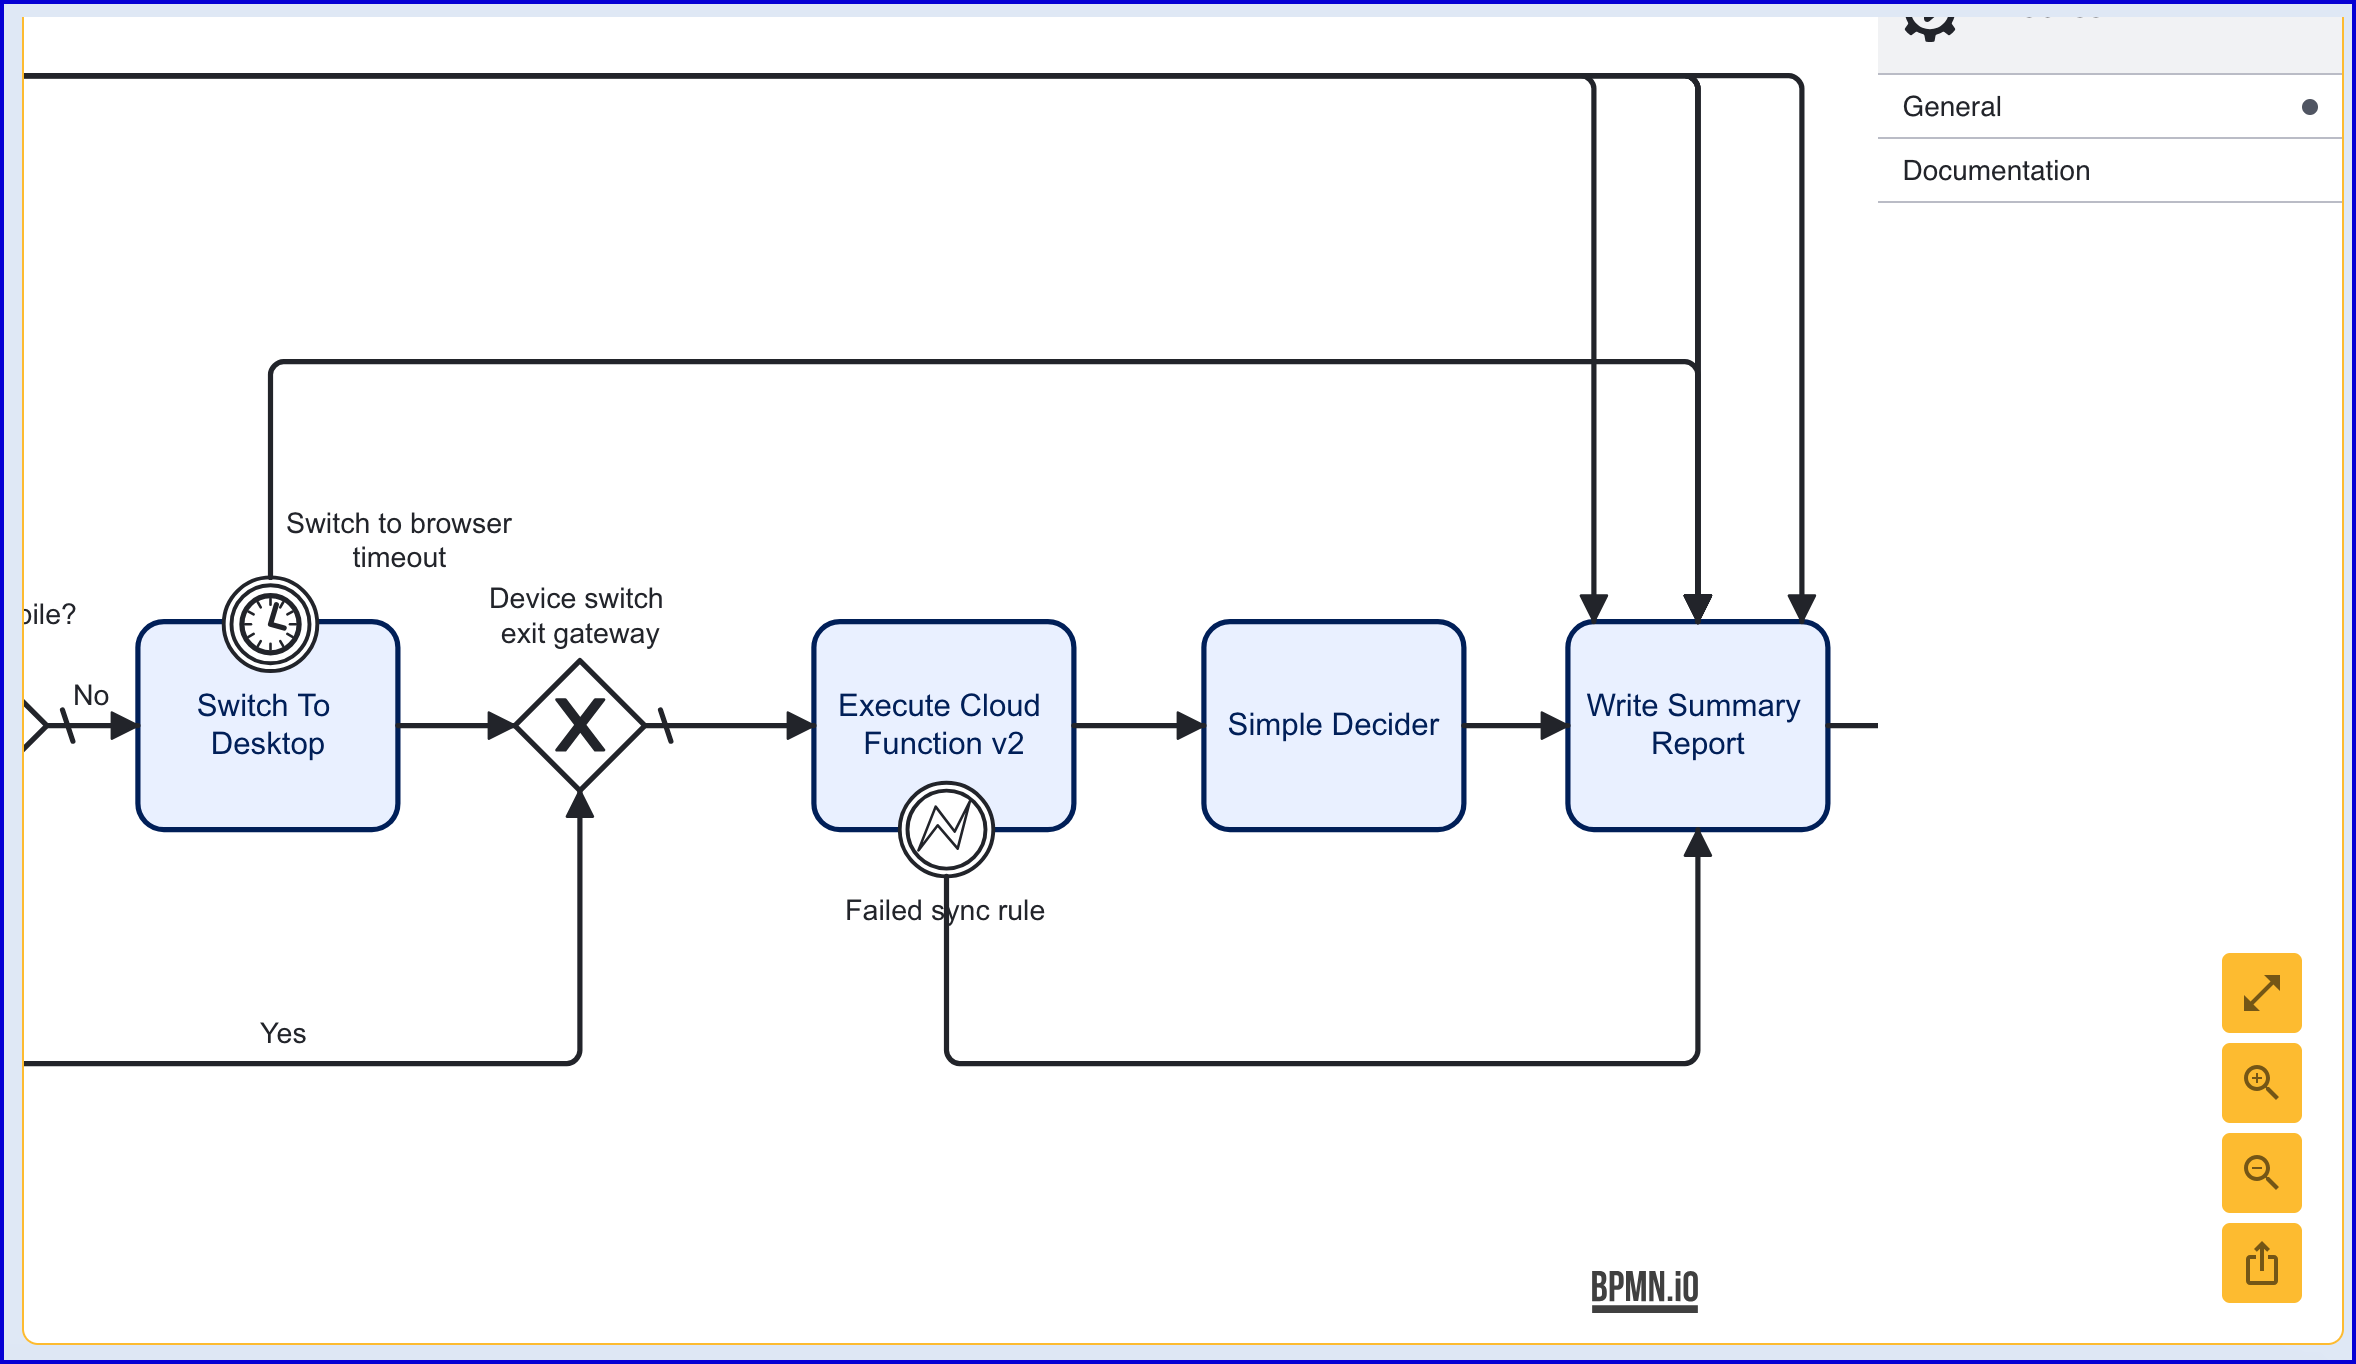
From the example above, the Execute Cloud Function v2 activity is connected to a Simple Decider, which will factor in all outcomes from each face check and calculate a final decision.
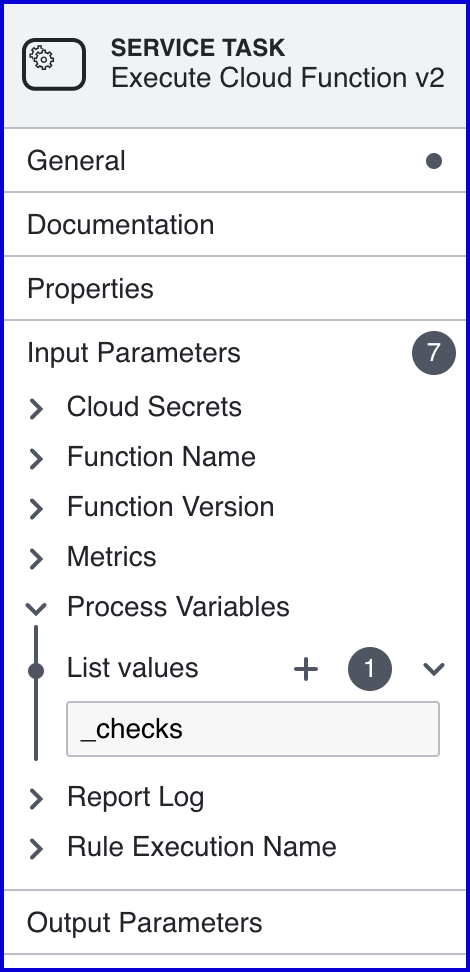
It is important to configure the Cloud Function activity and send the _checks __session data as a Process Variable within the Input Parameters. This will ensure the Cloud Function has access to the relevant data. To do this, click the Execute Cloud Function v2 activity to open the right-side contextual menu. Expand the list of Input Parameters and find the Process Variables. Add the _checks variable to the list.
Once configured, save the Process Definition to finalize the changes.