Early Access
The Watchlist feature provides a tool to create and manage lists of Persons of Interest. It allows users to maintain curated lists and track activities related to the listed individuals.
In TrustX, a Person of Interest refers to a person whose history may be suspect. It does not necessarily mean they are a criminal. And it does not necessarily mean the person should be added to a Watchlist. A Watchlist represents a group of Persons of Interest who have been assigned to it. More than one Watchlist can be created per tenant and different Watchlists may contain some of the same Persons of Interest.
Managing Watchlists in the Backoffice
Watchlists can be managed from the Backoffice application by navigating to the 'Watchlists' page found in the left-side vertical navigation bar.
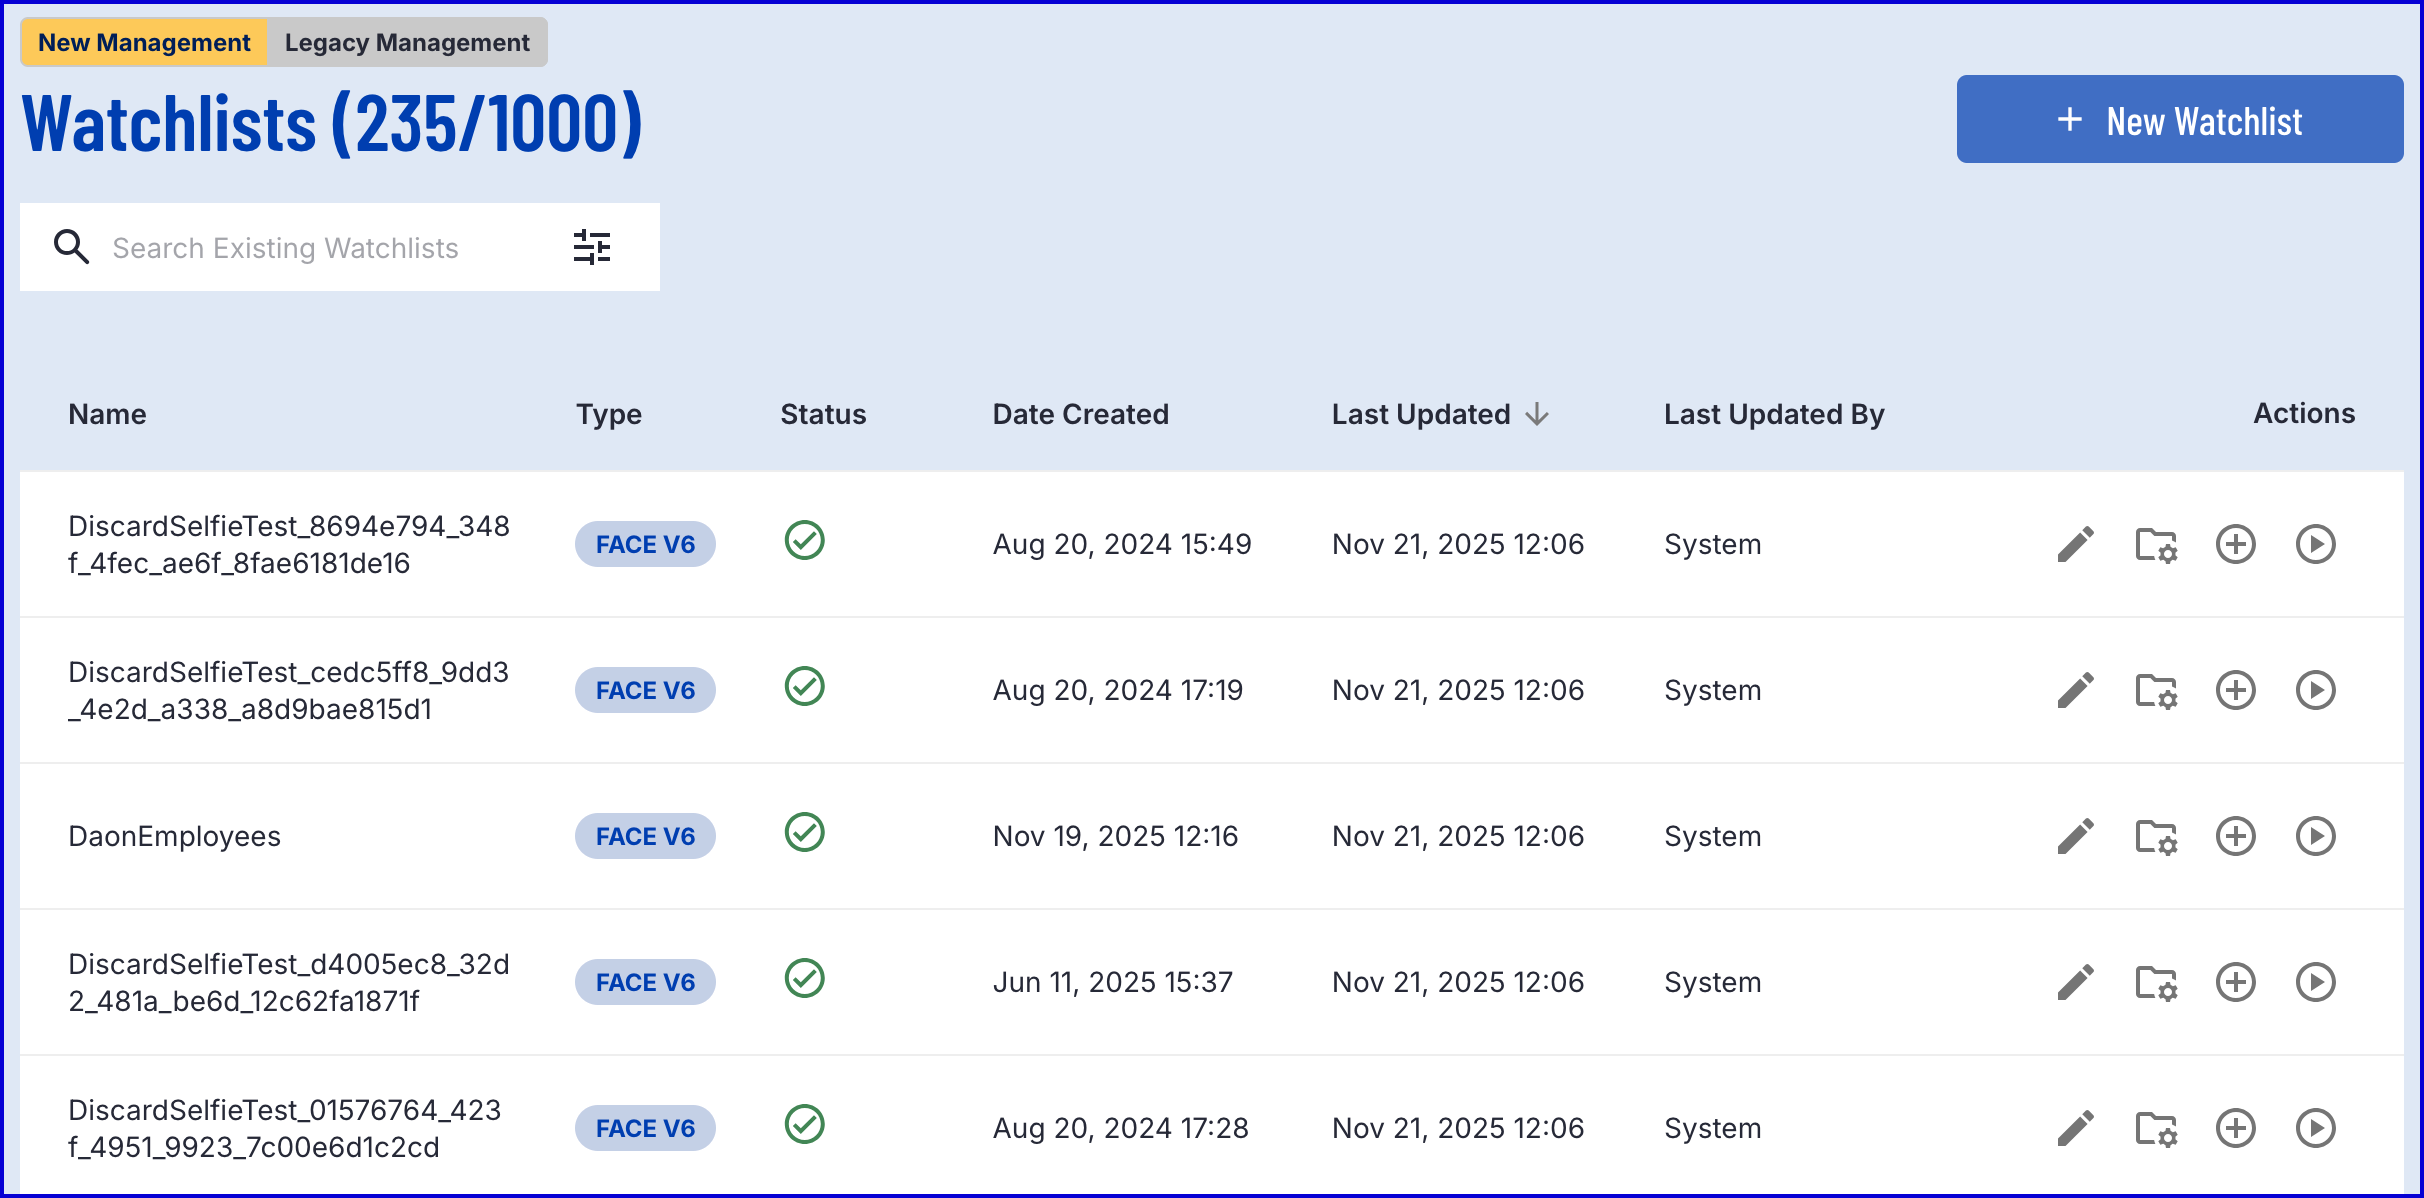
The landing page allows a user to view all Watchlists created in TrustX per tenant. By default, the Backoffice will display the New Management system introduced in TrustX release v2025.12.xx. To return to the Legacy Management system, click the 'Legacy Management' button.
This guide will discuss managing the New Management system. See Managing Legacy Watchlists for information on managing legacy Watchlists.
Creating a New Watchlist
To create a Watchlist, click the 'New Watchlist' button at the top of the 'Watchlists' page. This will open the 'New Watchlists' page.
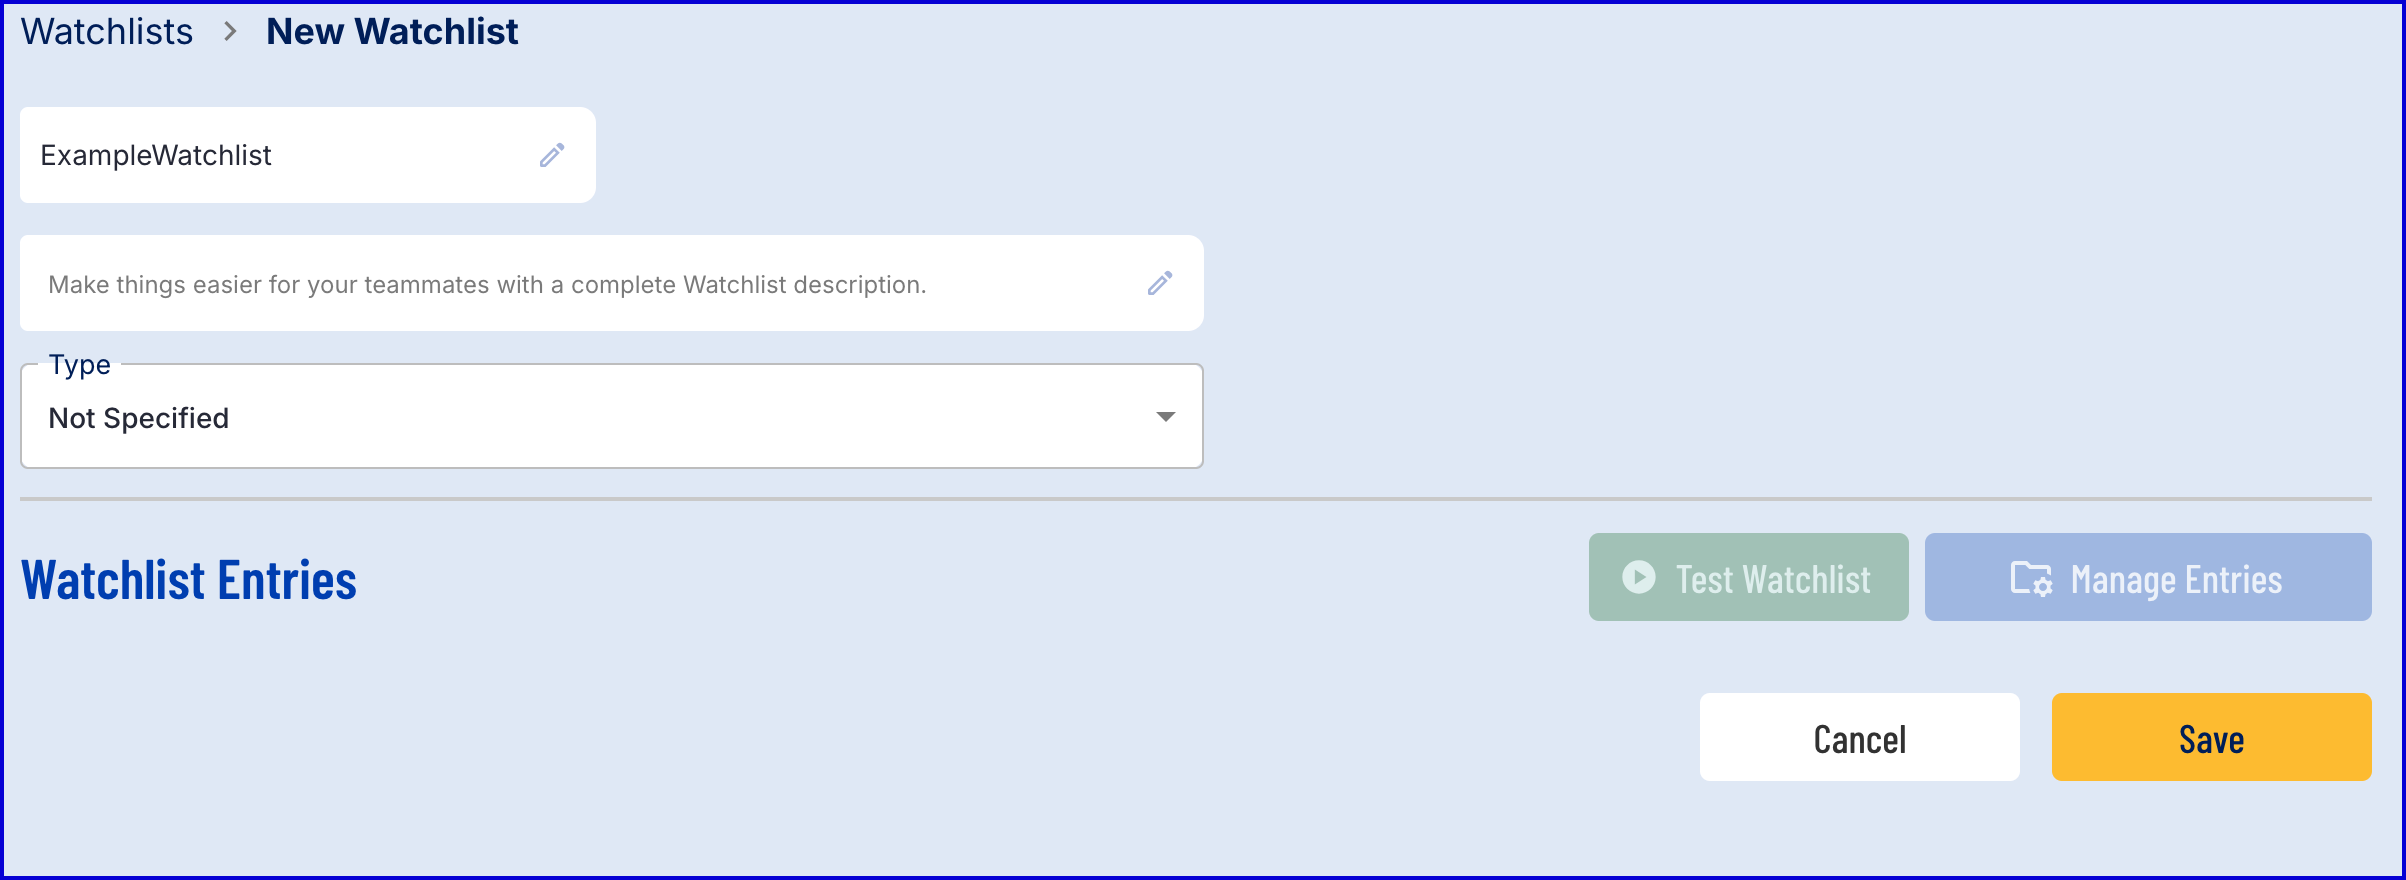
A new Watchlist can be created with the following fields:
Name - The name of the Watchlist. Once the Watchlist is saved, this field is not editable.
Description - An optional brief description that details the purpose of the Watchlist.
Type - The type of data that will be recorded in the Watchlist. Once the Watchlist is saved, this field is not editable. Possible types include:
Document Number - Identity document number matching.
Face v6 - Biometric face matching for person identification.
IPv4 Address - IP address range matching.
Visitor ID - Device/browser fingerprint matching.
Phone Number - Phone Number matching.
Email Address - Email Address matching.
When all initial fields are defined, click the 'Save' button to save the Watchlist and begin managing entries.
Managing Entries
Watchlist entries can be managed by navigating to the Manage Entries page. This page displays a list of all POIs entries currently in the Watchlist.
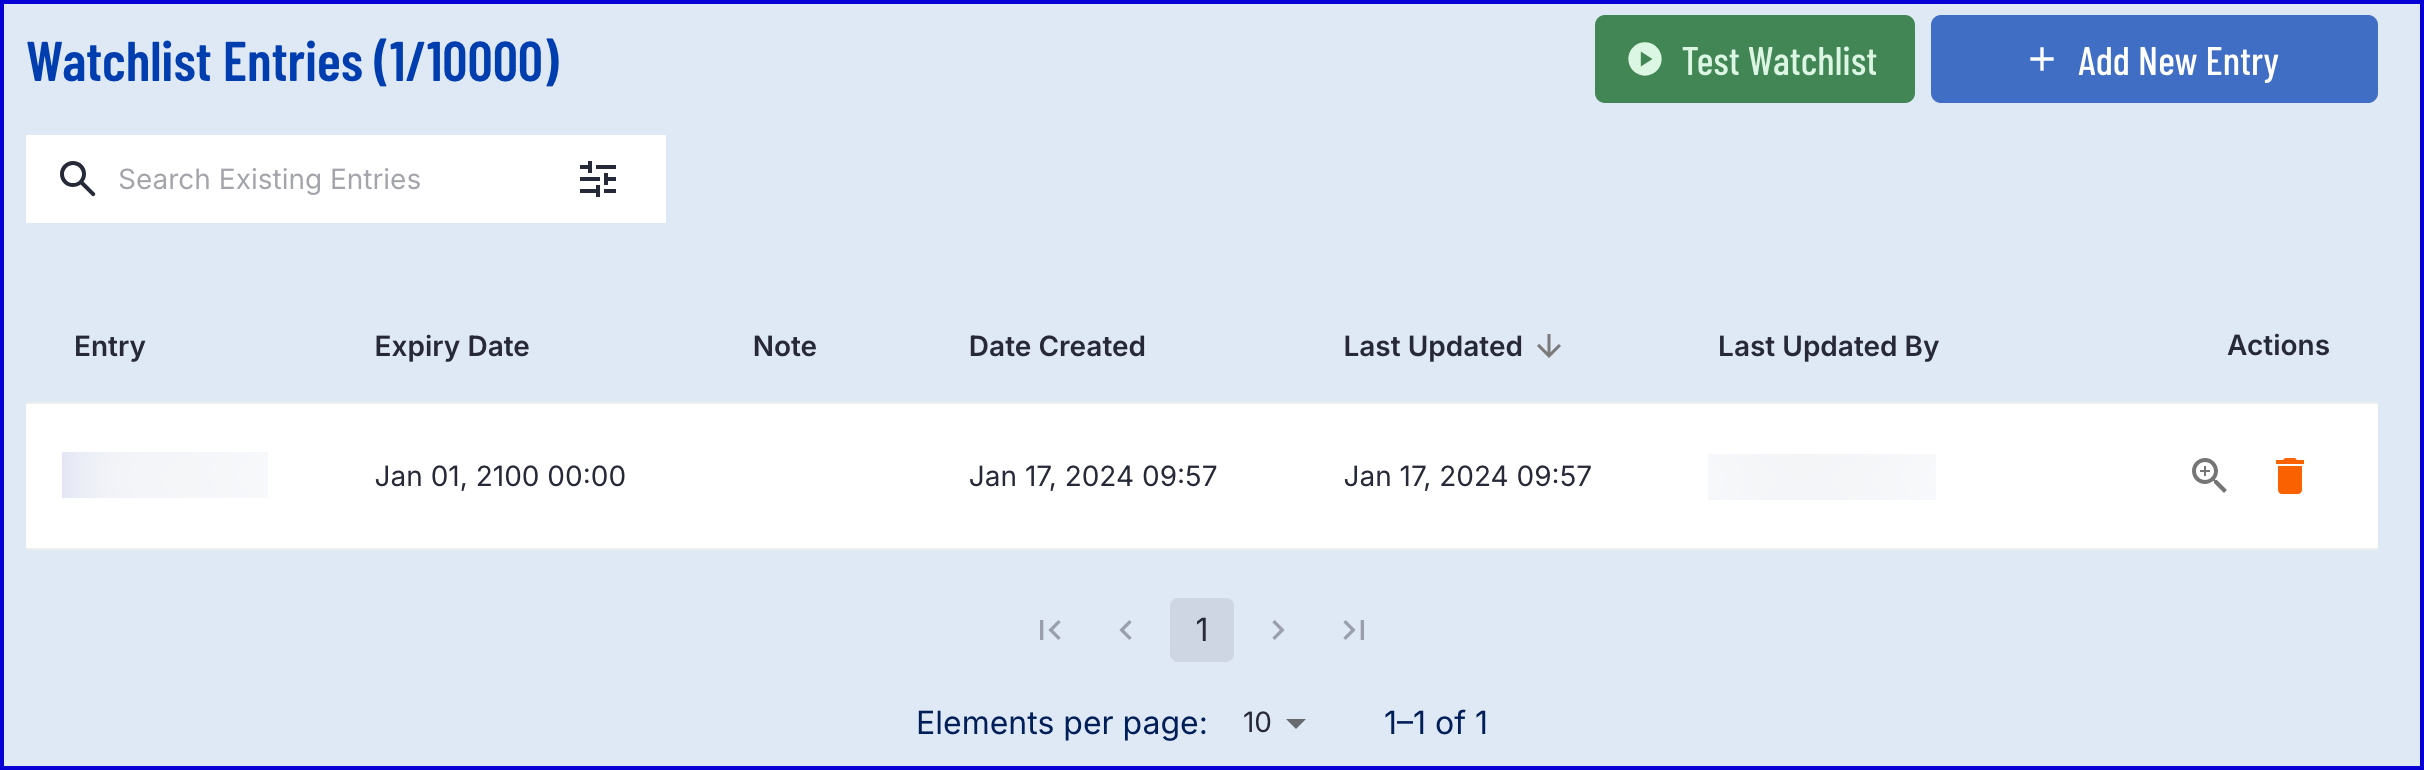
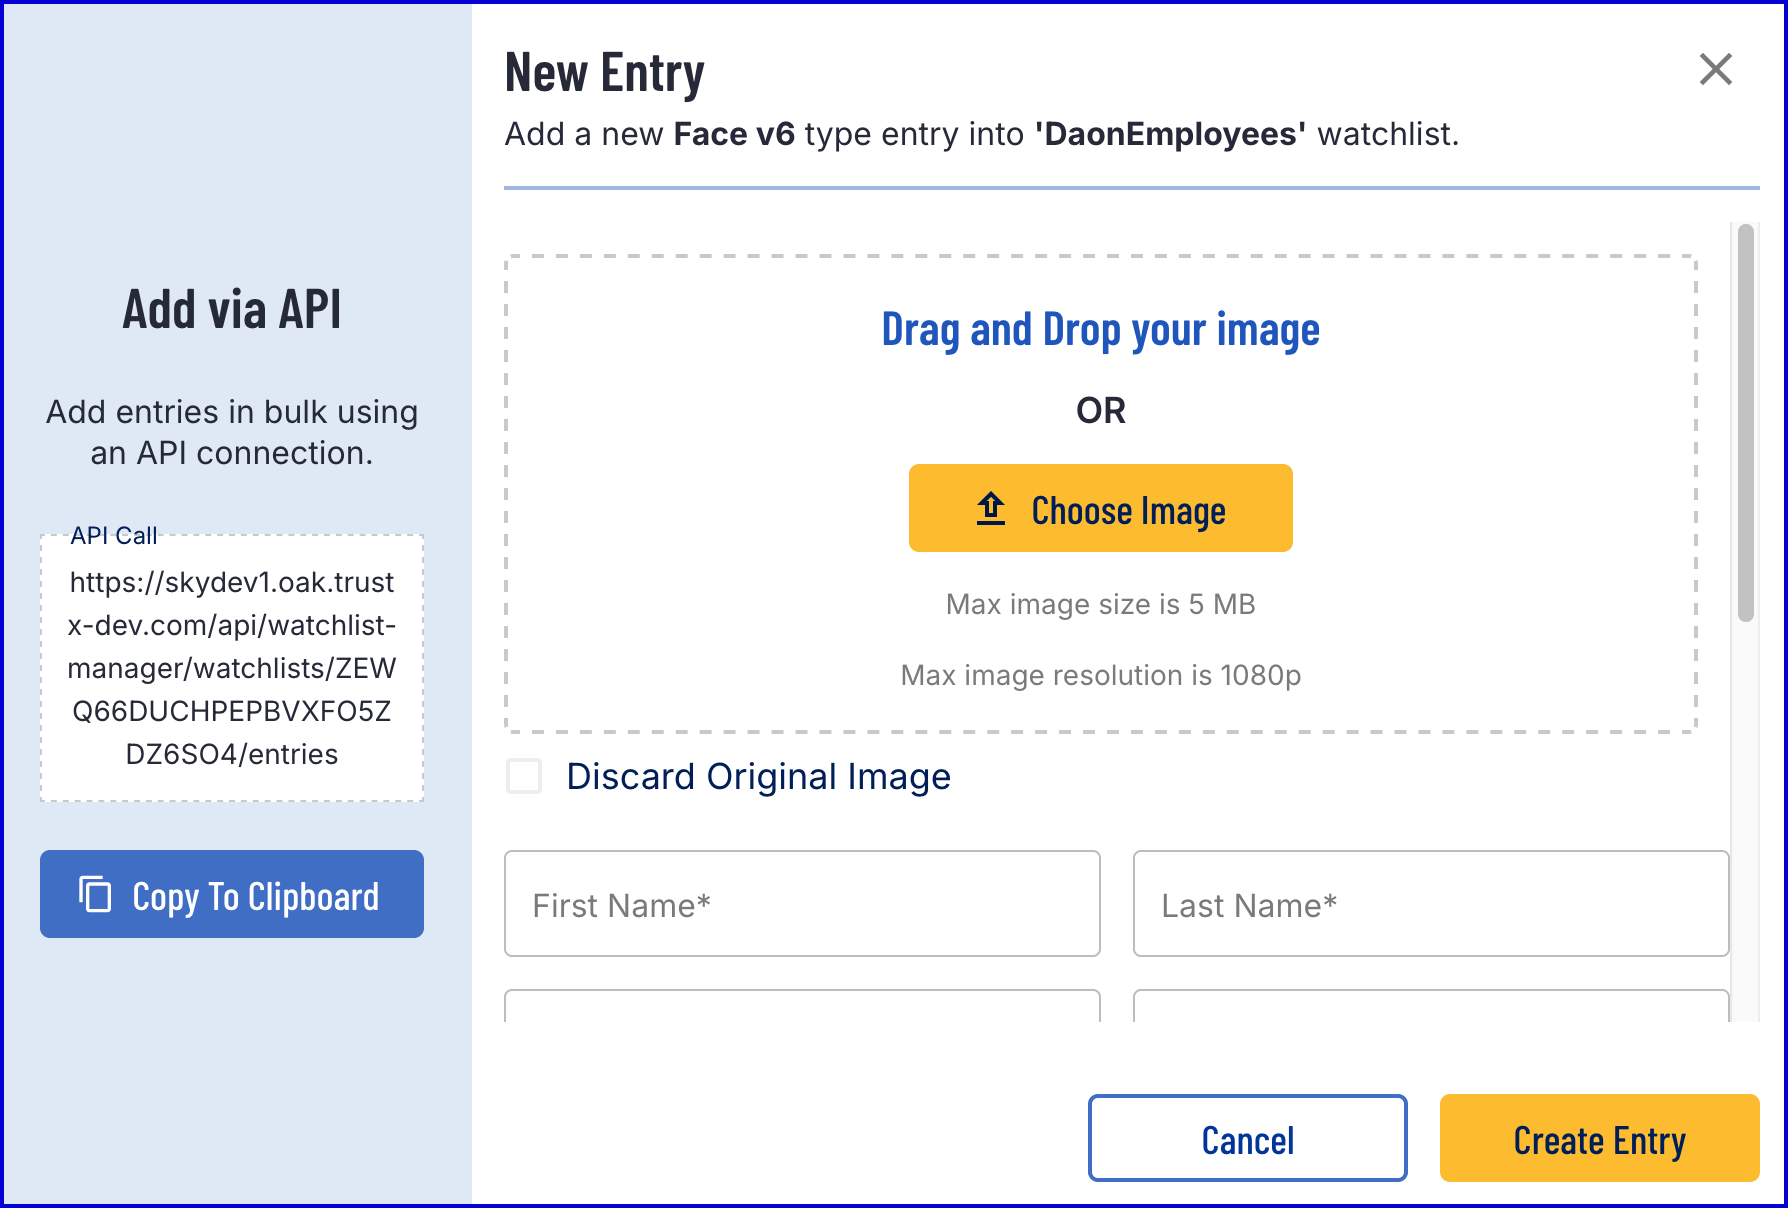
A new entry can be created by selecting the 'Add New Entry' button. The type of entry and the fields required will depend on the Watchlist type defined in the Creating a New Watchlist section.
For each type, it is possible to create a single entry using the provided form fields or add multiple entries using the TrustX API.
Tenant Permissions:
Example API Query:
Example Face v6:
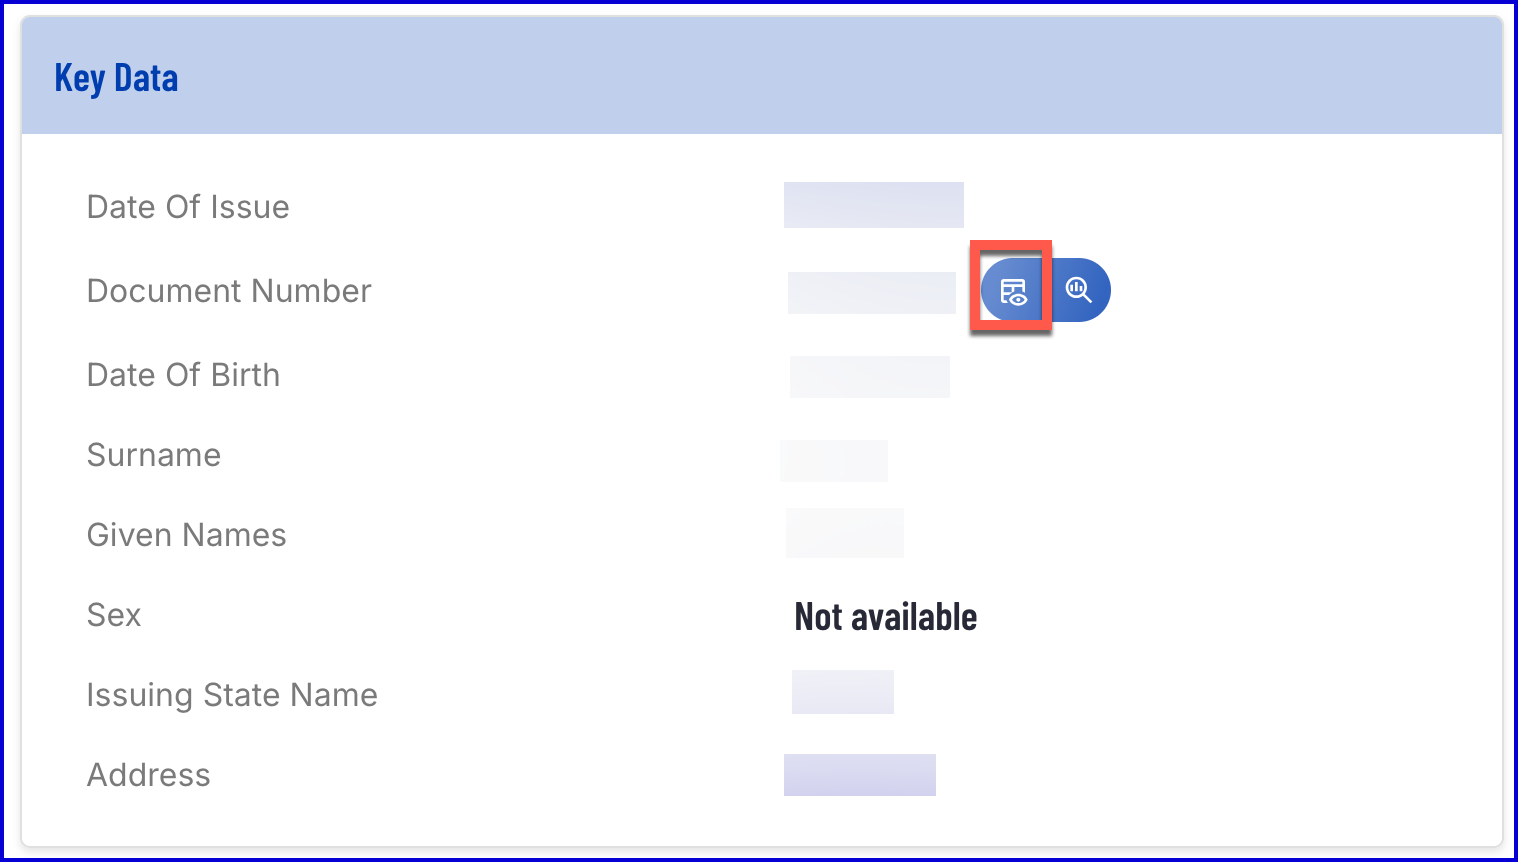
It is also possible to add new entries directly via the Process Instance page by using the buttons provided for each type:
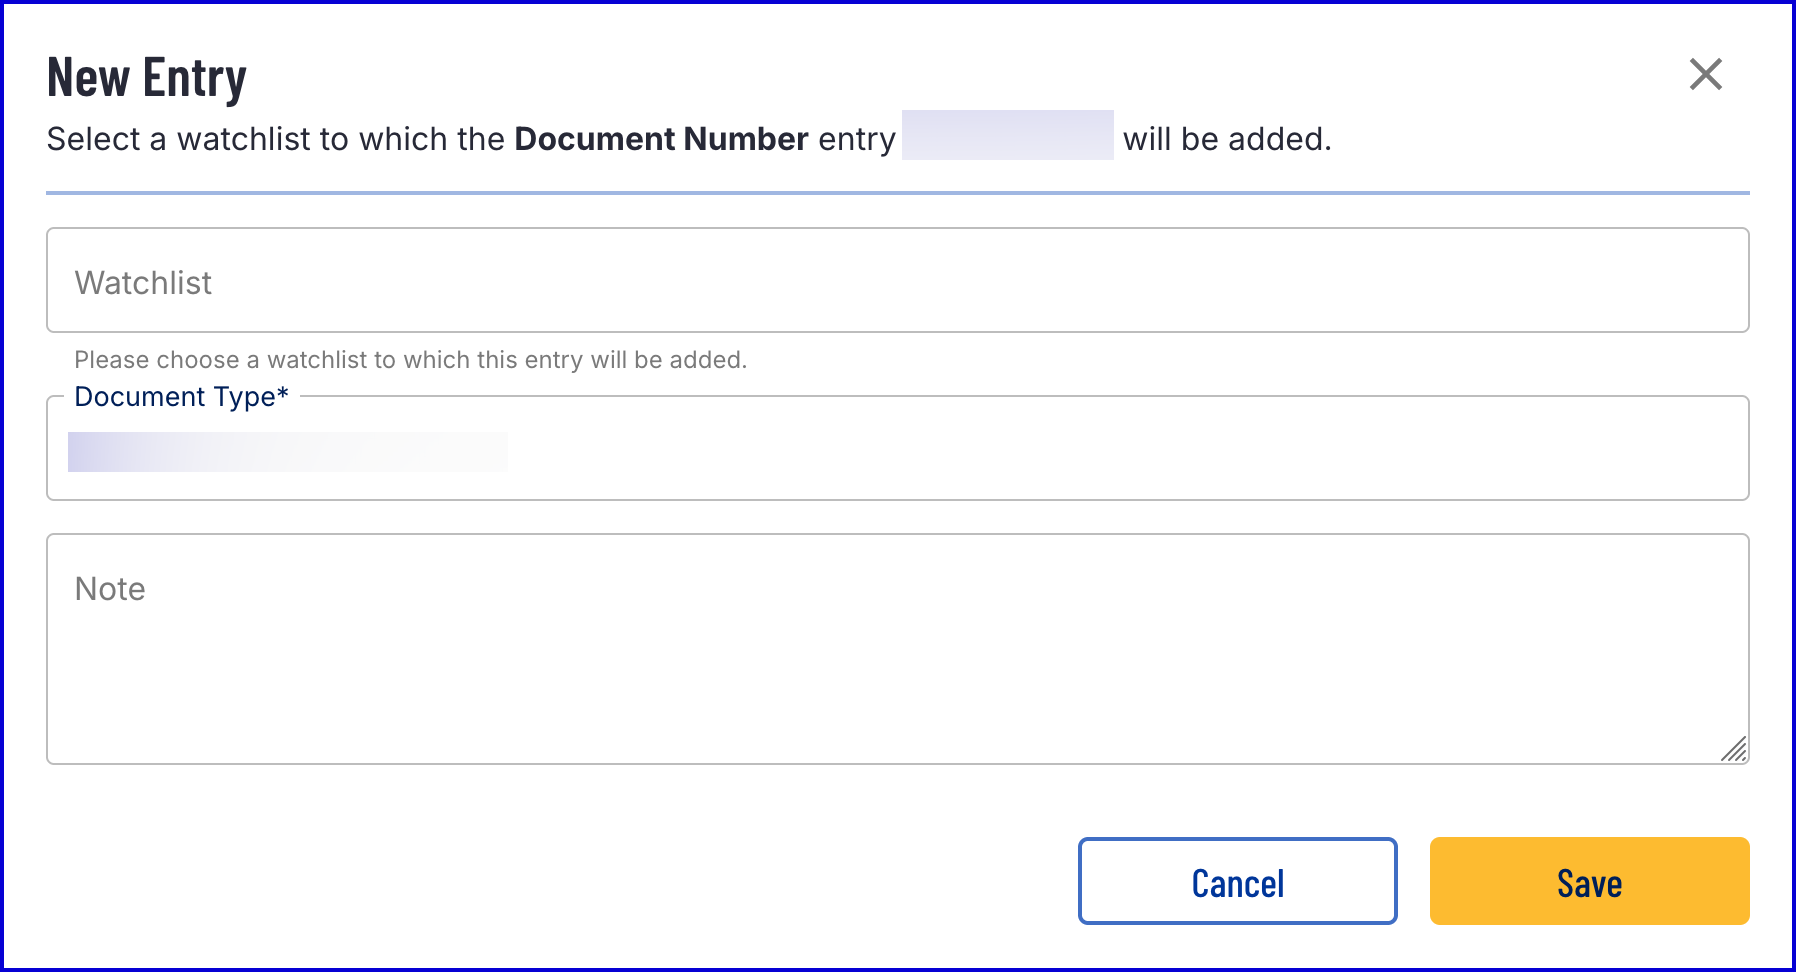
Example Document Number:
A pop-up modal will appear where details about the Watchlist entry can be defined:
For more information on managing Watchlist entries, see the guides listed below: