Early Access
TrustX Watchlists enables the recording and storing of the IPv4 address of the requesting device and resolves it to geographic location information about the device. The IP address and associated metadata are stored in the _signals object for use by other activities in the process.
Recording the IPv4 address of the device strengthens security in the following aspects:
Capturing user's IP address for fraud detection
Recording IP geolocation for risk assessment
Building IP address history for pattern analysis
Geographic compliance checks (e.g., GDPR region detection)
Bot and automation detection
Creating an IPv4 Watchlist
An IPv4 Watchlist stores a list of Persons of Interest by the IPv4 address. To create an IPv4 Watchlist, follow the steps below.
Log in to the Backoffice application and select Watchlists from the left-side vertical menu.
From the Watchlists landing page, ensure that 'New Management' is selected and click the 'New Watchlist' button.
Set the name of the Watchlist and set the Type to 'IPv4 Address'.
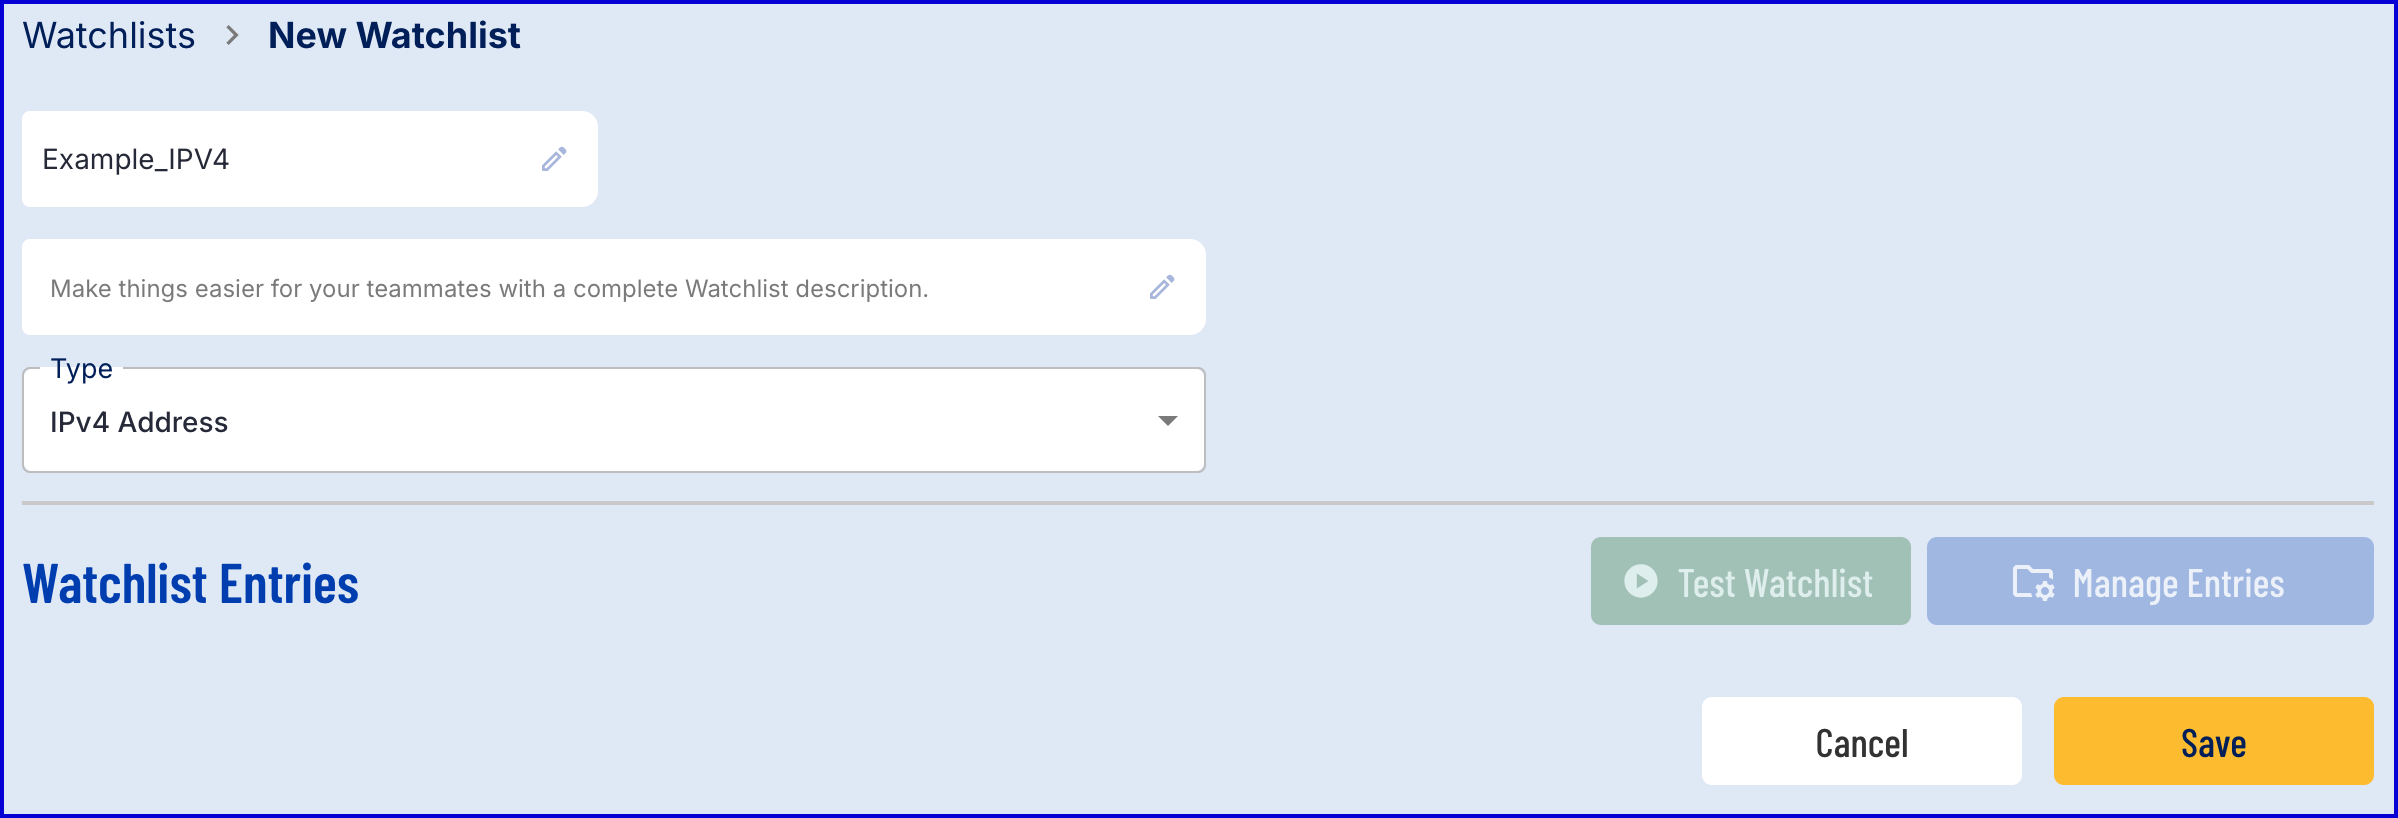
Click the 'Save' button to save the new Watchlist.
Add Watchlist Entry
An IPv4 Watchlist entry can be added in various methods. This section will cover each potential method.
Add Watchlist Entry via Backoffice
Navigate to the Watchlists page in the Backoffice application.
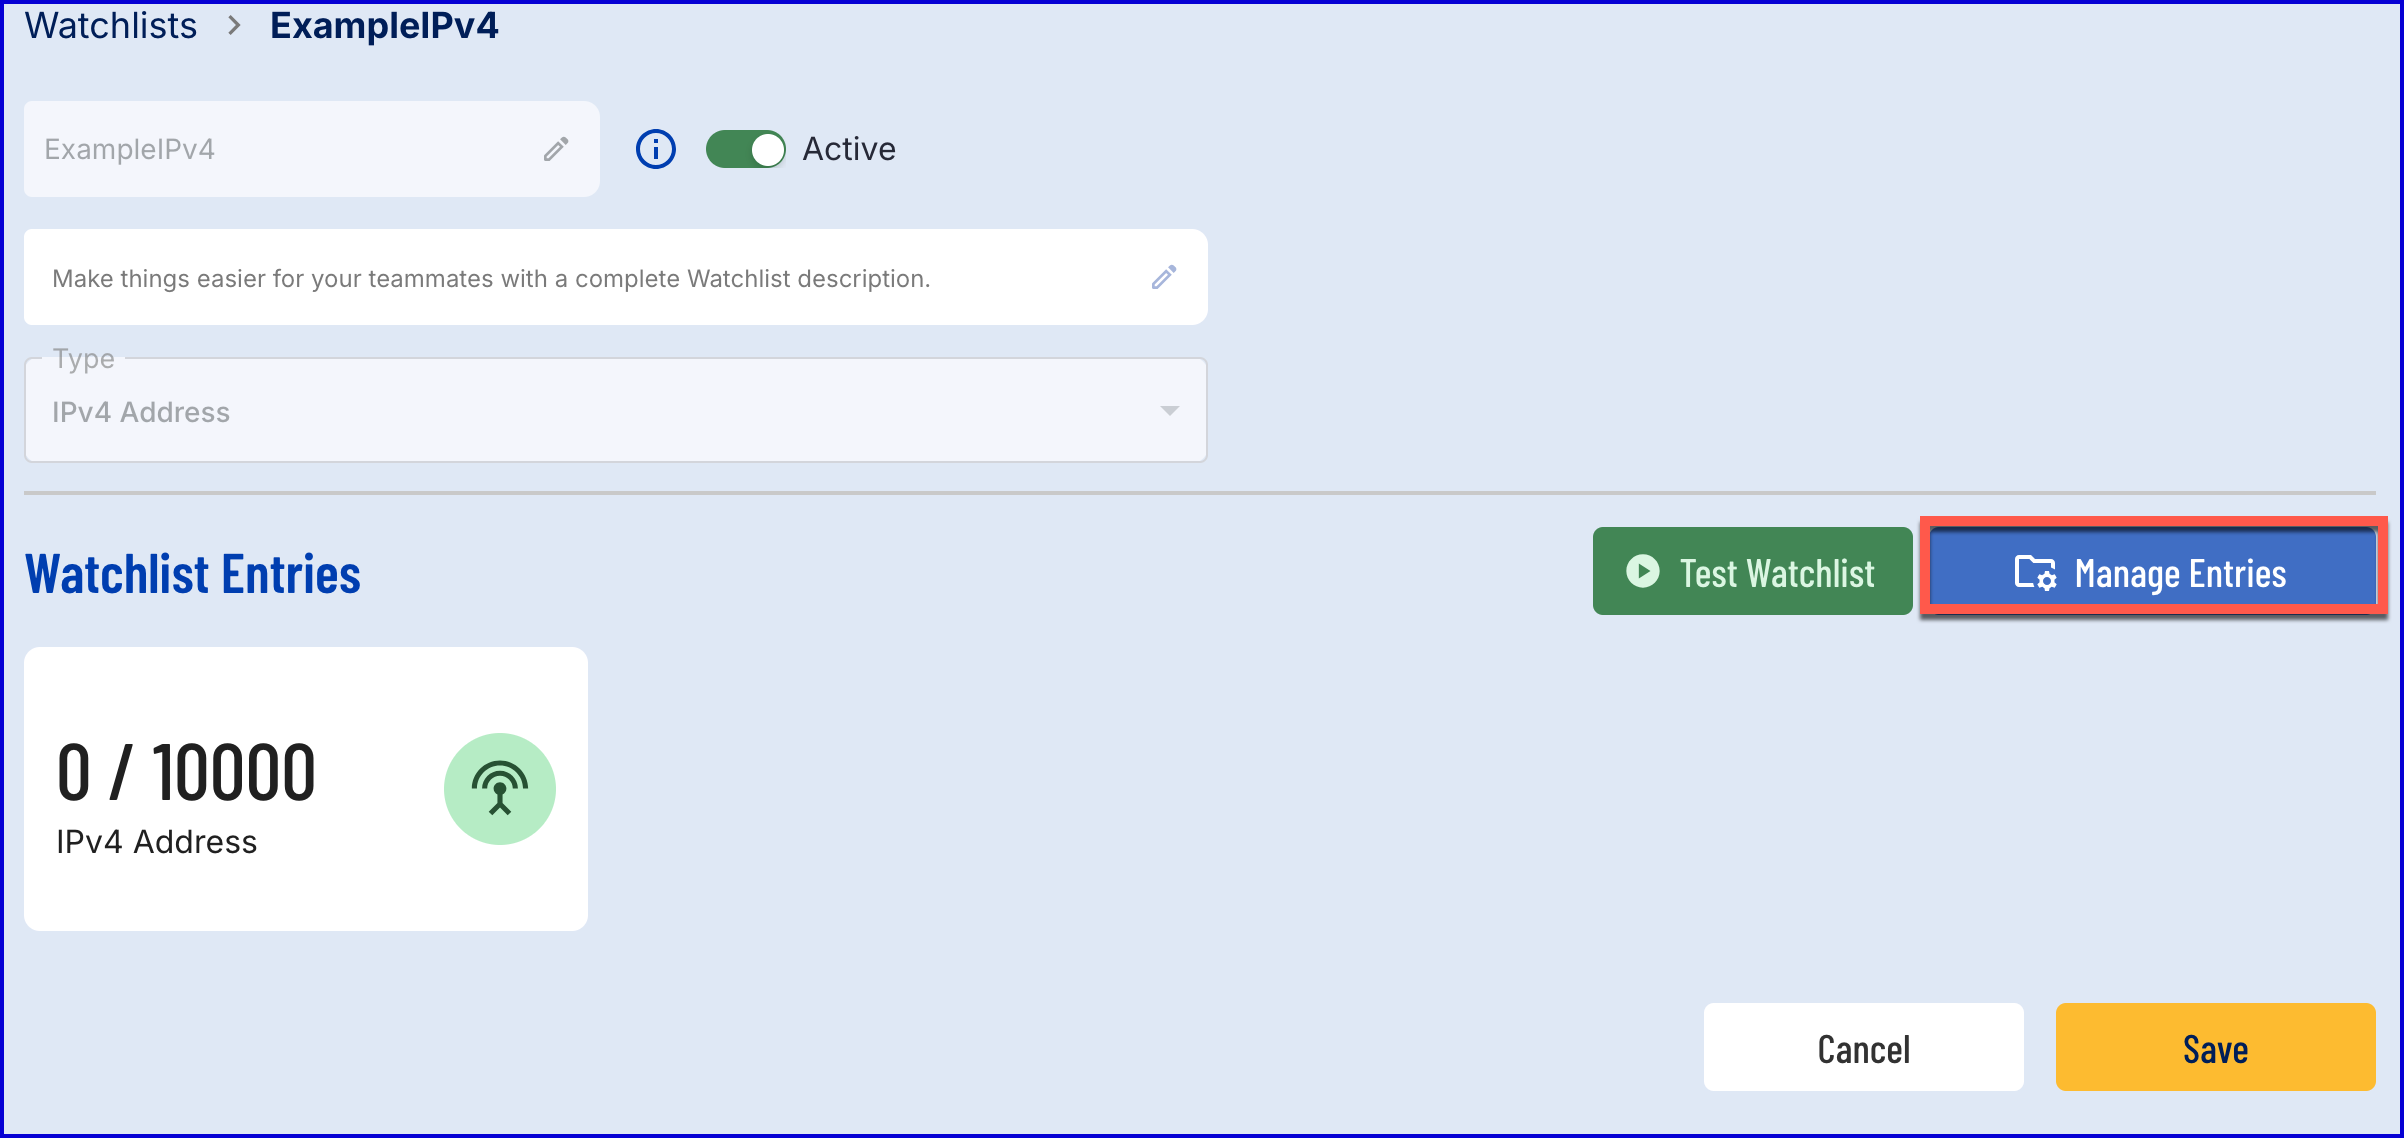
Find the name of the IPv4 Watchlist that will be updated.
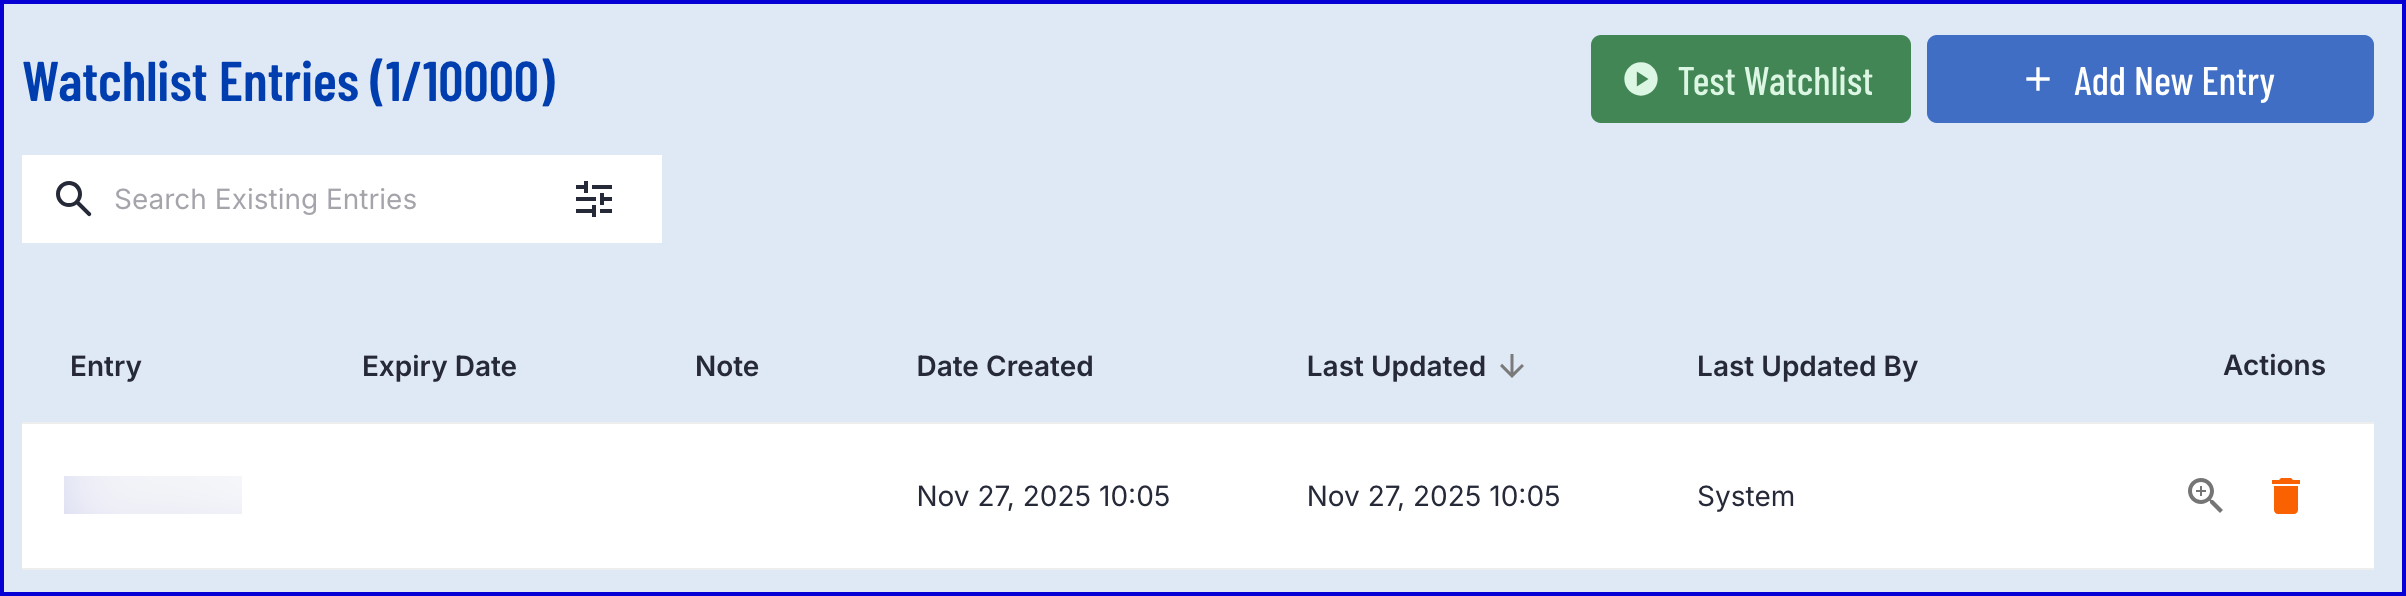
Click the 'Manage Entries' button to open a list of entries currently within the Watchlist.
Click the 'Add New Entry' button. A pop-up modal will appear where details about the new Watchlist entry can be defined.

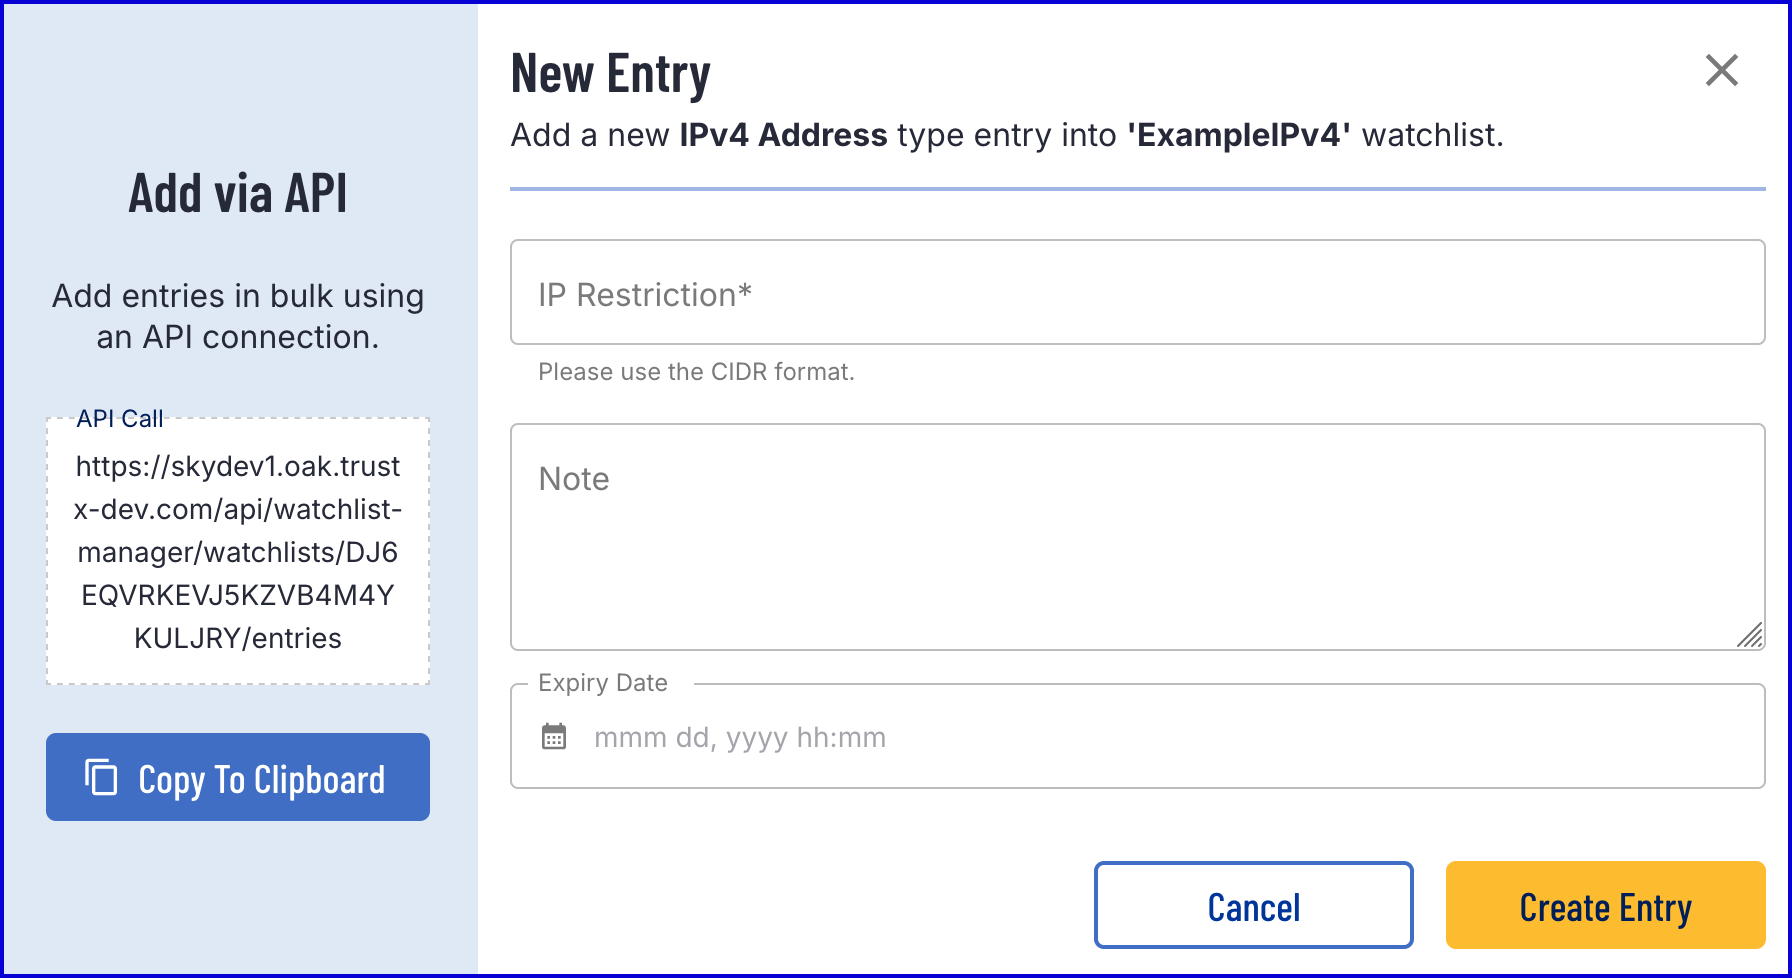
Each new entry can contain the following information:
Field Name | Type | Description |
|---|---|---|
IP Restriction | String | IPv4 address (max 15 chars, e.g., "192.168.100.100"). We will not support CIDR ranges at this time. |
Note | String | Optional additional information regarding the entry. |
Expiry Date | Date-Time | ISO 8601 duration after which the entry will be automatically deleted (e.g., PT1H, P1D). Converted to UTC timestamp by the activity. |
Once all fields are finalized, click the 'Create Entry' button to save the new Watchlist member.
Add Watchlist Entry via Process Definition
A Watchlist member can also be added from a Process Definition using the 'Record IPv4 Address v1' and 'Add IPv4 Watchlist Entry v1' to record the IPv4 address of the current device and add it to a specified Watchlist.
Step 1 - Create a Process Definition
Create a new Process Definition by navigating to Process Definitions > New Process Definition in the Backoffice application.
Add a 'Create Start Event' to the Process Designer.
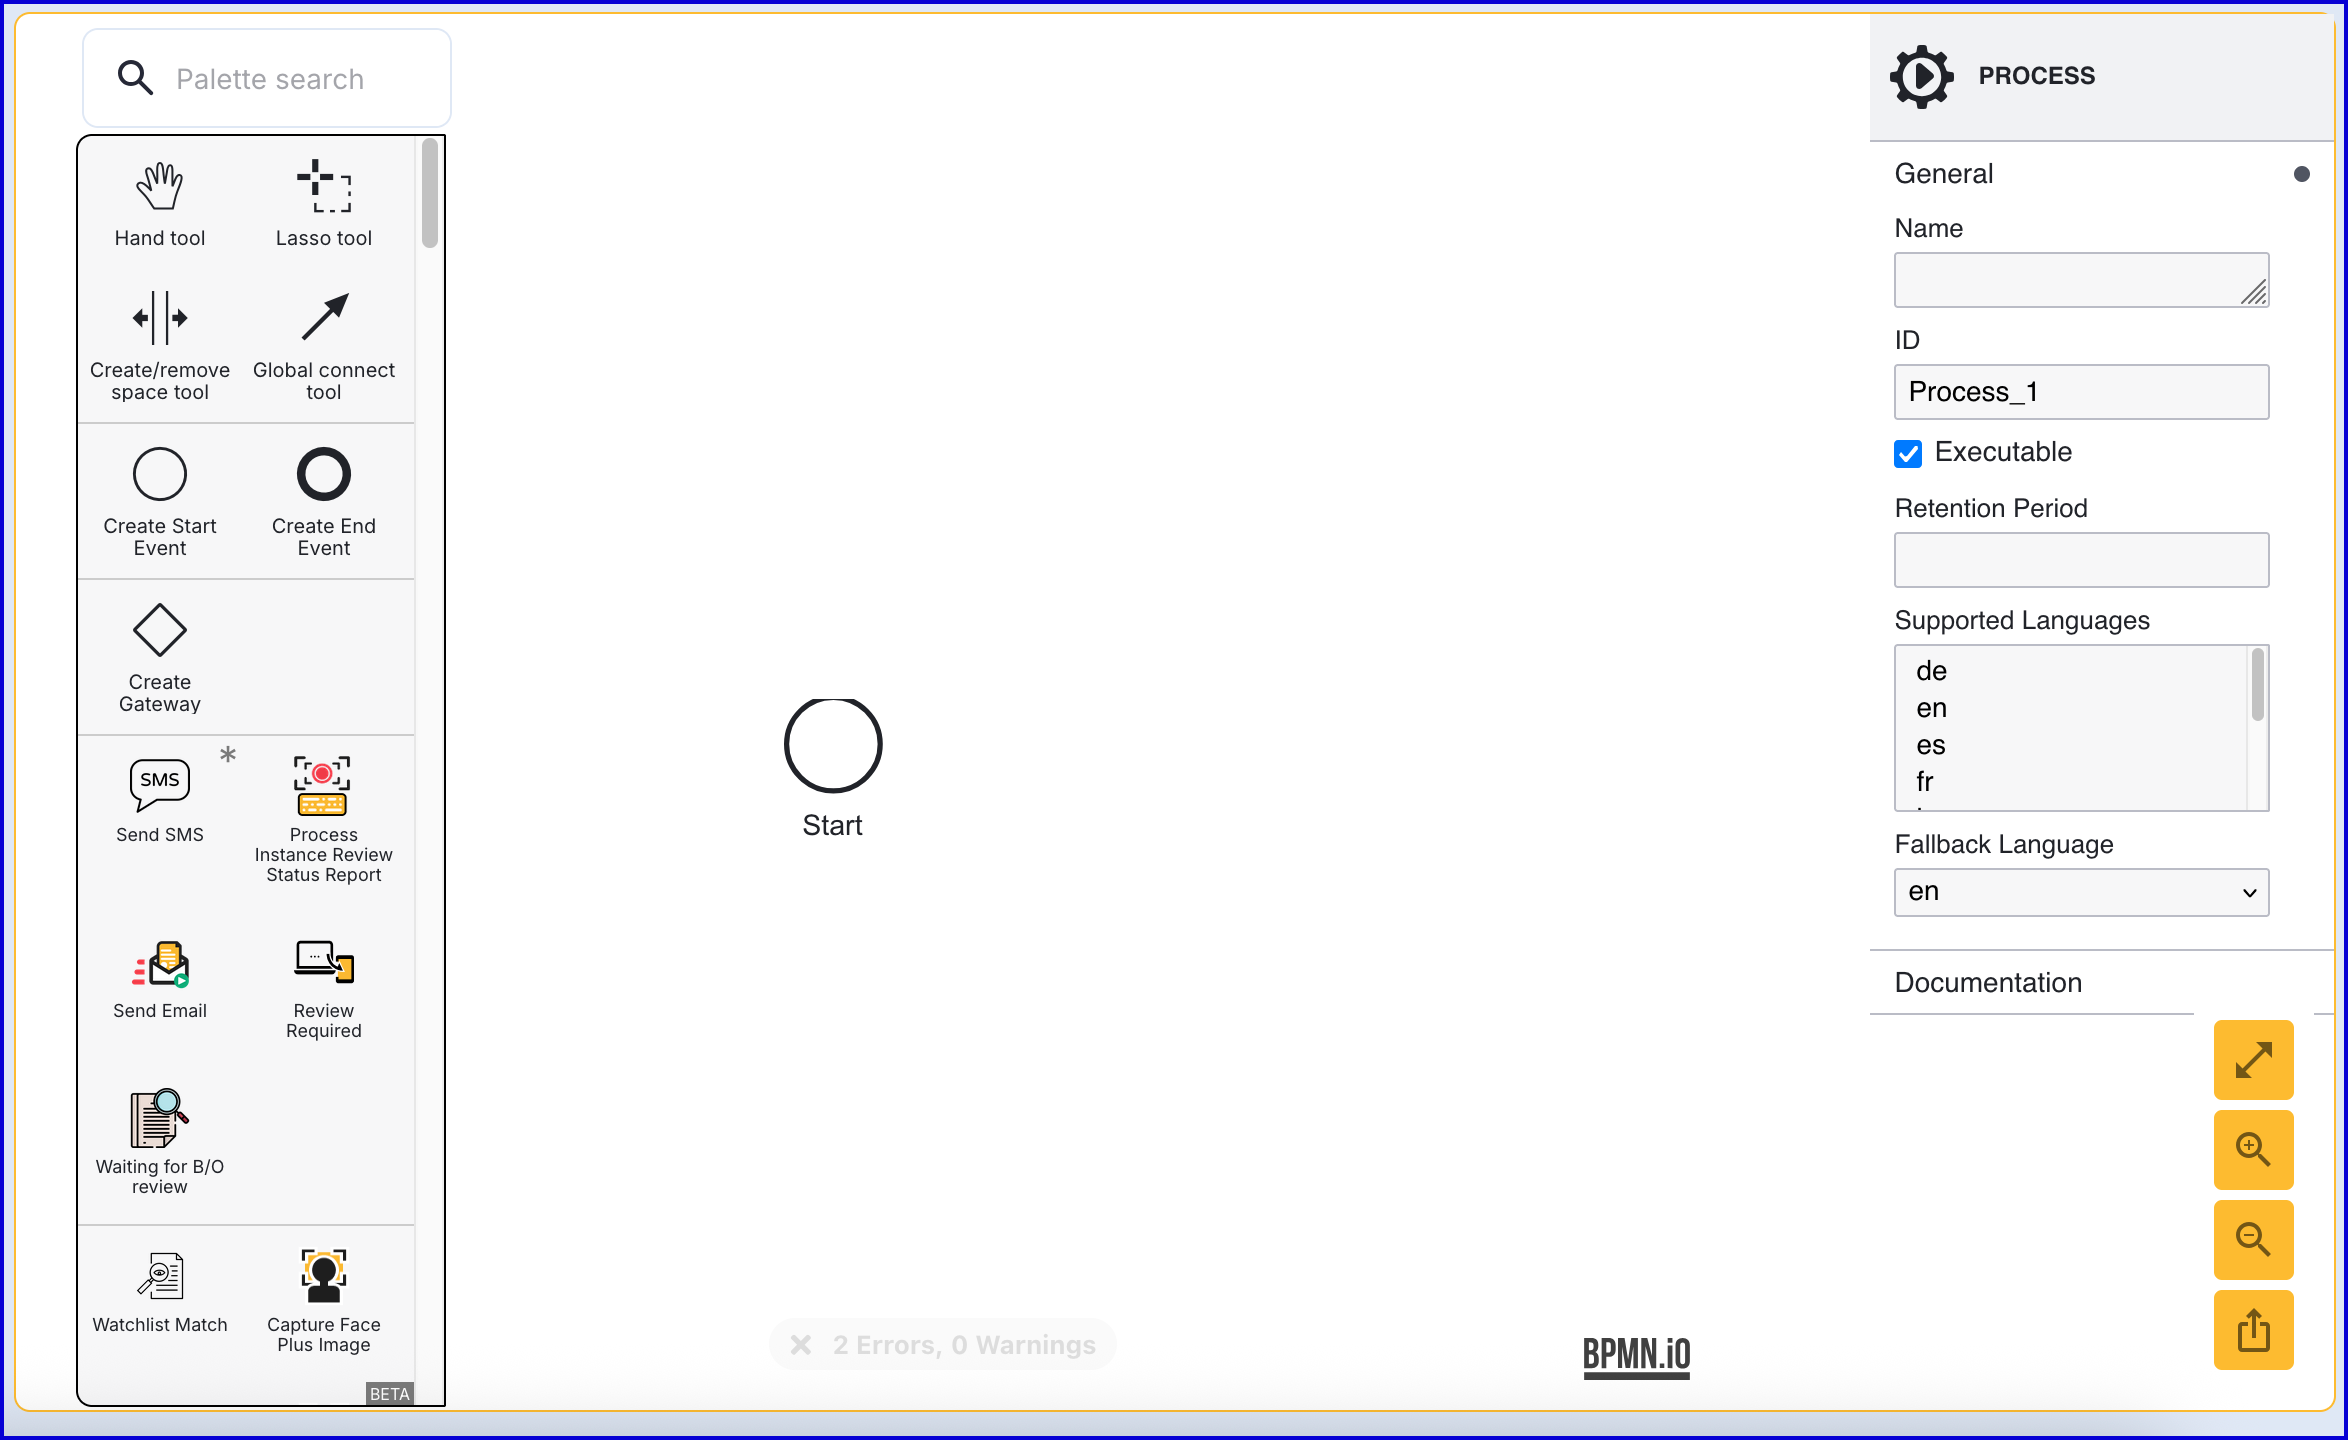
Click the 'Start' event to open the right-side contextual menu and enter a name for the 'Name' input parameter.
Add a 'Create End Event' to the Process Designer and connect it to the 'Start' event using a sequence flow arrow.
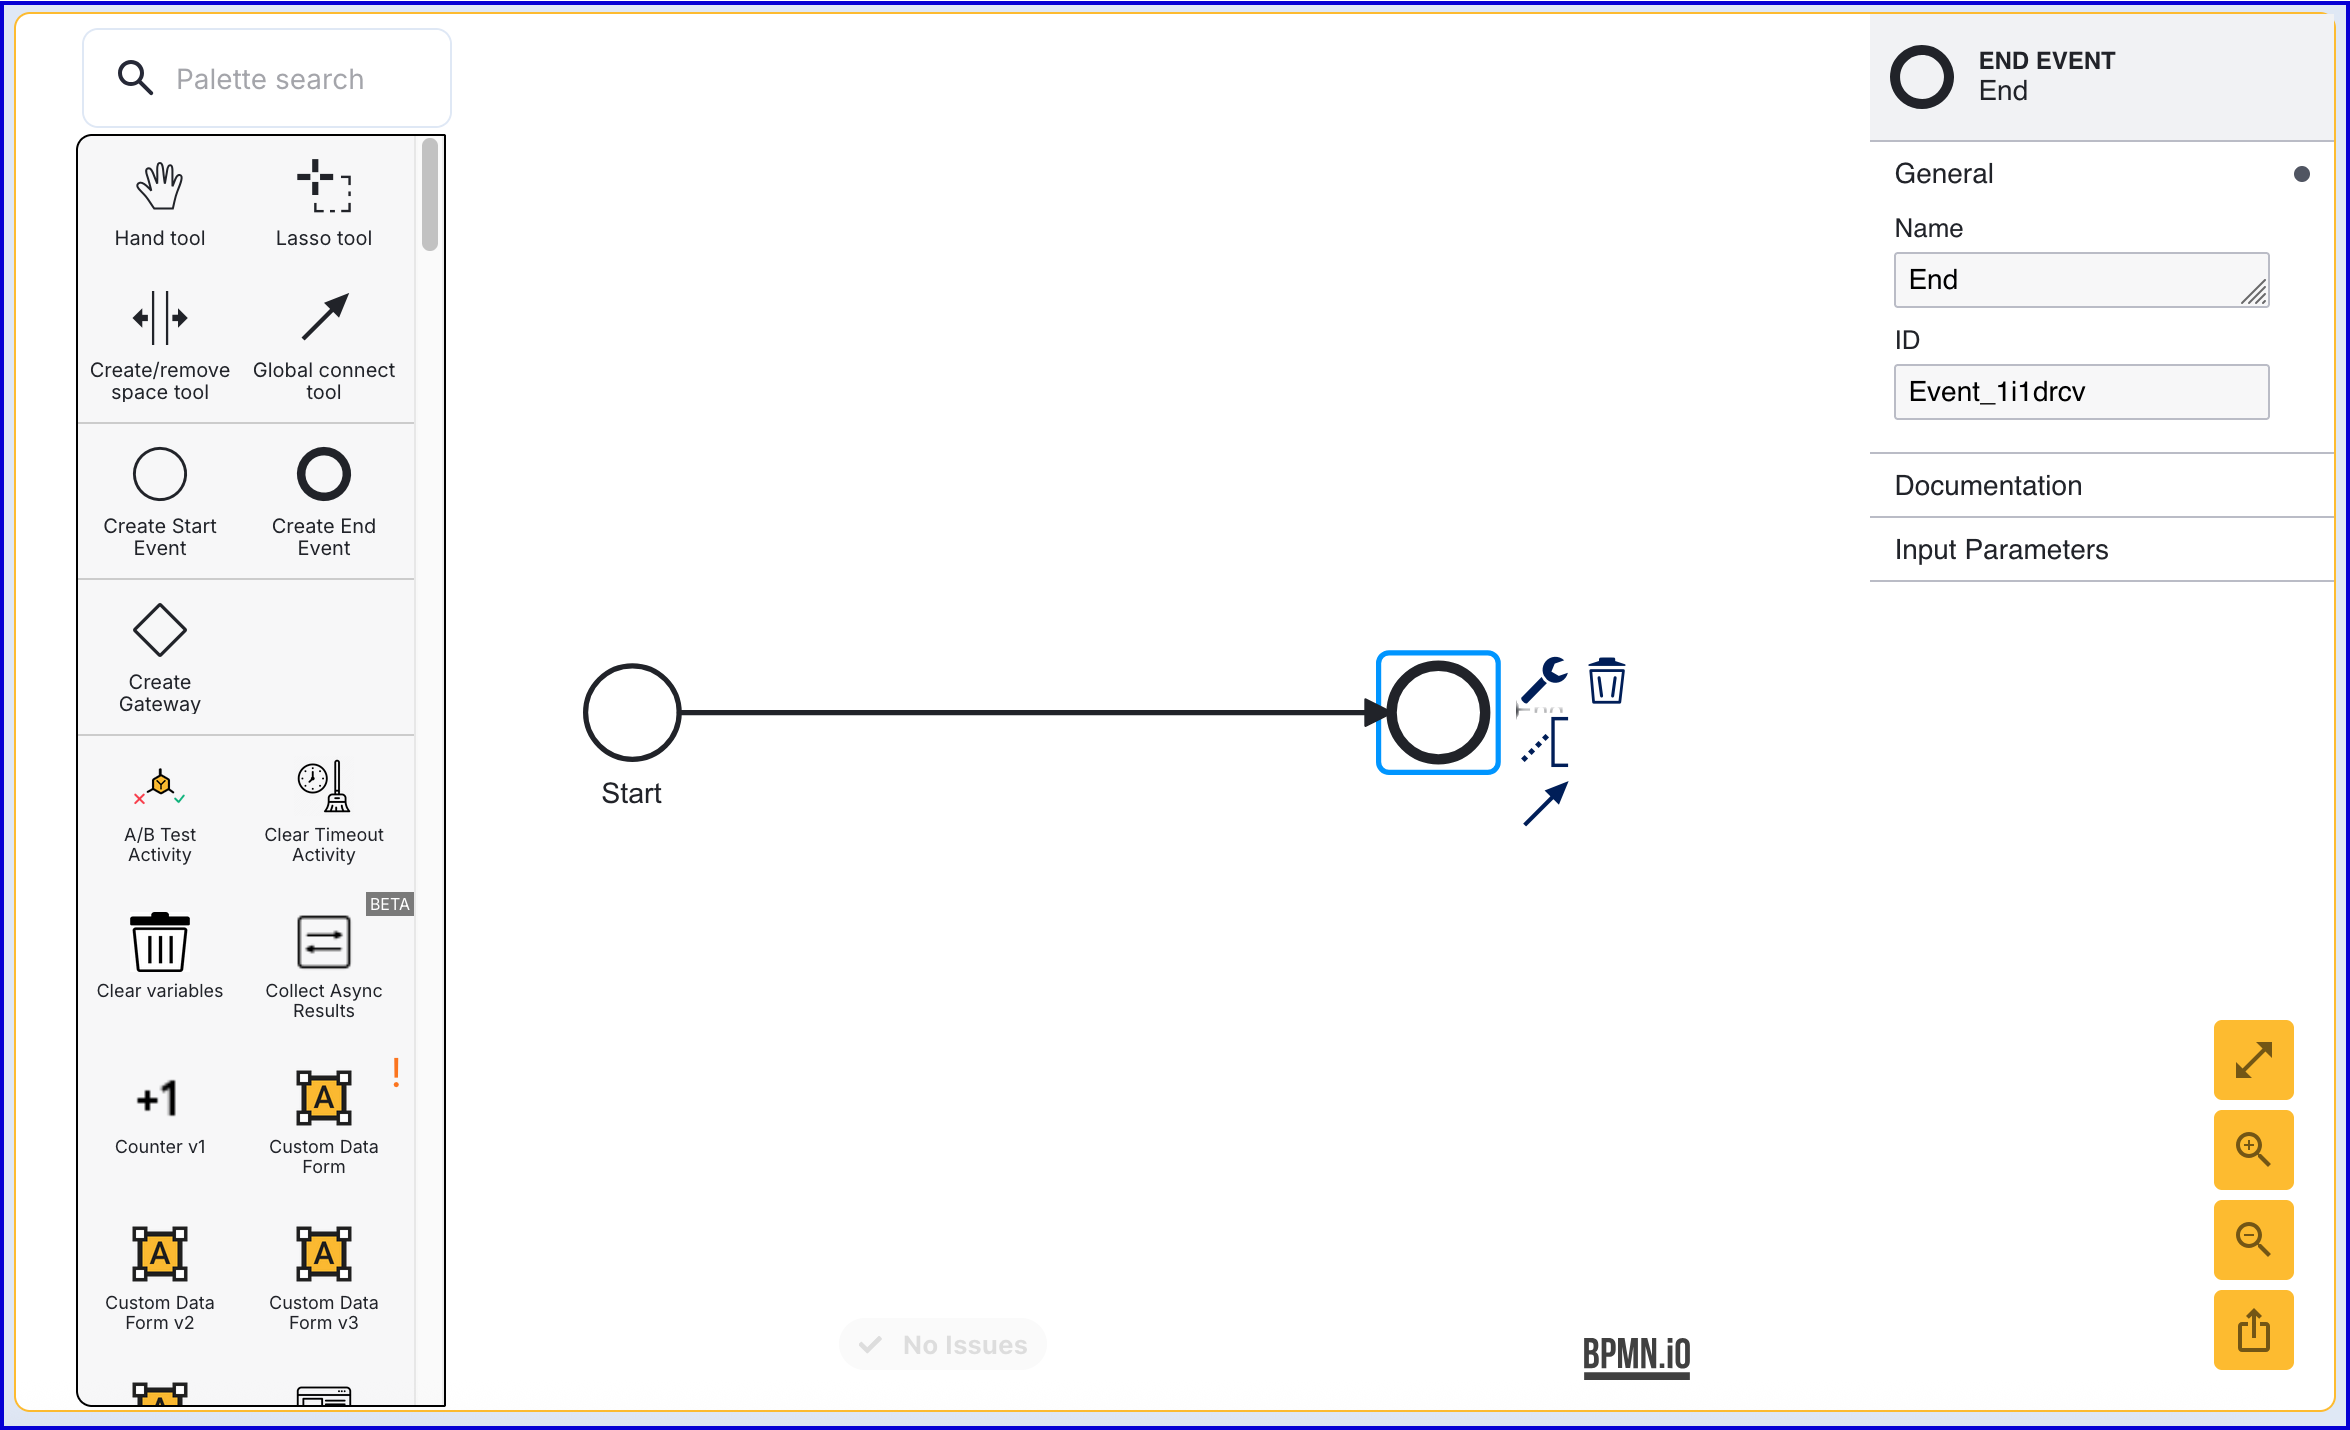
Click the 'End' event to open the right-side contextual menu and enter a name for the 'Name' input parameter.
Step 2 - Record the IPv4 Address
After the 'Start' event, add a 'Record IPv4 Address v1' activity to the Process Designer and use the 'Global connect tool' to connect the activity to the flow.
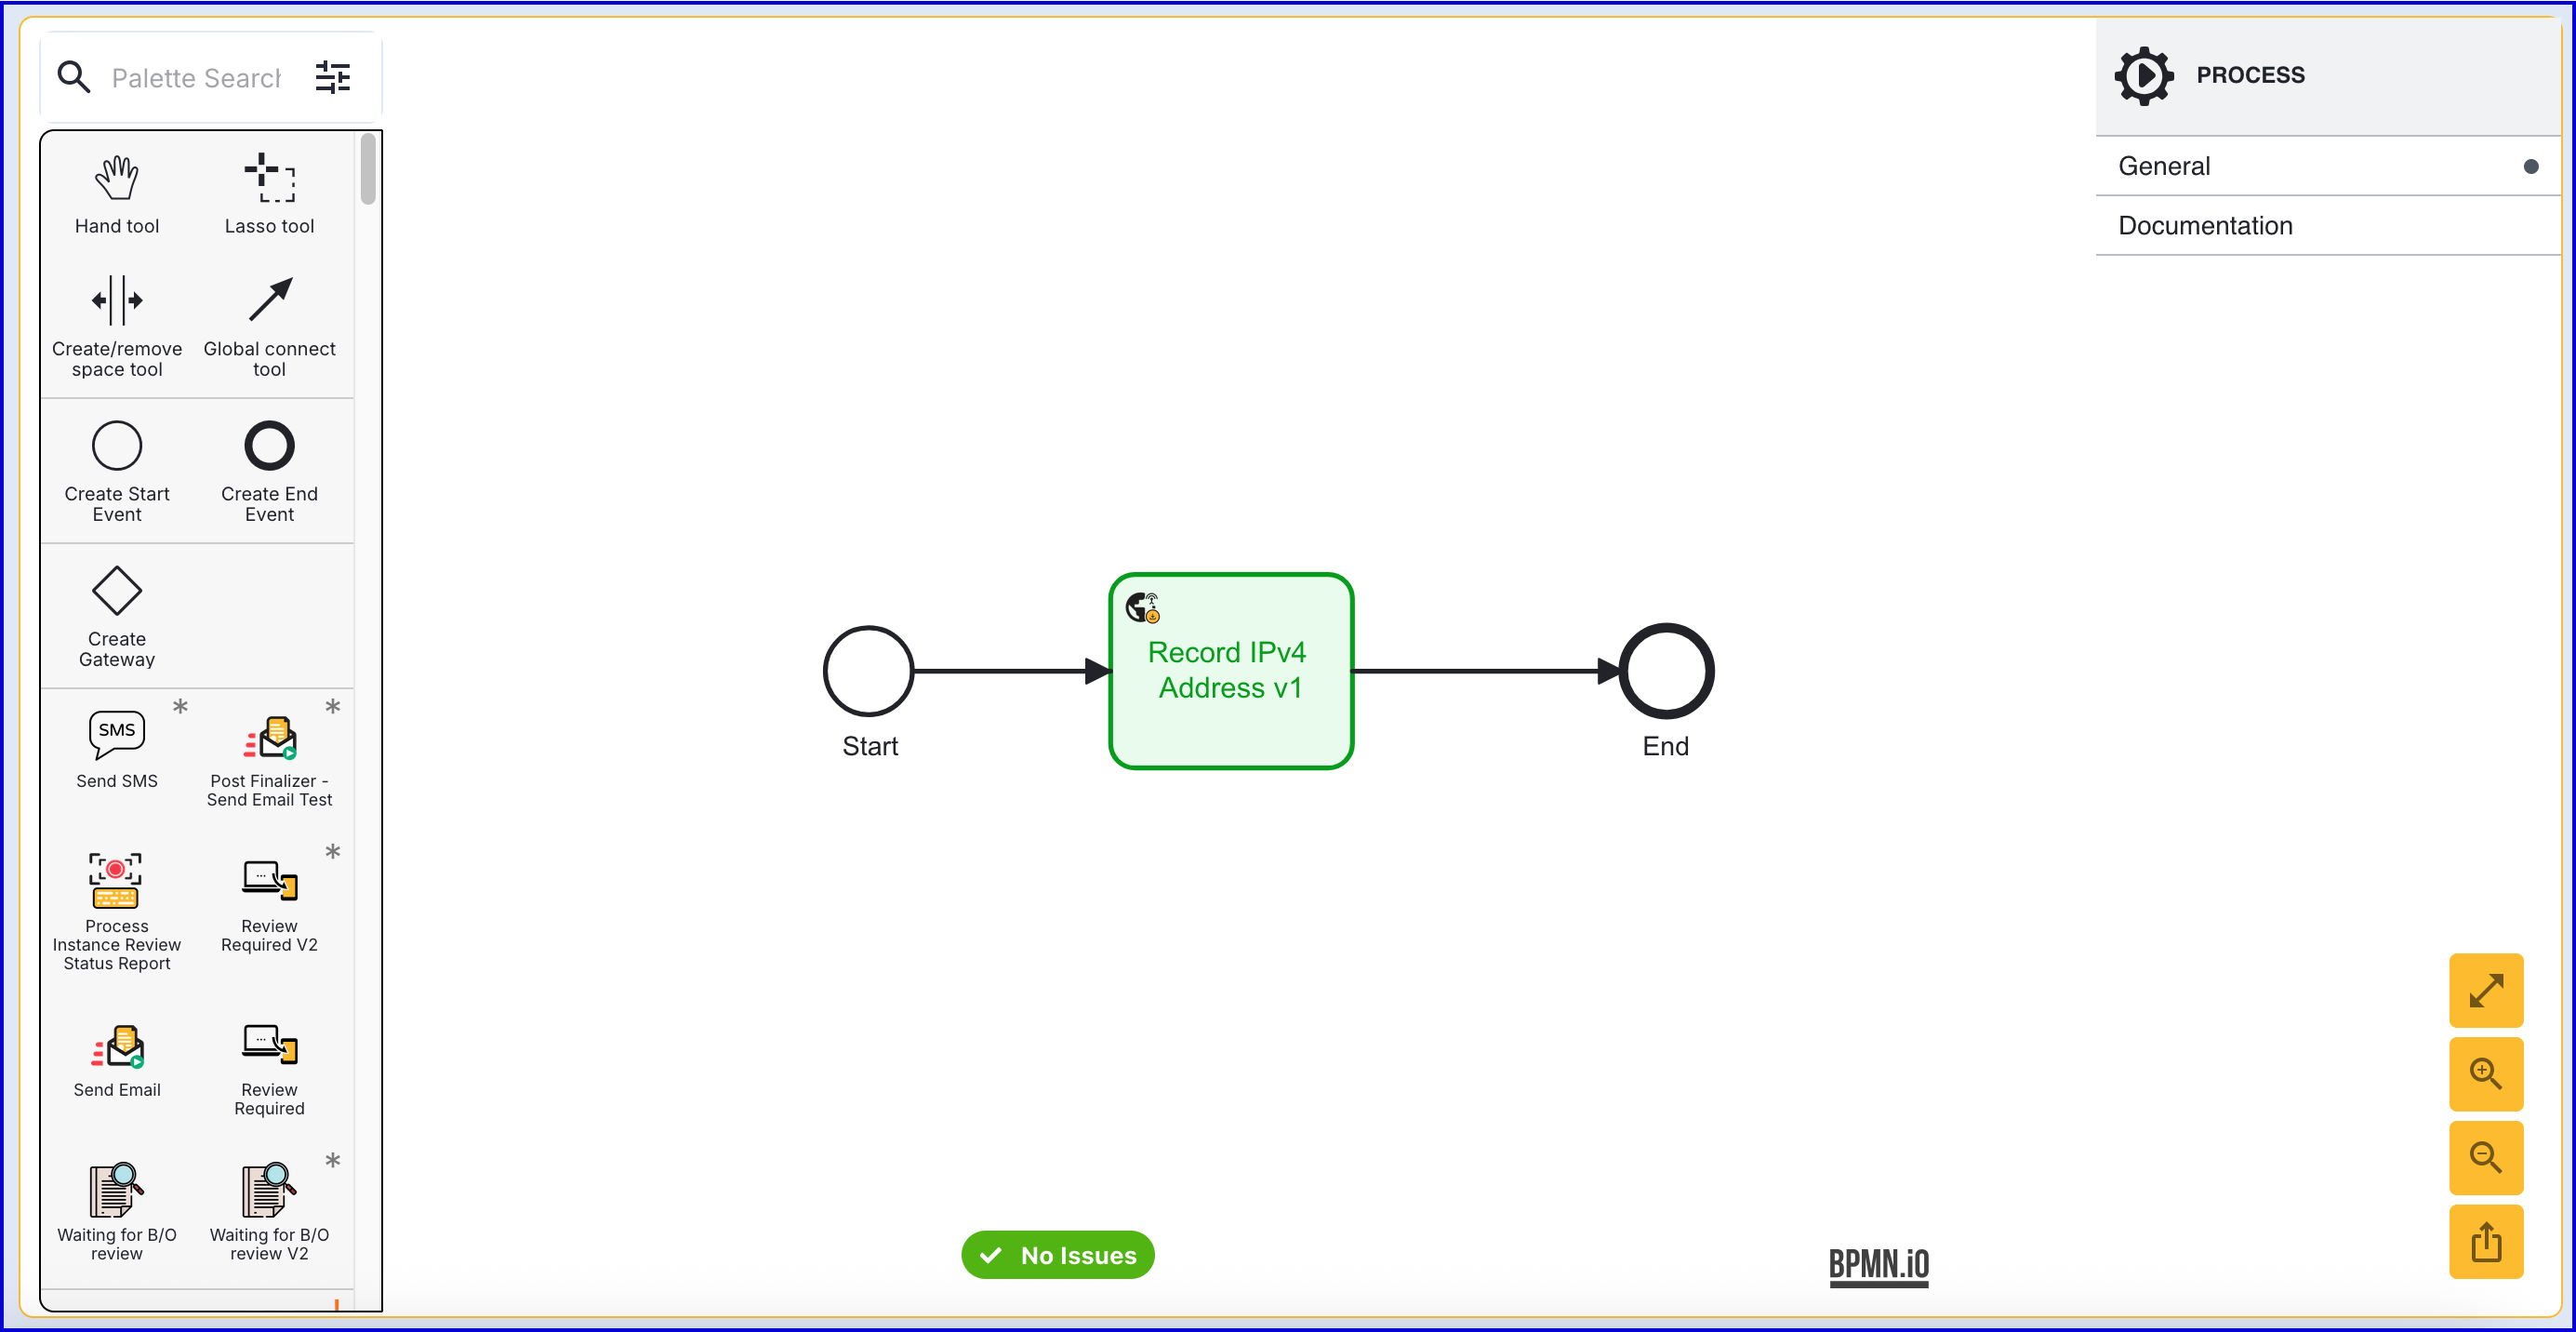
The activity supports one configurable activity parameter. The 'Key' parameter contains an identifier used to identify the IPv4 recording attempt. By default, the Key is set to "ipv4Address1". The IPv4 record will be stored in the
_signalsobject. For more information, see the Signal Recording of IPv4 Address section.
Step 3 - Add an IPv4 Address to a Watchlist
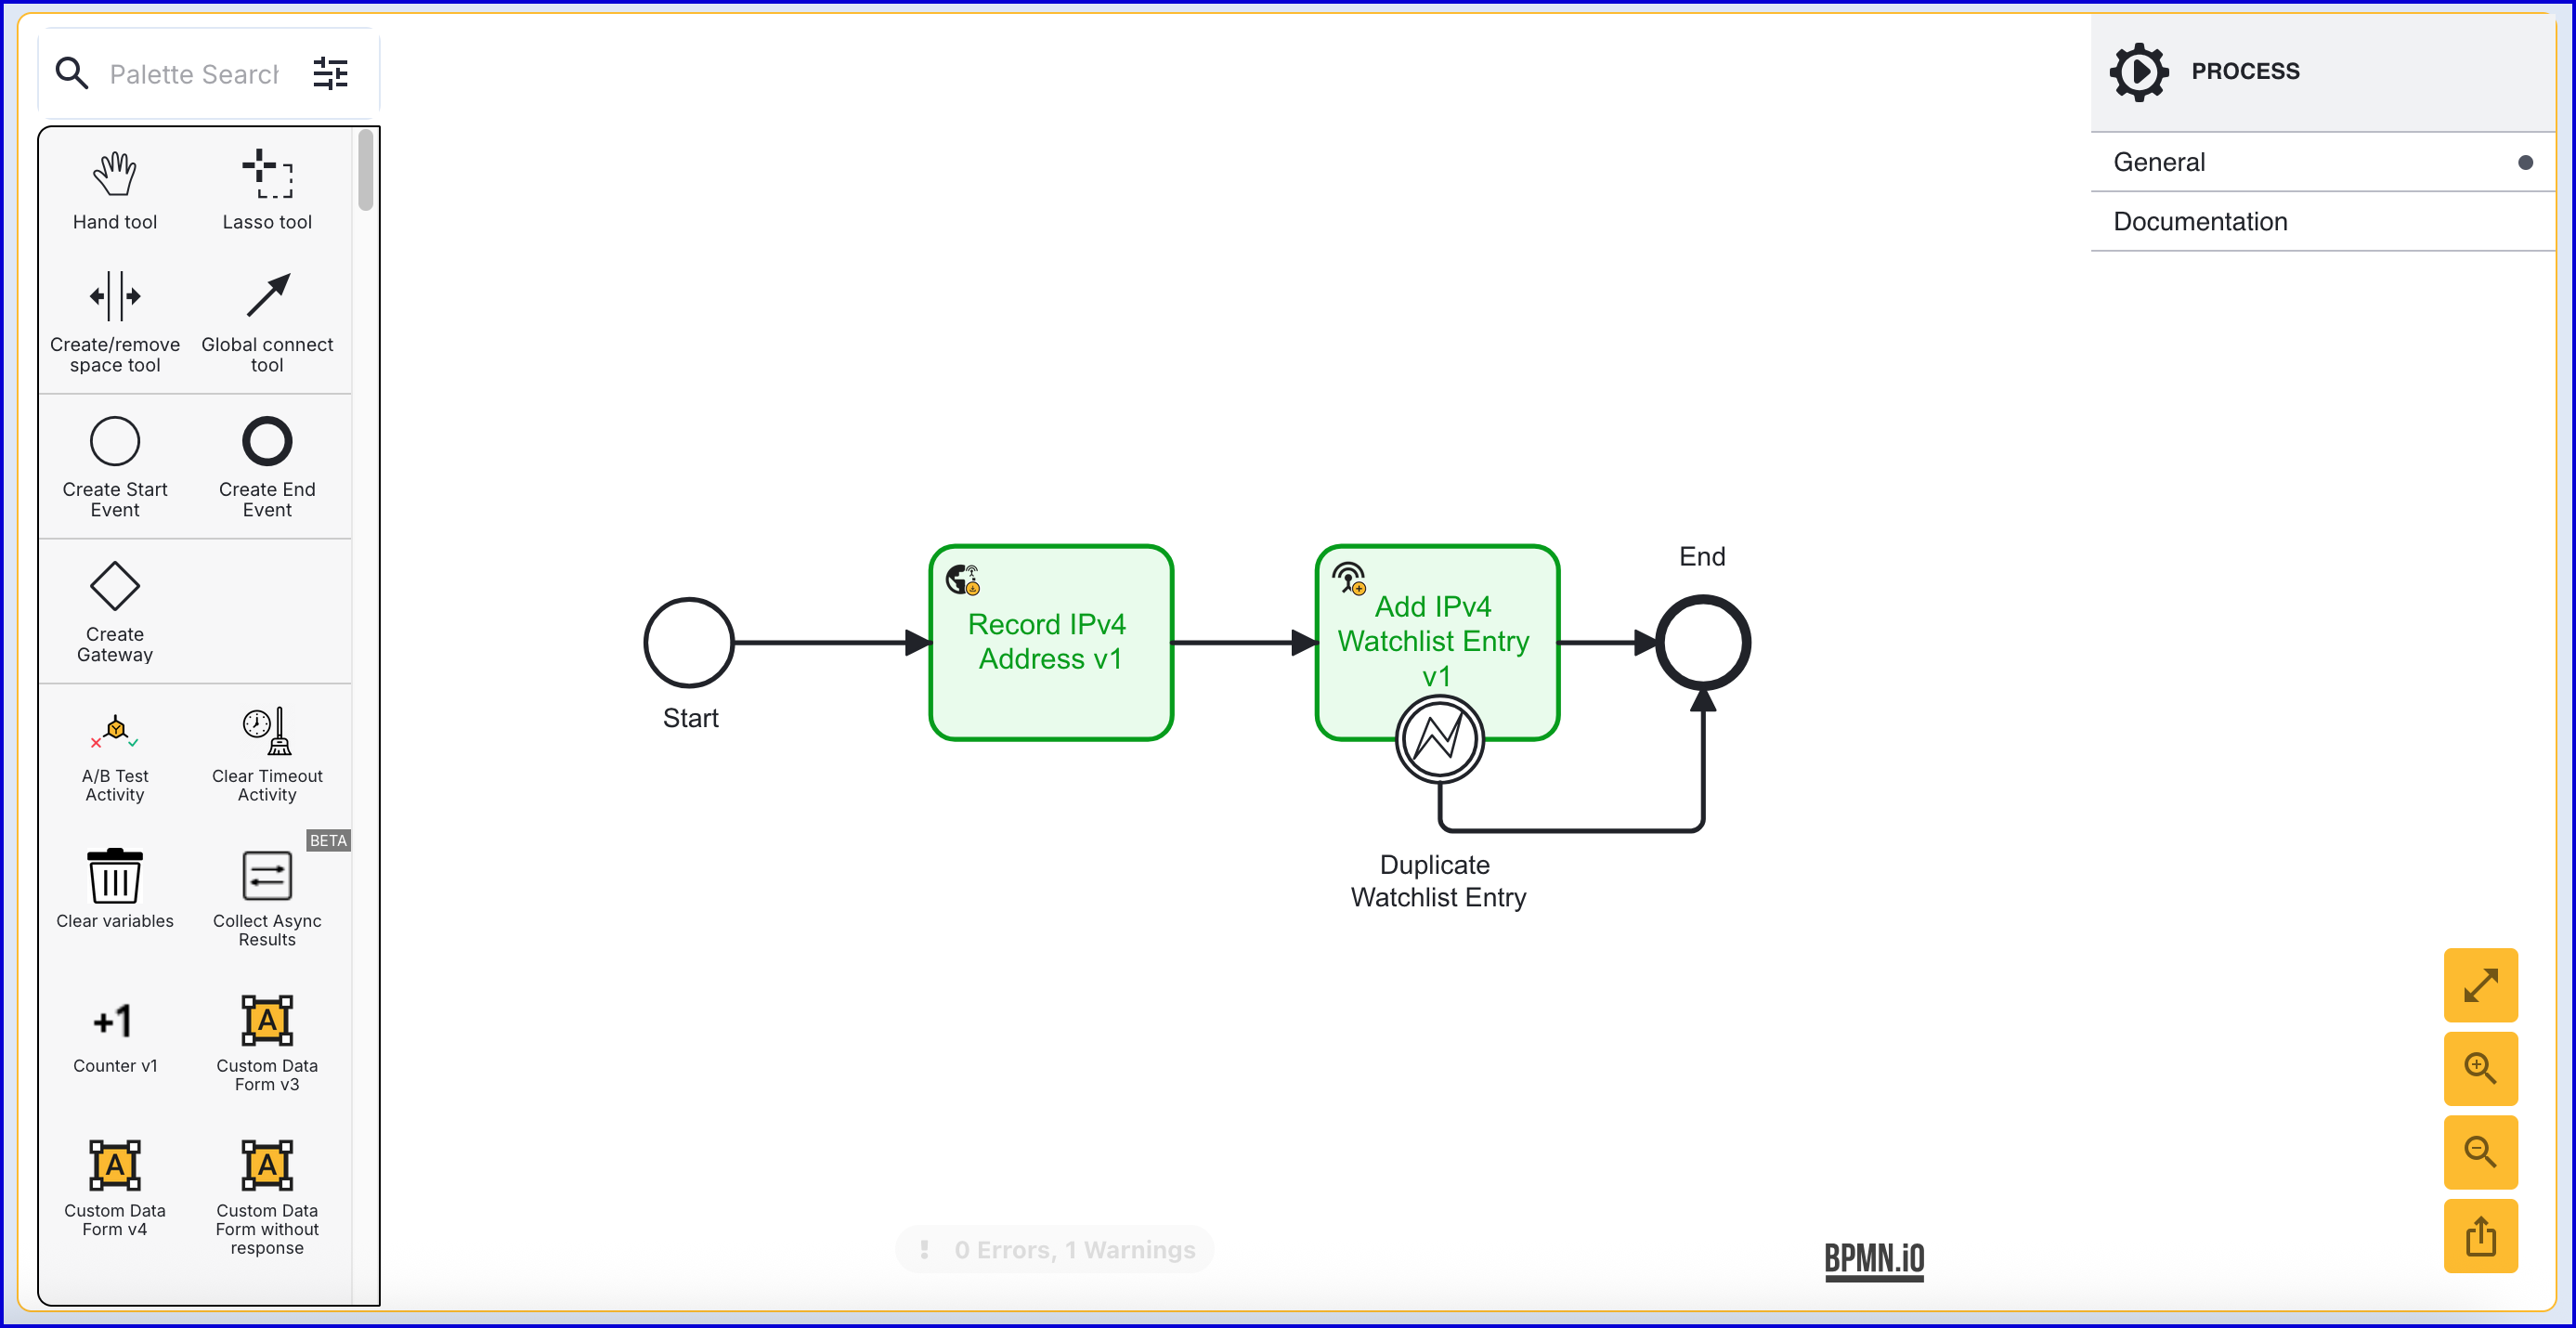
From the Process Designer, add an 'Add IPv4 Watchlist Entry v1' activity. Connect the activity to the 'Record IPv4 Address v1' activity.
This activity includes the following input parameters:
| Parameter | Description | Type | Default |
|---|---|---|---|
| Expire After | ISO 8601 duration after which the entry will be automatically deleted (e.g., PT1H, P1D). Converted to UTC timestamp by the activity. | String | |
| IPv4 Address | IPv4 address (max 15 chars, e.g., "192.168.100.100"). We will not support CIDR ranges at this time. | String | ${_signals.ipv4s.ipv4Address1.ipv4} |
| Watchlist Name | The name of the IPv4 Watchlist that the entry will be added to. | String |
By default, the 'IPv4 Address' input parameter is set to "
${_signals.ipv4s.ipv4Address1.ipv4}". This can be understood as follows:_signals- Accesses the _signals object where the IPv4 address is stored. For more information, see the Signal Recording of IPv4 Address section..ipv4s- Accesses the table of IPv4 addresses stored within the_signalsobject..ipv4Address1- Represents the key of the 'Record IPv4 Address v1' activity created in Step 2..ipv4- Retrieves the IPv4 address recorded as part of the 'Record IPv4 Address v1' activity.
The activity includes one error boundary event, "Duplicate Watchlist Entry", which is triggered when the IPv4 address added to the Watchlist is a duplicate of an existing IPv4 address currently in the Watchlist.
Once the Process Definition has been finalized, click the 'Save & Deploy' button to complete the creation process.
Step 4 - Test the Process Definition
This section will describe how to test the Process Definition created above by generating a Process Token. After completing the flow, results of the Process Instance can be viewed from the Process Instances page.
To test the Process Definition, create a new Process Token by navigating to the Process Definitions > Process Tokens page.
Click the 'New Process Token' button found on the top-right of the page to start creating a new token. A popup modal will appear where details of the token can be entered.
Once the token is created, scan the QR code or follow the link to begin the flow. The IPv4 of the current device will be recorded and added to the Watchlist.
Watchlist entries can be viewed by navigating to the Watchlists > Watchlist > Manage Entries page in the Backoffice.
Add a Watchlist Entry via TrustX API
To add a Watchlist entry via the TrustX API, the following tenant permissions are required:
Permissions:
The following query adds a new entry to the watchlist. The entry type must match the Watchlist type.
Example Request:
Signal Recording of IPv4 Address
Signal recording activities such as 'Record IPv4 Address v1' capture and store contextual information about the current Process Instance in a standardized _signals object in the execution variables. This information can be used by subsequent activities, cloud functions, custom pages, and for fraud analysis. All signals are stored in the execution variables and are available throughout the process instance lifecycle.
The activity stores information in the following structure.
Example:
Field Descriptions:
Field | Type | Description |
|---|---|---|
| String | The IPv4 address captured |
| String | City name resolved from IP address |
| String | State/region name resolved from the IP address |
| String | Country name resolved from the IP address |
| String | ISO 8601 timestamp when IP was captured |
Error Handling:
Error Condition | PSError | Code | Error Type | Description |
|---|---|---|---|---|
IP key blank |
| 7001 | Incident | ipv4Key parameter is blank or null (validation error) |
IP not found |
| 709 | Incident | No IP address found in execution context |
Searching an IPV4 Watchlist
Multiple methods can be used to search for a Watchlist match against an IPv4 address such as the TrustX API, Backoffice application, or via a Process Definition. This section will describe how to perform a Watchlist search using each of the listed methods and how to react to search results.
Searching via Backoffice
It is possible to search for a Watchlist match using the Backoffice 'Test Watchlist' functionality. As the name suggests, this method is primarily intended for testing purposes.
Navigate to the Watchlists page in the Backoffice.
Find the Watchlist to be tested using the search functionality provided.
Under the 'Actions' column. select the 'Test' icon.

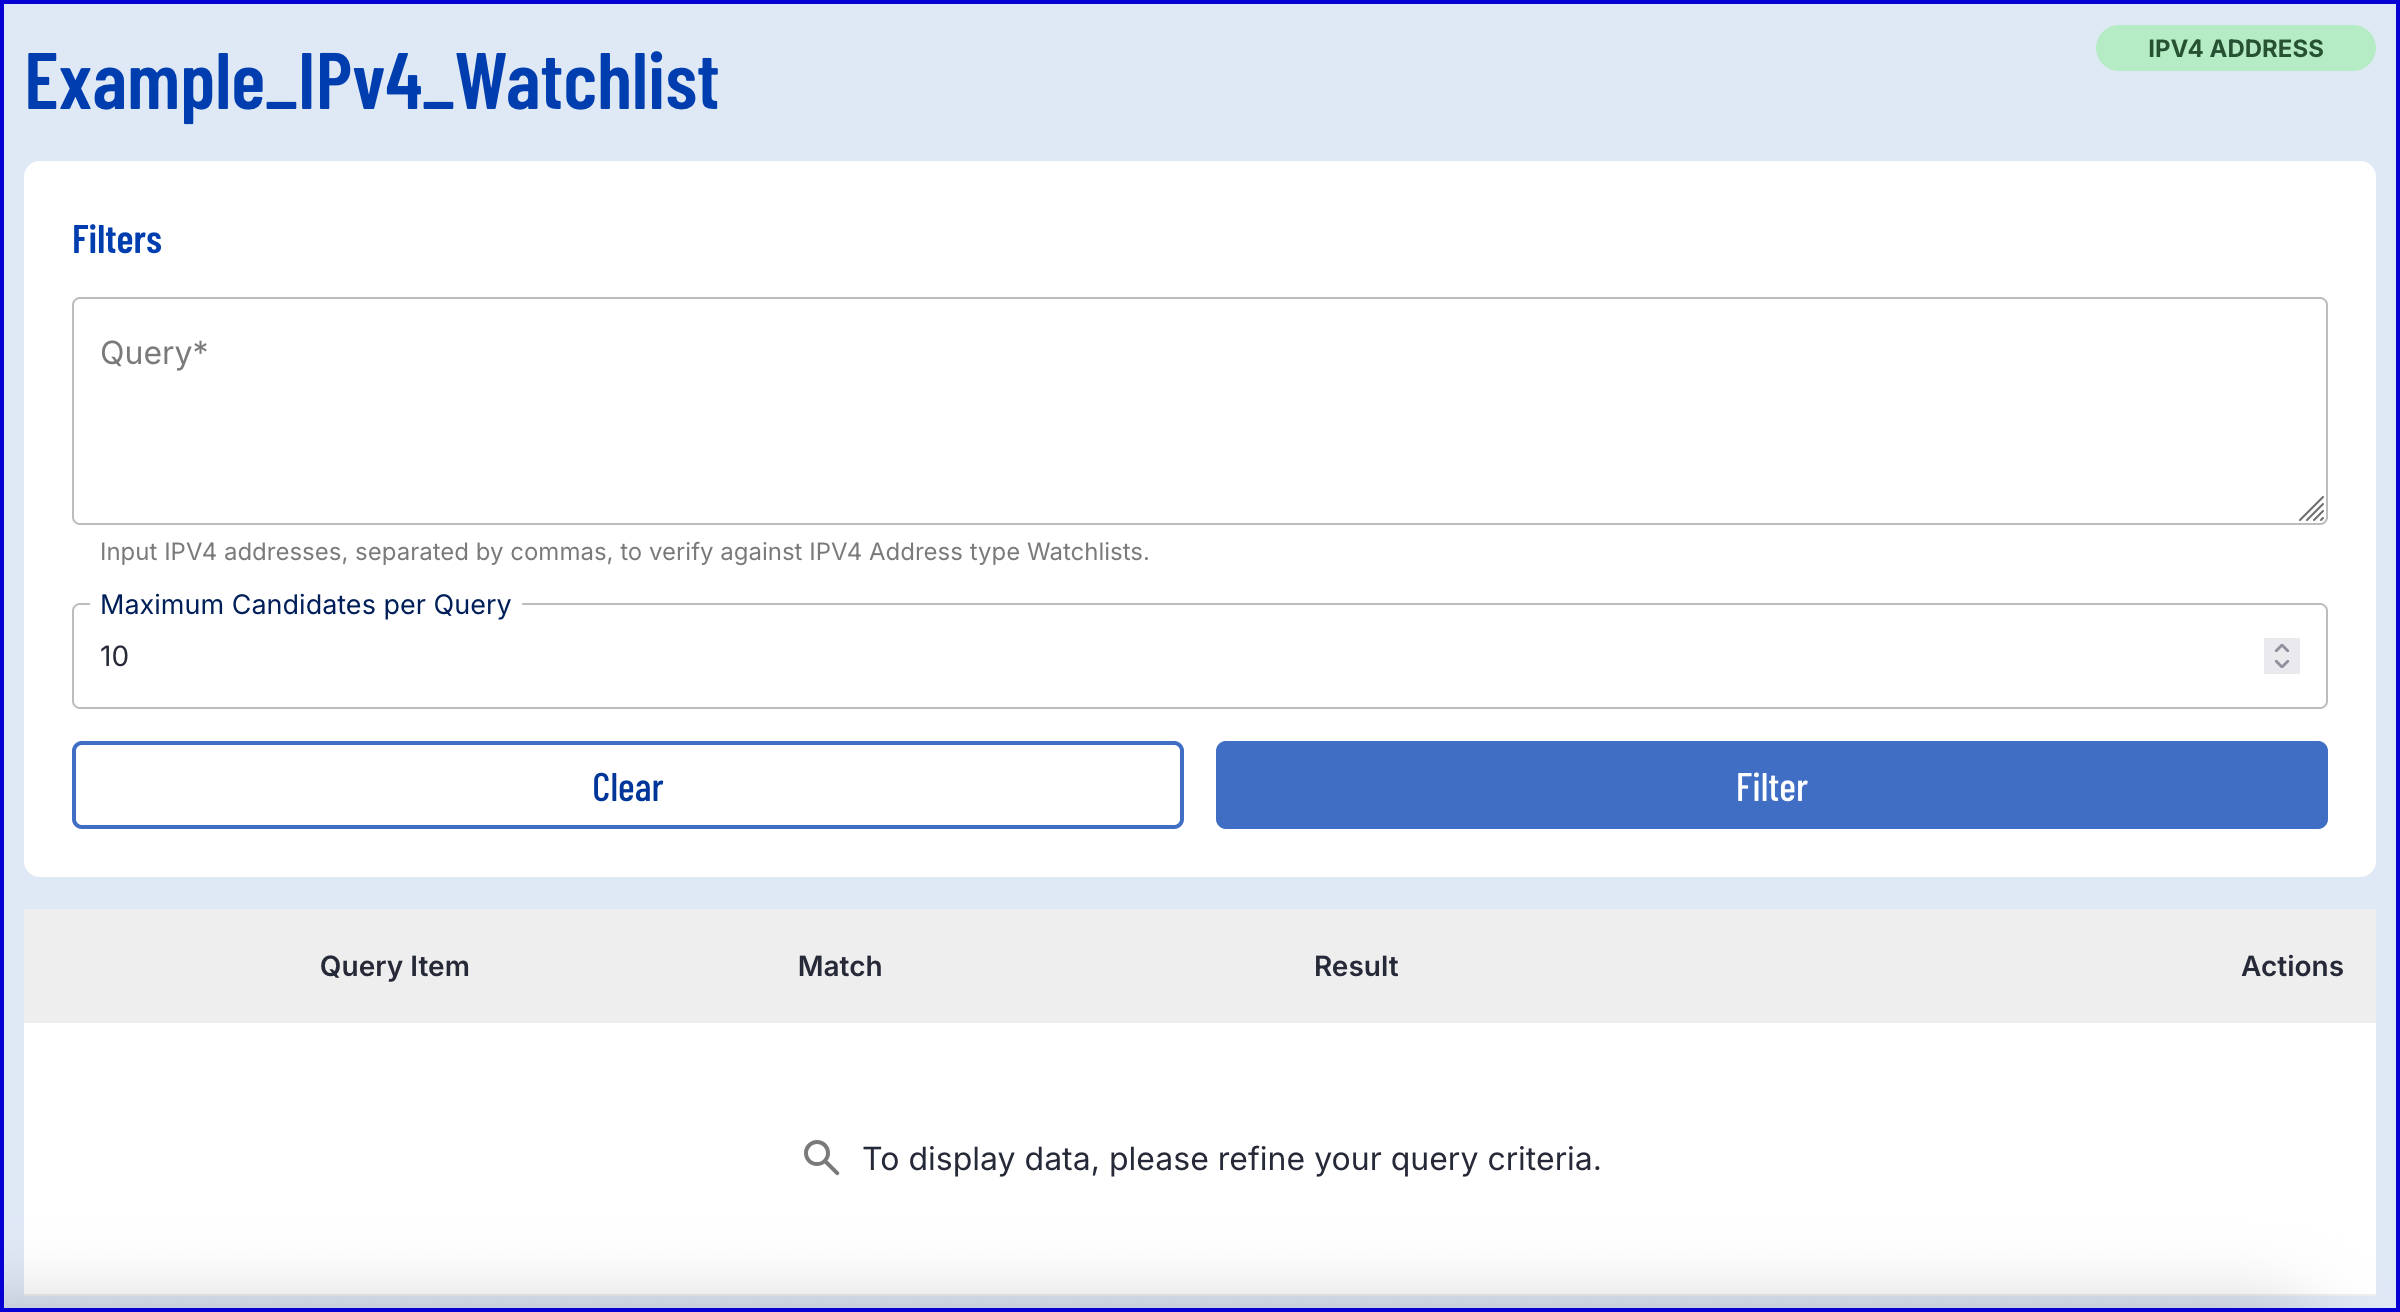
The test page provides a text field where a list of comma-delimited IPv4 addresses can be entered as search parameters.
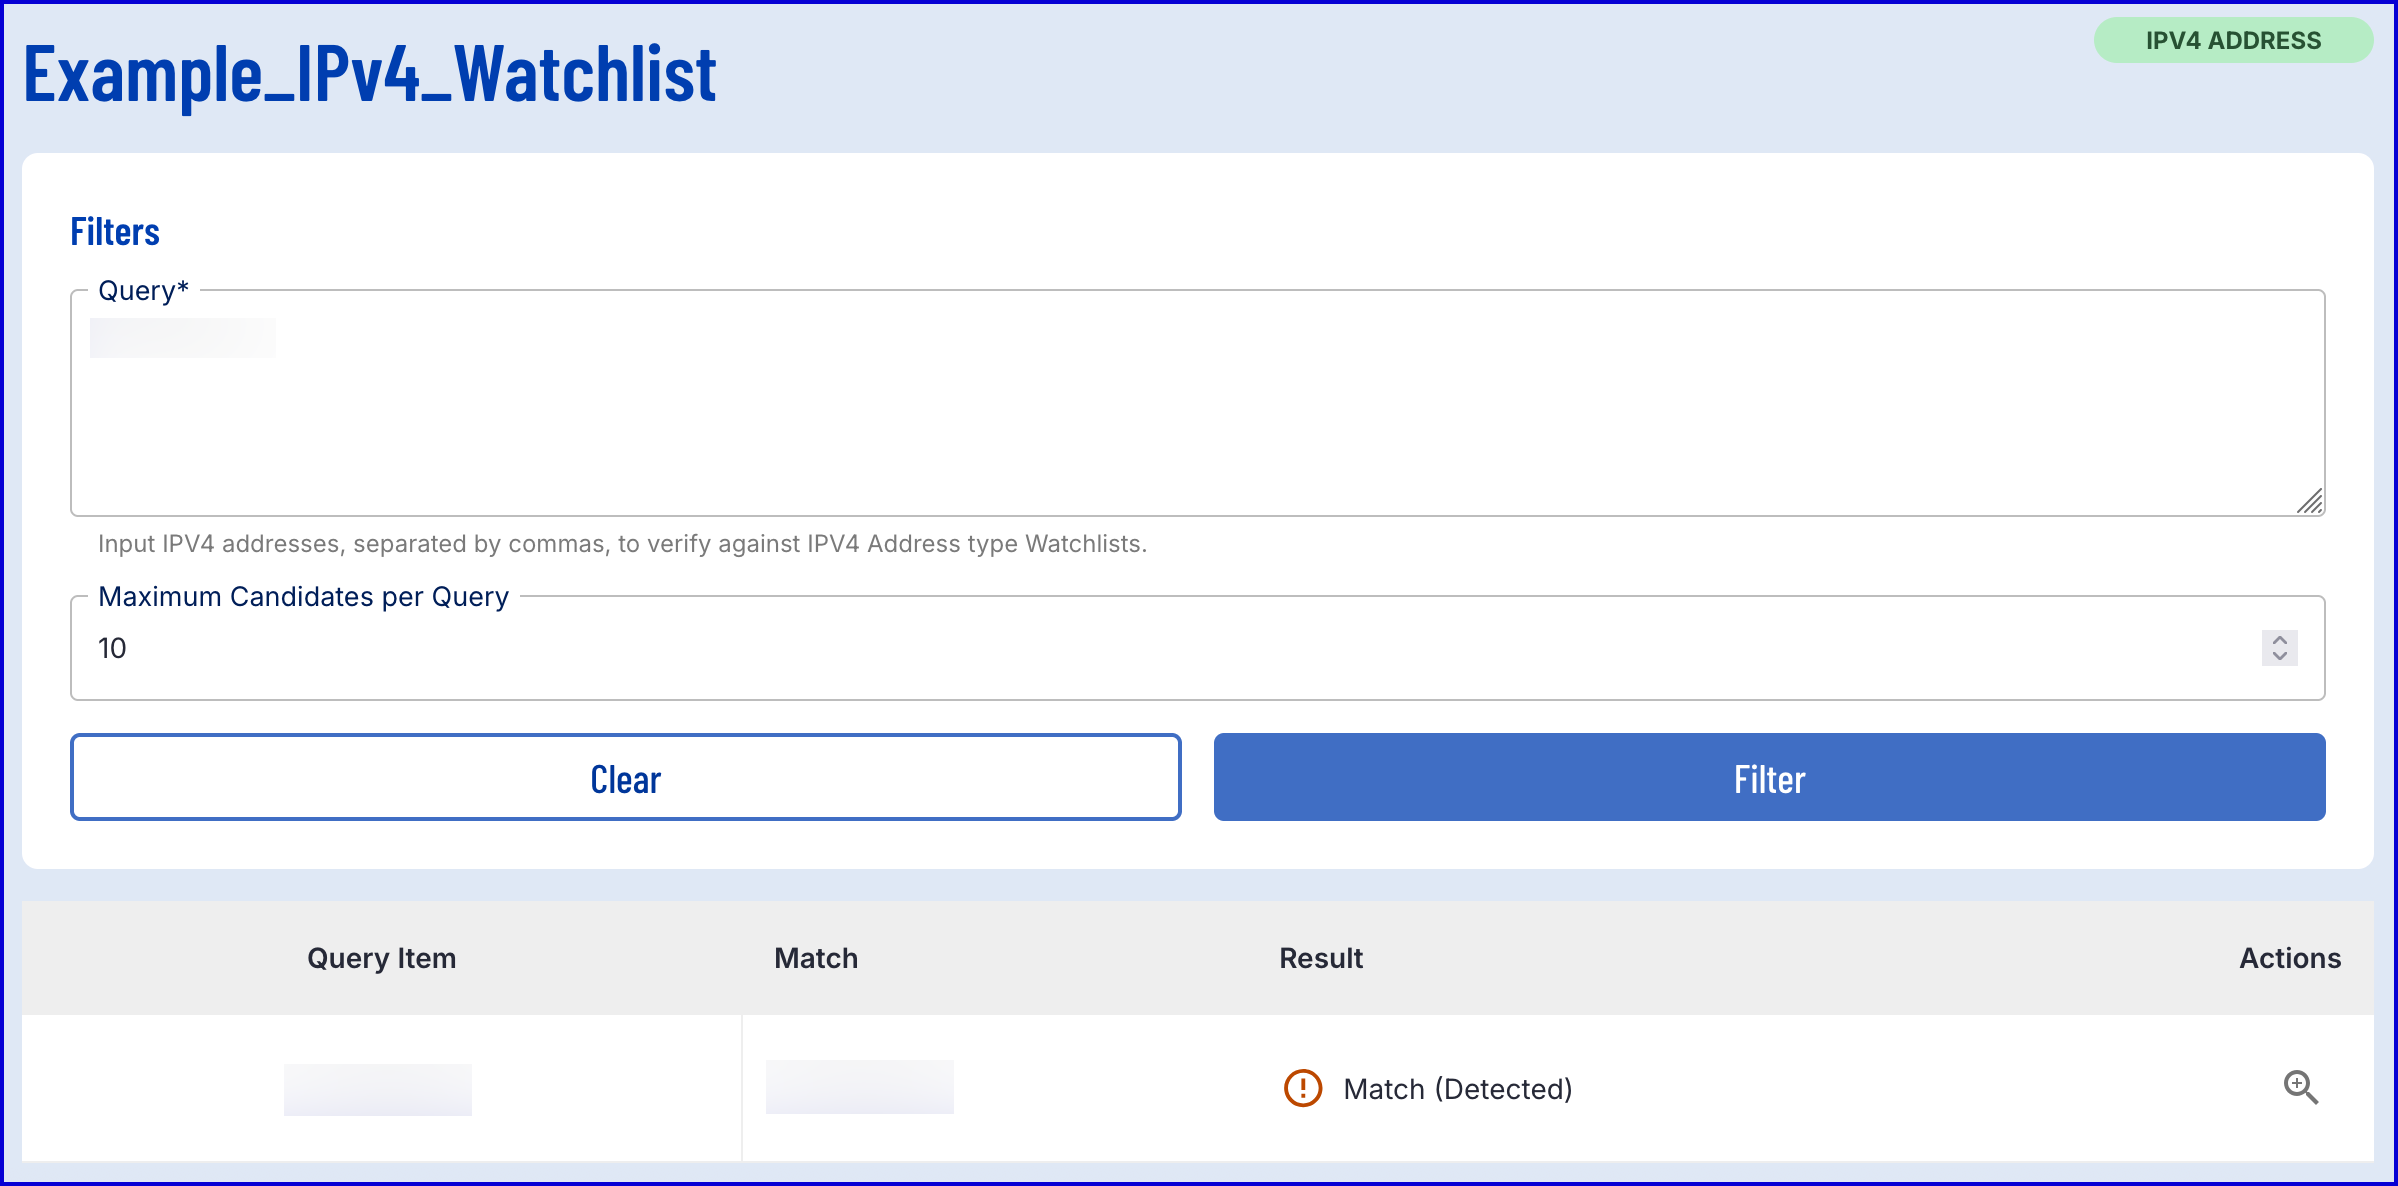
If a match is found, the results will be displayed in the table below with the result "Match (Detected)".
It is not possible to action on search results returned. This functionality is intended for testing purposes only.
Searching via Process Definition
The 'Search IPv4 Watchlist v1' activity can be used to search for an IPv4 match during a Process Instance. This section will describe how to configure a Process Definition that retrieves the IPv4 address of the device and perform a search against a Watchlist.
Step 1 - Configure the Process Definition
This process follows steps 1 and 2 of the Add Watchlist Entry via Process Definition flow where the 'Record IPv4 Address v1' activity is used to record the IPv4 of the device completing the Process Instance.
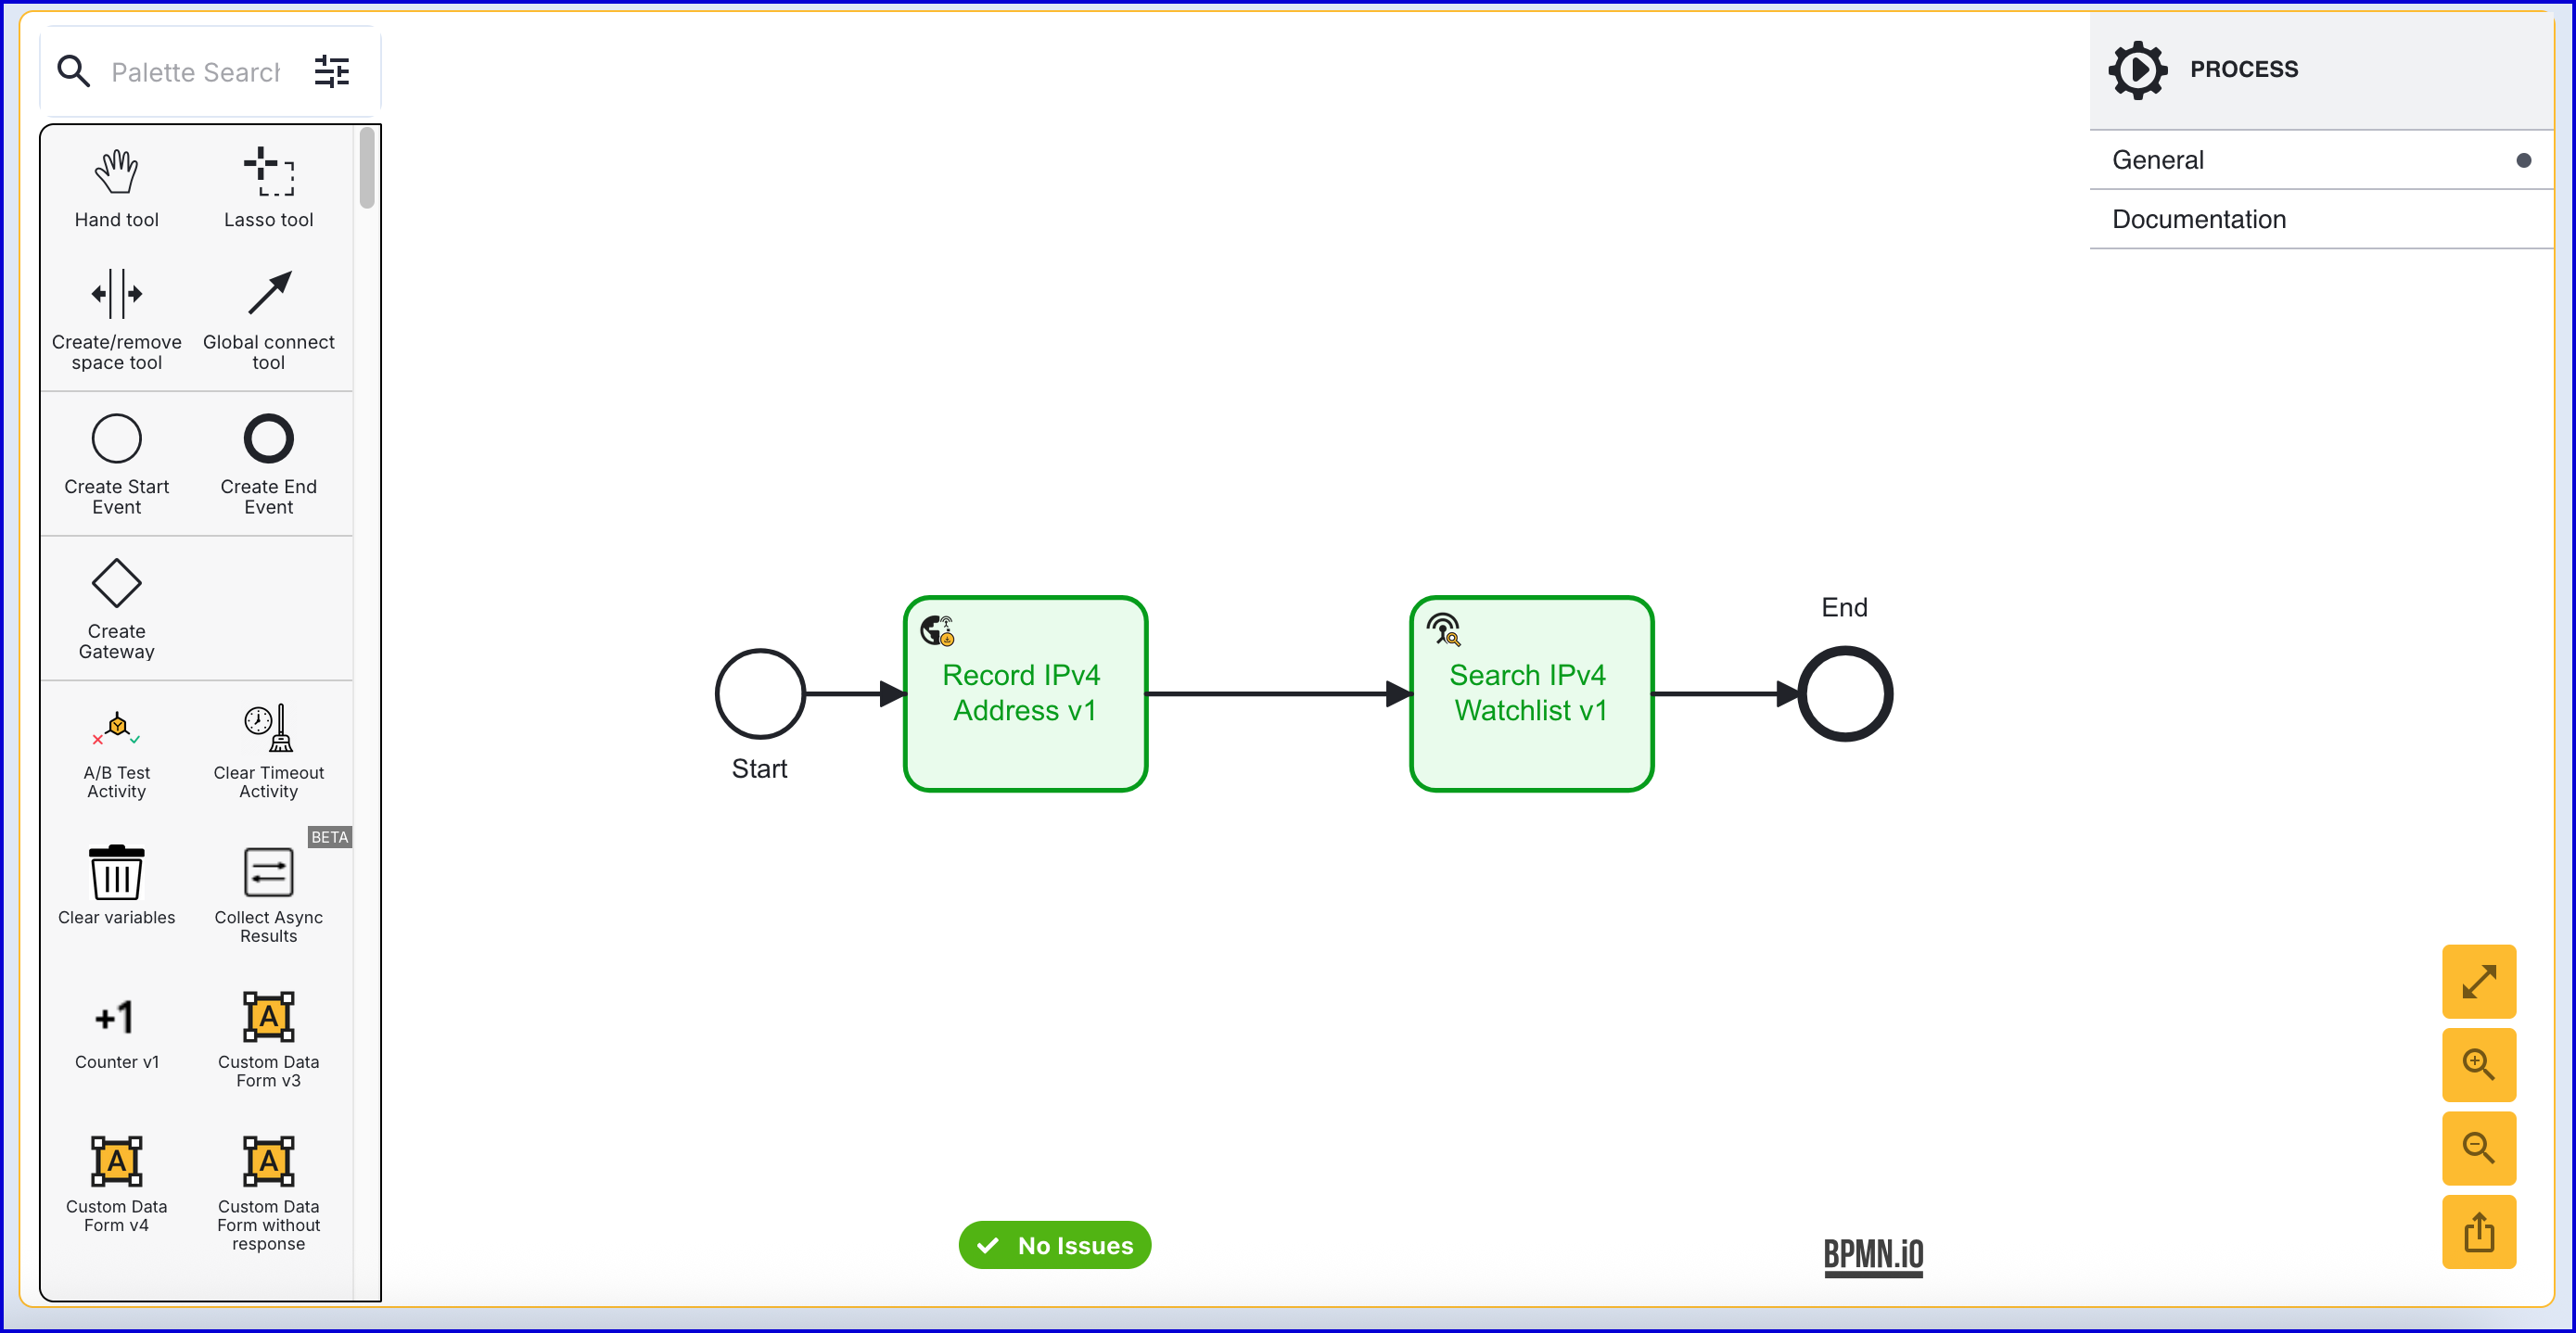
Follow the steps outlined in the section above by creating a 'Start' and 'End' event connected to a 'Record IPv4 Address v1' activity in a new Process Definition.
The activity supports one configurable activity parameter. The 'Key' parameter contains an identifier used to identify the IPv4 recording attempt. By default, the Key is set to "ipv4Address1". The IPv4 record will be stored in the
_signalsobject. For more information, see the Signal Recording of IPv4 Address section.
Step 2 - Perform Search Against Watchlist
Add a 'Search IPv4 Watchlist v1' activity to the Process Designer and connect it to the 'Record IPv4 Address v1' activity using the 'Global connect tool'.
The 'Search IPv4 Watchlist v1' activity includes the following input parameters:
| Parameter | Description | Type | Default |
|---|---|---|---|
| IPv4 Address | IPv4 address to search (max 18 chars, e.g., "192.168.1.1") | String | ${_signals.ipv4s.ipv4Address1.ipv4} |
| Max Match Results | Maximum number of matches to return (1-100) | Integer | ${10} |
| Search Behavior | Determines how match results are interpreted: BLOCK (match=FAIL, no match=PASS), ALLOW (match=PASS, no match=FAIL), BLOCK_REVIEW (match=REVIEW, no match=PASS), ALLOW_REVIEW (match=REVIEW, no match=FAIL) | String | BLOCK |
| Search Key | The key under which the check result will be stored in the checks object | String | watchlistSearch1 |
| Watchlist Name | Name of the IPv4 watchlist (max 250 chars) | String | Name of the IPv4 watchlist (max 250 chars) |
The 'Search Behavior' property controls how the activity will response to matches.
Value | Match Found | No Match | Use Case |
|---|---|---|---|
| outcome = FAIL | outcome = PASS | Blocklist: Fail the check if the IPV4 address is found on the watchlist |
| outcome = PASS | outcome = FAIL | Allowlist: Pass only if IPv4 address is found on the watchlist |
| outcome = REVIEW | outcome = PASS | Blocklist with Review: Send to review if found, otherwise pass |
| outcome = REVIEW | outcome = FAIL | Allowlist with Review: Send to review if found (match needs human verification), otherwise deny (not on allowlist) |
By default, the 'IPv4 Address' input parameter is set to
${_signals.ipv4s.ipv4Address1.ipv4}representing the IP address recorded by the 'Record IPv4 Address v1' activity._signals- Accesses the _signals object where the IPv4 address is stored. For more information, see the Signal Recording of IPv4 Address section..ipv4s- Accesses the table of IPv4 addresses stored within the_signalsobject..ipv4Address1- Represents the key of the 'Record IPv4 Address v1' activity created in Step 2..ipv4- Retrieves the IPv4 address recorded as part of the 'Record IPv4 Address v1' activity.
Results of the search will be stored in the _checks table and can be viewed from the Backoffice application or retrieved using the TrustX API.
Searching via API
The following query searches a watchlist for matches against the provided query. The query type must match the watchlist type. Returns matching entries with scores and metadata.
To search a Watchlist entry via the TrustX API, the following tenant permissions are required.
Permissions:
Example Request:
Example Response:
Utilizing Watchlist Output Parameter
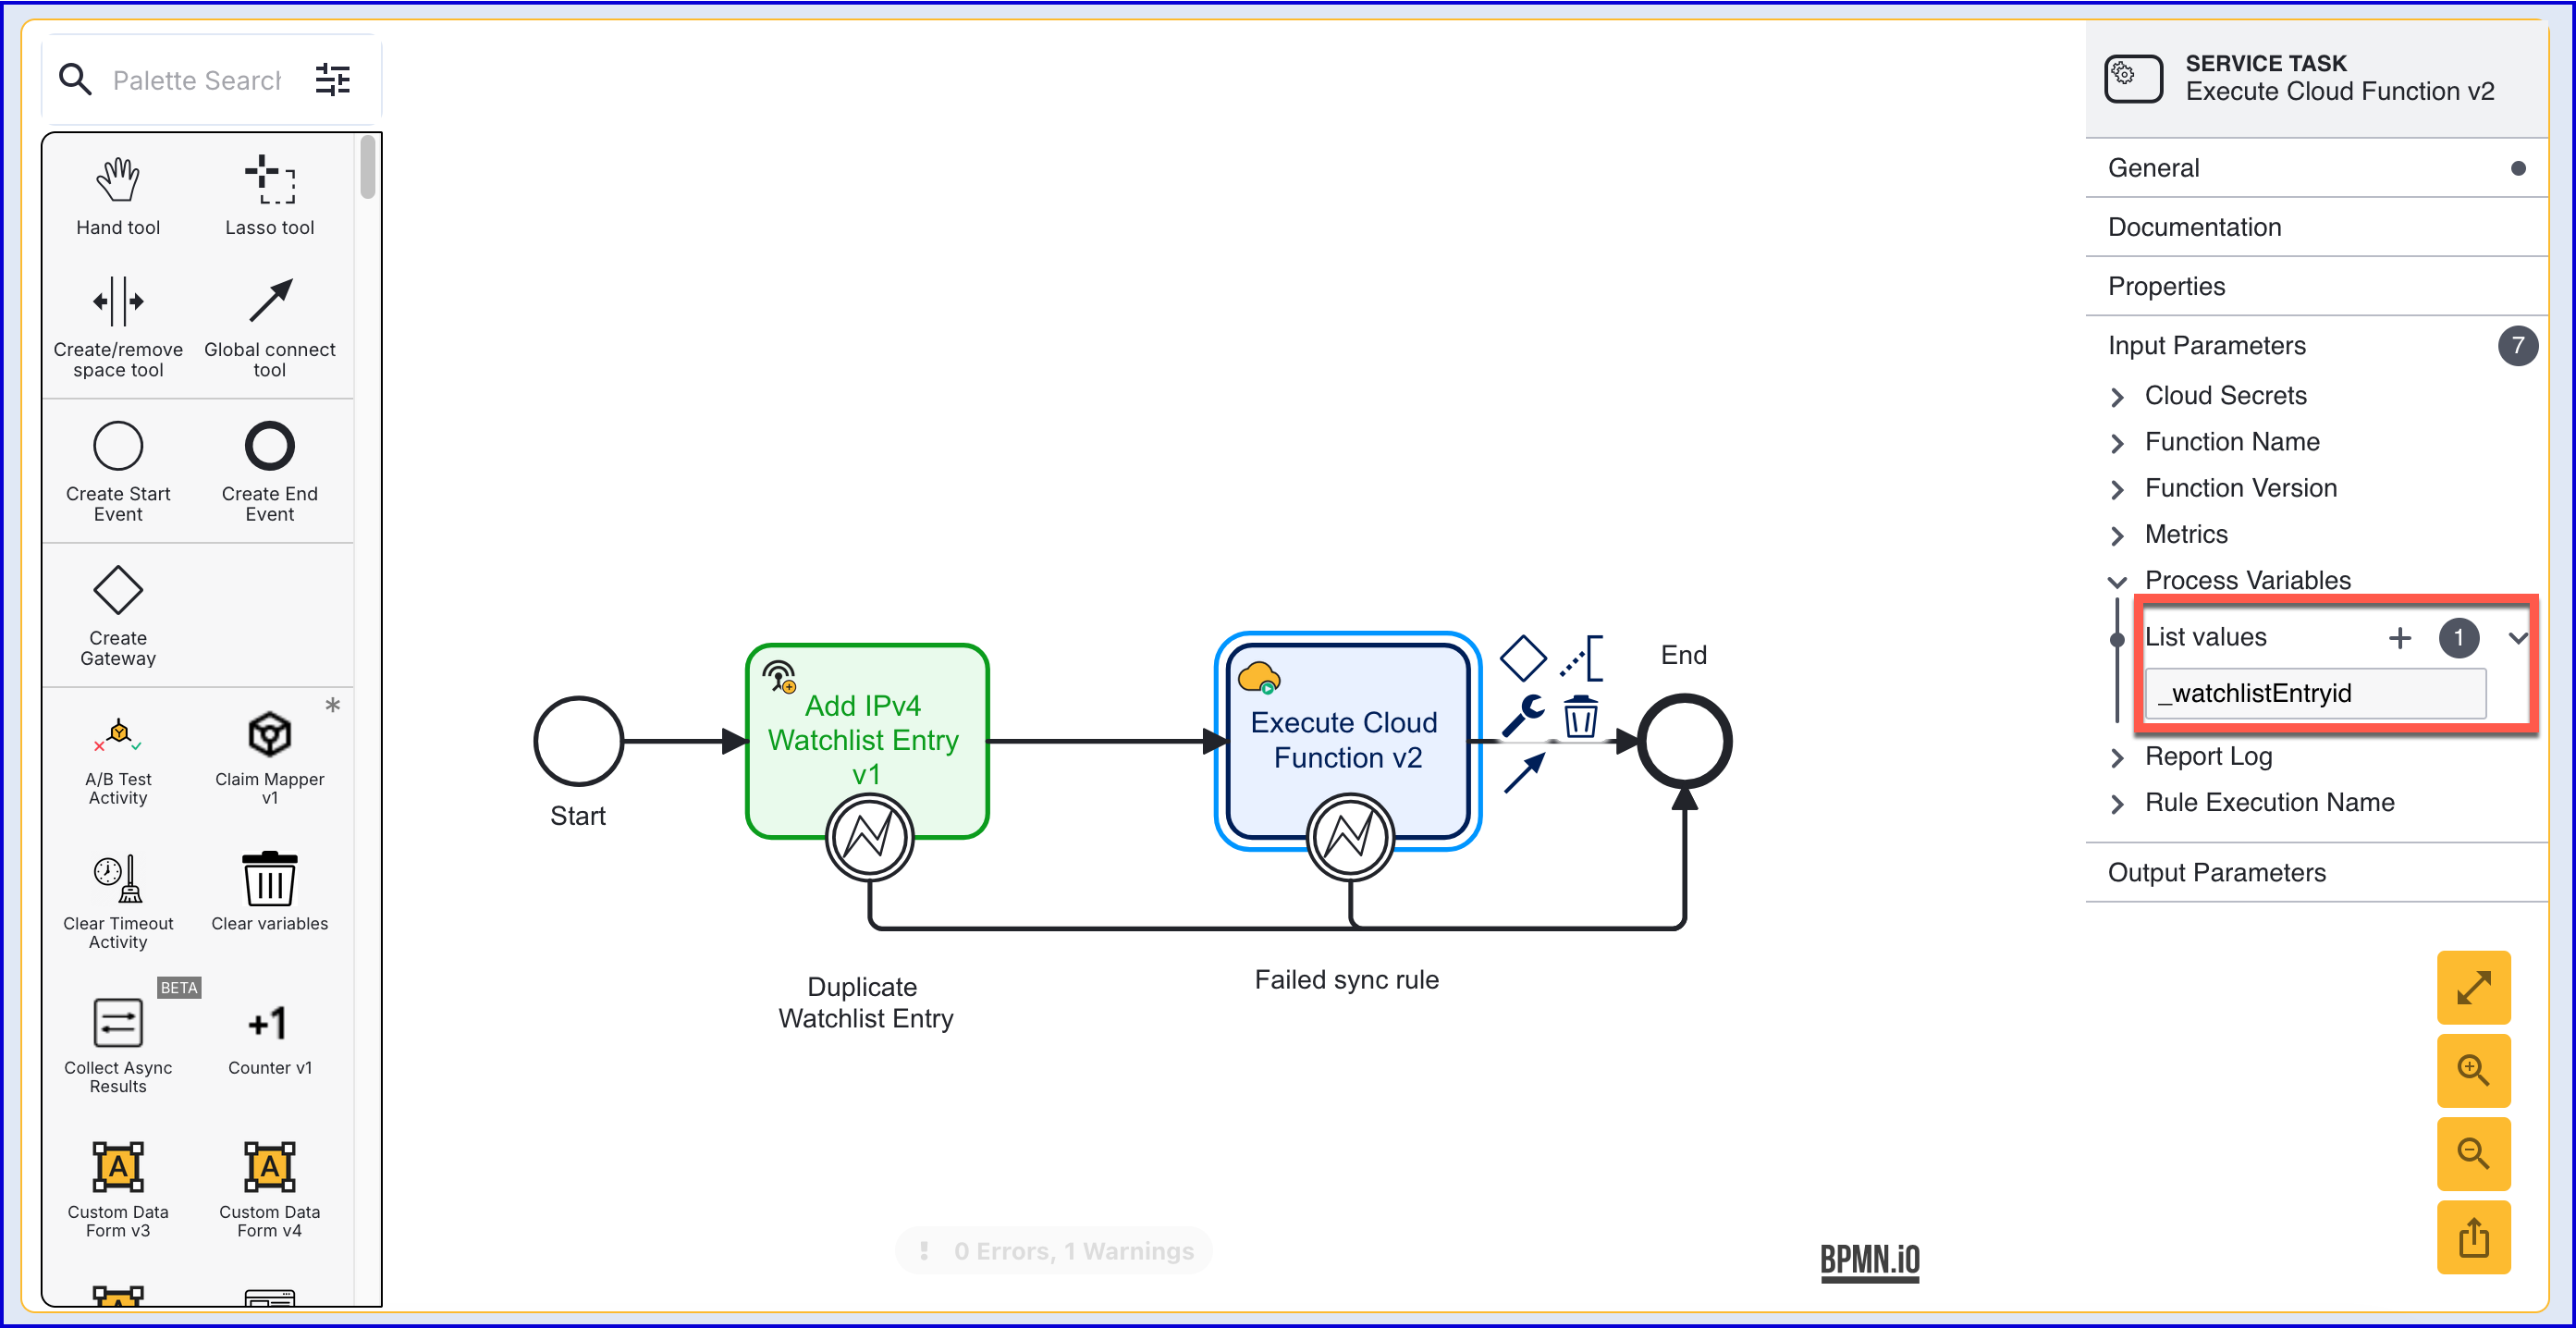
The 'Add IPv4 Watchlist Entry' activity will populate a Watchlist entry ID (_watchlistEntryId) variable when included in a Process Definition. This variable can be used as a reference to the watchlist entry.
To take advantage of this output parameter, previous integrations that utilized the 'Add IPv4 Watchlist Entry' activity will need to be replaced with a newer version of the activity.
The example Cloud Function below can be used to retrieve the Watchlist entry id.
Example:
From the example above, the Watchlist entry ID is retrieved using params['vars'] ['_watchlistEntryId'] . The value will be printed by the Cloud Function.
To ensure the output parameter is available to the 'Execute Cloud Function' activity in the Process Definition, ensure that the _watchlistEntryId is included in the list of 'Process Variables' in the activity input parameters.
Example:
Viewing Results
The results of a Watchlist search attempt can be found in the Backoffice application or retrieved using the TrustX API. This section will describe how to retrieve the results of a search in both cases.
Viewing Results in the Backoffice
To find the results of the Watchlist search in the Backoffice application, follow the steps outlined:
Log in to the Backoffice and navigate to the Process Instances page.
Using the search filters provided, find the Process Instance where Watchlist searching was performed.
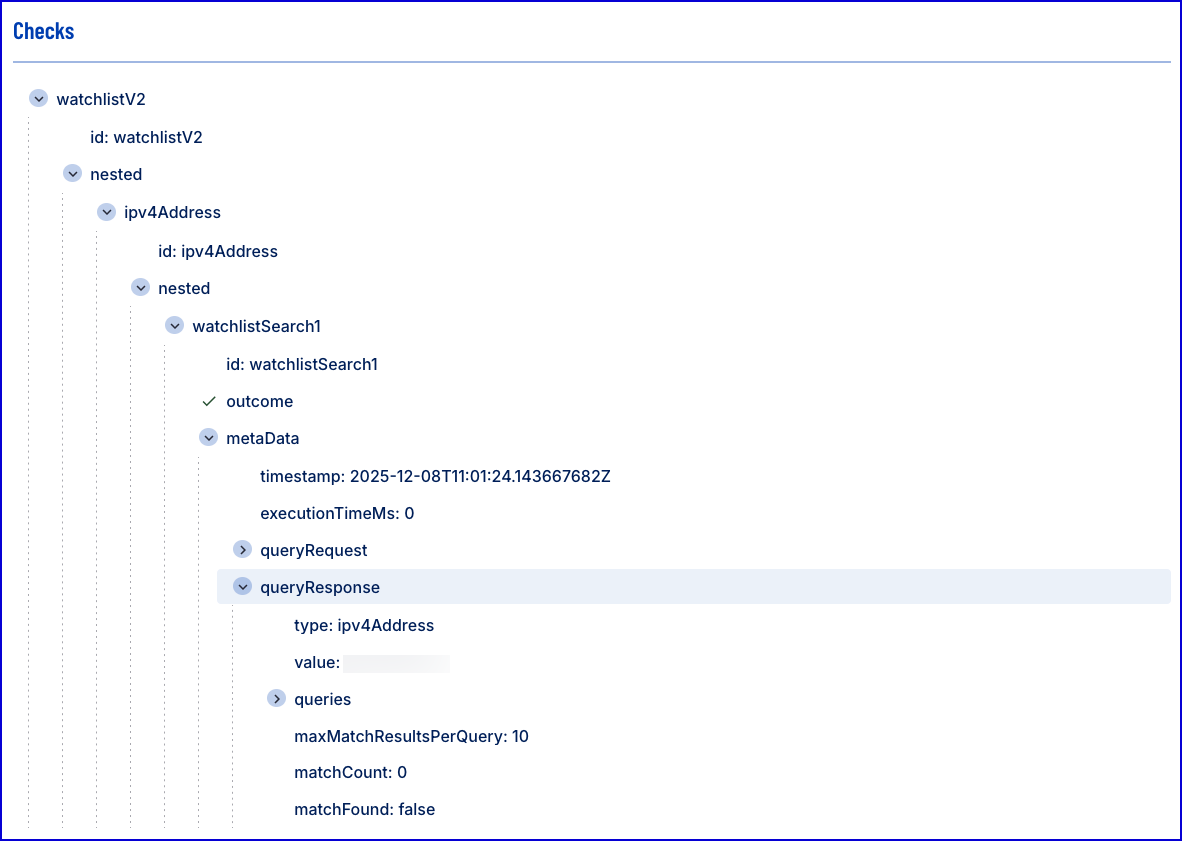
Watchlist search results can be found in the
_checkstable, displayed in the Backoffice under the Checks section. This will include the recorded IPv4 that was tested and the result of the search.
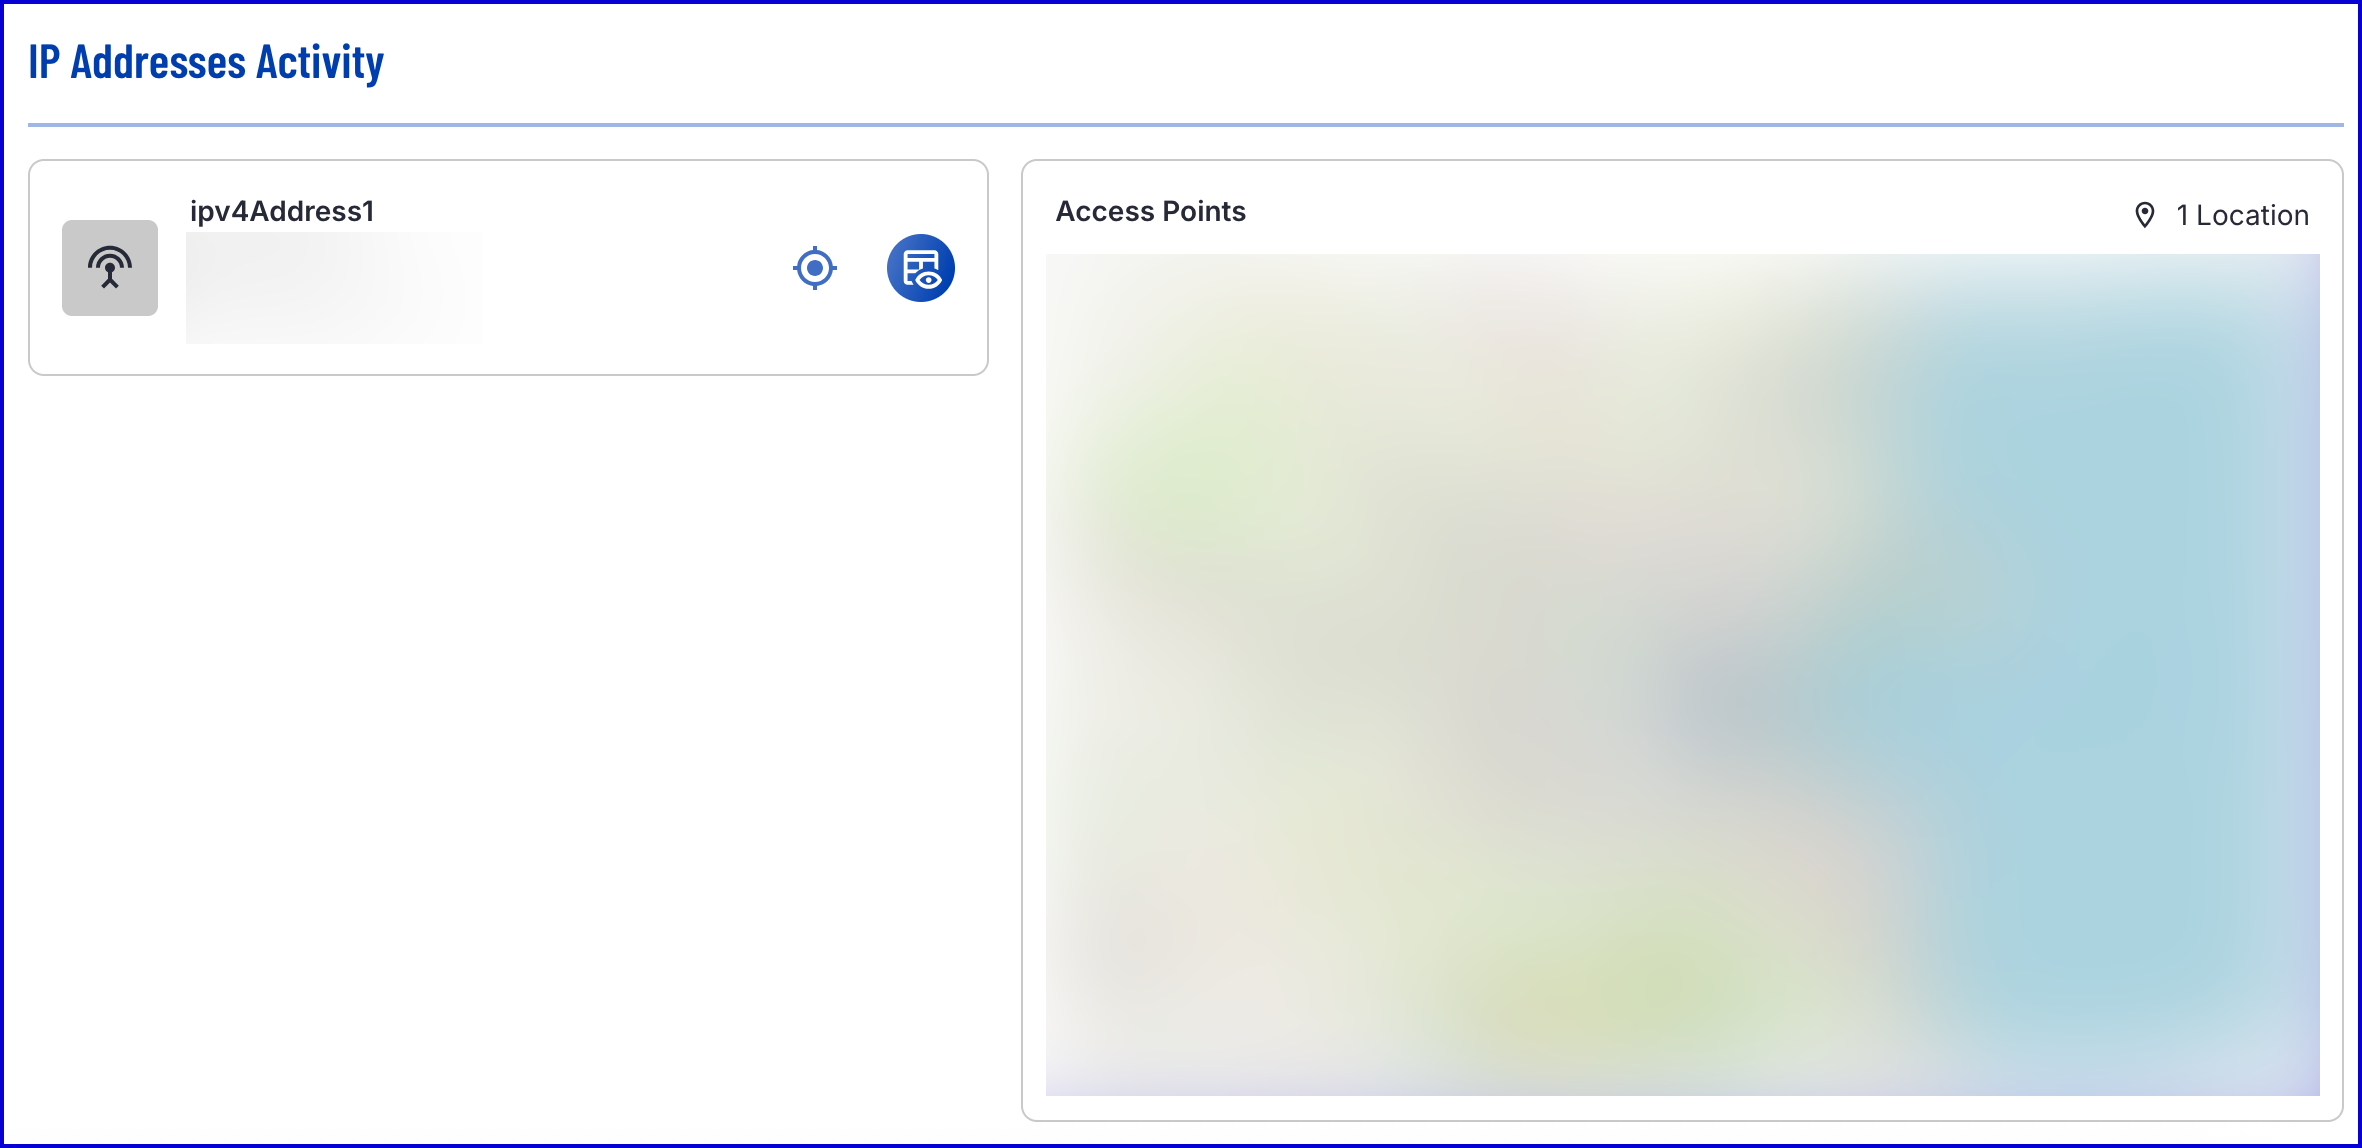
Specific details about the recorded address, including the device location, can be found in the IP Addresses Activity section.
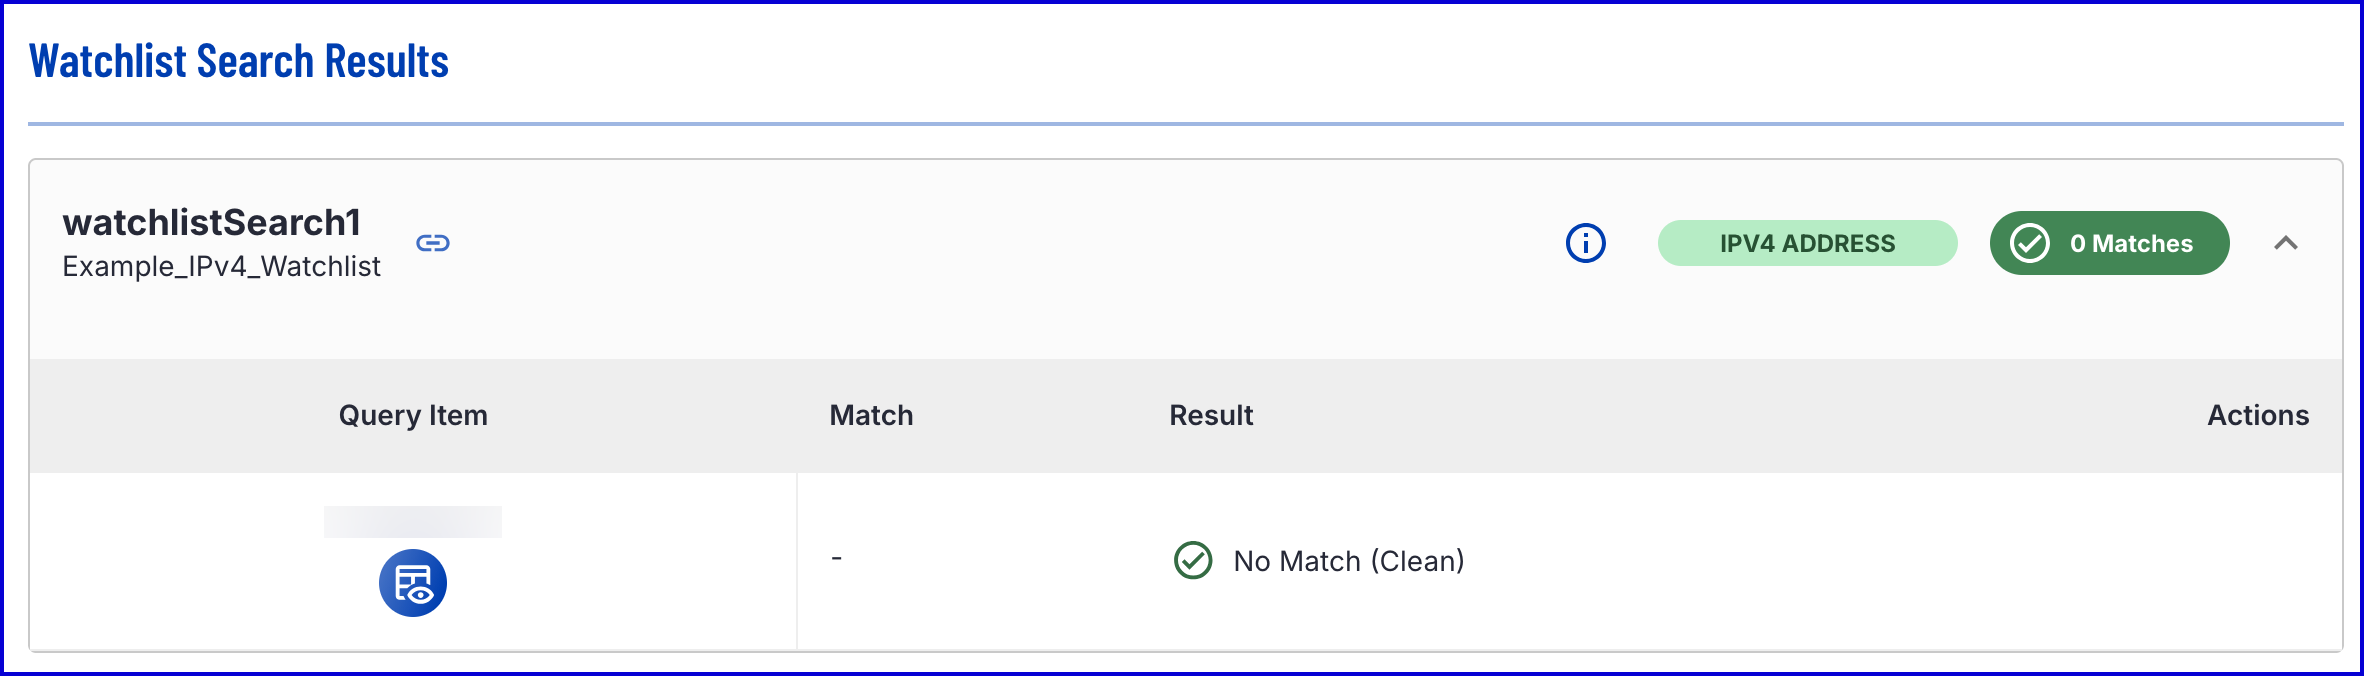
A list of Watchlist search results can be found in the Watchlist Search Results section.
Example No Match Detected:
Example Match Detected:
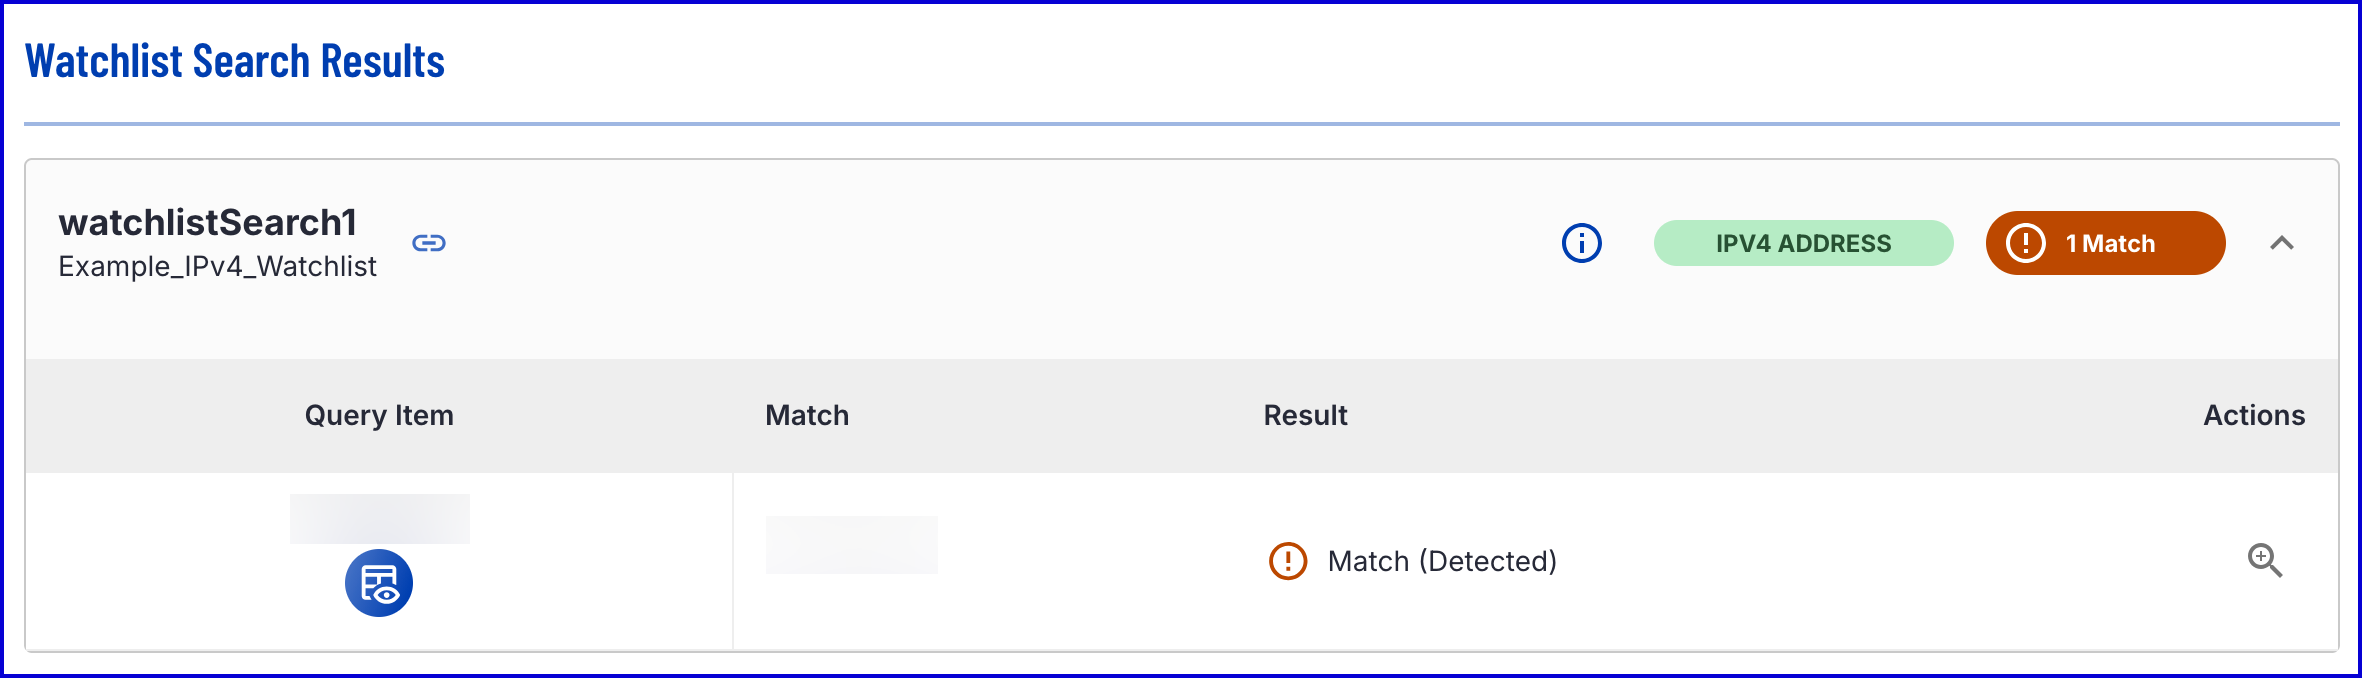
The table of results include the following information:
Query Item - Displays the recorded IPv4 address used to perform the search query.
Match - The IPv4 address matched against within the Watchlist.
Result - The result of the Watchlist search.
Actions - In the event of a match, enables users to see additional details about the Watchlist entry that the IPv4 address was matched against.
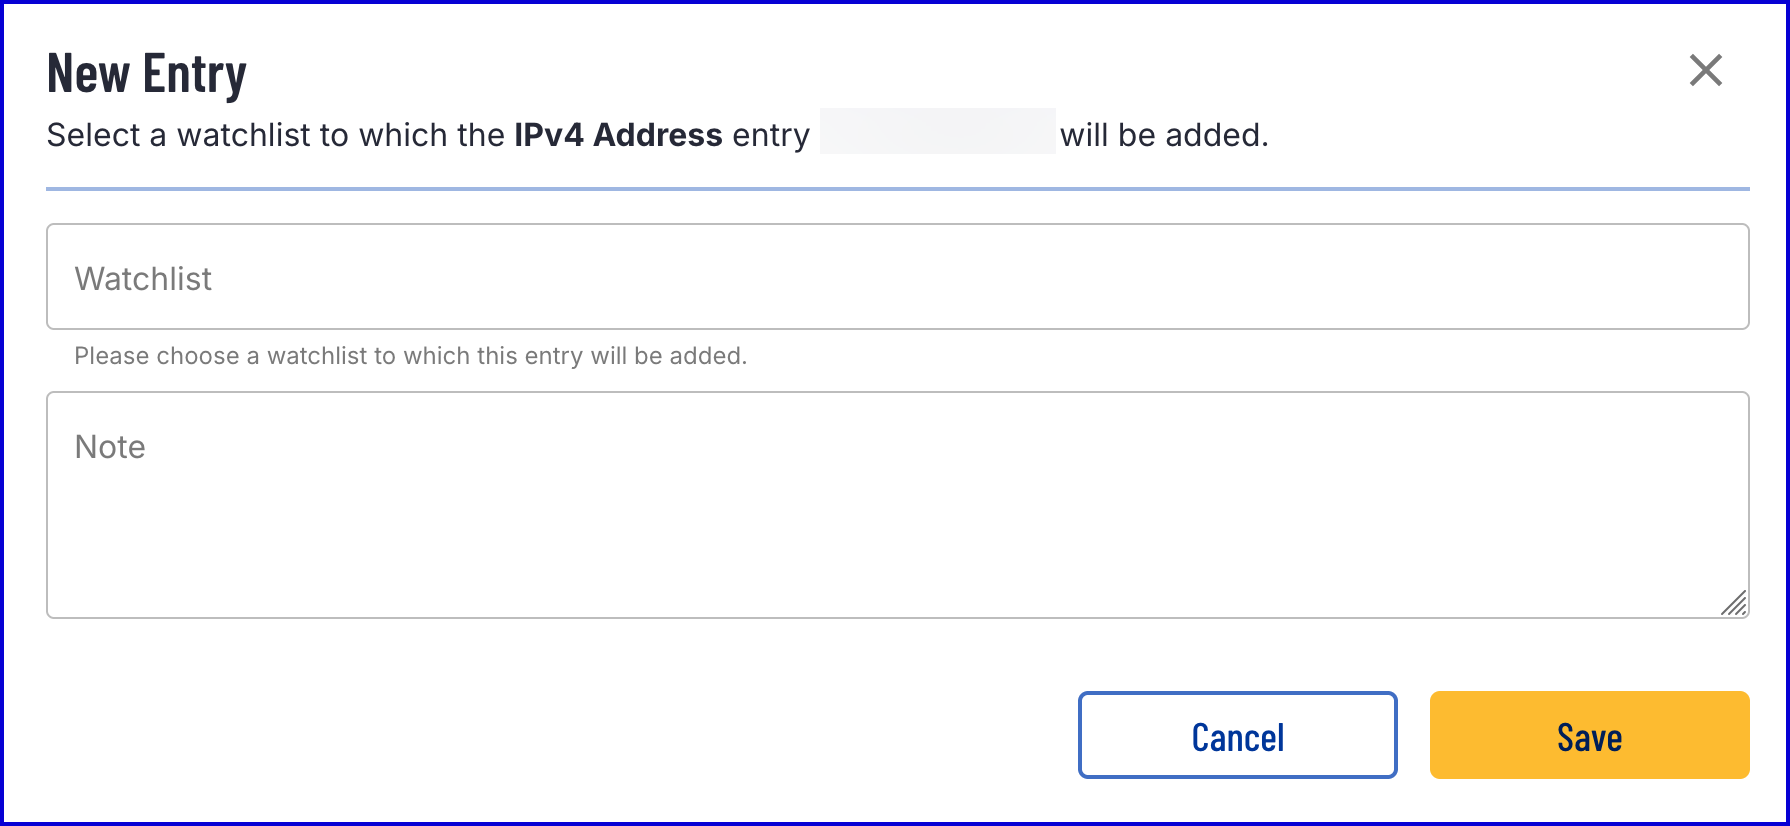
Using the blue 'tracking' button under the 'Query Item' column, it is possible to add the recorded IPv4 address directly to a Watchlist. Selecting this button will open a popup modal where the address can be added.