Introduction
Custom Data Forms can be used to configure a custom 'Thank You' page that is presented to the end user before redirecting them to a URL of choice.
This can be accomplished by configuring a Custom Data Form at the end of a Process Definition and a Process Token that includes a redirect URL that will redirect the end user once the flow has been completed. To configure a custom 'Thank You' page, follow the steps outlined below.
Step 1 - Create the Custom Form
The first step required is to create a custom form that will be used as the final 'Thank You' screen presented to the end user. For general instructions on creating a custom form, see the Custom Data Forms guide.
Navigate to the 'Custom Forms' page found under the 'Integration Hub' category of the Backoffice.
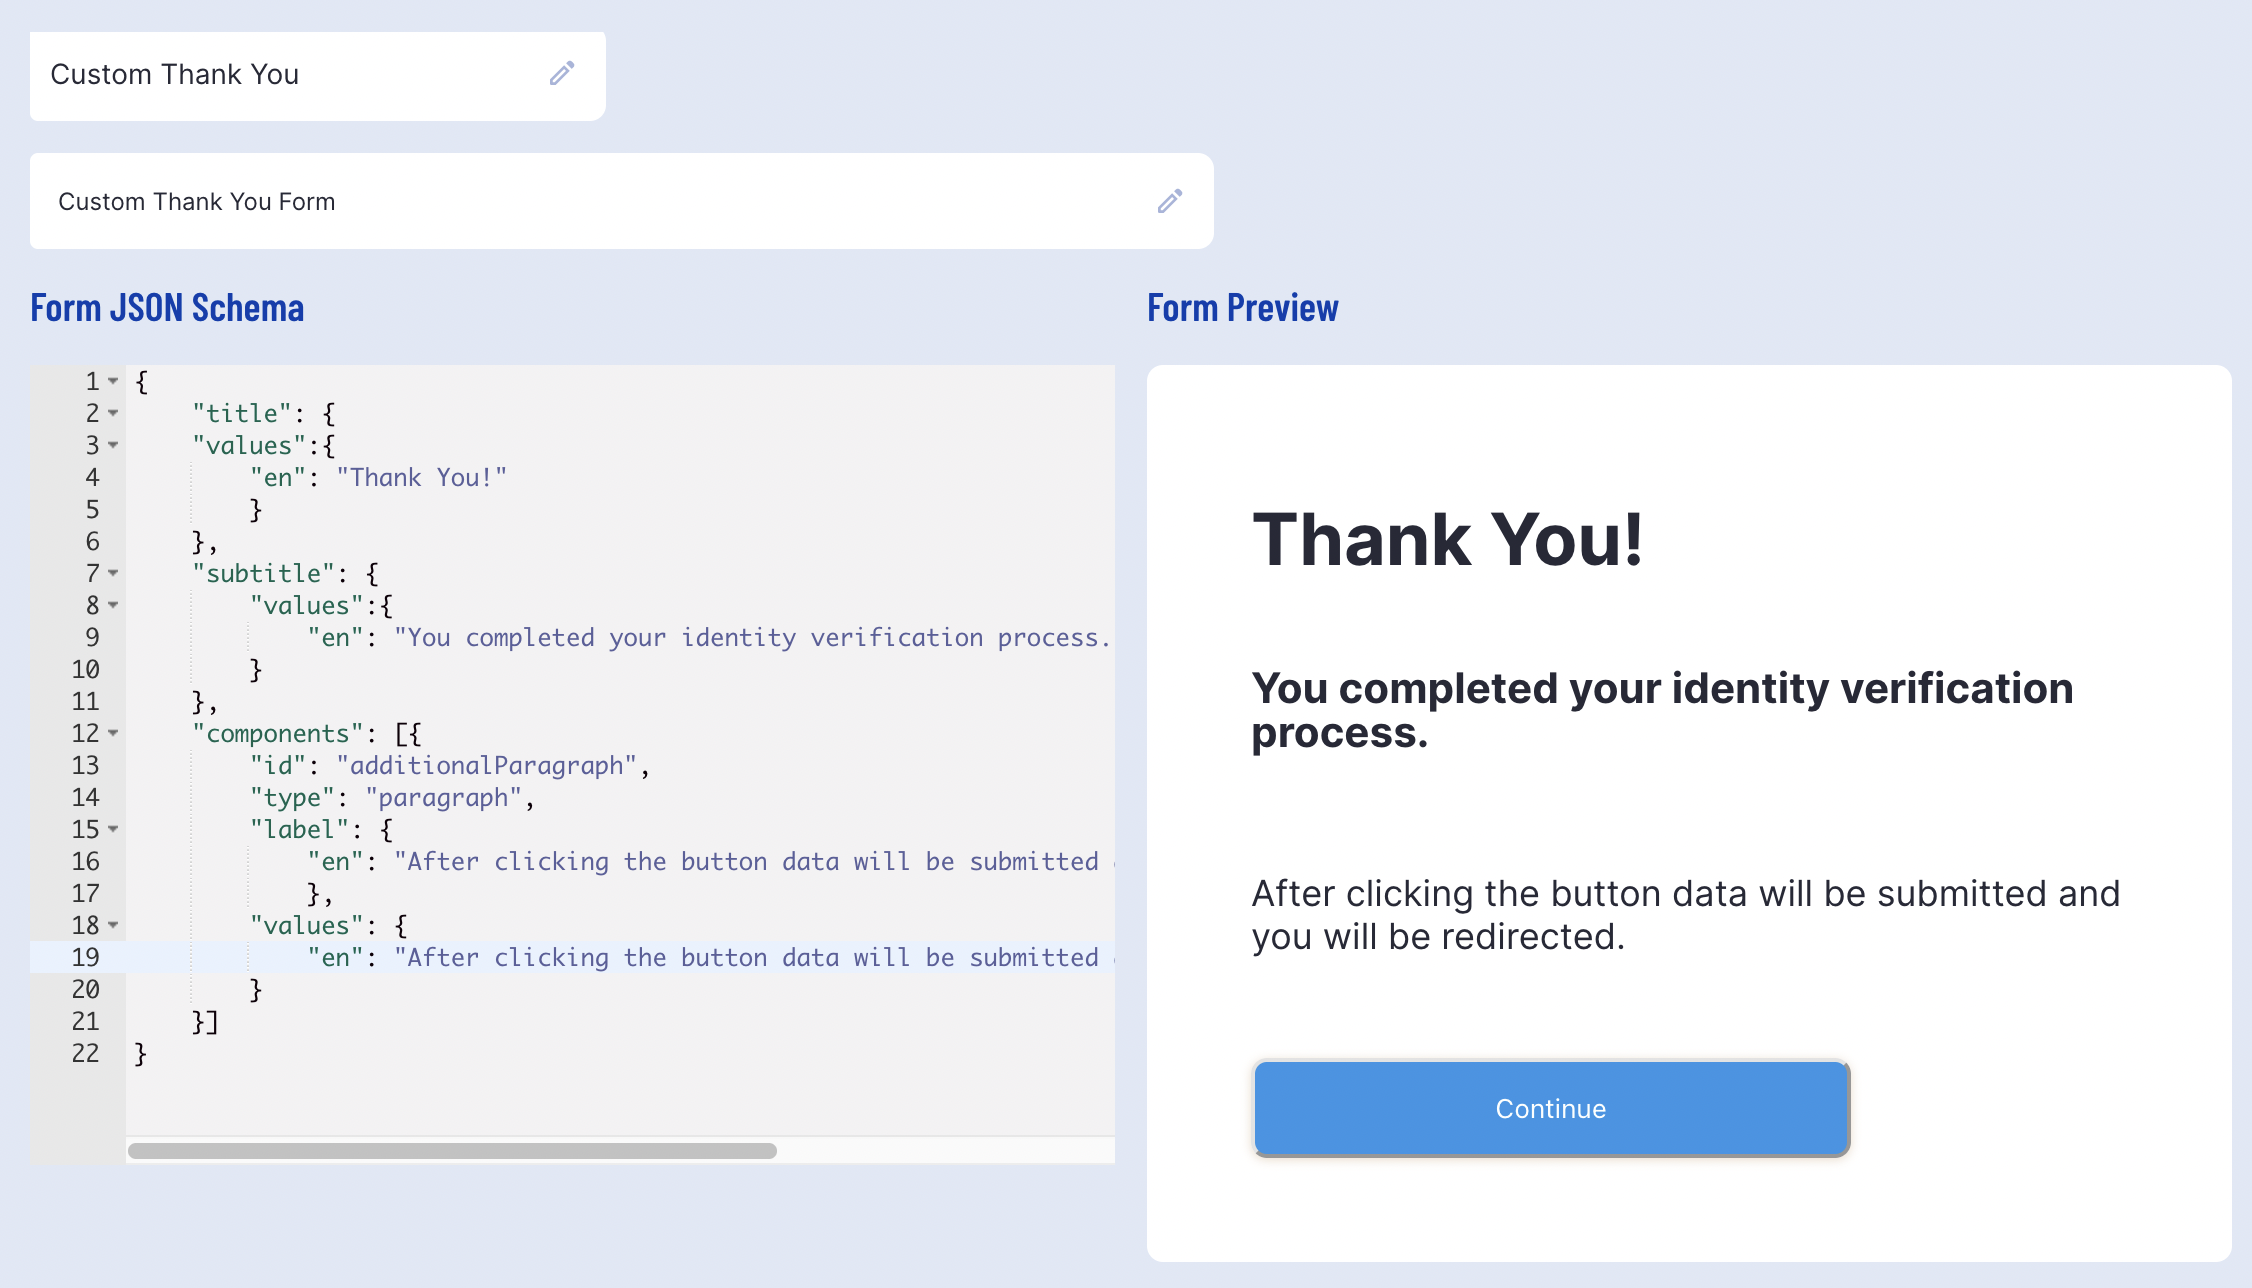
Define the JSON schema of the custom form and click the 'Save & Deploy' button to complete the configuration. An example form can be found below.
{ "title": { "values":{ "en": "Thank You!" } }, "subtitle": { "values":{ "en": "You completed your identity verification process." } }, "components": [ { "id": "paragraph", "type": "paragraph", "label": { "values":{ "en": "After clicking the button data will be submitted and you will be redirected." } }, "values":{ "en": "After clicking the button data will be submitted and you will be redirected." } }]}Step 2 - Configure the Process Definition
When configuring the Process Definition, the Custom Form activity will be placed at the end of the ID&V flow. This ensures that the activity will serve as the final page of the flow, finalizing the process while redirecting the end user to the URL defined as the _redirectUrl.
If a _redirectUrl is not configured or a redirect activity is not part of the Process Definition, then completing the process will still show the default 'Thank You' page.
Create or edit a new Process Definition by finding the 'Process Definitions' page in the left-side navigation bar of the Backoffice. For more information on configuring Process Definitions, see the Process Definition Guide.
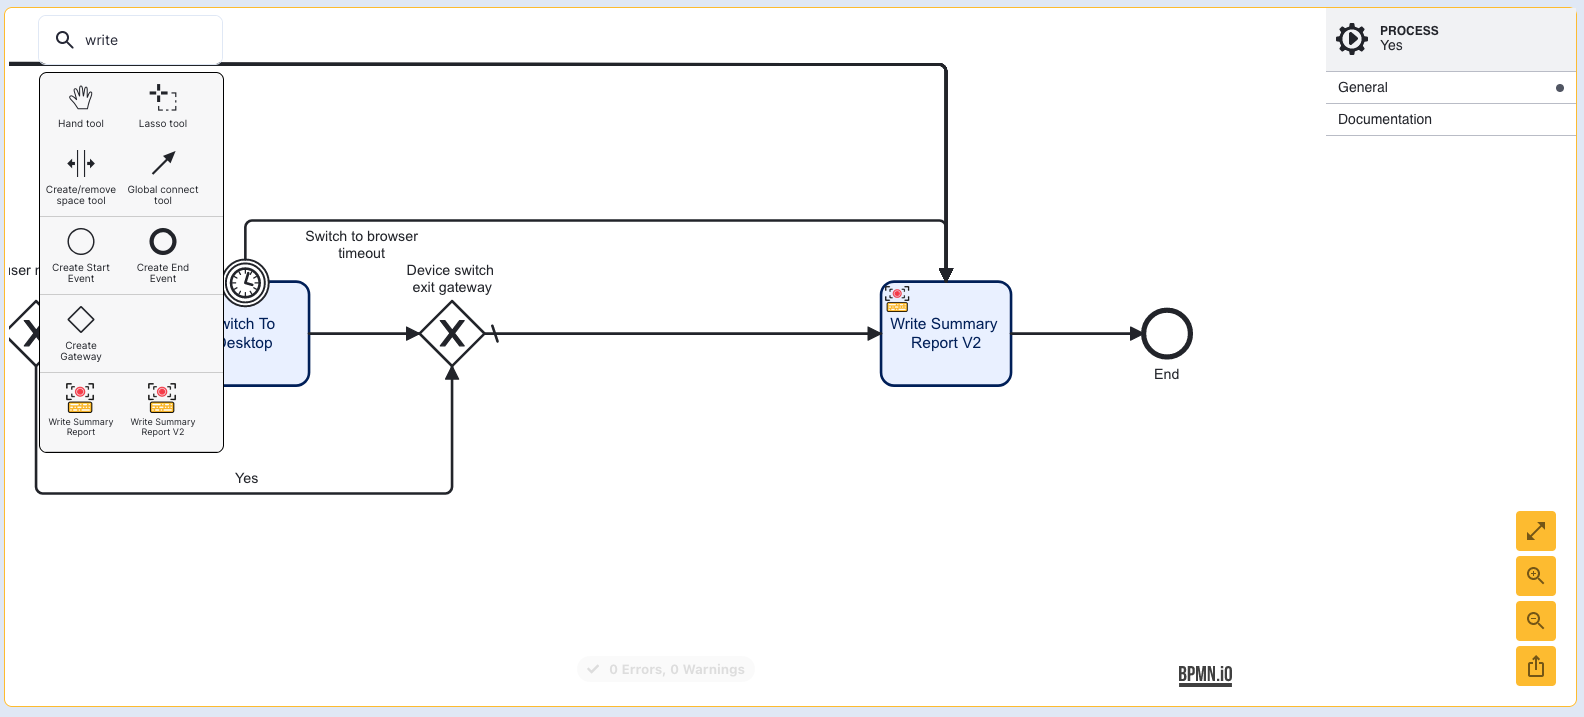
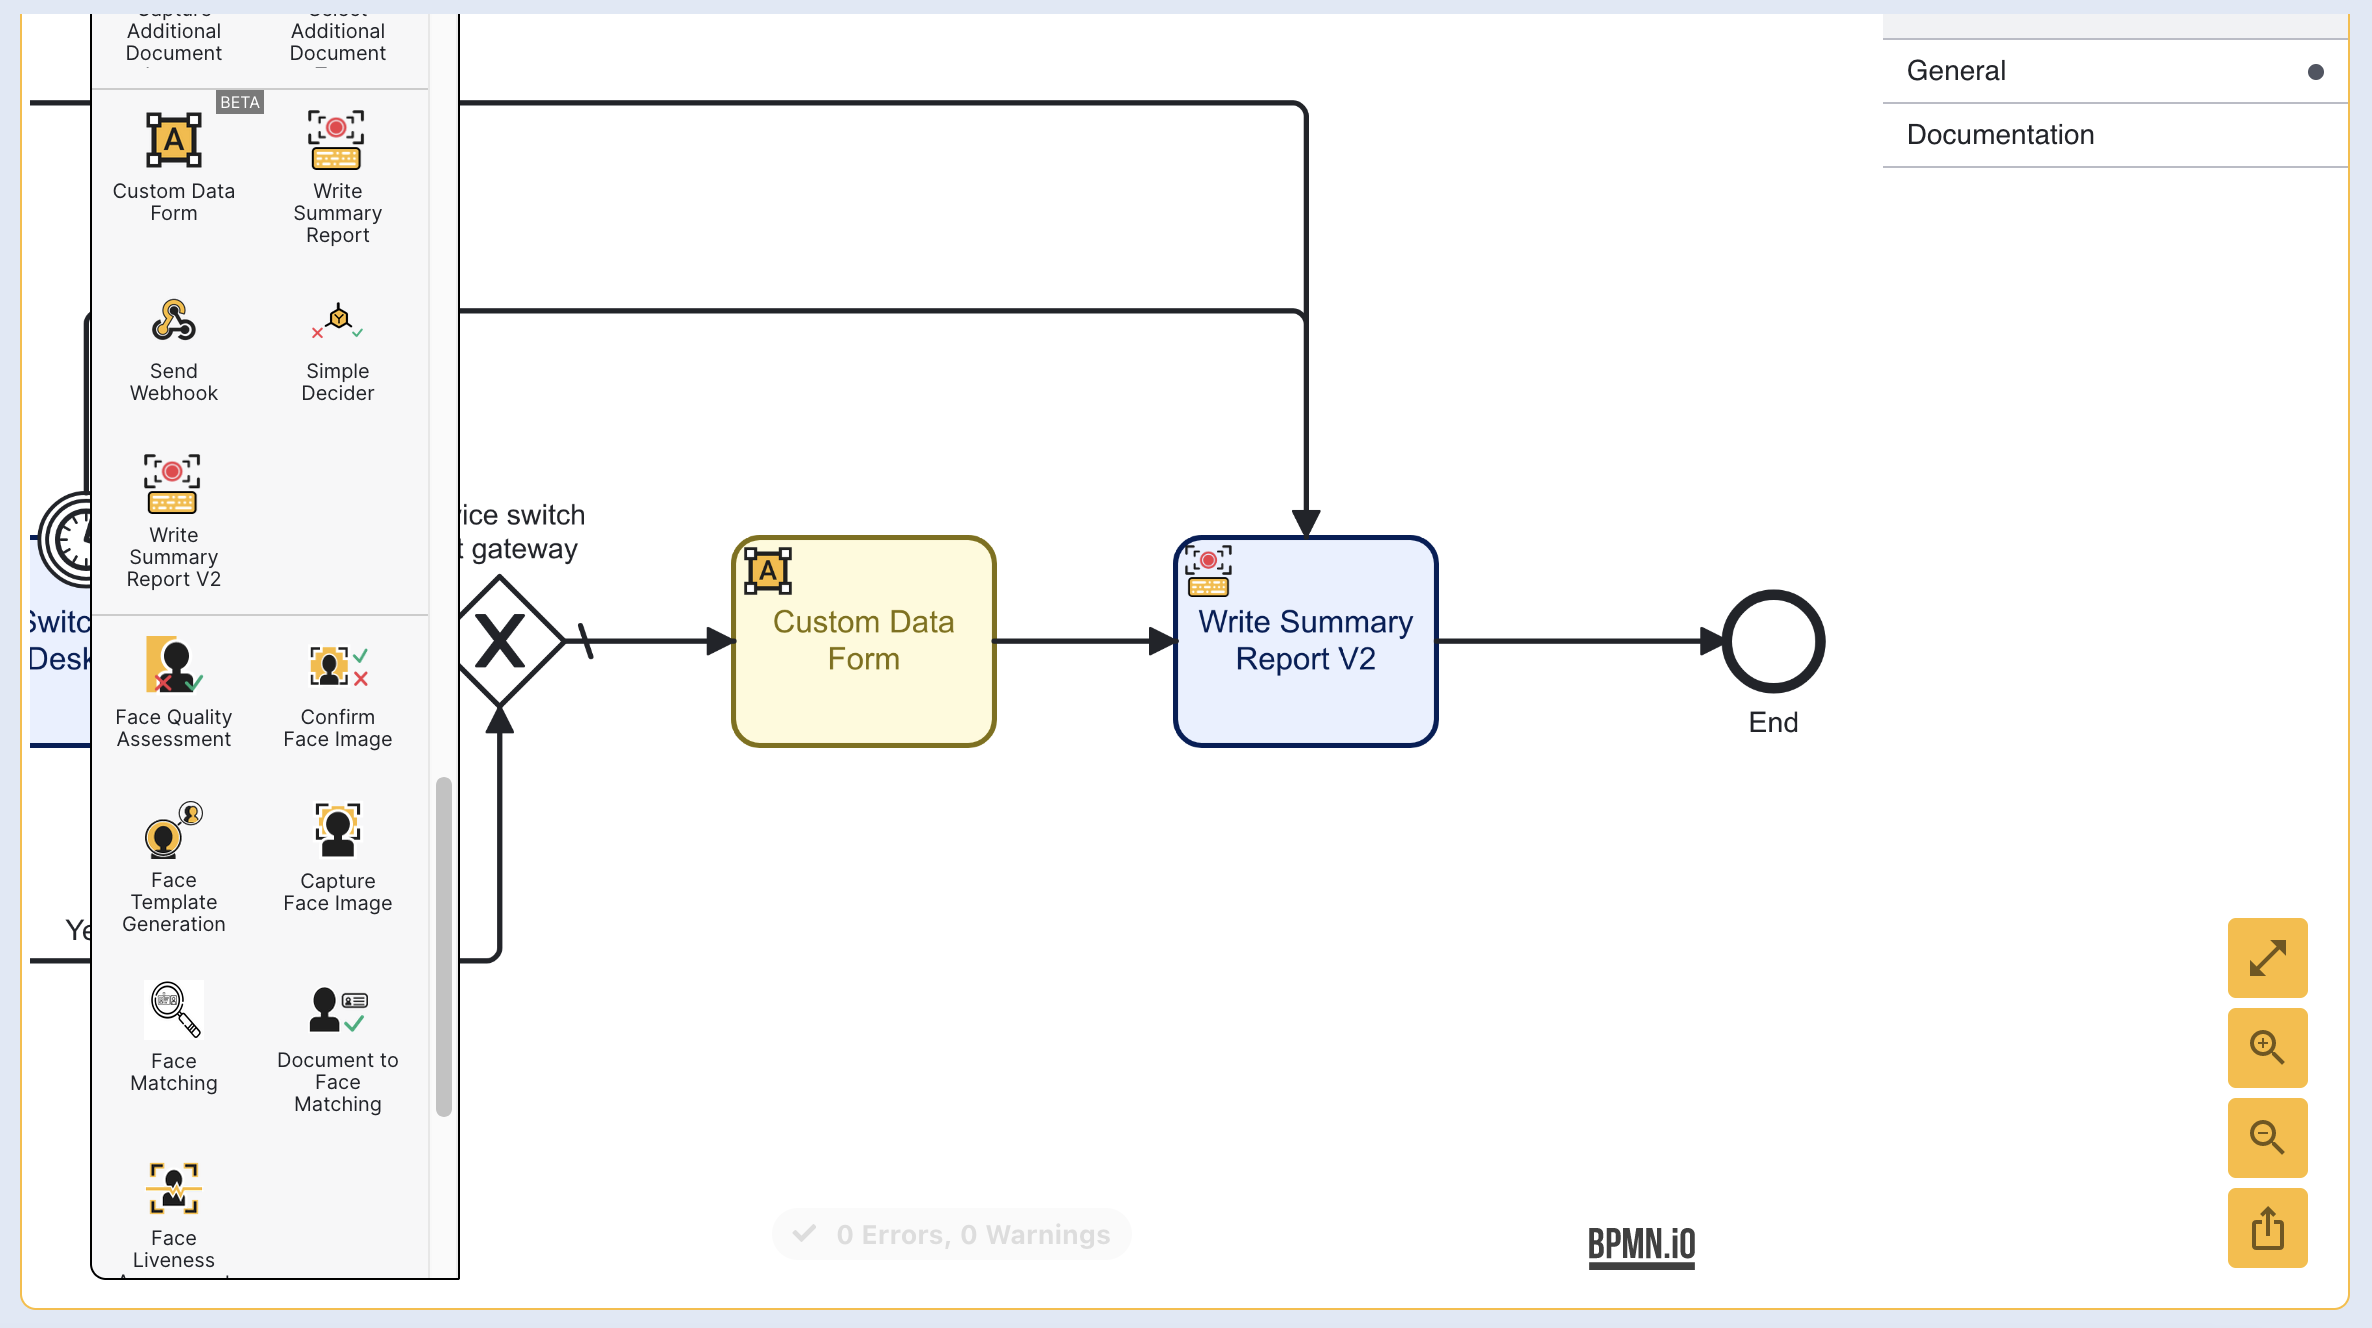
Scroll to the end of the Process Designer and add a new Custom Data Form activity before the Write Summary Report activity.
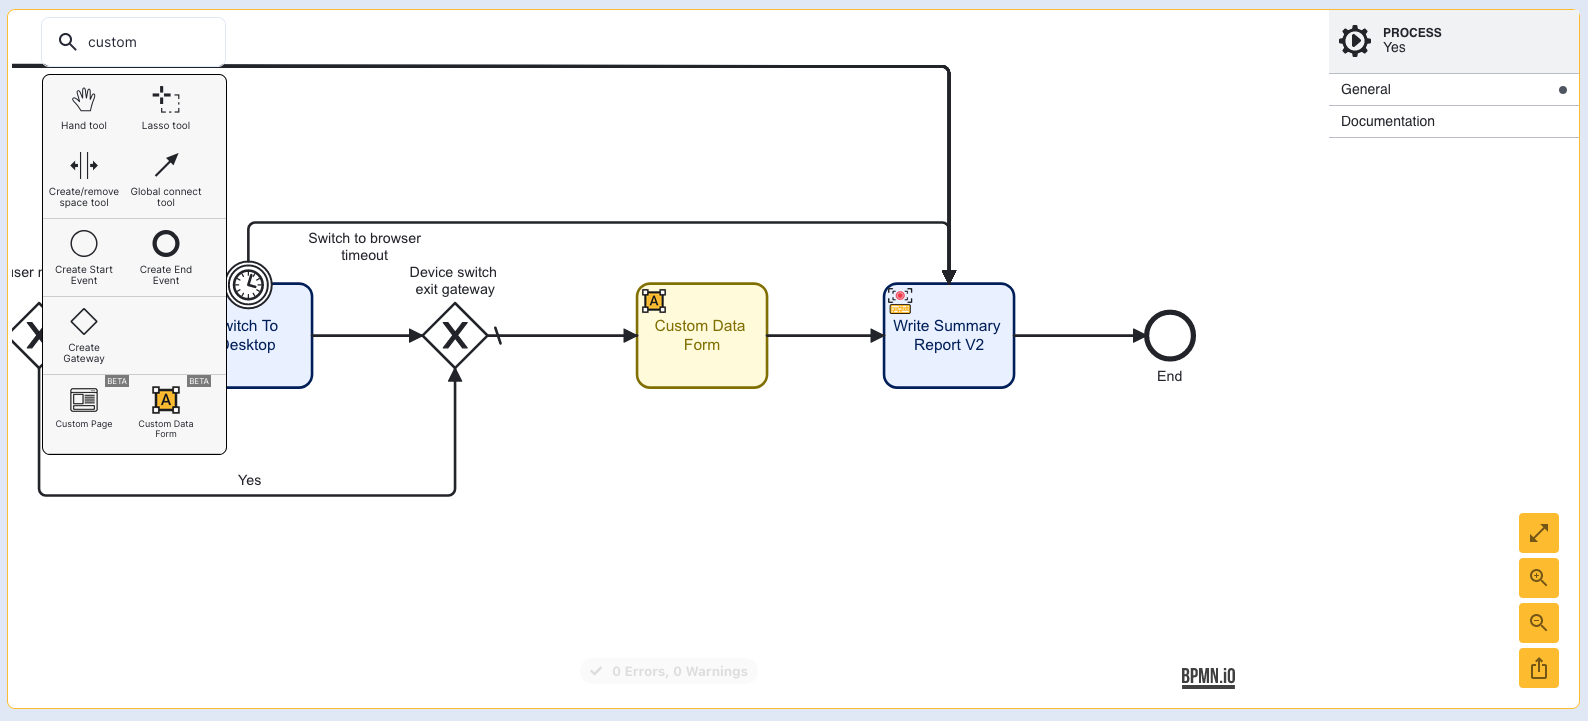
For this example, the error boundary and timer boundary events have been removed as the Custom Data Form will serve as a static page only.
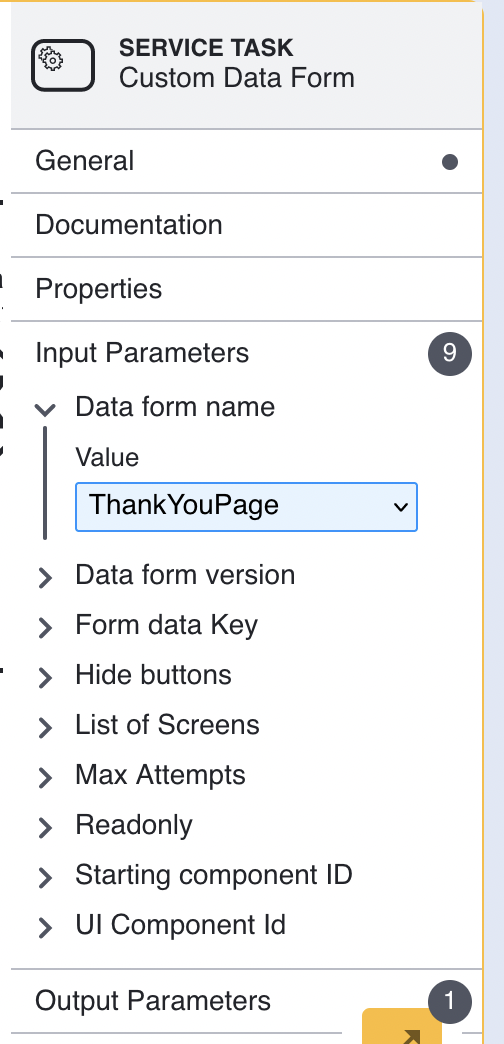
Click the Custom Data Form activity to open the right-side contextual menu. Expand the Data form name and set the form to the 'Thank You' page created in Step 1.
Custom Form Without Continue
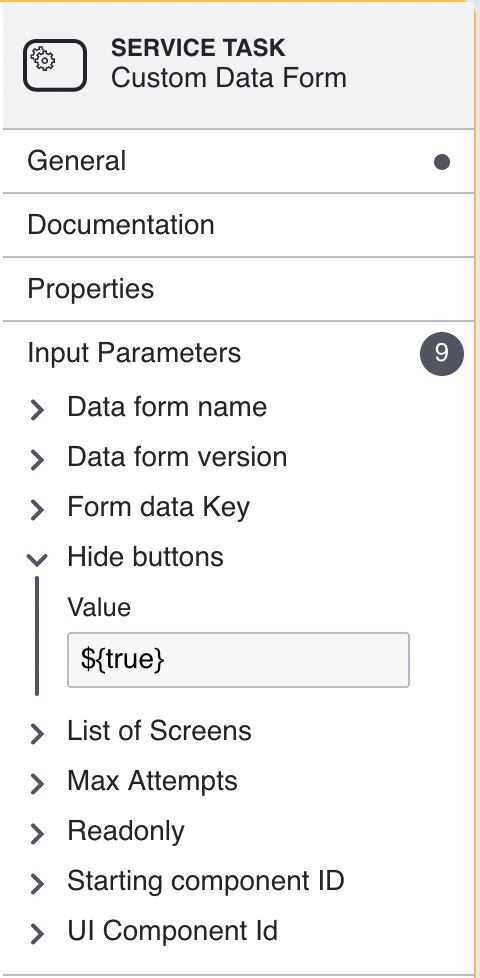
It is also possible to create a custom 'Thank-You' form that does not include a 'Continue' button. The 'Hide buttons' input parameter allows users to specify a whether buttons will be displayed on the form page. Setting this value to ${true} will hide all buttons displayed on the form, including the 'Continue' button.
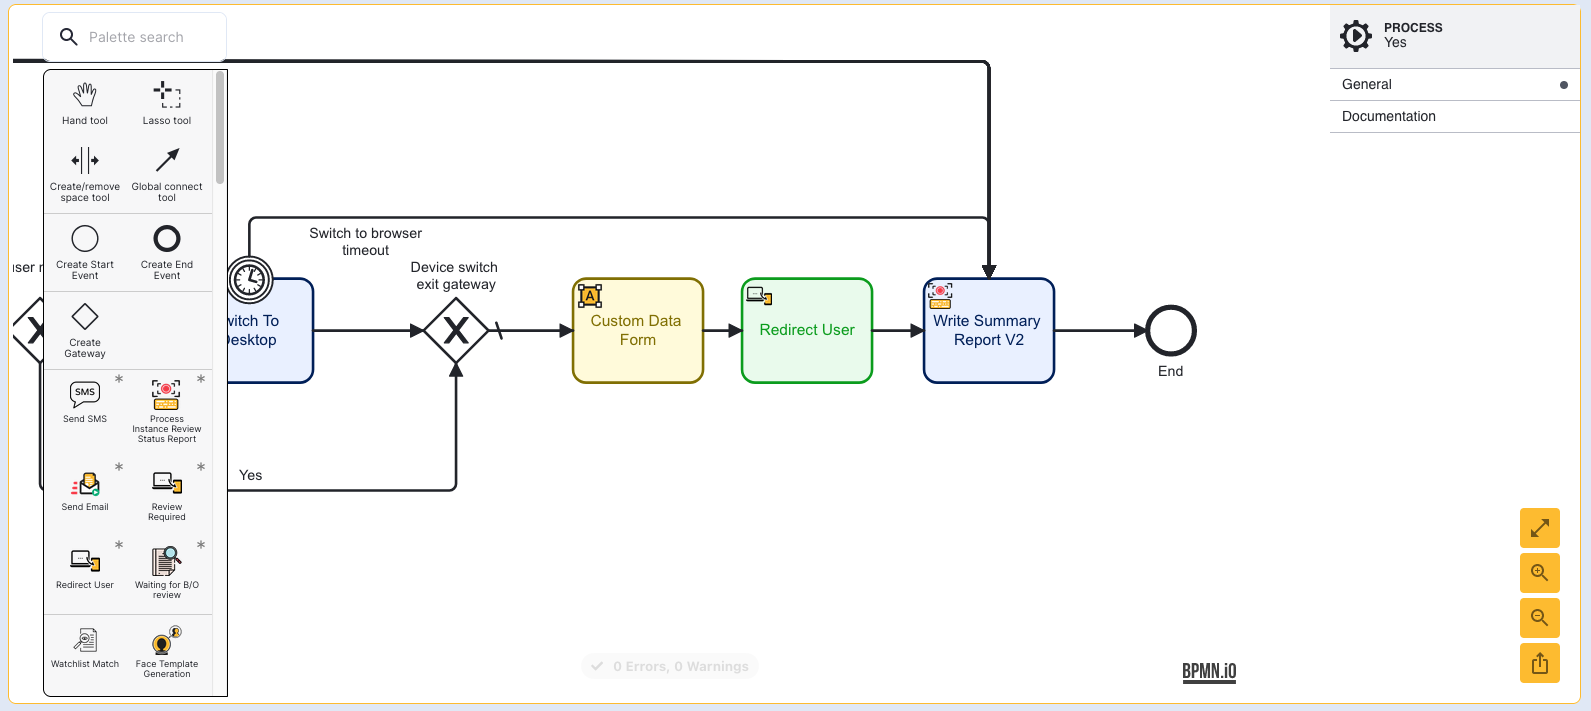
To ensure that the user is automatically redirected, an additional 'Redirect User' activity is added after the 'Custom Data Form' activity. This activity will automatically redirect the user after 5 seconds of wait time.
Step 3 - Update the Write Summary Report
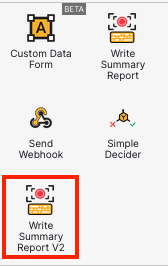
A custom 'Thank You' page requires the Write Summary Report V2 activity. For Process Definitions that use an earlier version of this activity, it is important to update the Process Definition to use V2 of this activity.
Find the Write Summary Report V2 activity in the activities palette.
Replace the existing Write Summary Report activity with the V2 activity and connect the sequence flow arrows accordingly.
Step 4 - Testing the Process Definition
After the Process Definition has been configured, navigate to the Process Definitions landing page and find the newly created Process Definition. Click the expanding arrow to reveal additional options under the chosen Process Definition.

From the 'Actions' column, select the 'Create new token' key.

A pop-up modal will appear where details about the token can be set, including additional parameters. Under the list of additional parameters, set the key to _redirectUrl and the value to the URL the user will reach when the process is finished.
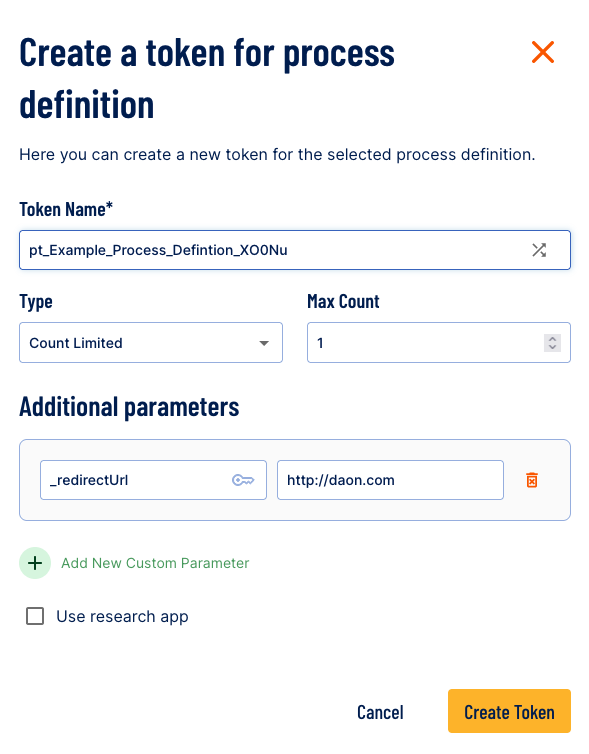
For more information on creating tokens, see the Process Definition Tokens Guide.
Click the 'Create Token' button to finish the process.
Conclusion
A new Process Definition has been configured where the end user will be redirected after the custom 'Thank You' page is completed.
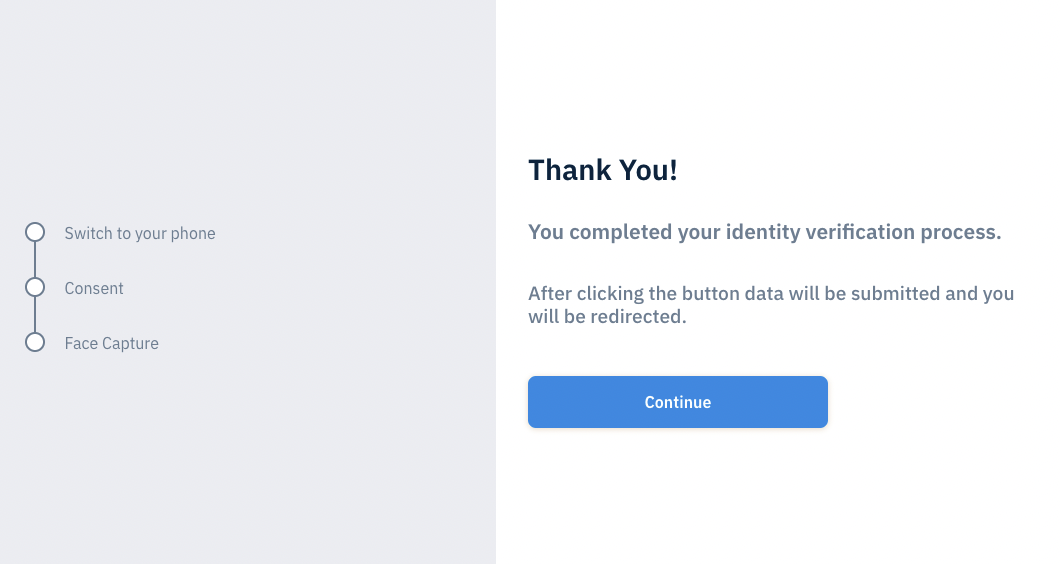
Custom Data Form serving as a 'Thank You' screen.
If a _redirectUrl is not configured or a redirect activity is not part of the Process Definition, then completing the process will still show the default 'Thank You' page.