Early Access
TrustX Watchlists enables the capture and store of Phone Numbers as Watchlist entries.
Creating a Phone Number Watchlist
A phone number Watchlist stores a list of Persons of Interest by phone number. To create a phone number Watchlist, follow the steps below.
Log in to the Backoffice application and select Watchlists from the left-side vertical menu.
From the Watchlists landing page, ensure that 'New Management' is selected and click the 'New Watchlist' button.
Set the name of the Watchlist and set the Type to 'Phone Number'.
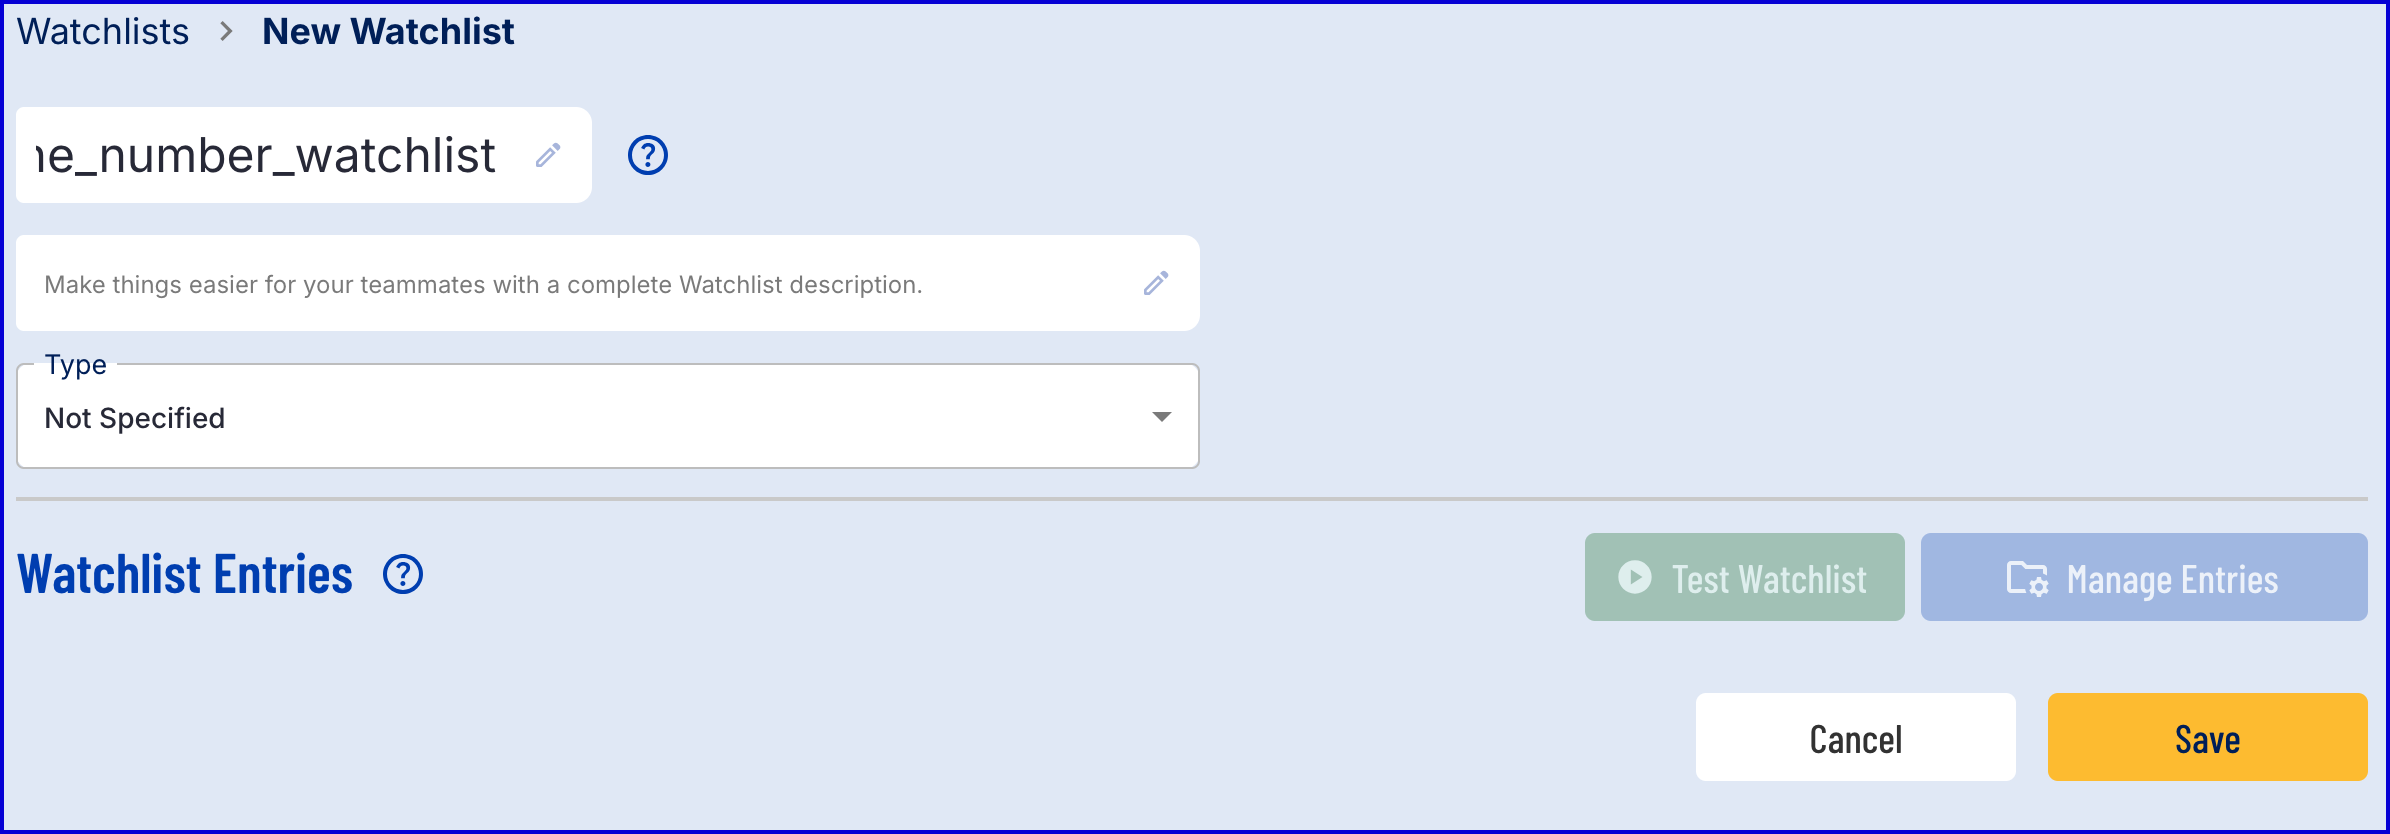
Click the 'Save' button to save the new Watchlist.
Add Watchlist Entry
A phone number Watchlist entry can be added in various methods. This section will cover each potential method.
Add Watchlist Entry via Backoffice
Navigate to the Watchlists page in the Backoffice application.
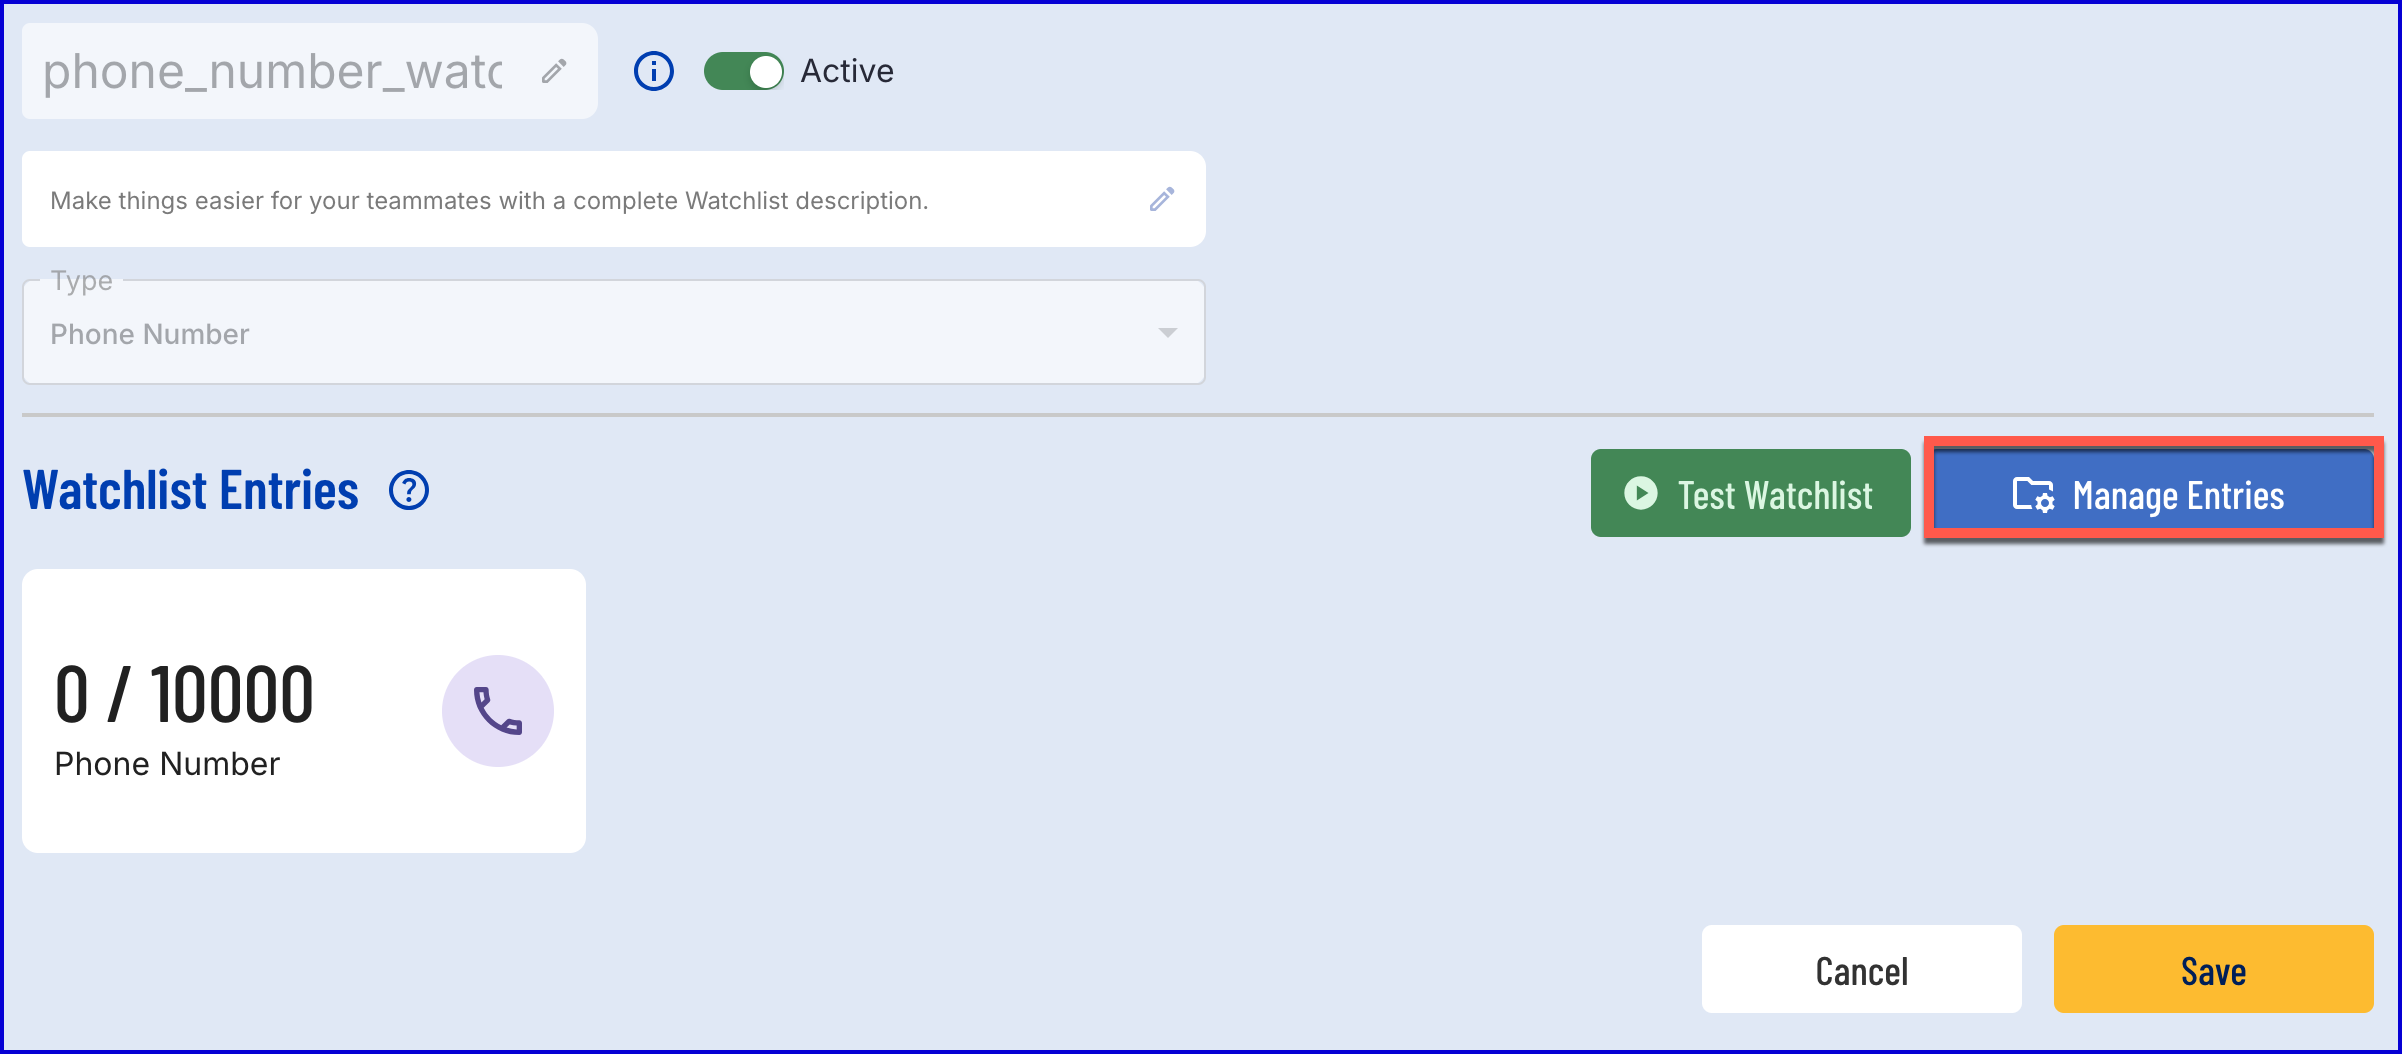
Find the name of the phone number Watchlist that will be updated.
Click the 'Manage Entries' button to open a list of entries currently within the Watchlist.
Click the 'Add New Entry' button. A pop-up modal will appear where details about the new Watchlist entry can be defined.

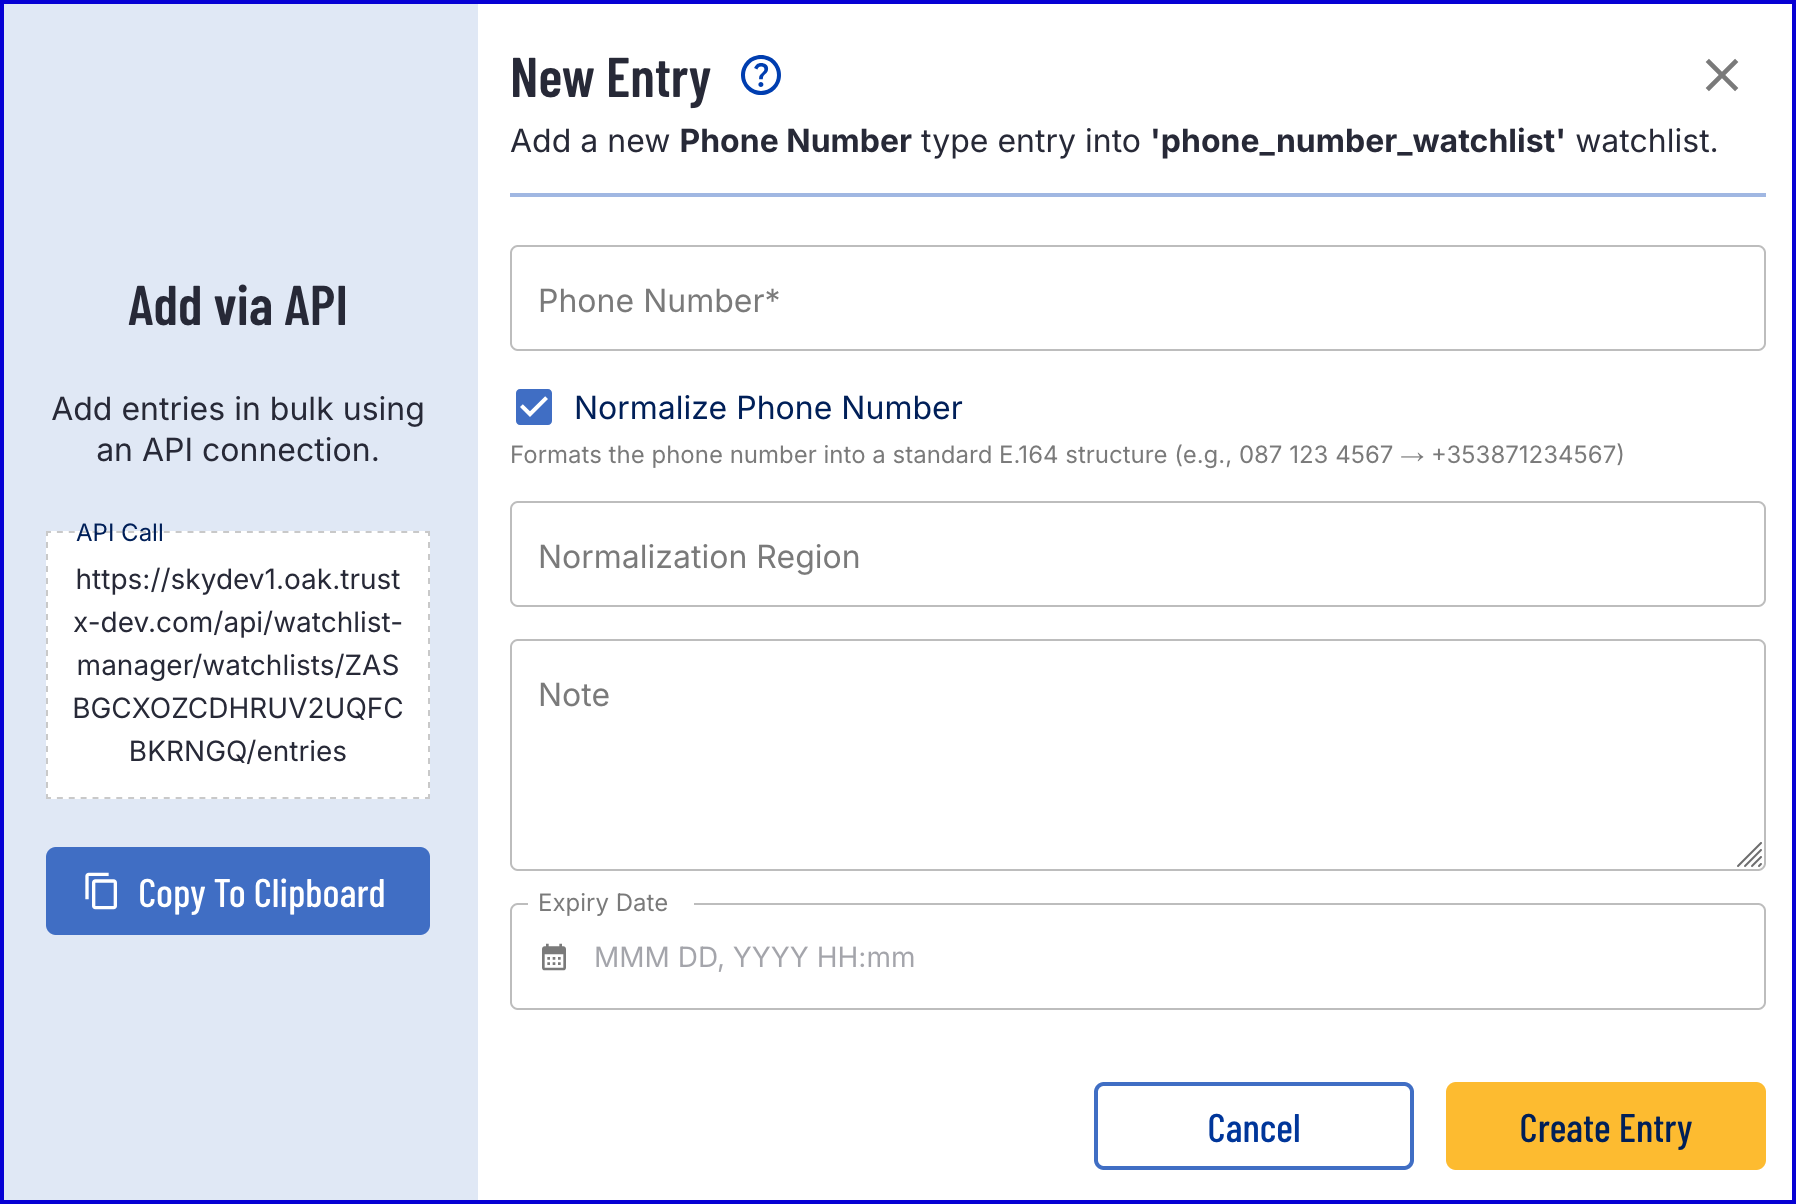
Each new entry can contain the following information:
Field Name | Type | Description |
|---|---|---|
Phone Number | String | The phone number to be added to the Watchlist |
Normalize Phone Number | Boolean | Formats the phone number into a standard E.164 structure. |
Normalization Region | String | Optional region code for phone number normalization. A maximum of 2 characters is supported. |
Expiry Date | Date-Time | ISO 8601 duration after which the entry will be automatically deleted (e.g., PT1H, P1D). Converted to UTC timestamp by the activity. |
Once all fields are finalized, click the 'Create Entry' button to save the new Watchlist member.
Add Watchlist Entry via Process Definition
A Watchlist member can also be added from a Process Definition using the 'Add Phone Number Watchlist Entry v1'.
Step 1 - Create a Process Definition
Create a new Process Definition by navigating to Process Definitions > New Process Definition in the Backoffice application.
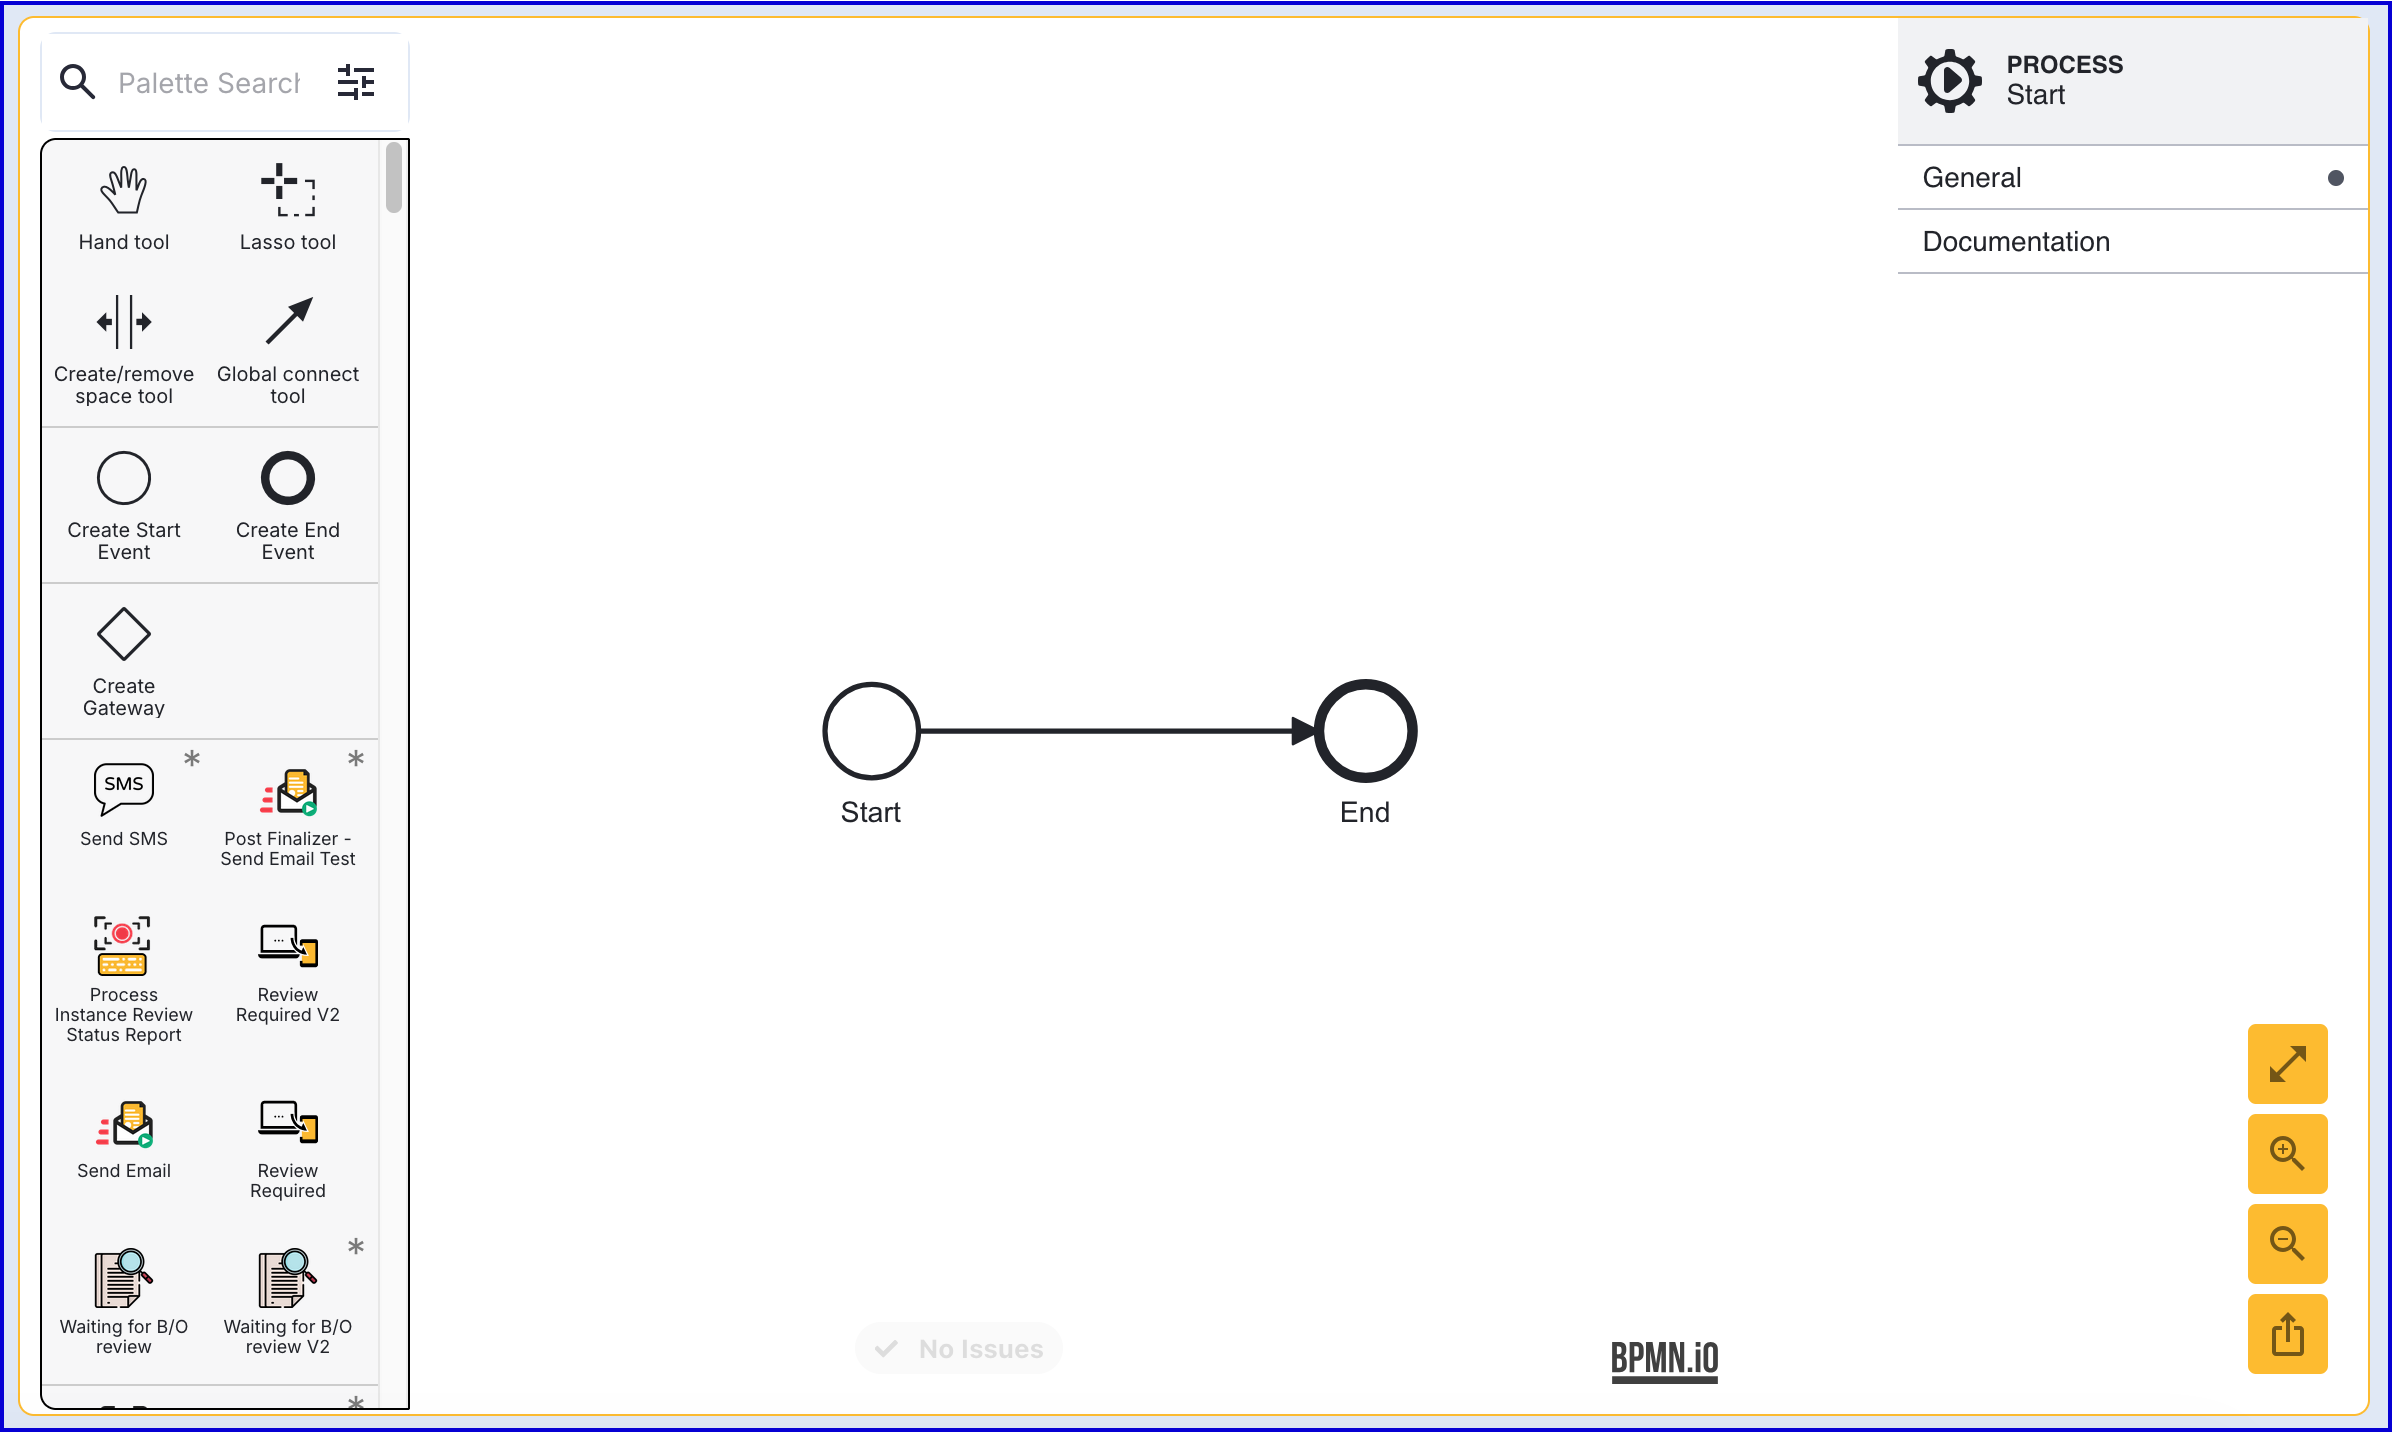
Add a 'Create Start Event' to the Process Designer.
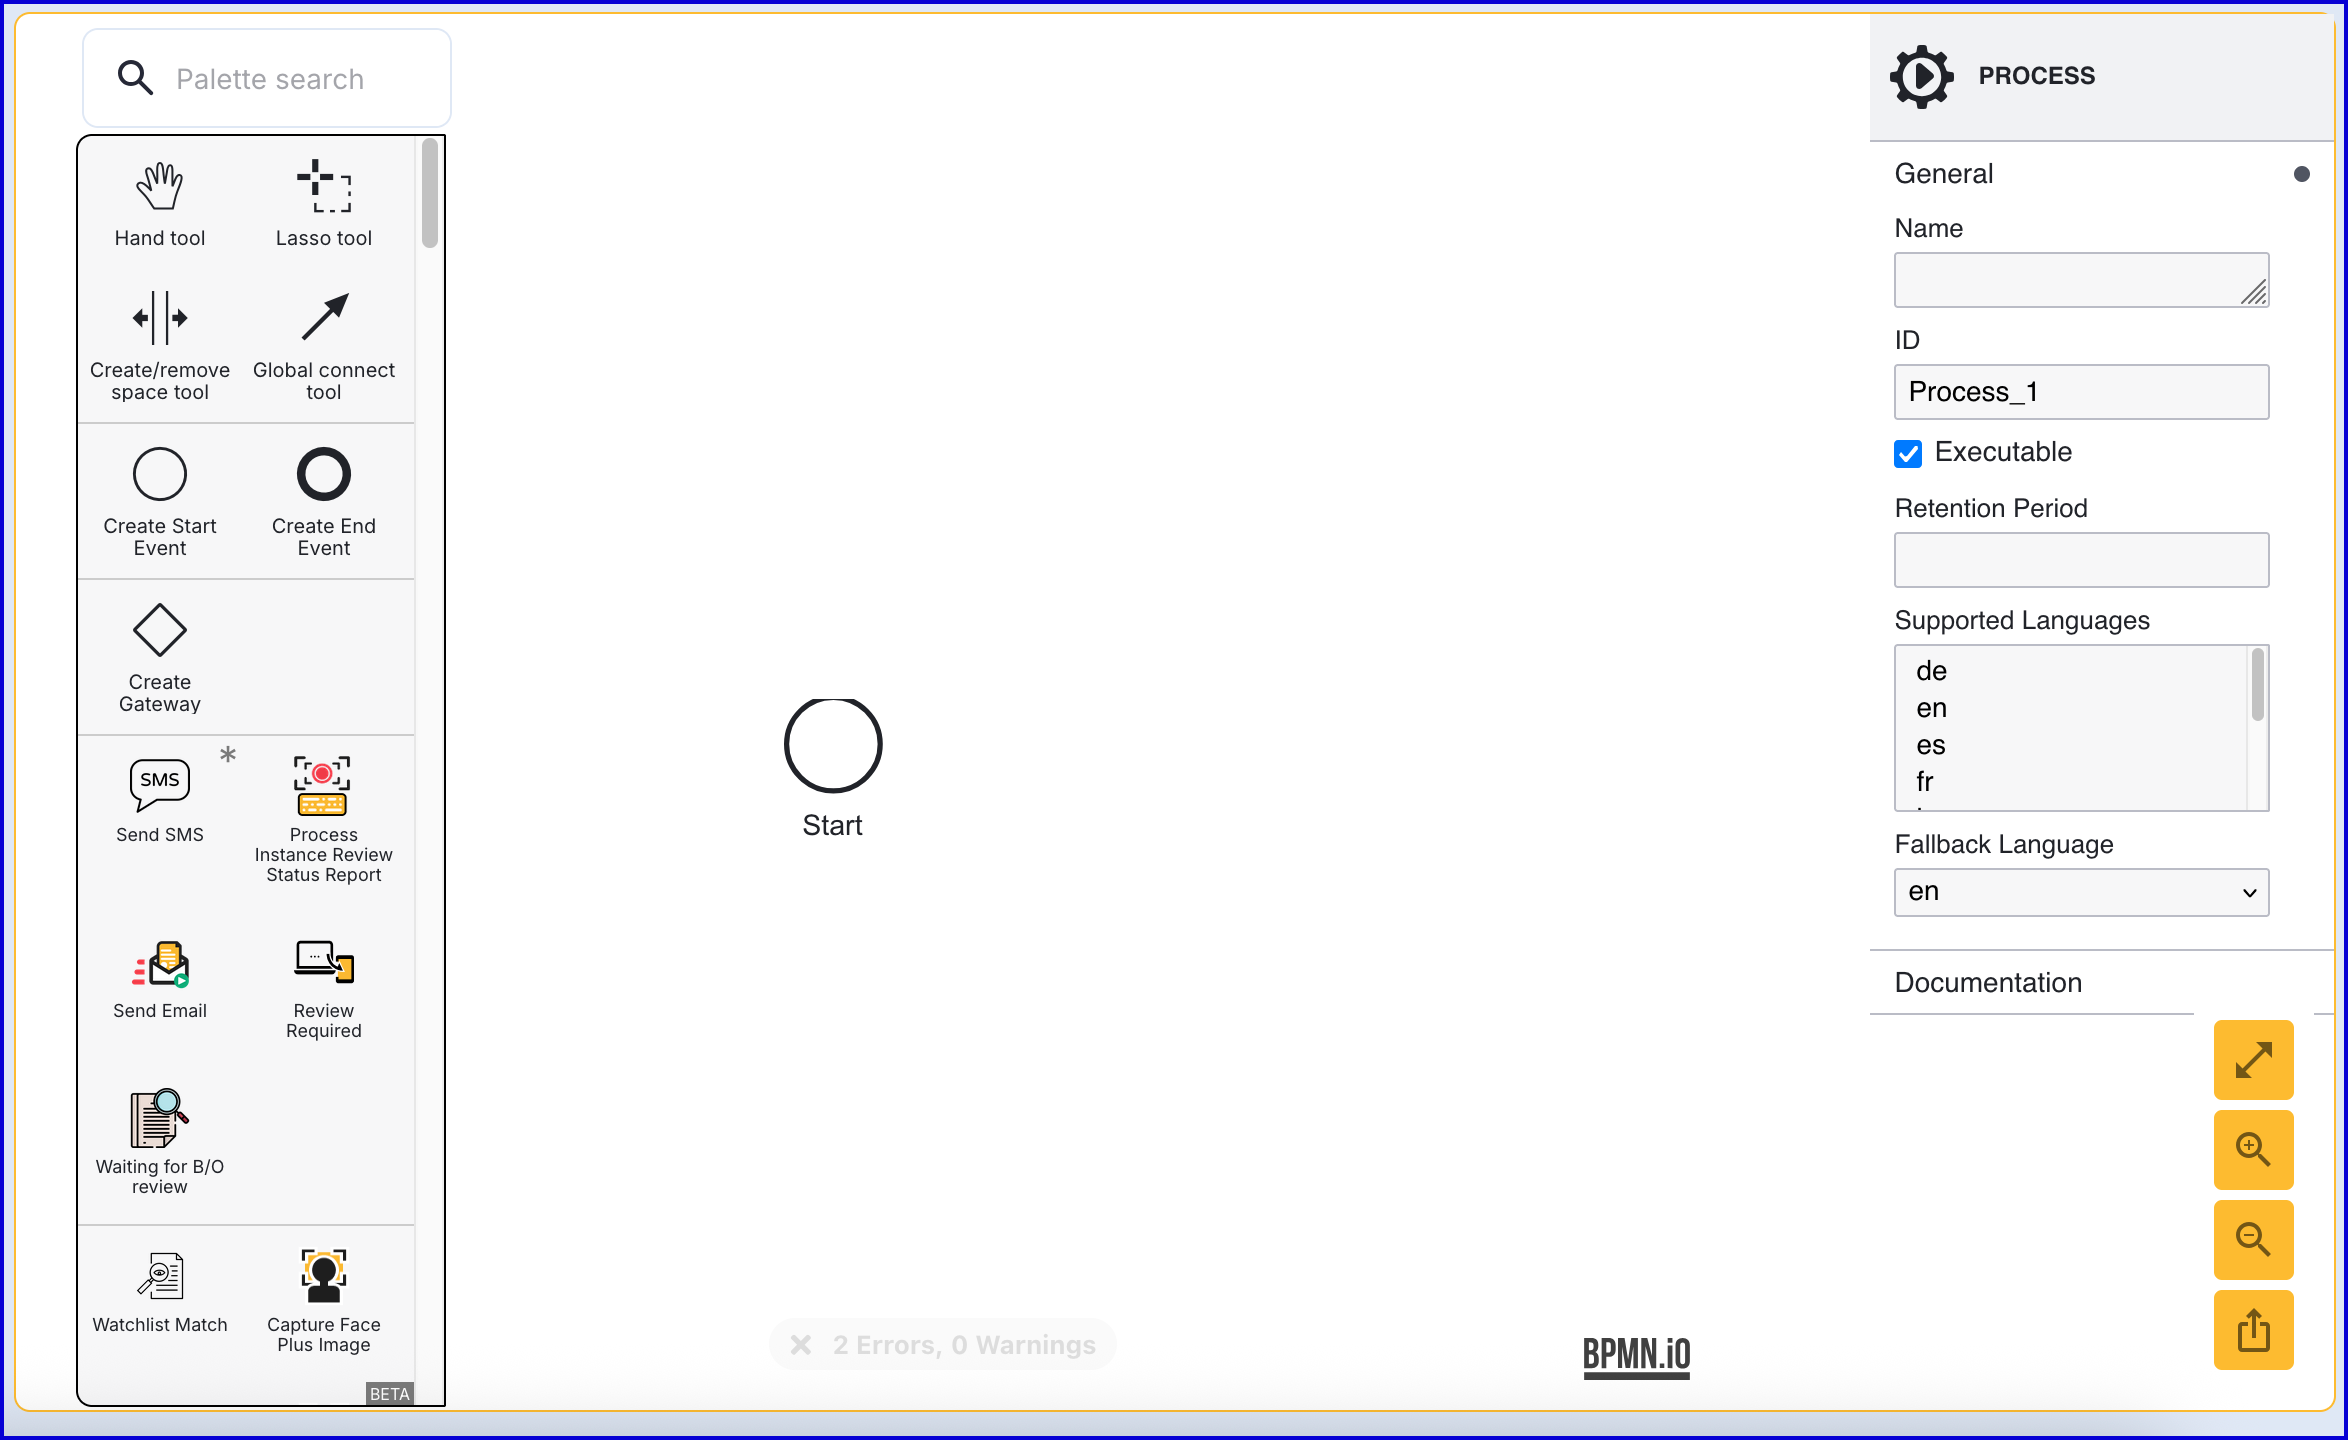
Click the 'Start' event to open the right-side contextual menu and enter a name for the 'Name' input parameter.
Add a 'Create End Event' to the Process Designer and connect it to the 'Start' event using a sequence flow arrow.
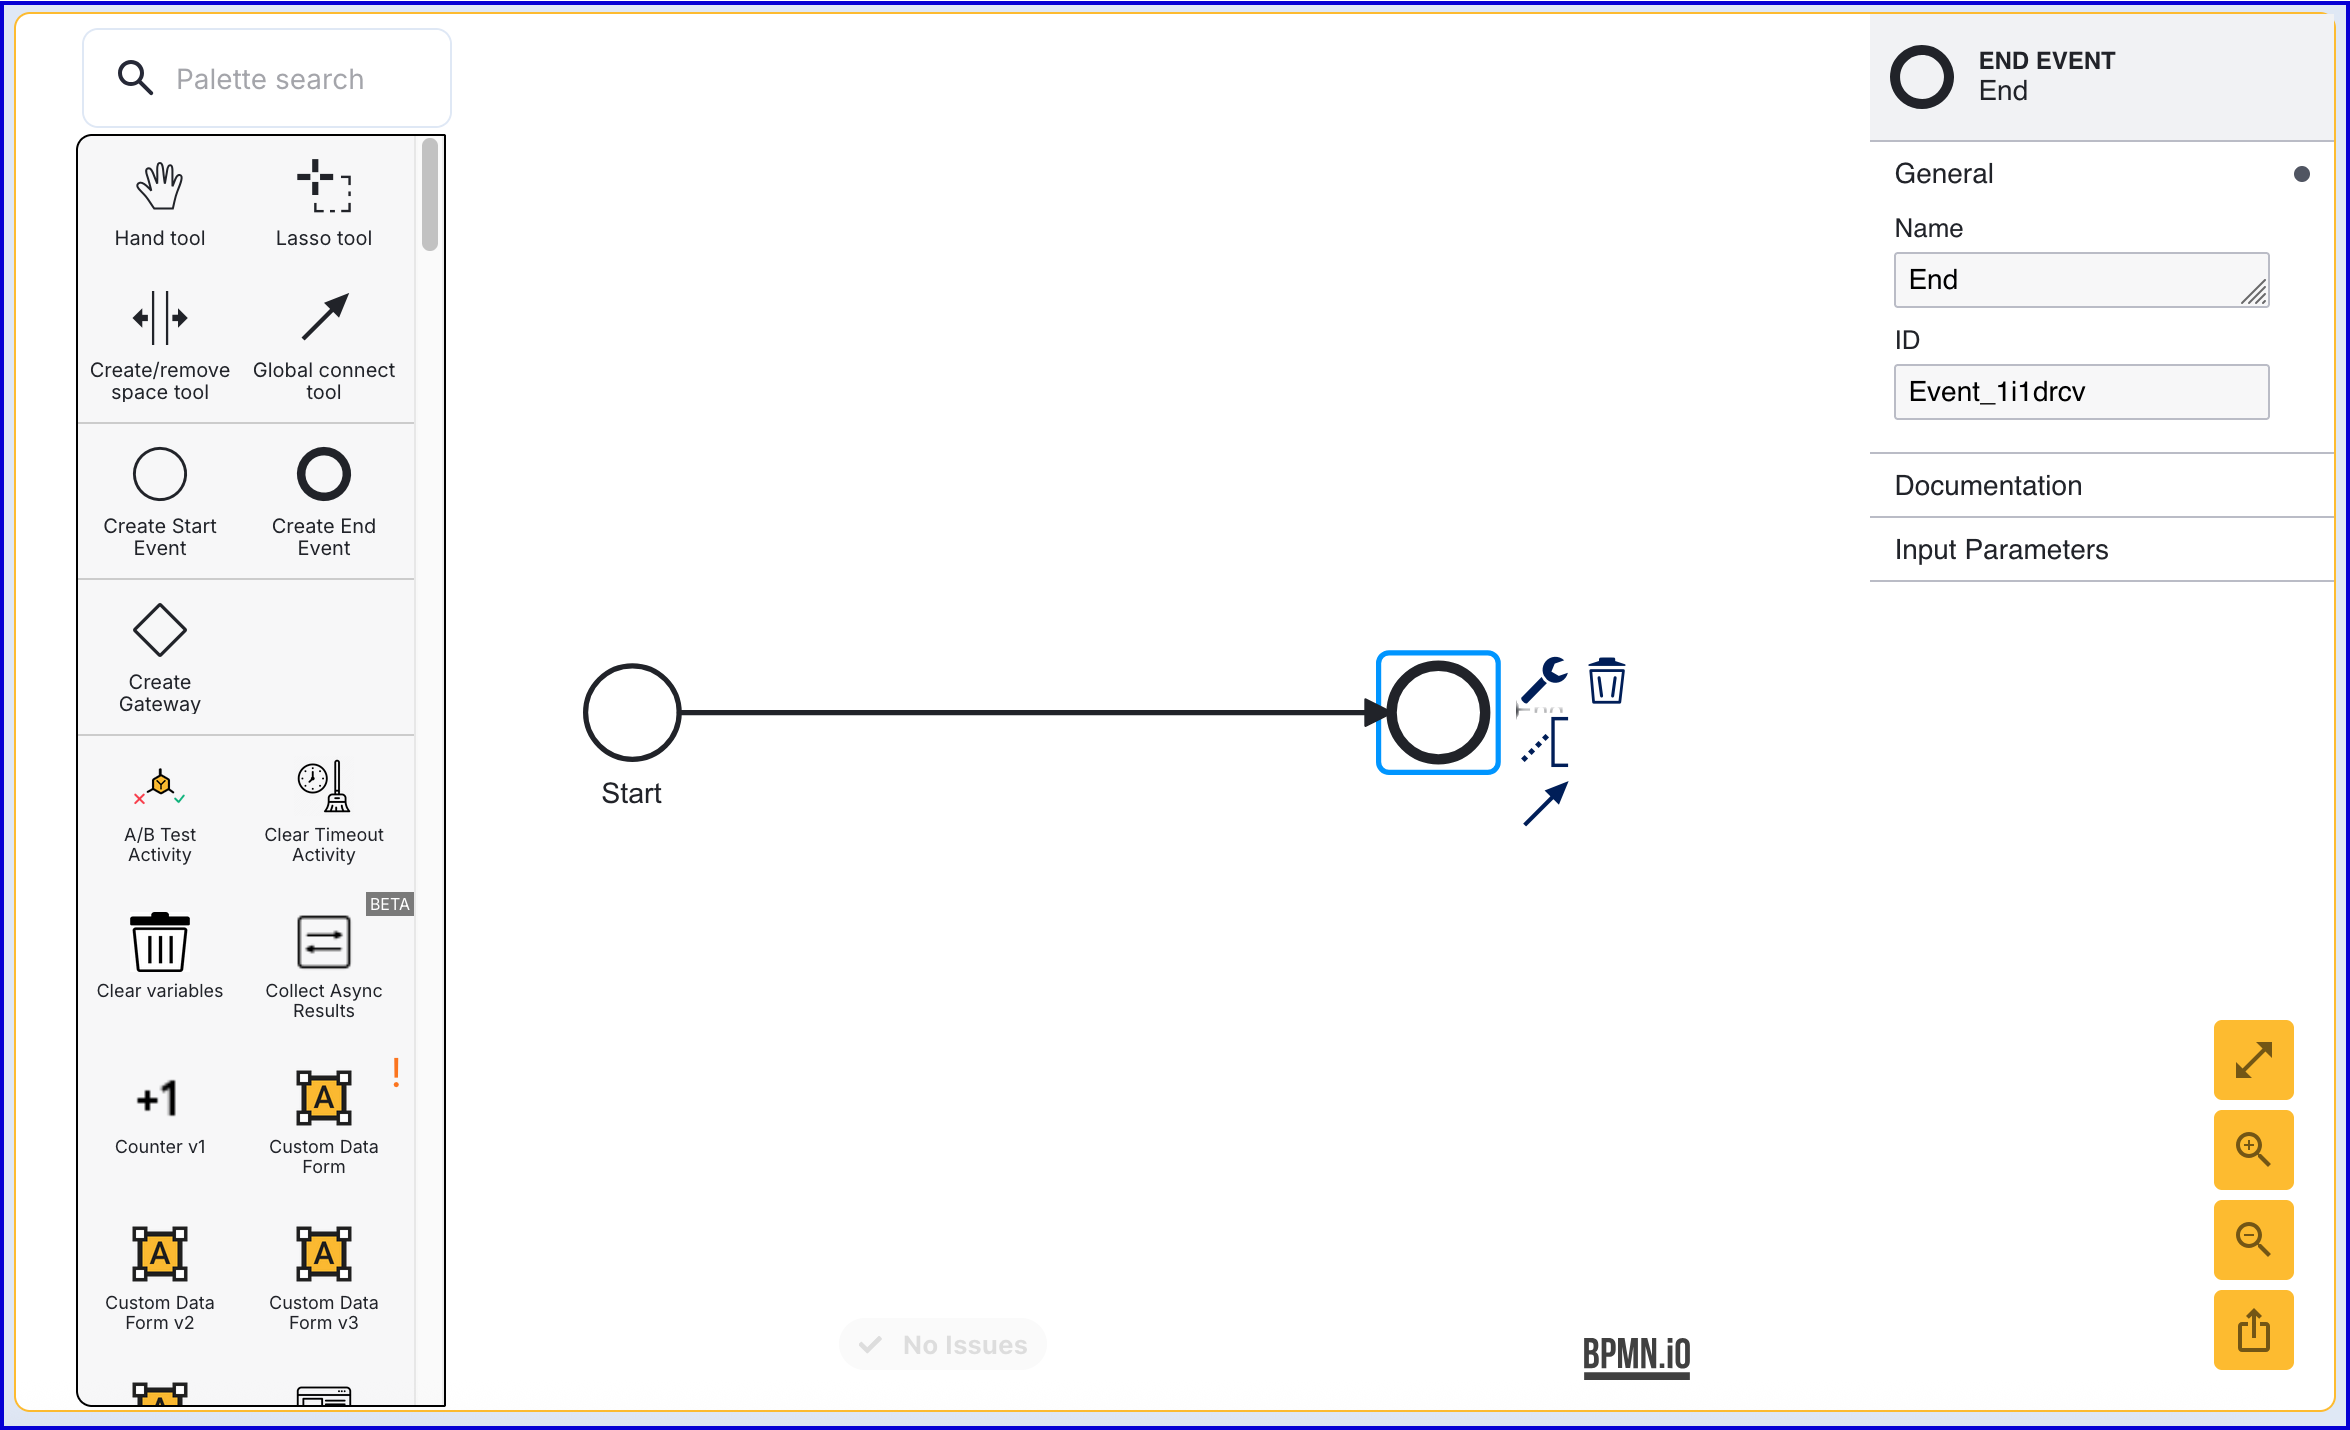
Click the 'End' event to open the right-side contextual menu and enter a name for the 'Name' input parameter.
Step 2 - Add a Phone Number to a Watchlist
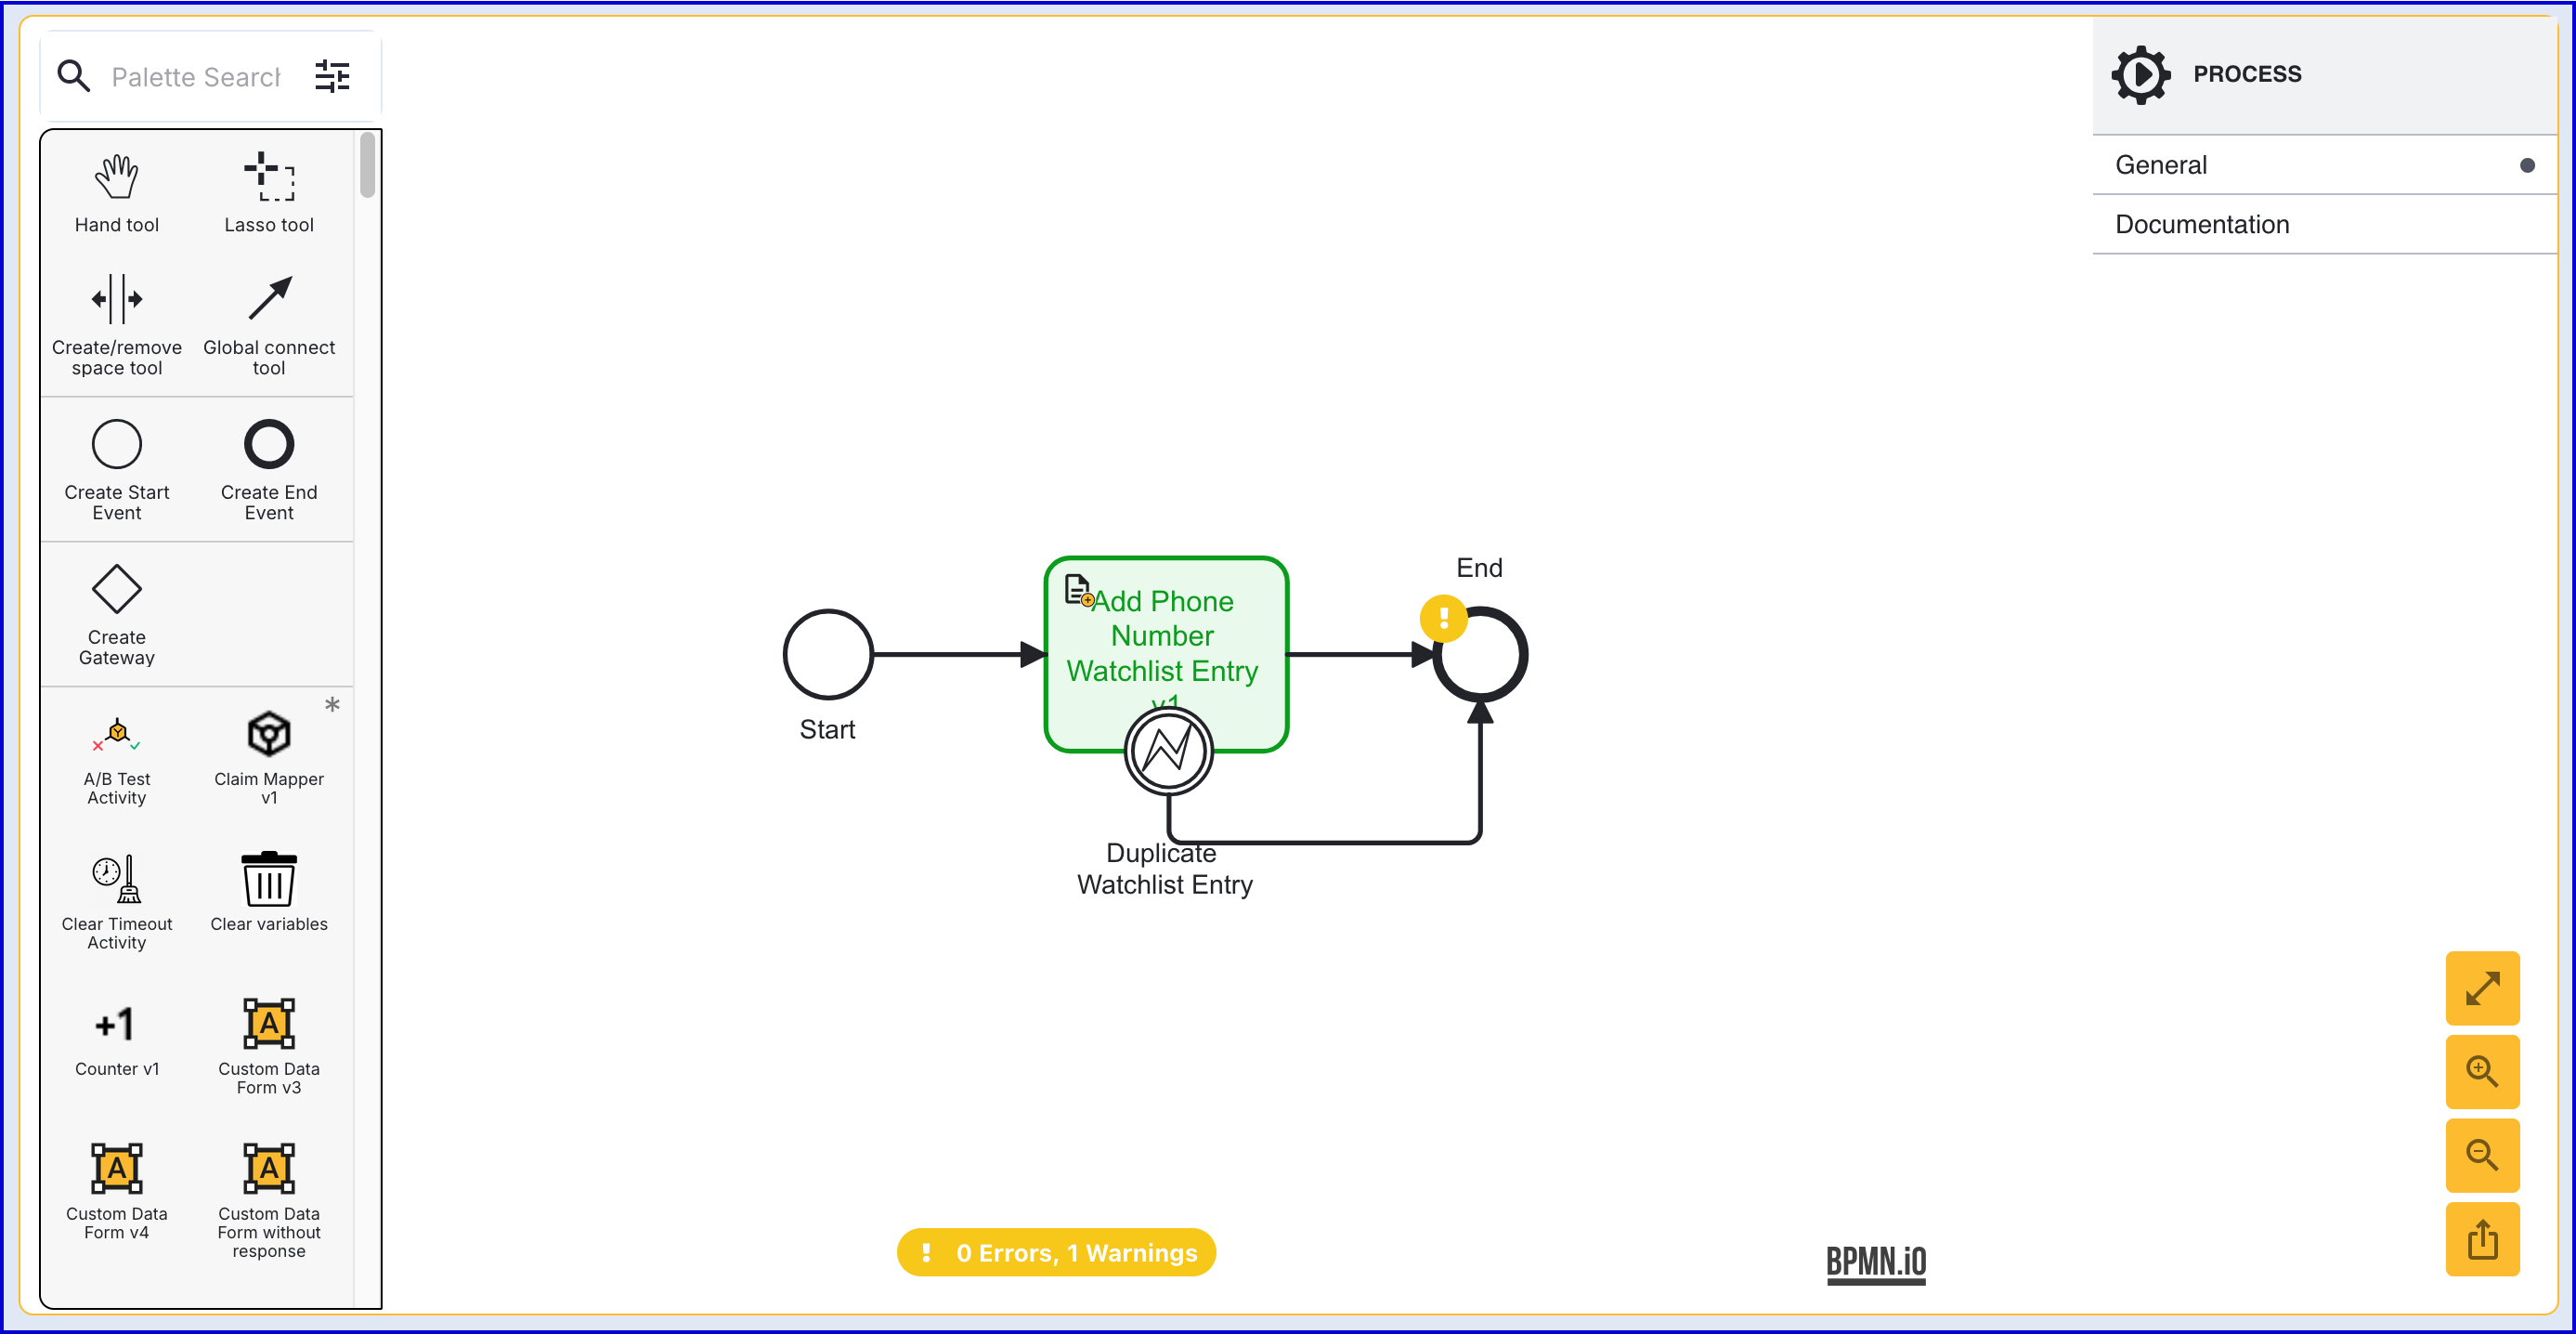
From the Process Designer, add an 'Add Phone Number Watchlist Entry v1' activity. Connect the activity to the 'Start' event.
This activity includes the following input parameters:
| Parameter | Description | Type | Default |
|---|---|---|---|
| Expire After | ISO 8601 duration after which the entry will be automatically deleted (e.g., PT1H, P1D). Converted to UTC timestamp by the activity. | Date-Time | |
| Normalize | Whether to normalize the phone number before adding. | Boolean | ${true} |
| Note | An optional note. When provided, the note is stored with the watchlist entry and is visible in the activity history, enabling better context and traceability when reviewing watchlist matches. | String | |
| Phone Number | Phone number to be added to the Watchlist (max 24 chars). | String | |
| Region | Optional region code for phone number normalization. A maximum of 2 characters is supported. | String | |
| Watchlist Name | The name of the Watchlist to be added. | String |
Step 4 - Test the Process Definition
This section will describe how to test the Process Definition created above by generating a Process Token. After completing the flow, results of the Process Instance can be viewed from the Process Instances page.
To test the Process Definition, create a new Process Token by navigating to the Process Definitions > Process Tokens page.
Click the 'New Process Token' button found on the top-right of the page to start creating a new token. A popup modal will appear where details of the token can be entered.
Once the token is created, scan the QR code or follow the link to begin the flow. The phone number and details about the POI will be recorded and added to the Watchlist.
Watchlist entries can be viewed by navigating to the Watchlists > Watchlist > Manage Entries page in the Backoffice.
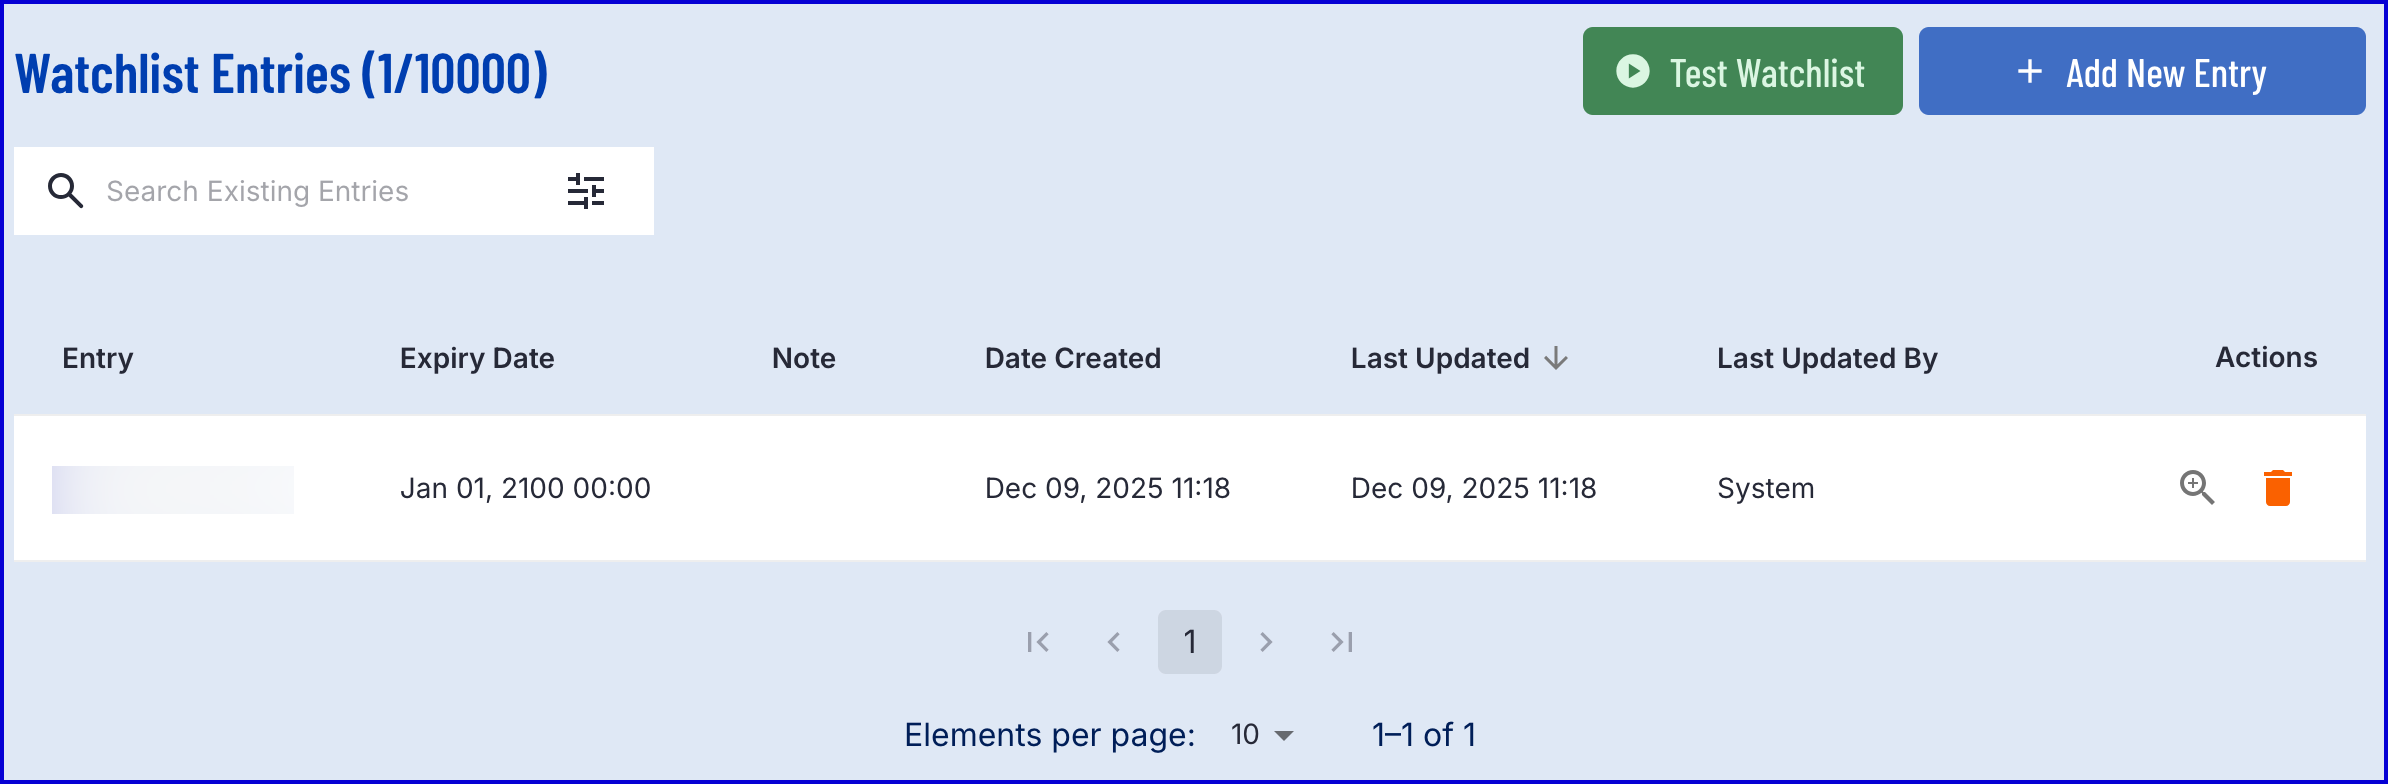
Selecting the magnifying glass under the 'Actions' column will provide more information in a popup modal.
Add a Watchlist Entry via TrustX API
To add a Watchlist entry via the TrustX API, the following tenant permissions are required:
Permissions:
The following query adds a new entry to the watchlist. The entry type must match the Watchlist type.
Example Request:
Searching a Phone Number Watchlist
Multiple methods can be used to search for a Watchlist match against a phone number such as the TrustX API, Backoffice application, or via a Process Definition. This section will describe how to perform a Watchlist search using each of the listed methods and how to react to search results.
Searching via Backoffice
It is possible to search for a Watchlist match using the Backoffice 'Test Watchlist' functionality. As the name suggests, this method is primarily intended for testing purposes.
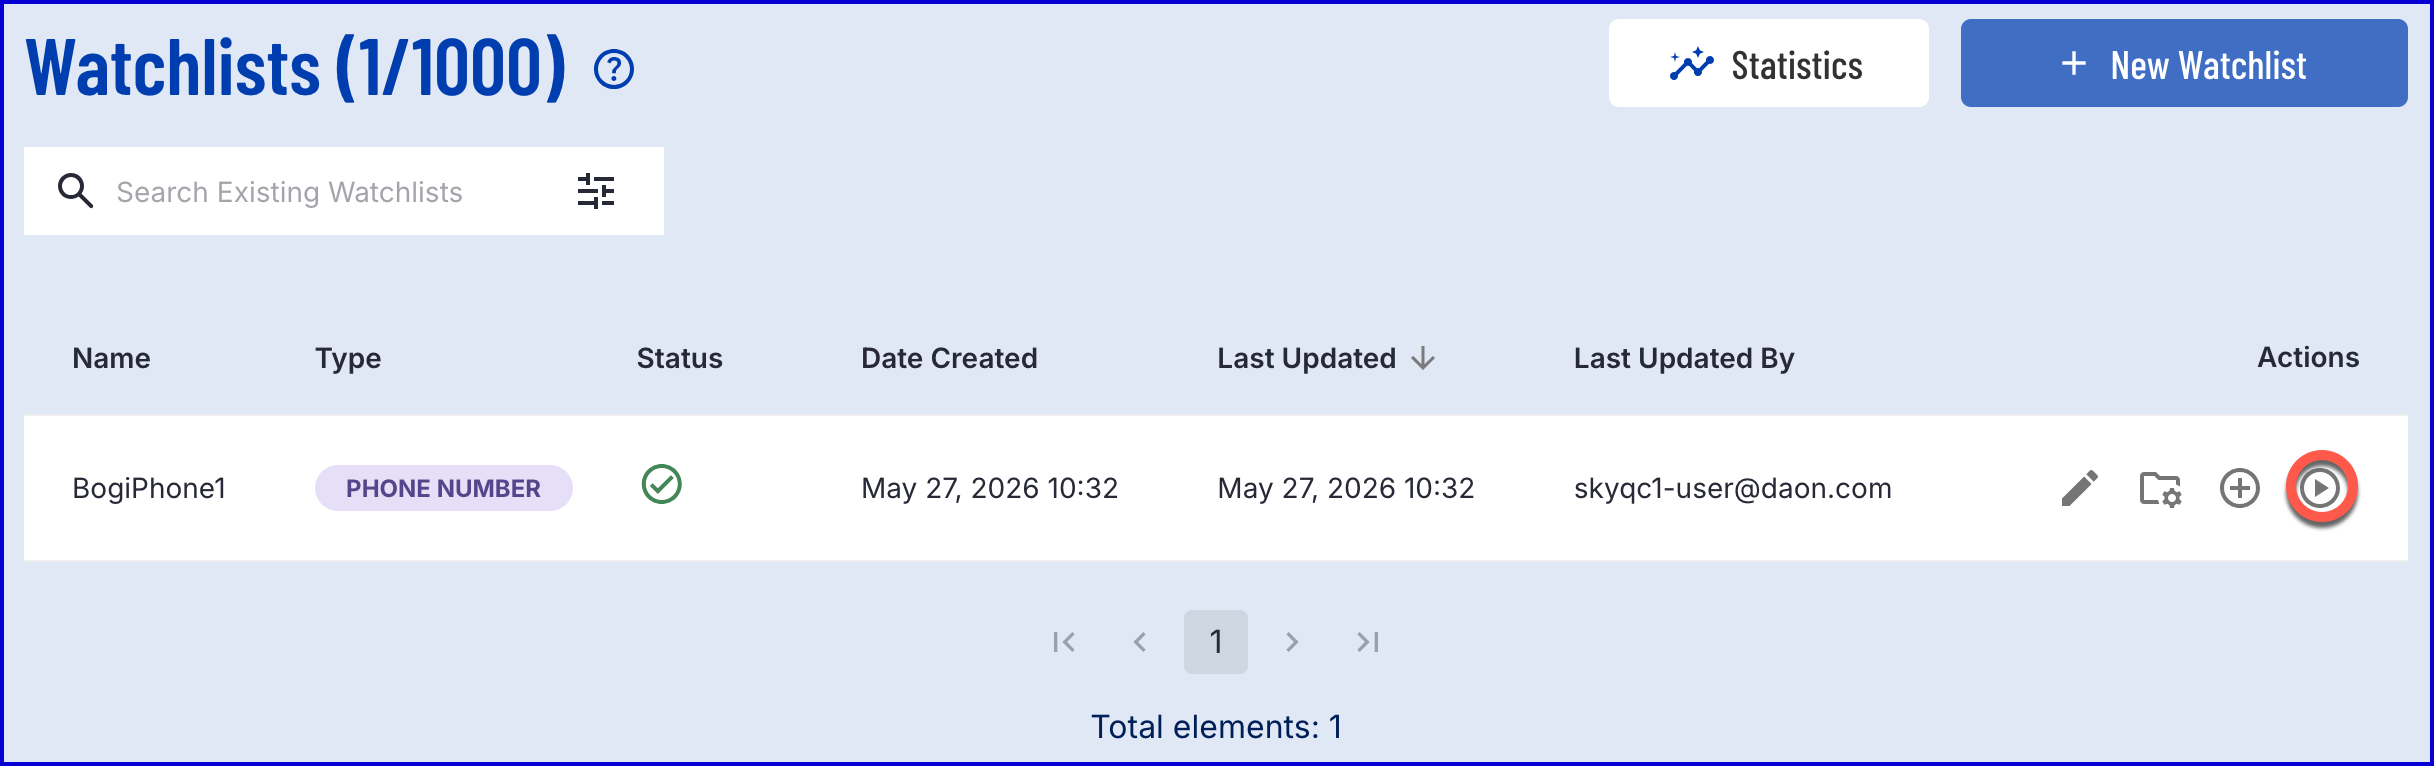
Navigate to the Watchlists page in the Backoffice.
Find the Watchlist to be tested using the search functionality provided.
Under the 'Actions' column. select the 'Test' icon.
The test page provides a drag and drop field where a list of phone number can be entered to test against the watchlist. The match threshold and the number of candidates to return can be set using the filter options provided.
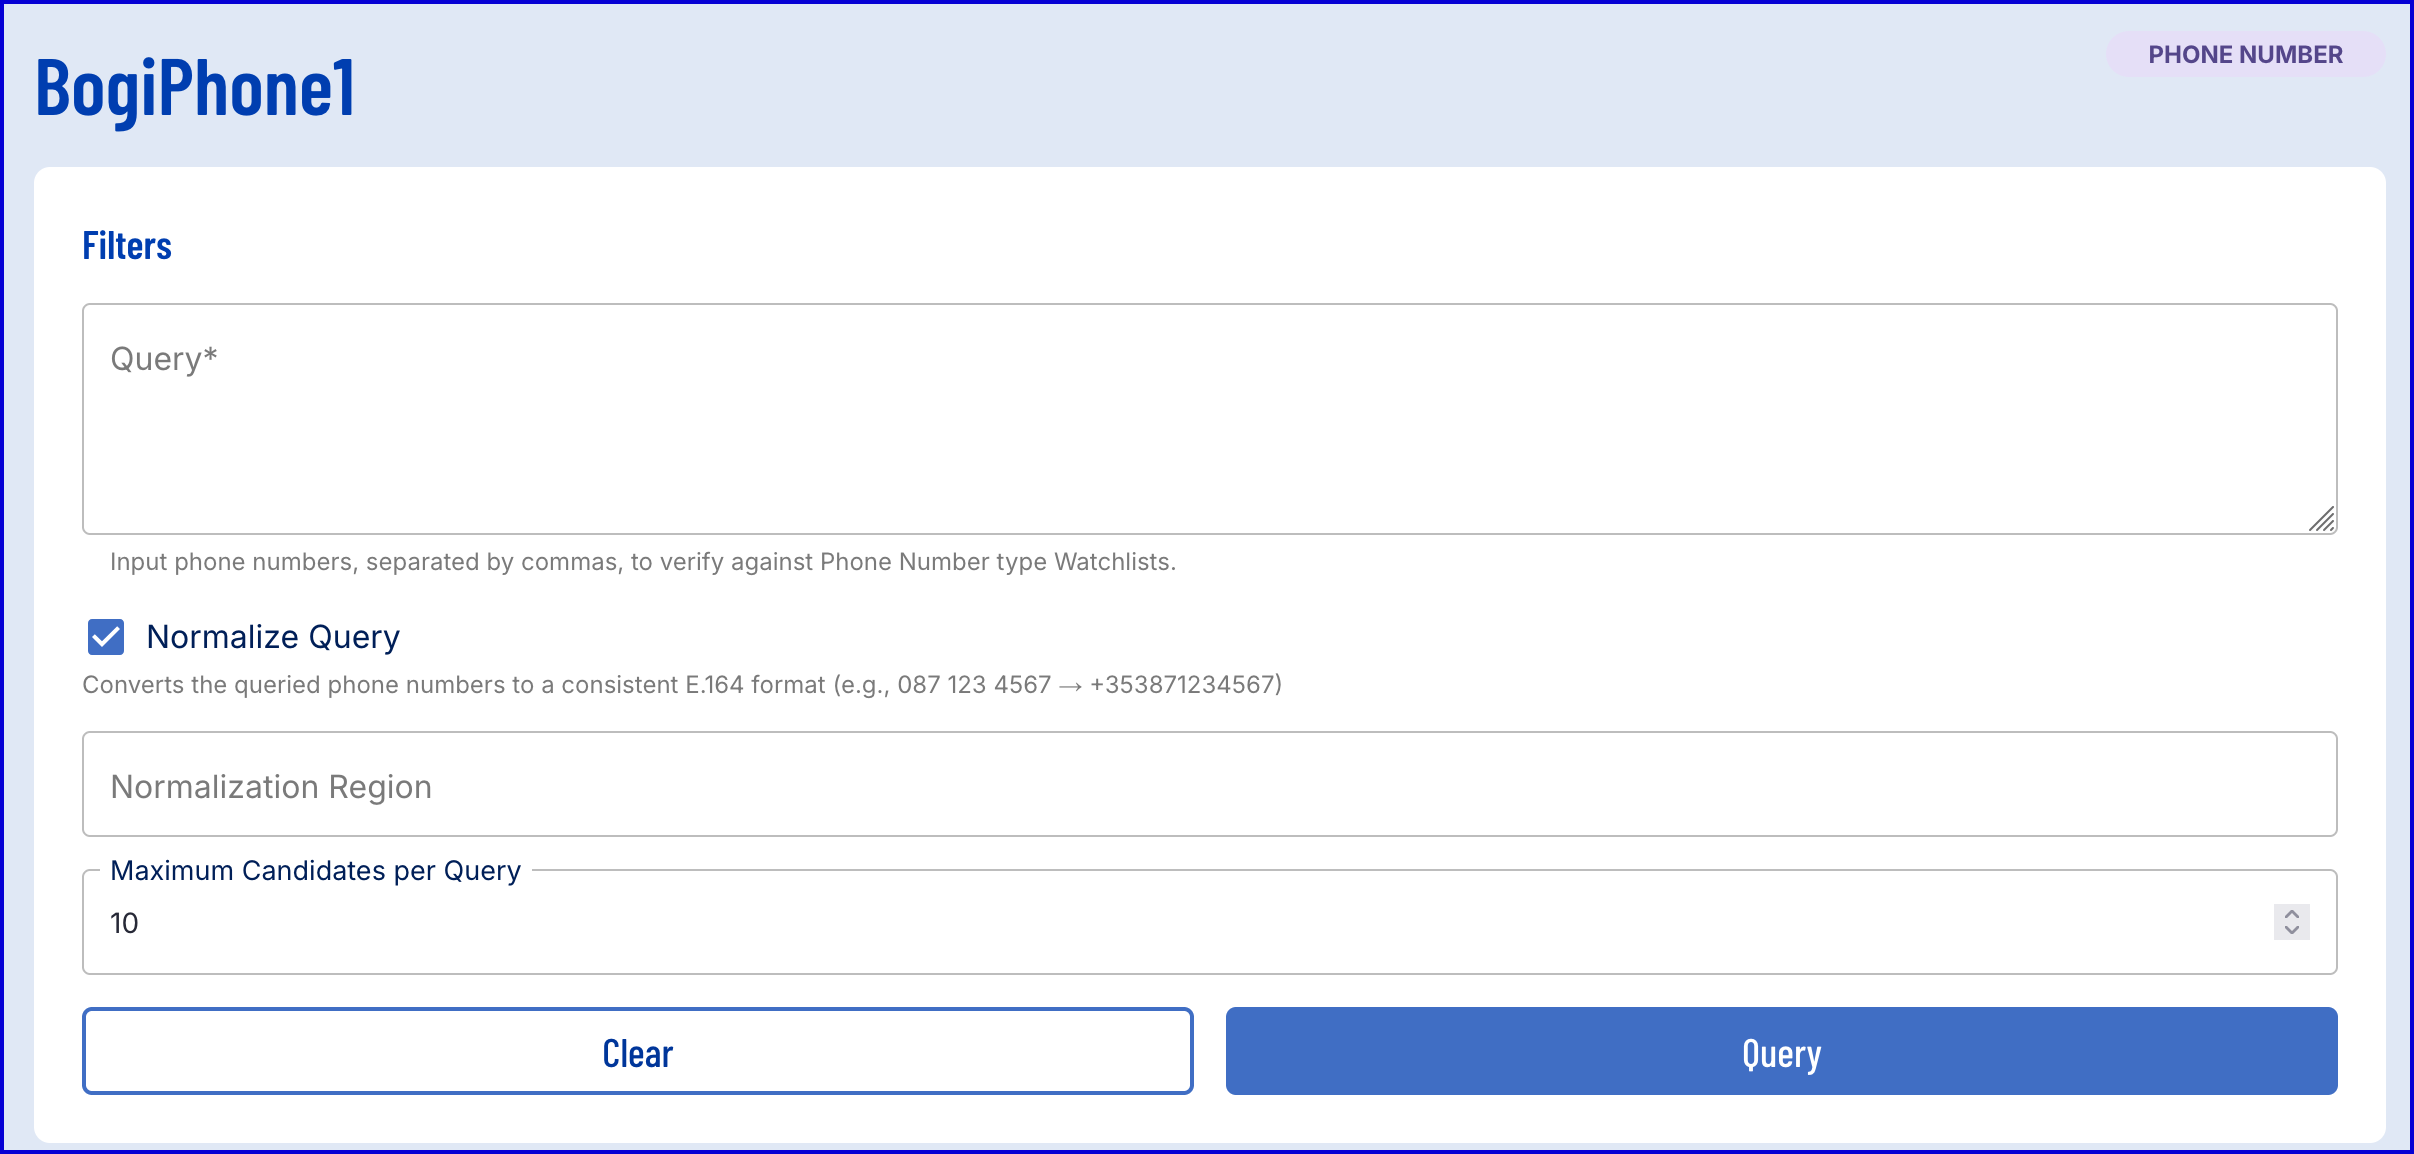
If a match is found, the results will be displayed in the table below with the result "Match (Detected)".
It is not possible to action on search results returned. This functionality is intended for testing purposes only.
Searching via Process Definition
The 'Search Phone Number Watchlist v1' activity can be used to search for a matching phone number during a Process Instance. This section will describe how to configure a Process Definition to search against a phone number Watchlist.
Step 1 - Configure the Process Definition
This process follows step 1 of the Add Watchlist Entry via Process Definition.
Follow the steps outlined in the section above by creating a 'Start' and 'End' event.
Step 2 - Perform Search Against Watchlist
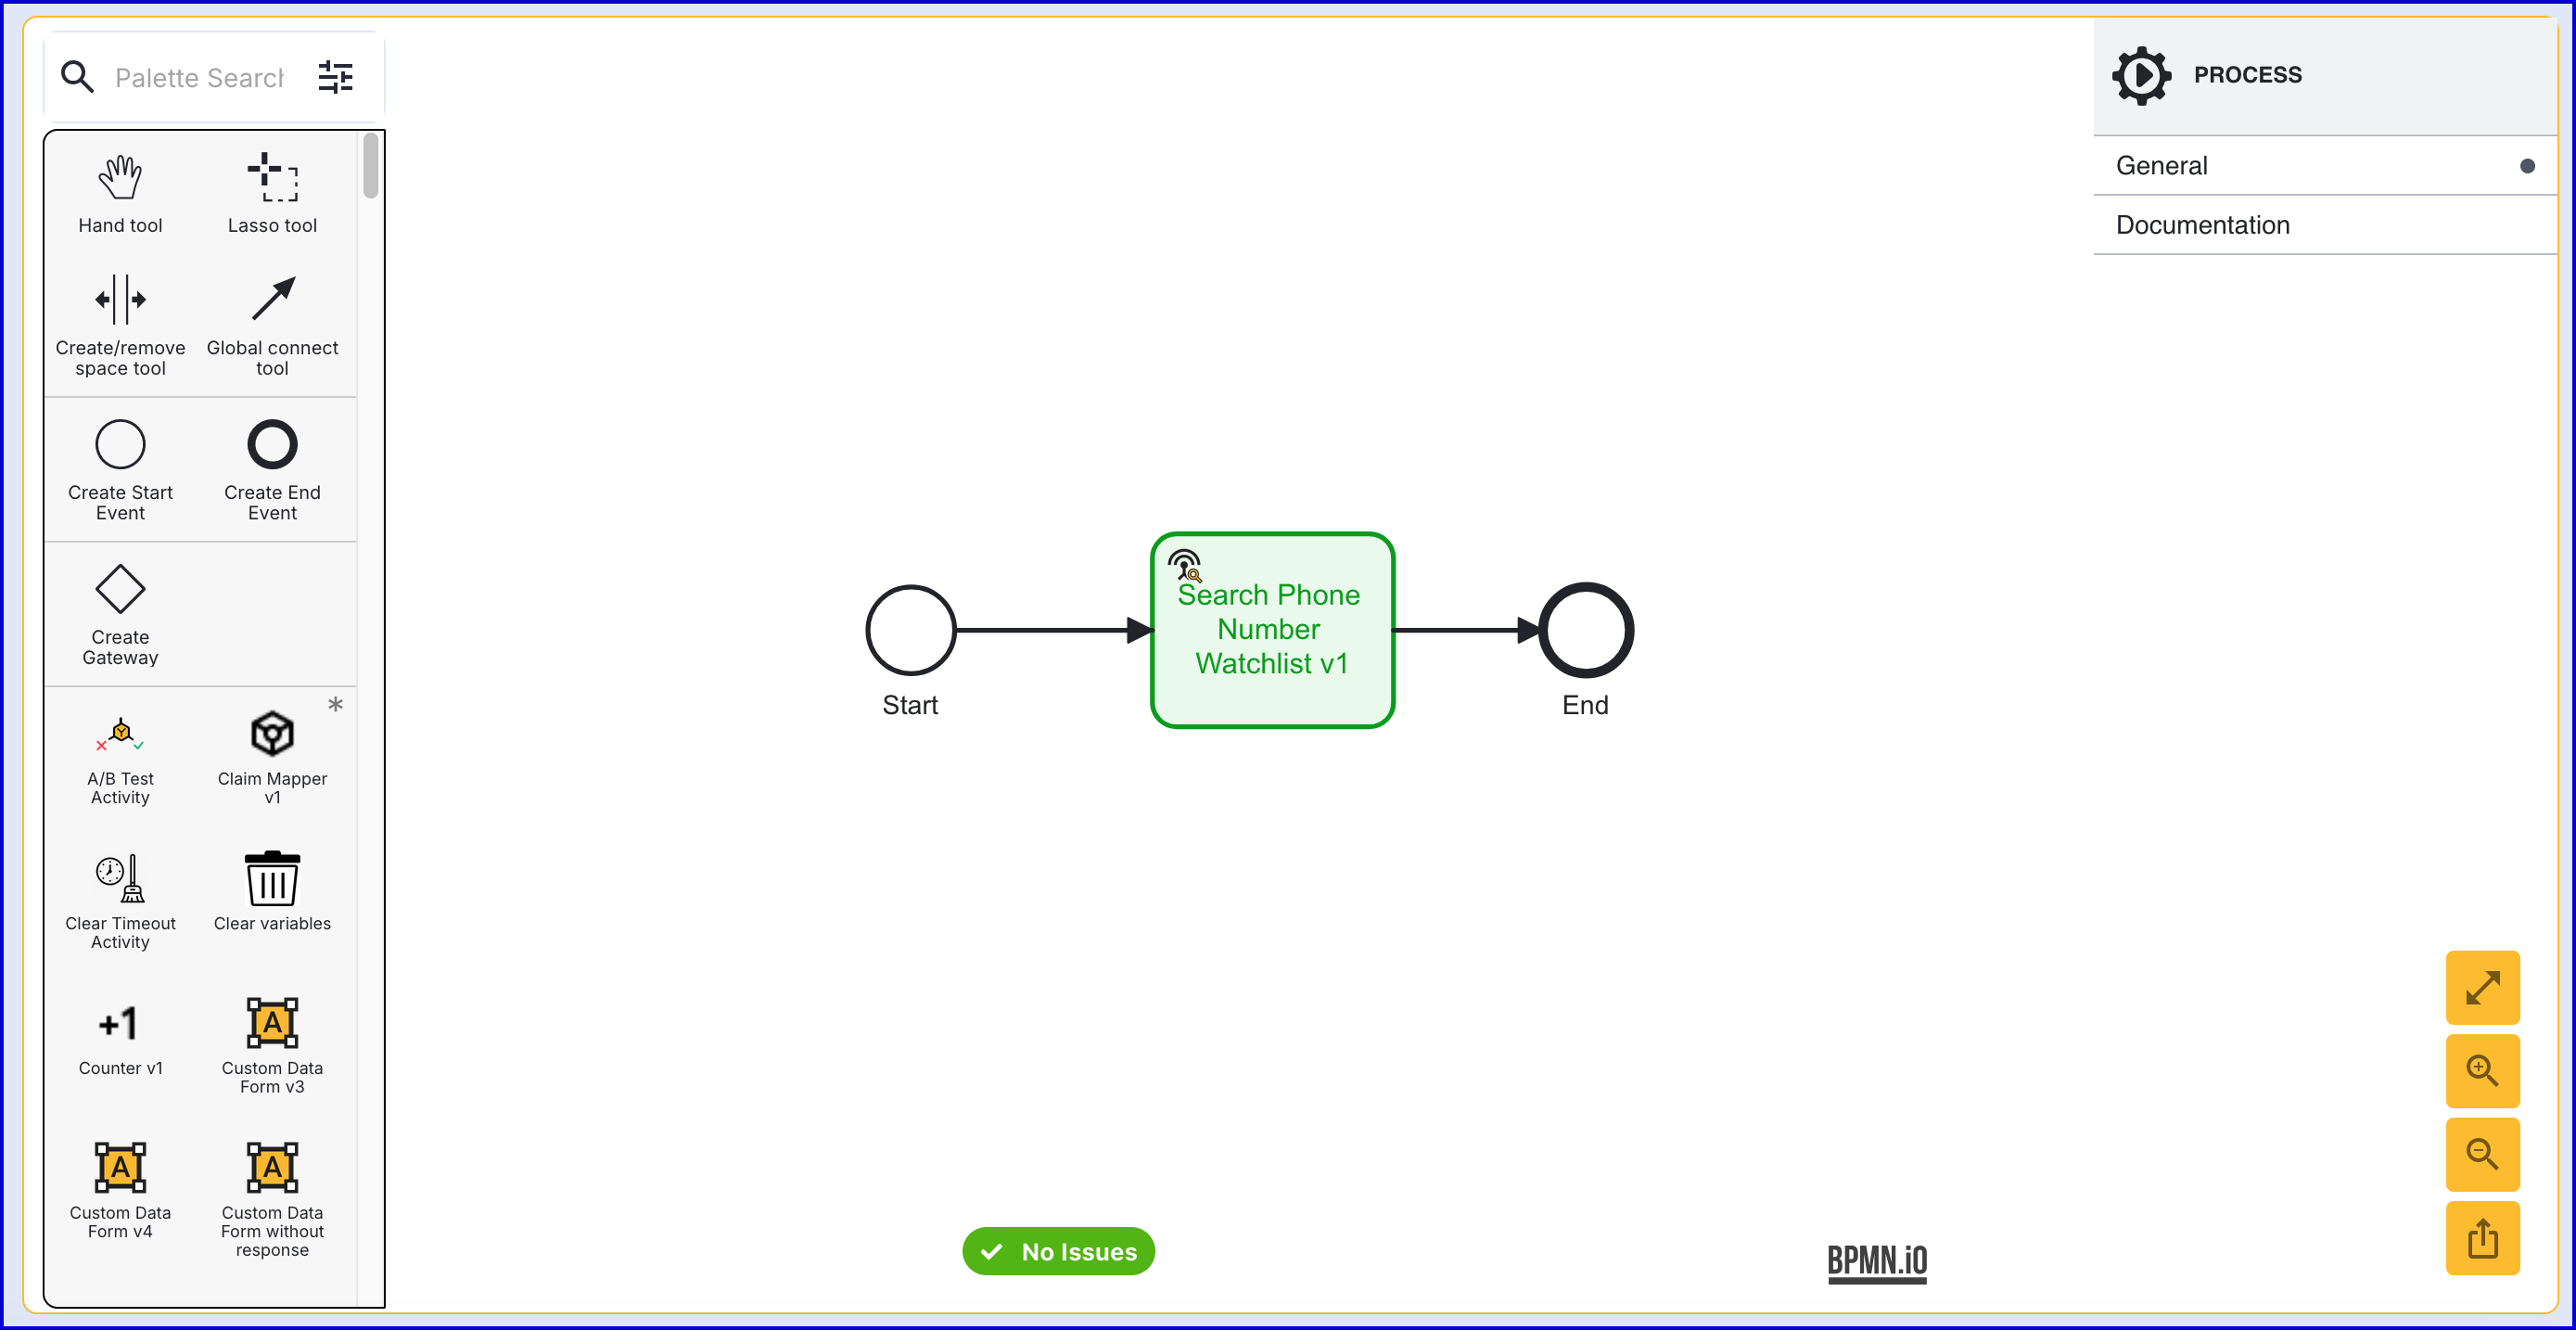
Add a 'Search Phone Number Watchlist v1' activity to the Process Designer.
The 'Search Phone Number Watchlist v1' activity includes the following input parameters:
| Parameter | Description | Type | Default |
|---|---|---|---|
| Max Match Results | Maximum number of matches to return (1-100) | Integer | ${10} |
| Normalize | Whether to normalize the phone number before searching. | Boolean | ${true} |
| Phone Number | Phone number to search for in the Watchlist (max 24 chars). | String | |
| Region | Optional region code for phone number normalization. A maximum of 2 characters is supported. | String | |
| Search Behavior | Determines how match results are interpreted: BLOCK (match=FAIL, no match=PASS), ALLOW (match=PASS, no match=FAIL), BLOCK_REVIEW (match=REVIEW, no match=PASS), ALLOW_REVIEW (match=REVIEW, no match=FAIL) | String | BLOCK |
| Search Key | The key under which the check result will be stored in the checks object | String | watchlistSearch1 |
| Watchlist Name | Name of the phone number watchlist (max 250 chars) | String |
The 'Search Behavior' property controls how the activity will response to matches.
Value | Match Found | No Match | Use Case |
|---|---|---|---|
| outcome = FAIL | outcome = PASS | Blocklist: Fail the check if the phone number is found on the watchlist |
| outcome = PASS | outcome = FAIL | Allowlist: Pass only if the phone number is found on the watchlist |
| outcome = REVIEW | outcome = PASS | Blocklist with Review: Send to review if found, otherwise pass |
| outcome = REVIEW | outcome = FAIL | Allowlist with Review: Send to review if found (match needs human verification), otherwise deny (not on allowlist) |
Results of the search will be stored in the _checks table and can be viewed from the Backoffice application or retrieved using the TrustX API.
Searching via API
The following query searches a watchlist for matches against the provided query. The query type must match the watchlist type. Returns matching entries with scores and metadata.
To search a Watchlist entry via the TrustX API, the following tenant permissions are required.
Permissions:
Example Request:
Example Response:
Viewing Results
The results of a Watchlist search attempt can be found in the Backoffice application or retrieved using the TrustX API. This section will describe how to retrieve the results of a search in both cases.
Viewing Results in the Backoffice
To find the results of the Watchlist search in the Backoffice application, follow the steps outlined:
Log in to the Backoffice and navigate to the Process Instances page.
Using the search filters provided, find the Process Instance where Watchlist searching was performed.
Watchlist search results can be found in the
_checkstable, displayed in the Backoffice under the Checks section.
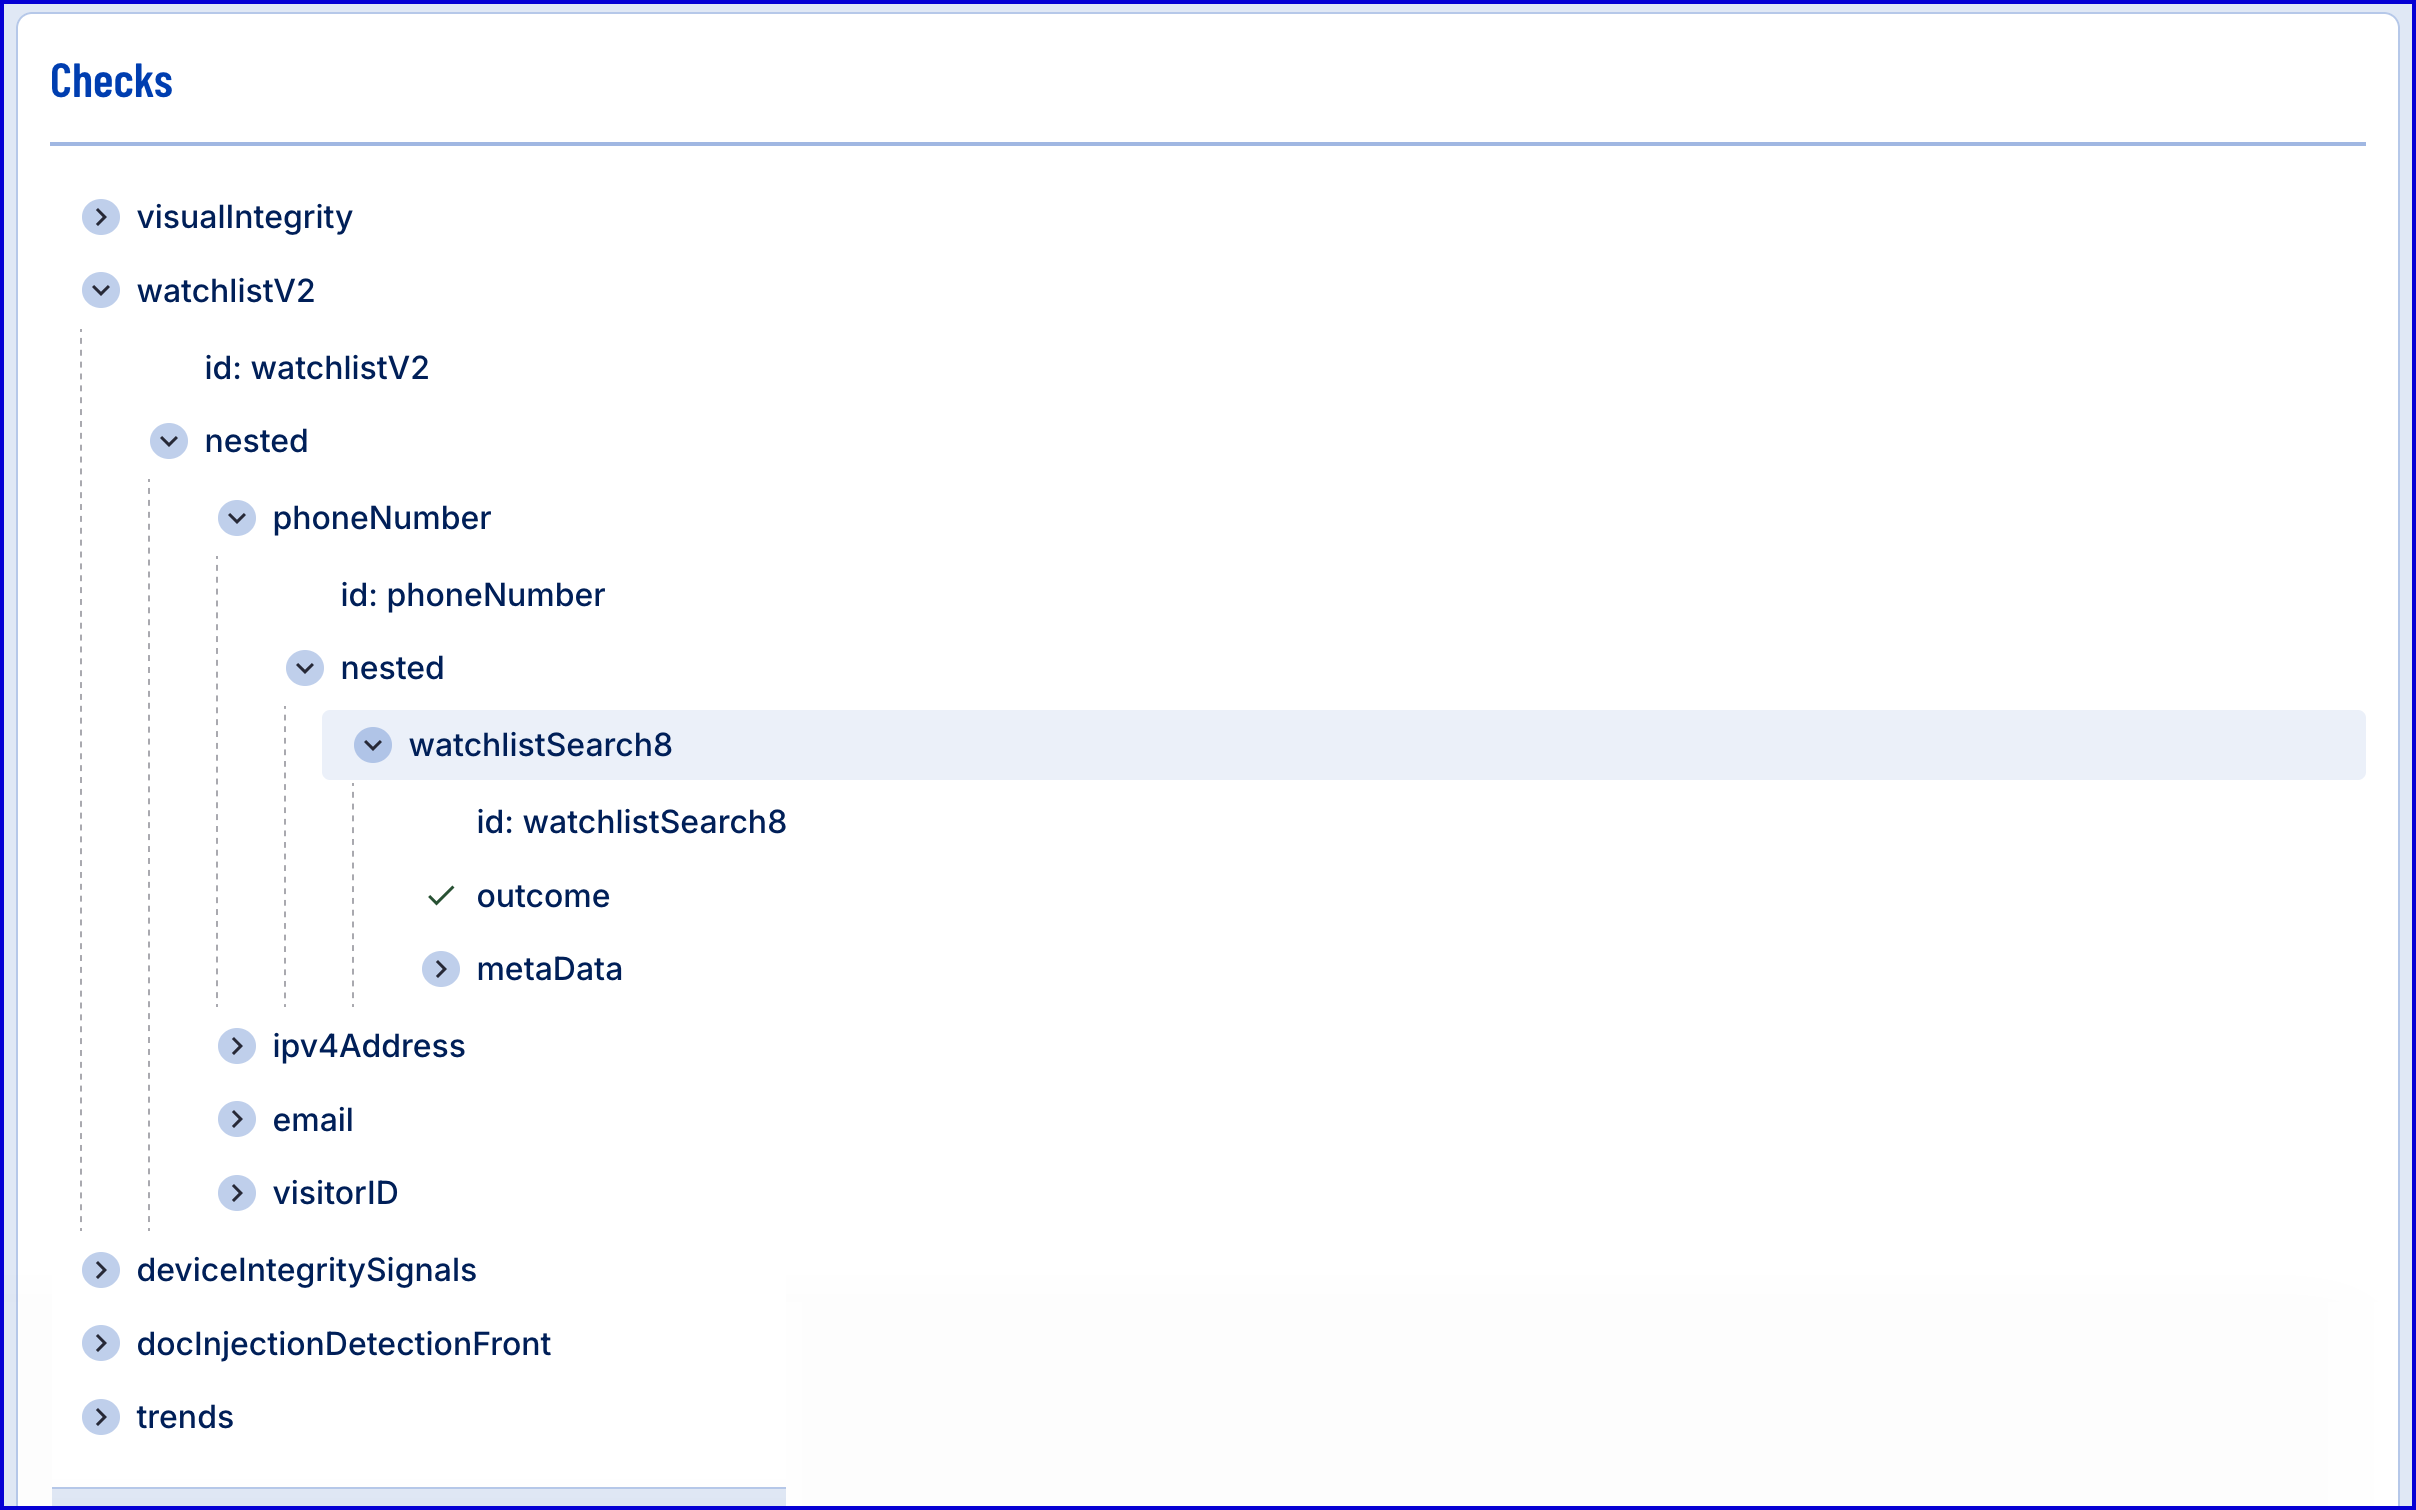
A list of Watchlist search results can be found in the Watchlist Search Results section.
Example No Match Detected:
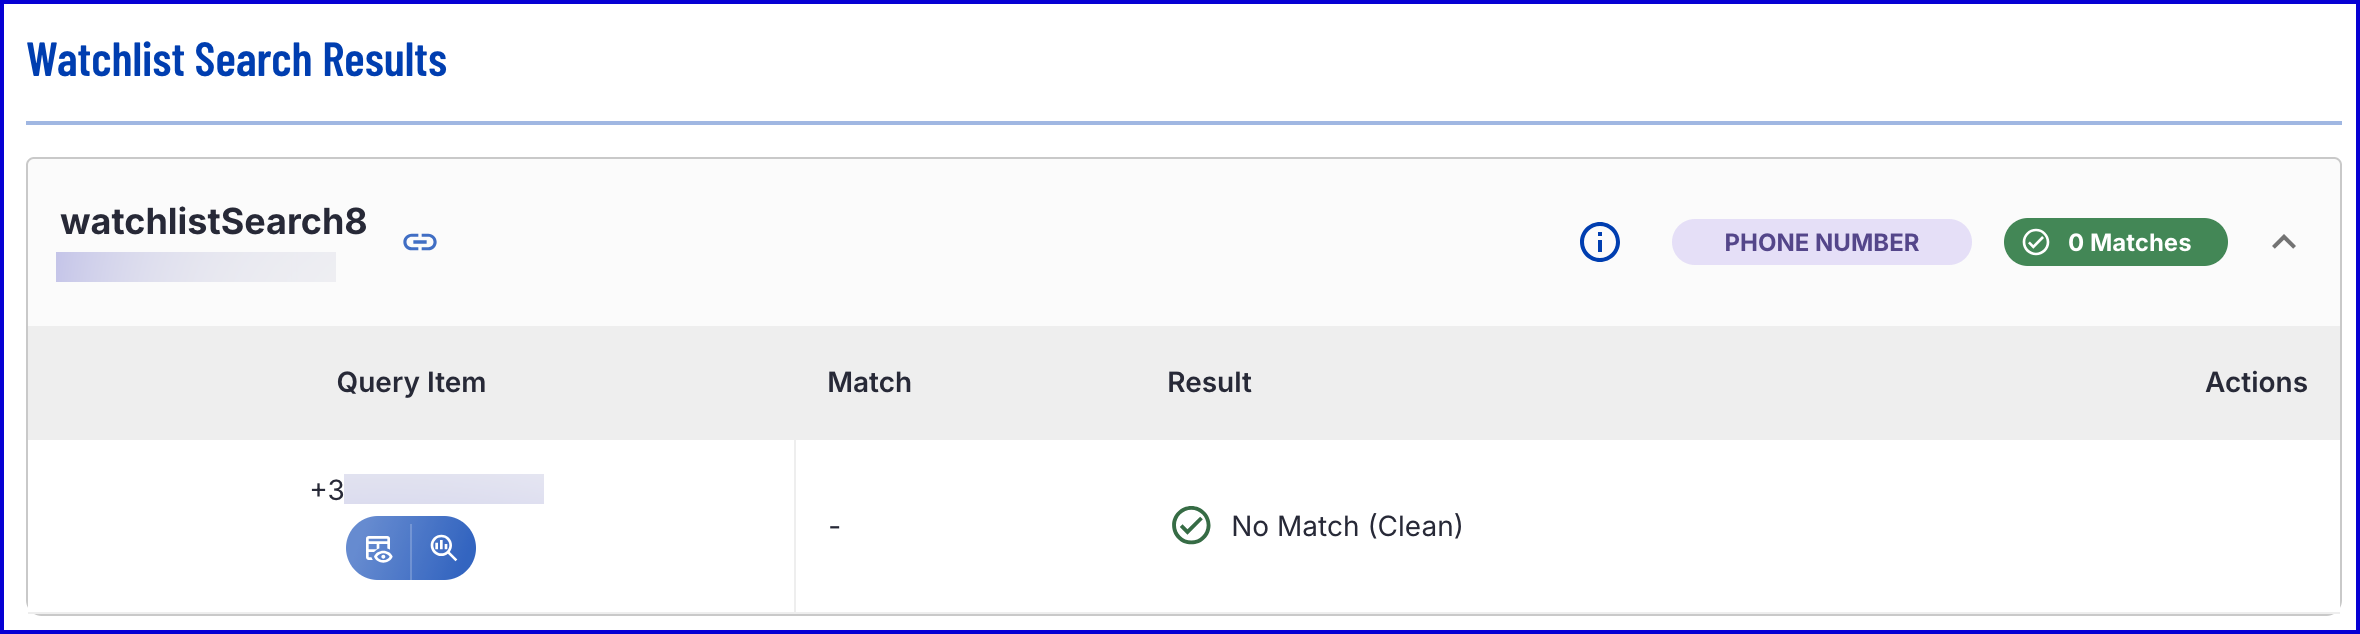
The table of results include the following information:
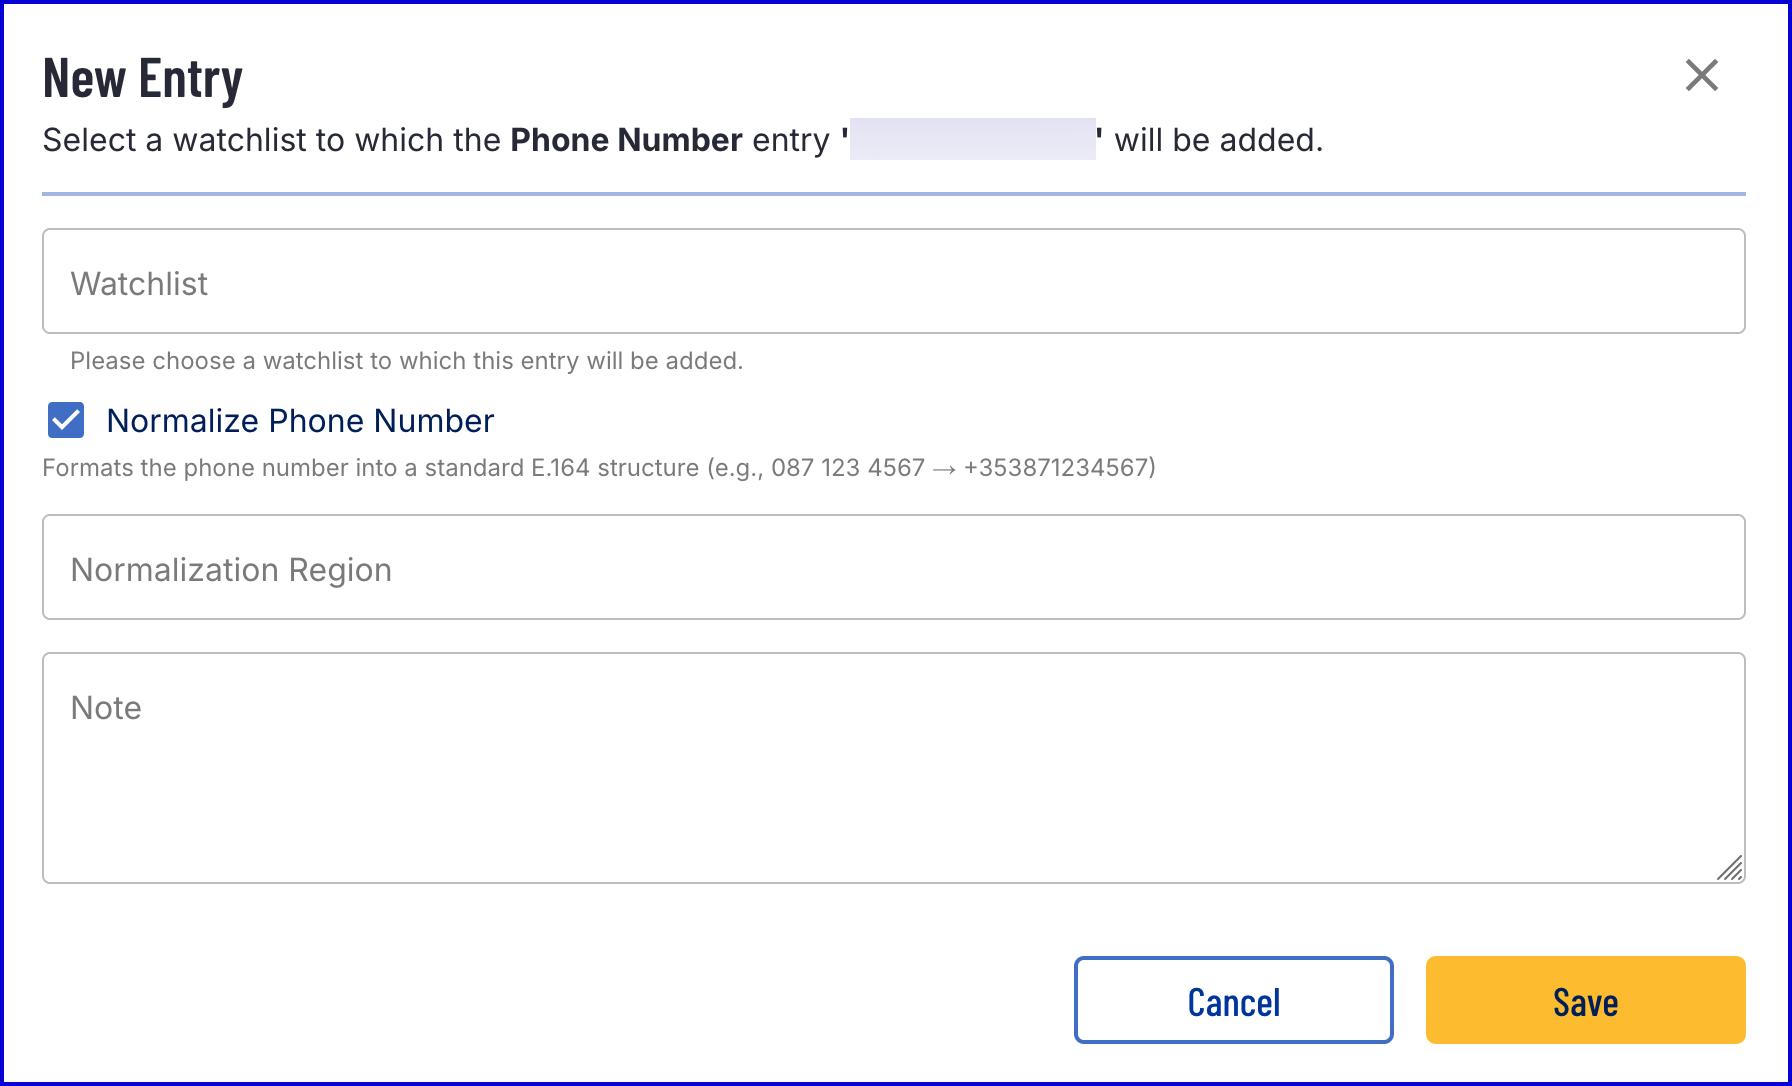
Query Item - Displays the captured phone number used to perform the search query.
Match - The name of the POI matched against within the Watchlist.
Result - The result of the Watchlist search.
Actions - In the event of a match, enables users to see additional details about the Watchlist entry that the phone number was matched against.
Using the blue 'tracking' button under the 'Query Item' column, it is possible to add the phone number directly to a Watchlist. Selecting this button will open a popup modal where the phone number can be added.