Custom Page and Form Without Response
Introduction
TrustX provides a number of methods that enables a user journey to complete before the process completes. This can happen for a number of reasons such as when all the data from the user has been captured and now the data will be used to run background checks on the user which may take time.
To facilitate such a user journey, TrustX has 3 activities which allow the user to end the interaction with the end-user.
- Custom Data Form Without Response
- Custom Page Without Response
- Custom Page Without Response - External
If the reader is not familiar with the equivalent activities, then these should be reviewed as this topic will not cover the use of Custom Data Form, Custom Page and Custom Page External activities. See the Activity Parameters guide for more information.
As soon as TrustX executes any of the 3 activities listed above, a message is sent to TrustWeb (the browser app) that the process is complete and the appropriate Form or Page is displayed to the user.
TrustX can be deployed in three scenarios:
- As the page within the browser (Browser Page)
- Embedded within an iframe within the browser
- Embedded within the Trust SDK within a customer iOS or Android App
This document will describe the implementation steps for each scenario and the event types available.
Event Handling
Within the content of the Custom Page, three event types that can be triggered will be implemented to perform some action depending on the results of the Process Instance or session.
The following table describes each of the event types that must be implemented to complete integration:
| Event Name | Description |
|---|---|
webCompleted | Event is triggered when the process has completed successfully. |
webTimeout | Event is triggered when a timeout occurs on the page. |
error | Triggered when the process has ended in an error. |
Trustweb Integration
There are two integration options when implementing a Custom Page or Custom Data Form without a response via TrustWeb.
To redirect to a new URL, if TrustWeb is running in a Browser Page
- In this instance the Redirect URL property of the Activity must be set
To do nothing, if TrustWeb is running in a Browser Page
- In this instance the Redirect URL property of the activity must NOT be set
The example in this section will implement a custom 'Thank You' page using the 'Custom Page Without Response' activity. This will demonstrate how a 'Thank You' page can be presented as the final page in a flow while the Process Instance continues.
Create the Custom Page
This example consists of a HTML page that displays the "Thank You" message. While the HTML page is displayed, the Process Instance will continue to execute in the background.
<html lang="en"><head> <title>Thank You Page</title> <meta name="viewport" content="width=device-width, initial-scale=1.0" /> <link rel="stylesheet" href="css/style.css" /></head><body style="background-color: white;"> <div class="container"> <p>Thank You.</p> </div></body></html>Once the Custom Page is created, click the 'Save & Deploy' button to finalize the configuration. For more information on creating Custom Pages, see the Custom Pages Guide.
Configure the Process Definition
The 'Custom Page Without Response' activity will be used to configure the Process Definition. In this example, it will appear as the final page the end-user will see.

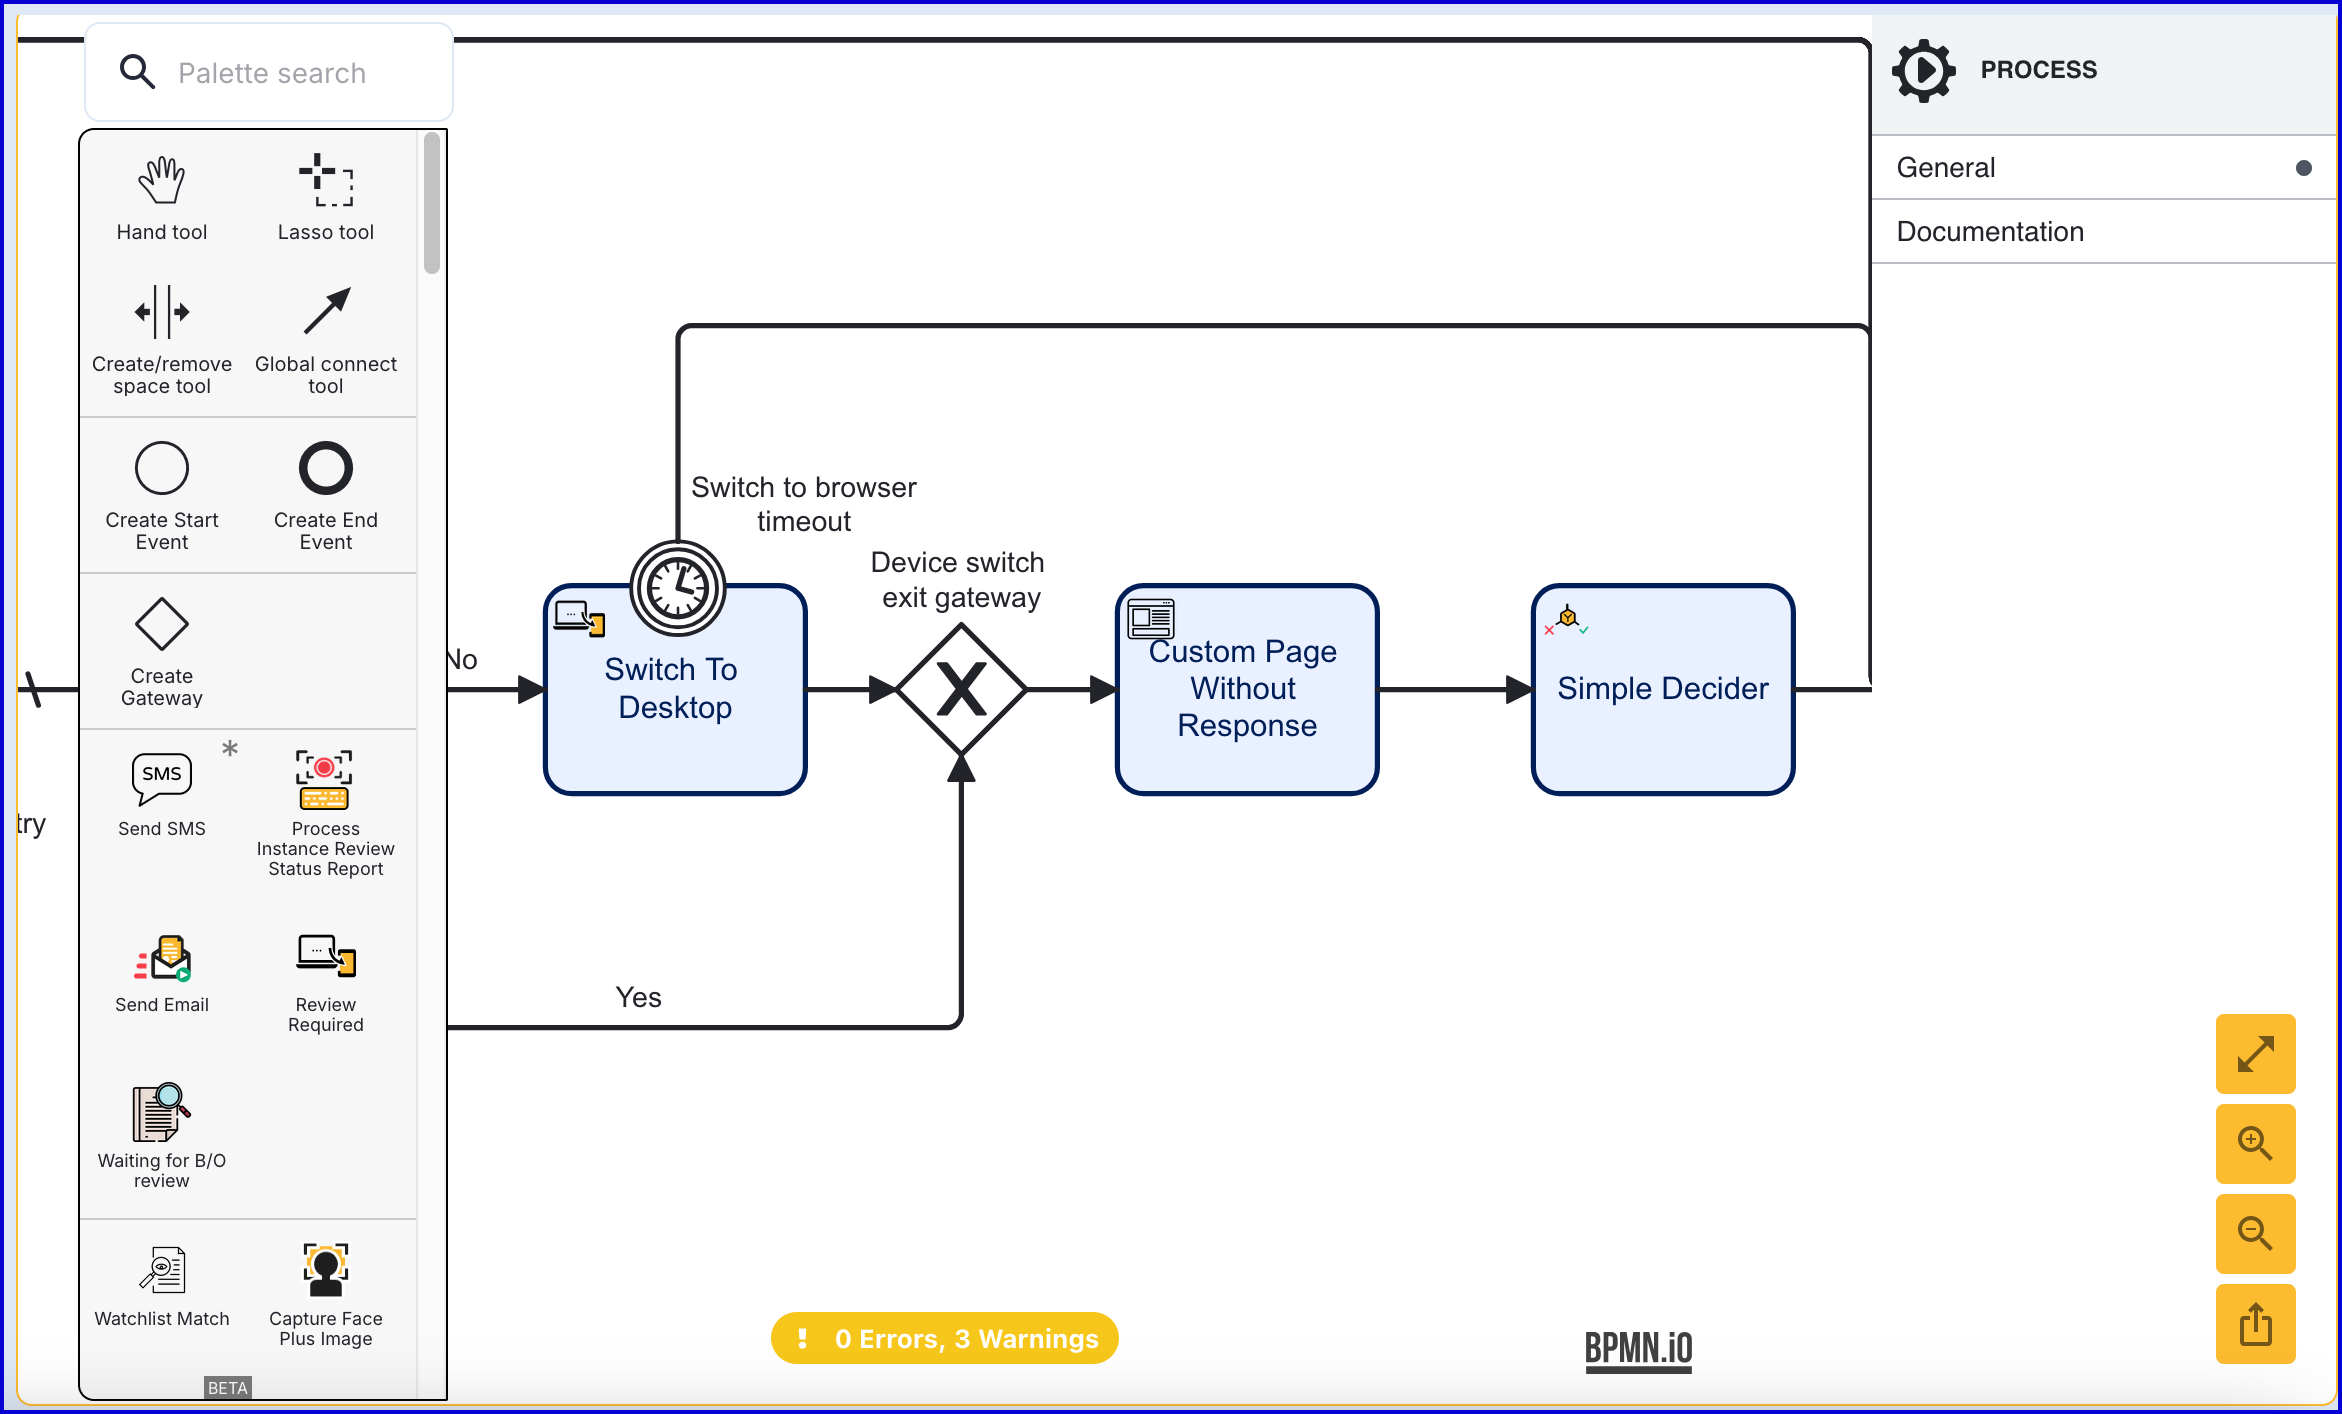
In the example above, the custom 'Thank You' page appears after the face image has been confirmed and the user has switched to desktop. This is the final page the end-user will see while the Process Instance will continue through the 'Simple Decider' activity that follows before the Process Instance ends.
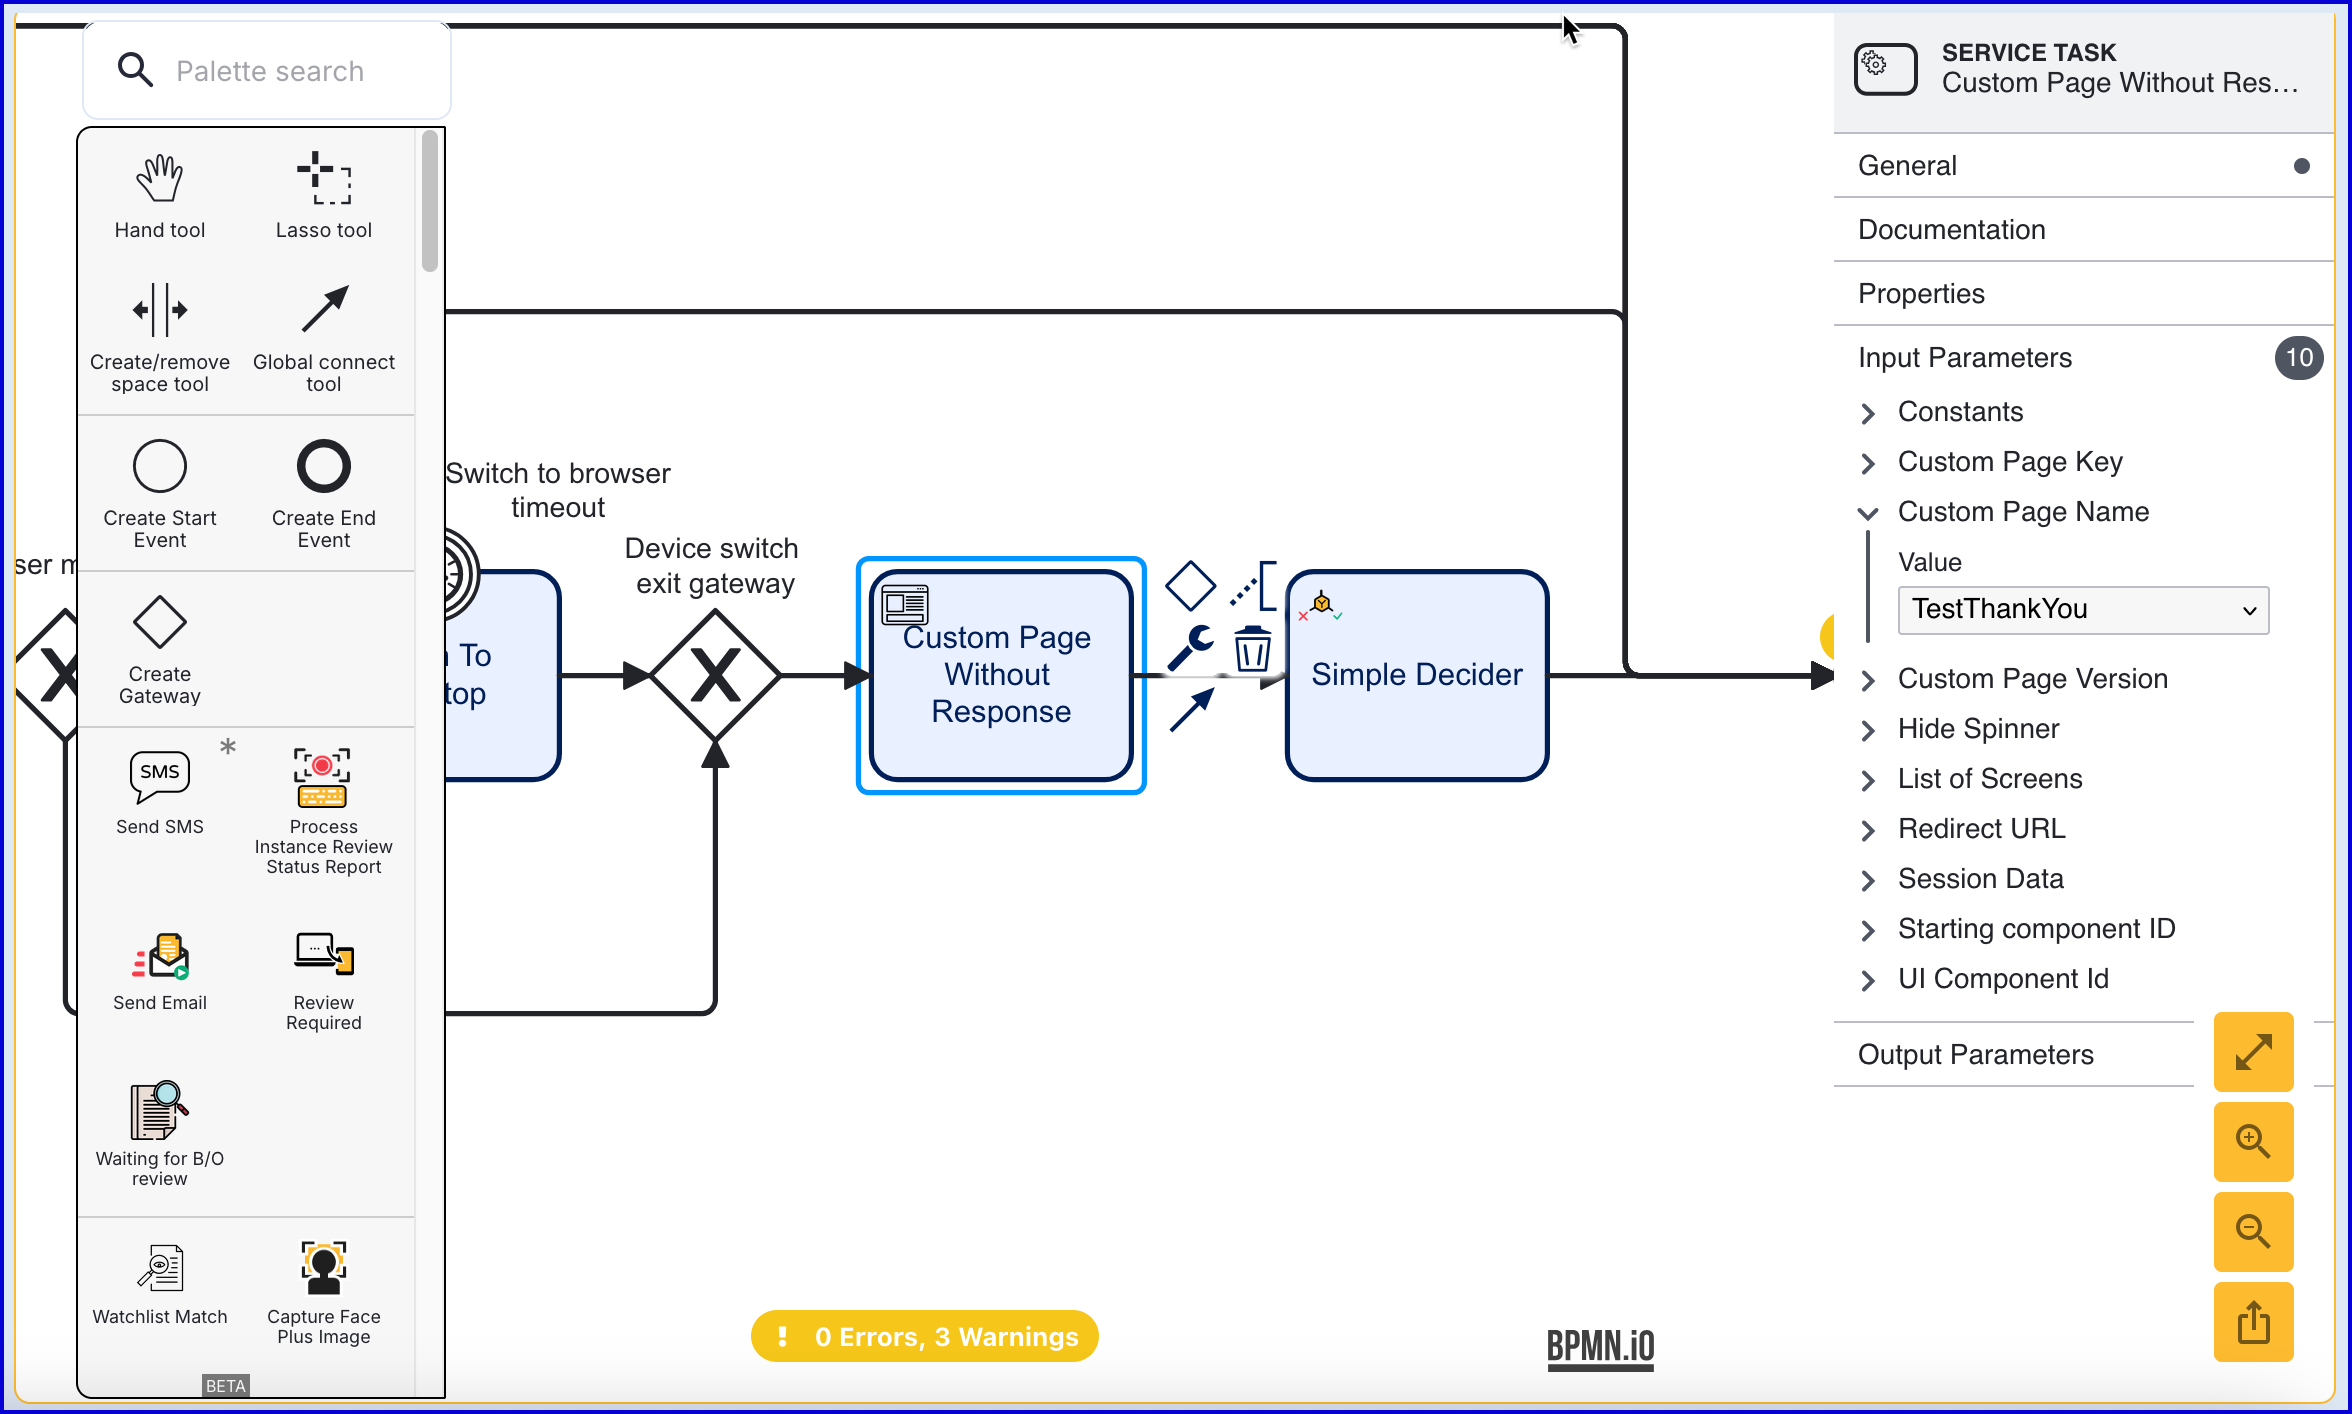
When the 'Custom Page Without Response' activity is added to the Process Designer, click the activity to open the right-side contextual menu where various input parameters such as the Custom Page to show can be set.

An explanation for each input parameter can be found on the Custom Page Without Response activity parameter page.
It is also possible to set a Redirect URL that will redirect after the 'Thank You' page is show.
Iframe Integration
This section will demonstrate how to display a Custom Page within an iframe.
A code sample to demonstrate implementing a Custom Page integrated into an iframe can be found below. This example uses a switch statement to handle each of the event types that can be implemented.
<html><body><script>window.addEventListener('message', (event) => { if (!event.data || !event.data.event) return switch (event.data.event) { case 'webCompleted': if (event.data.message) { alert(event.data.message) } else alert('Process ended successfully') break case 'webTimeout': alert('Session expired') break case 'error': alert('Process ended with an error') break default: console.log(event.data) }})</script><!-- Change src with your URL. For example: src="https://localhost:3000/?pt=Y7WHCKXC3WCS2D3Z23UGANJ5JU" --><iframe width="500px" height="500px" src="https://localhost:3000/?pt=Y7WHCKXC3WCS2D3Z23UGANJ5JU" allow="camera"/></body></html>Similar to Configuring the Process Definition section above, this Custom Page can be integrated using the 'Custom Page Without Response' activity. In this case, a message can be sent based on the outcome of the process by implementing the event types listed above.
Trust SDK Integration
The below sample Trust SDK and Webview integration demonstrates how to handle a response and continue the process. This example displays a “continue” button that, when pressed, will continue to the next step of the user journey (outside TrustX).
function isIOSWebView() { var userAgent = navigator.userAgent || navigator.vendor || window.opera; var isIOS = /iPad|iPhone|iPod/.test(userAgent) && !window.MSStream; var isSafari = /Safari/.test(userAgent) && !/CriOS|FxiOS/.test(userAgent); return isIOS && !isSafari;}function webCompleted() { if (isIOSWebView()) { // on iOS window.webkit.messageHandlers.webCompleted.postMessage(''); } else { // on Android MobileFormHandler.webCompleted(); }}document.addEventListener('DOMContentLoaded', () => { window.addEventListener('message', (event) => { const continueButton = document.getElementById('continue'); continueButton.addEventListener('click', () => { // notify the native host app that the process has completed webCompleted(); }); }); window.parent.postMessage({ event: 'READY' }, '*');});For more information on Webview integration, see the below guides.