A TrustX push notification will send a push notification to an Identity Store (IDS) User with a registered Appkey on their device. When the User accepts the push notification, a child Process Instance can be started. The parent Process Instance (The Process Instance that initiated the push notification) will be paused using the 'Wait On Push Notification" activity until the child Process Instance is completed.
This flow can be summarized as follows:
Customer requests a push notification. This will happen either directly via an API on the Identity Store server, or indirectly via a TrustX Activity from a process instance. The request contains the details of the process definition & version or process definition tag, and process token parameters.
A limited duration Process Token is created for the push notification on the Identity Store server and provide the TrustX redirect URL as the payload for the push notification to all devices or a preferred device.
The user accepts the push notification on the device which redirects to the TrustX URL for the push notification process instance.
The 'Wait On Push Notification' activity in the parent Process Instance will react to these statuses.
This guide will demonstrate how to configure a standard TrustX push notification flow using the Process Designer and the TrustX API.
Prerequisites
Before configuring a TrustX push notification flow, the following prerequisites must be satisfied.
An Appkey Identity Store must already exist. See Managing Identity Stores for more information.
A User must be created in the Identity Store. See Managing Users for more information.
An Appkey policy must be created and the Identity Store User must have a registered Appkey registered to their device. See Managing Policies and Appkey Device Registration
Configure Push Notification Policy
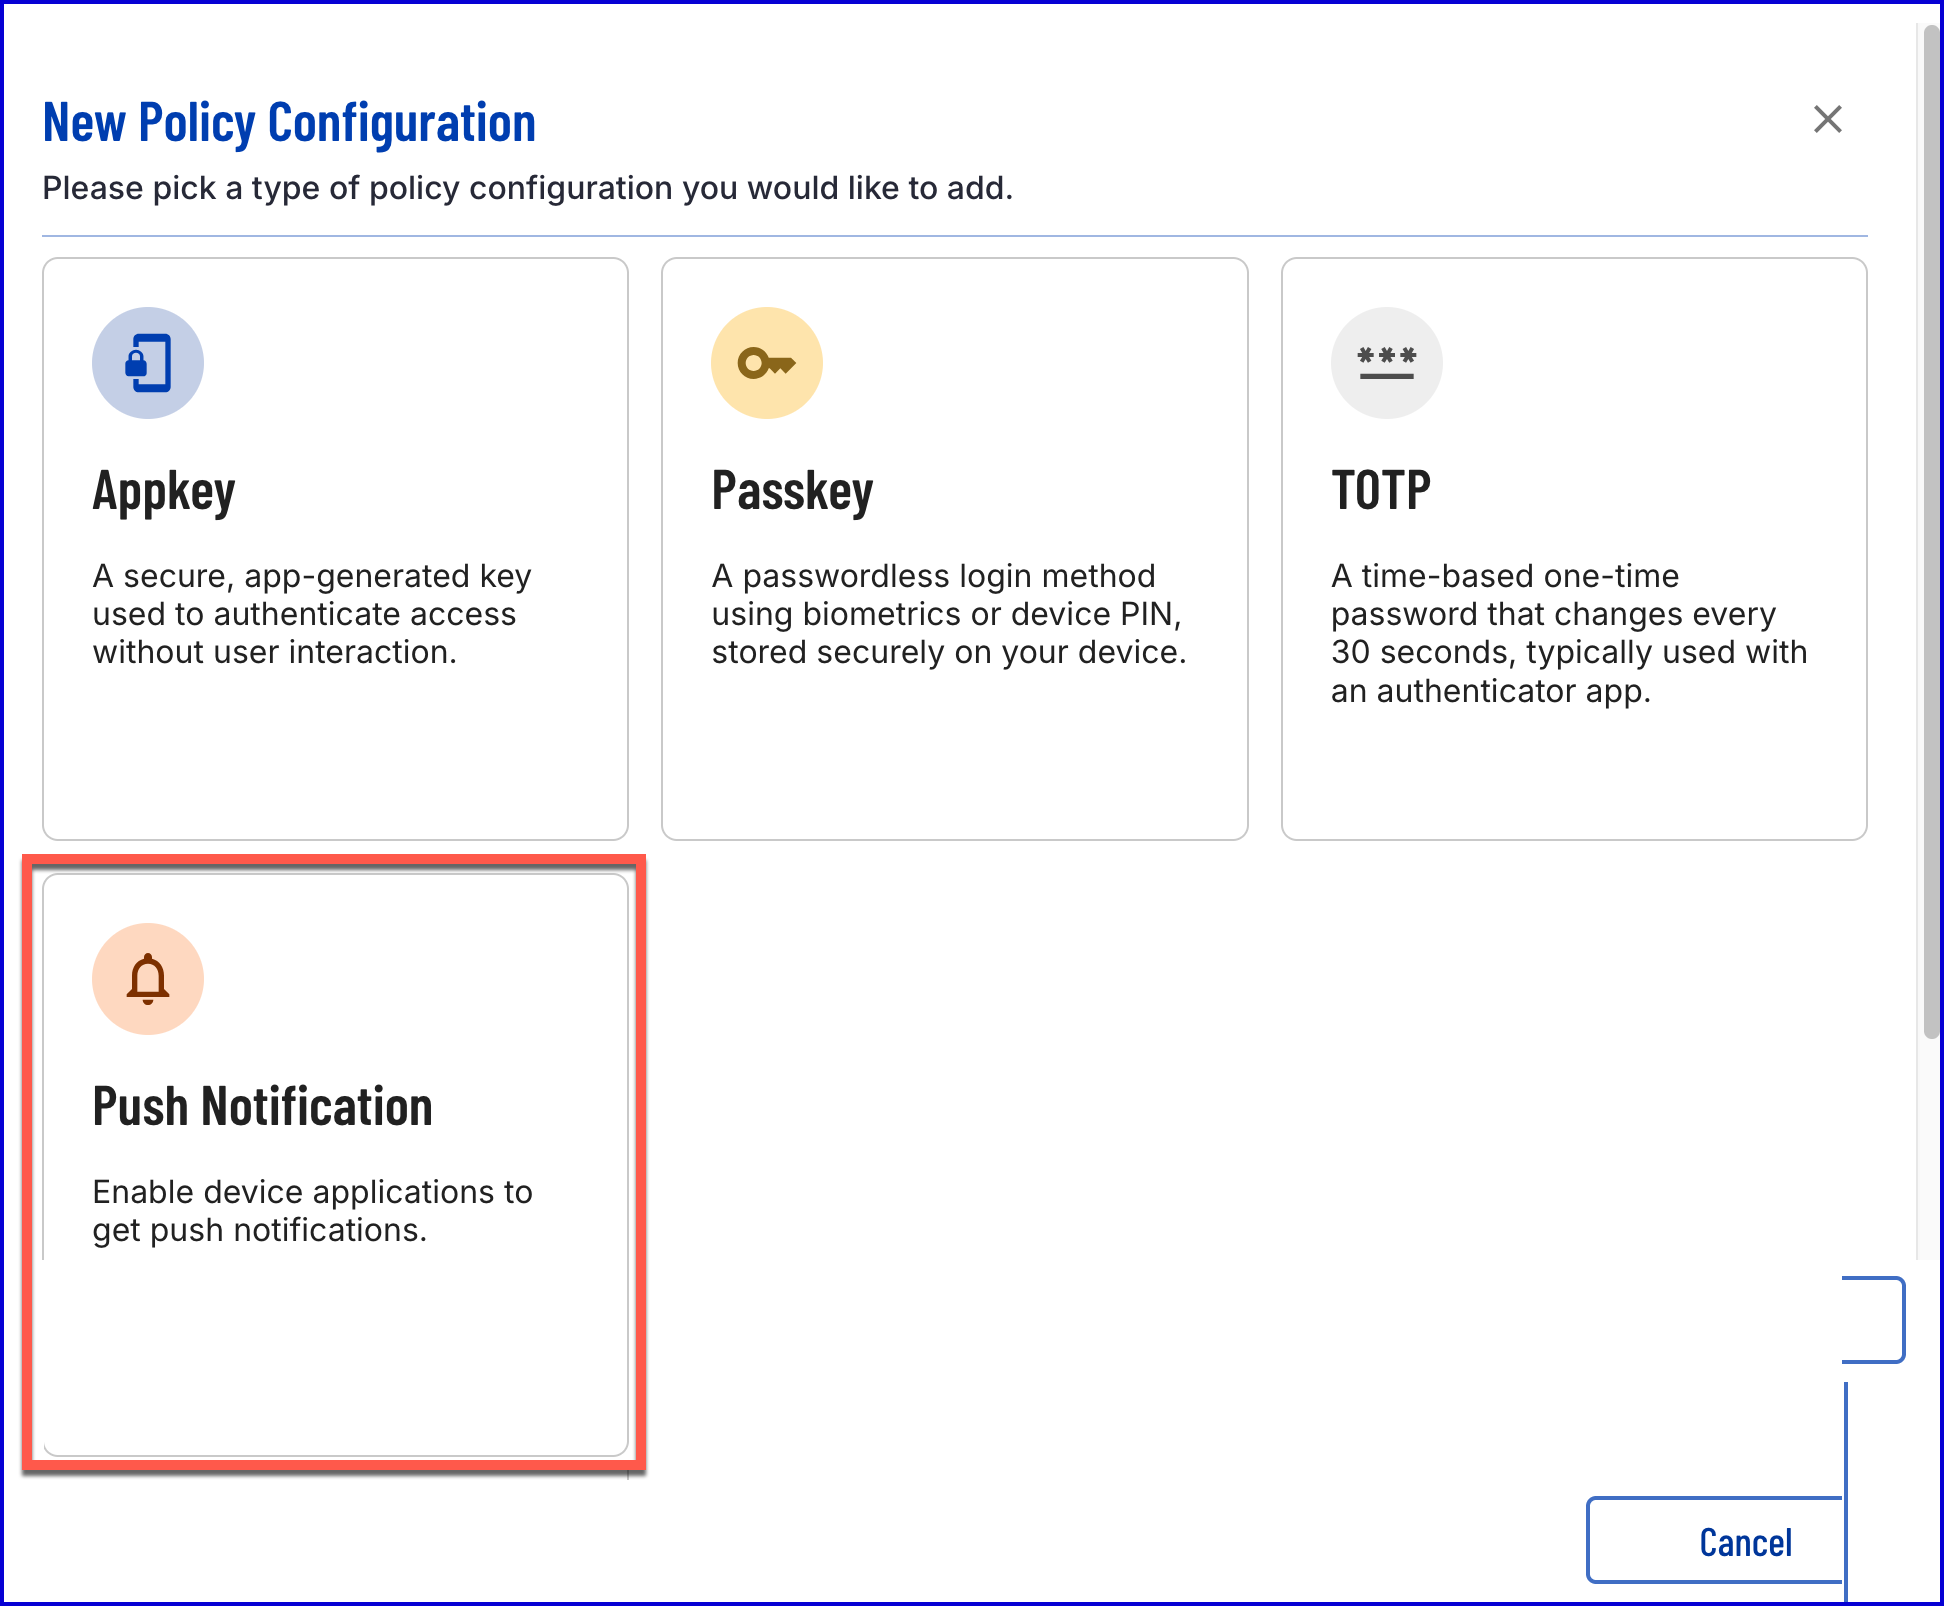
A push notification policy is a form of Appkey Identity Store policy that can be configured for Apple Push Notifications (APN) for iOS applications or Firebase Cloud Messaging (FCM) for Android applications.
To create a new policy, follow the steps outlined below.
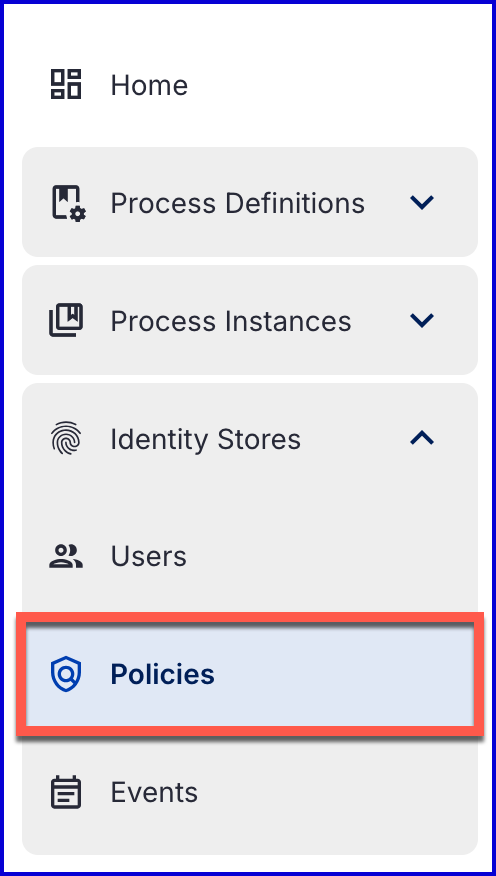
Select the Policies page found under the Identity Stores tab in the left-side navigation menu in the Backoffice application.
Using the 'Select a Store' dropdown menu, select an Appkey Identity Store. If an Identity Store that does not support Appkeys is selected, the option to create a push notification policy will be greyed out.
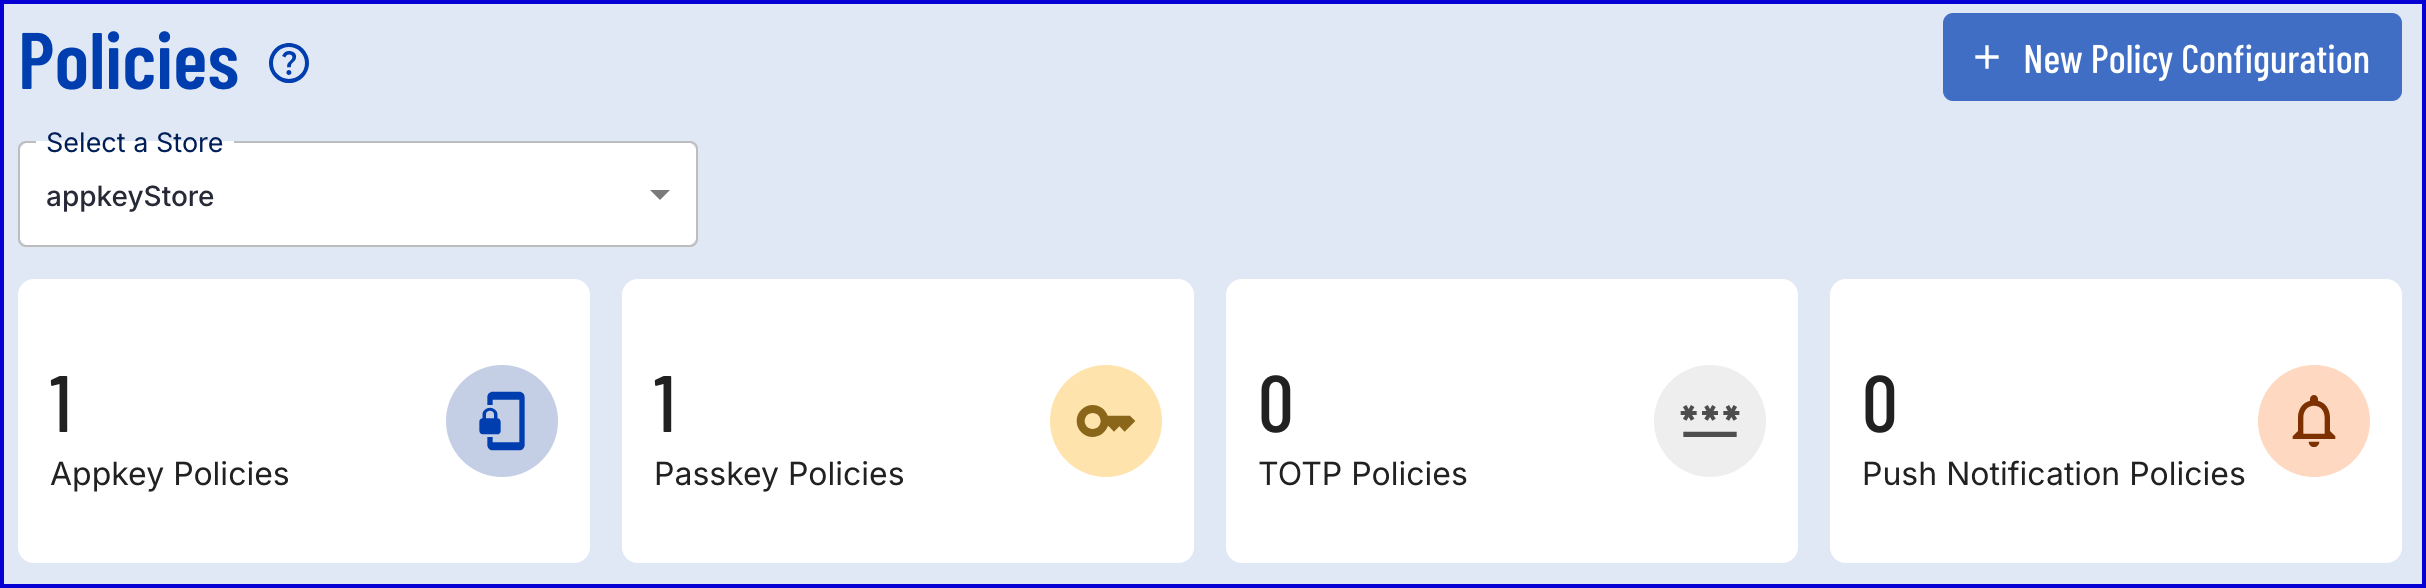
Click the blue 'New Policy Configuration' button at the top-right of the screen. A pop-up modal will appear with a list of available policy types. Select the 'Push Notification' policy.
Push Notification Policy Configuration Options
This section will describe the various configuration options available when defining a push notification policy.
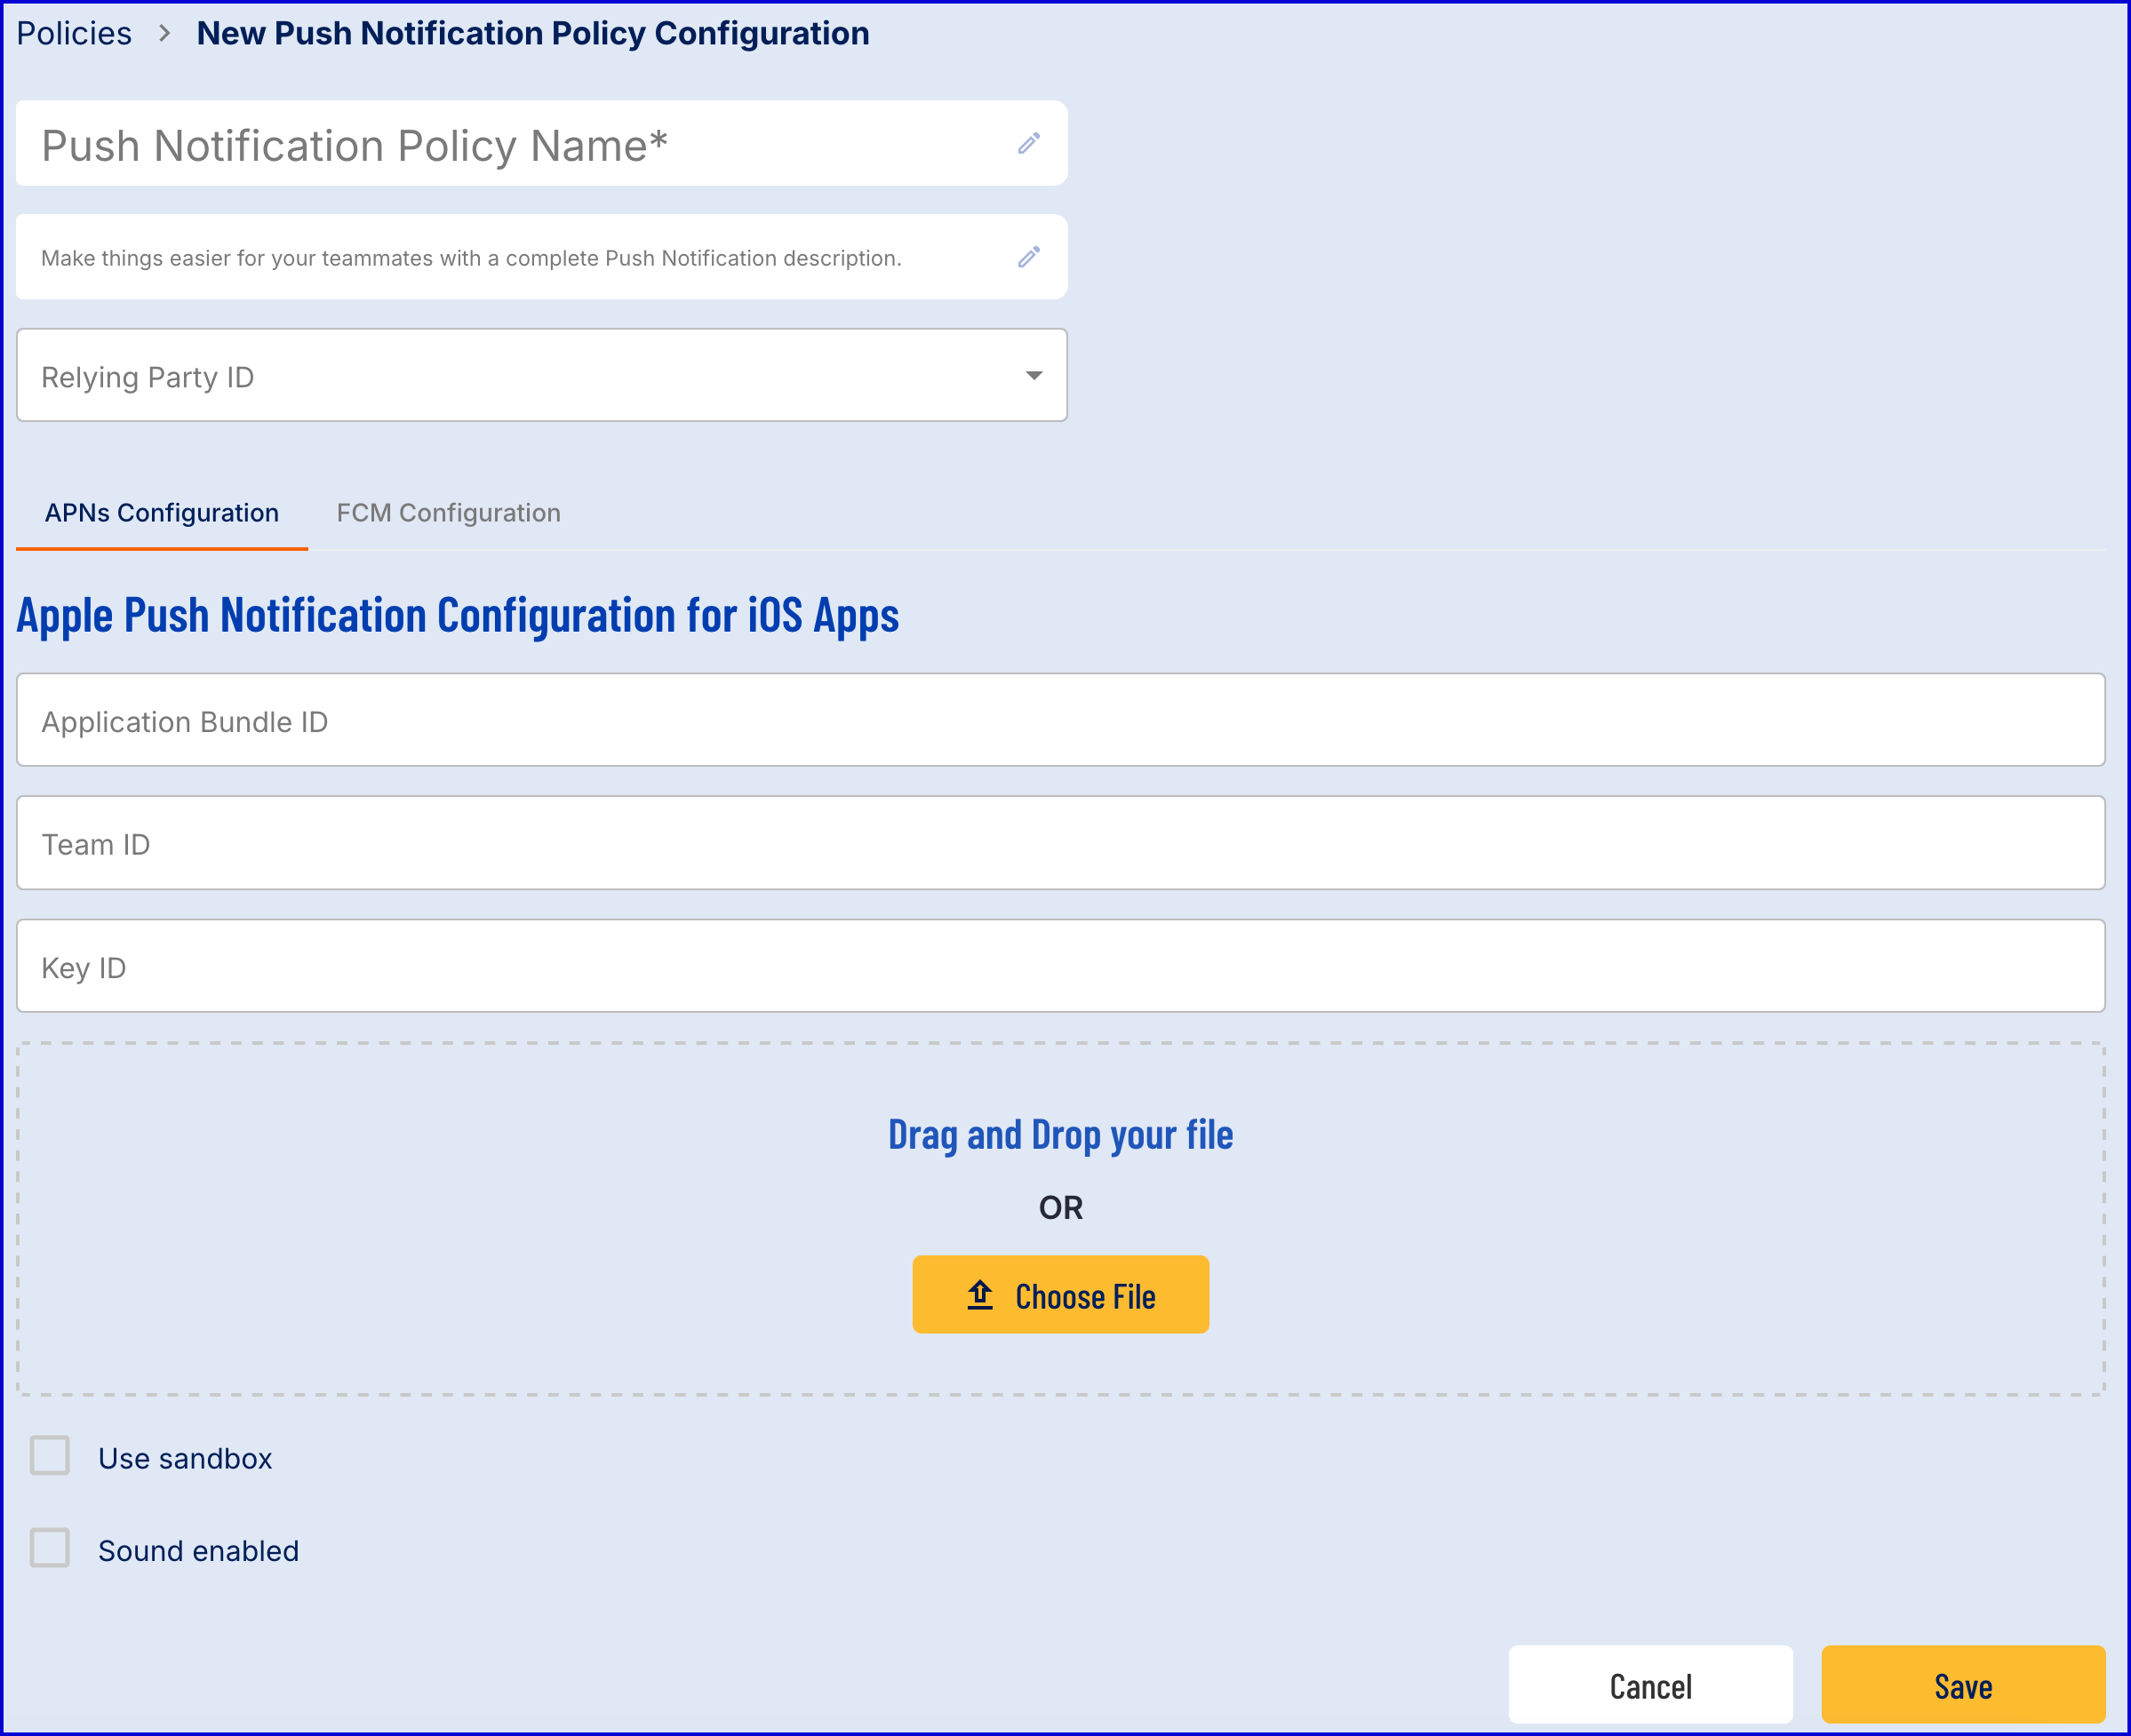
Configuration Option | Description |
|---|---|
Push Notification Policy Name | Mandatory. The name given to the push notification policy. |
Description | Optional. An optional description for the push notification policy. |
Relying Party ID | Mandatory. The Appkey relying party. Push notifications are only supported for device applications configured for Appkeys. |
APNs Configuration | |
Application Bundle ID | The Bundle ID that uniquely identifies your App, for example com.daon.trustx. To avoid conflicts, Apple encourages developers to use reverse domain name notation for choosing an application's bundle identifier. Must contain only alphanumeric characters (A–Z, a–z, and 0–9), hyphens (-), and periods (.) |
Team ID | The issuer key, the value for which is the 10-Character Team ID you use for developing your company apps. Obtain this value from your developer.apple.com account. |
Use Sandbox | Optional. Enable APN sandbox environment. |
Sound Enabled | Optional. Whether to enable ping sound when notification is sent. |
FCM Configuration | |
FCM URL | The FCM URL - available from https://fcm.googleapis.com/v1/projects/my_project_id/messages:send |
APN Configuration
To configure iOS push notifications, you’ll need four pieces of information from your Apple Developer account.
Application Bundle ID
Go to https://developer.apple.com/account/resources/identifiers/list.
Under Identifiers, find your app.
Copy the Bundle ID (e.g., com.yourcompany.yourapp).
Team ID
Log in to https://developer.apple.com/account/.
Click [Account Name] → Membership Details. in the top-right corner.
Copy the Team ID listed there.
Key ID
In your Apple Developer account, navigate to Certificates, Identifiers & Profiles → Keys
Create a new key (or select an existing one) and enable Apple Push Notifications service (APNs).
After creating the key, copy the Key ID.
Token Signing Key
When you create the key, download the .p8 file immediately (Apple only allows one download).
Open the .p8 file in a text editor.
Copy the entire content (including -----BEGIN PRIVATE KEY----- and -----END PRIVATE KEY-----) and paste it into the Token Signing Key field.
You must have an Apple Developer Program membership.
Keep your .p8 file secure—Apple does not allow re-downloading.
If you lose the file, you will need to create a new key.
FCM Configuration
To configure Android push notifications, you’ll need two pieces of information from your Firebase project.
FCM URL
Select your project.
Navigate to Project Settings → Cloud Messaging.
Copy the FCM endpoint URL (usually https://fcm.googleapis.com/fcm/send).
Paste it into the FCM URL field.
Google Application Credentials
In the same Cloud Messaging section, click Manage Service Accounts or go to https://console.cloud.google.com/.
Create a Service Account for your Firebase project if one does not exist.
Generate a JSON key for the service account.
Open the downloaded .json file in a text editor.
Copy the entire JSON content and paste it into the Google Application Credentials field.
You must have a Firebase project linked to your Android app.
Keep your service account JSON secure—do not share it publicly.
If compromised, revoke the key and generate a new one.
Configure the Process Definition
This section will describe the steps necessary for configuring a standard Process Definition that integrates a TrustX push notification flow.
A typical Process Definition will follow the structure:
Get an IDS User.
Initiate a TrustX push notification.
Wait for the child Process Instance to complete.
Make a decision.
The Process Definition outlined above will be implemented in this section of the guide.
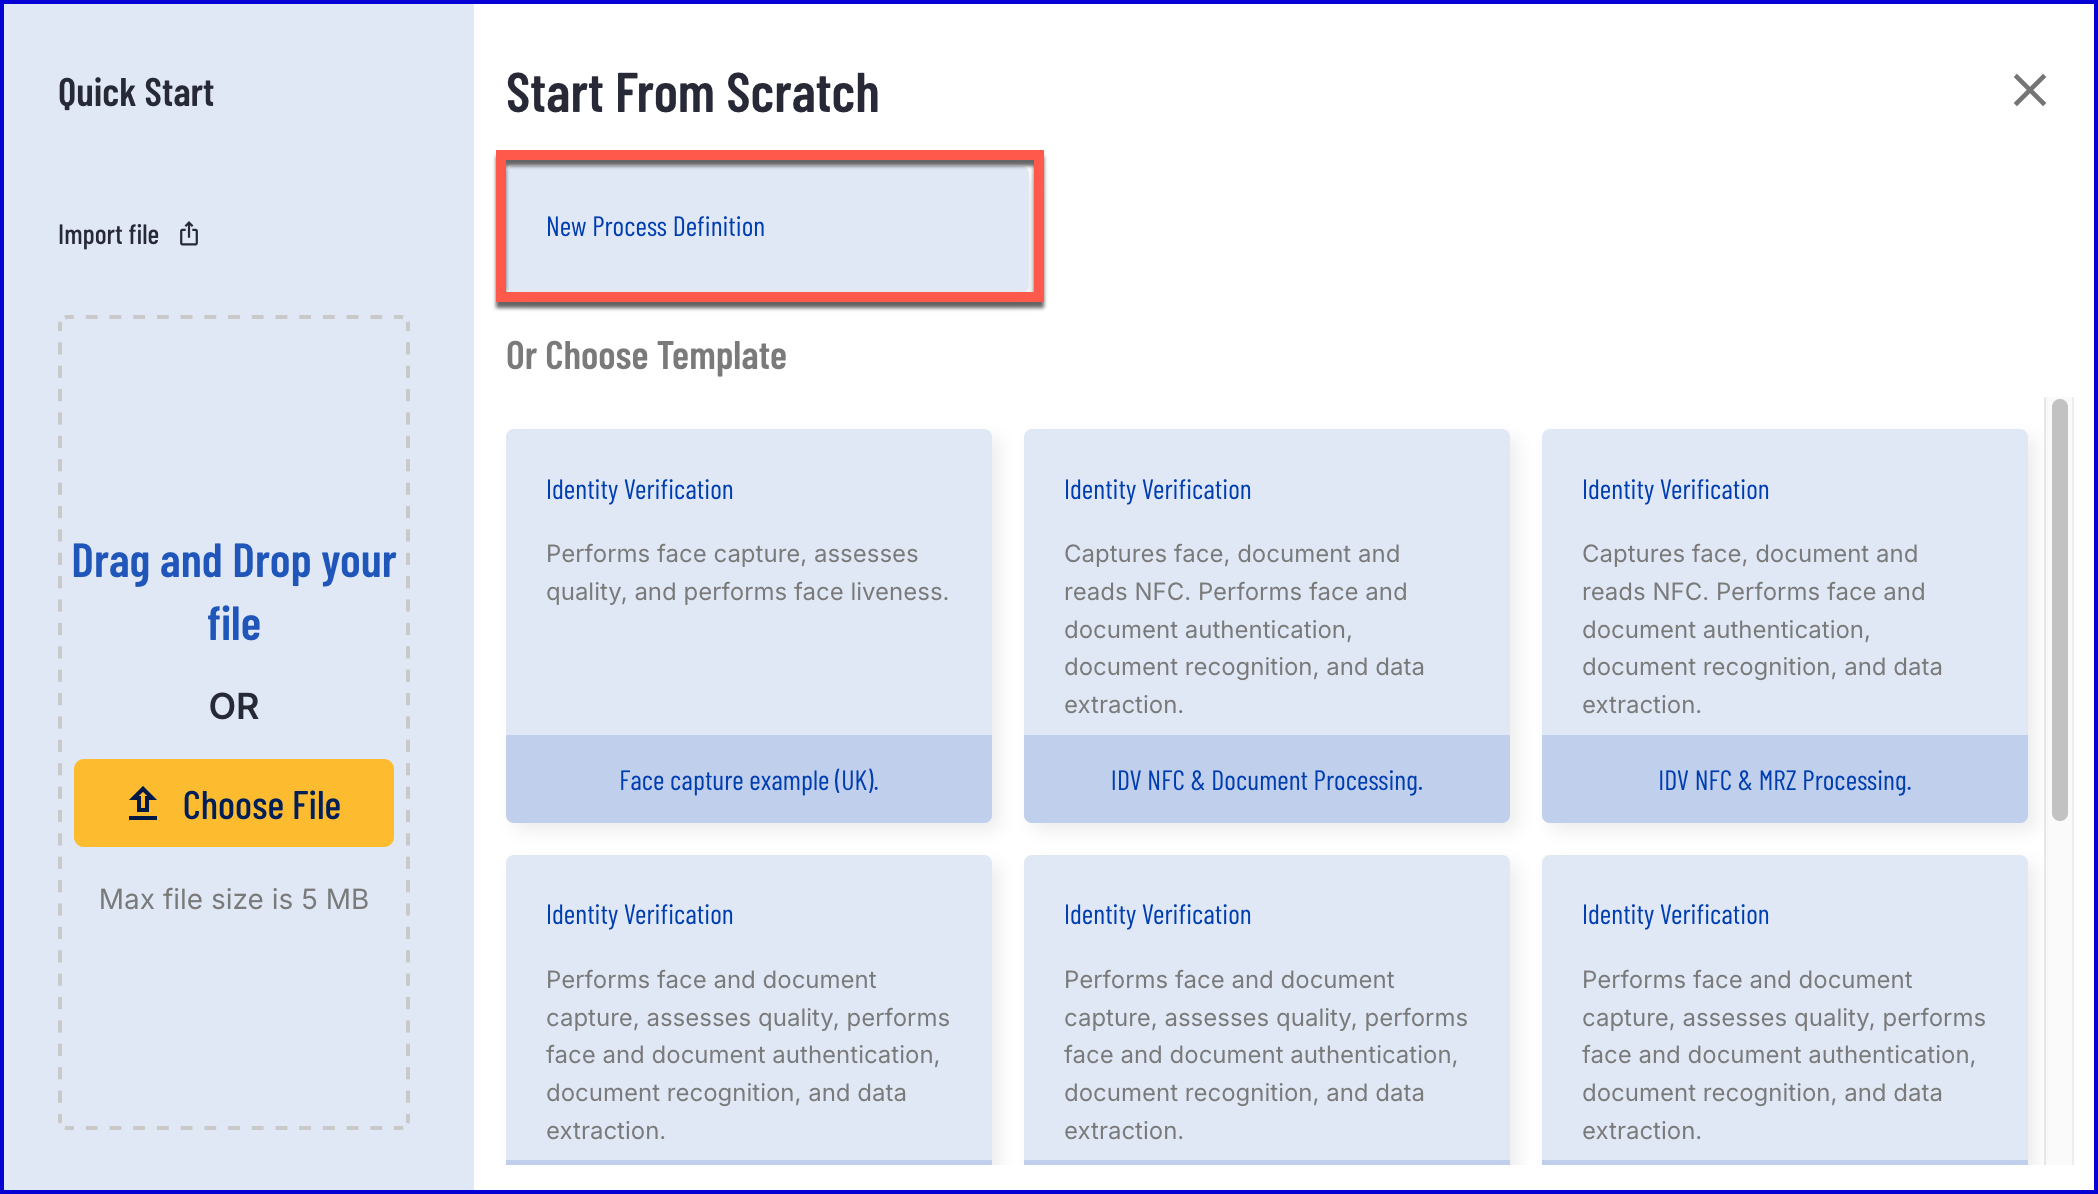
Create a New Process Definition
Create a new Process Definition by navigating to the Process Definitions page found in the left-side navigation bar of the Backoffice application.
On the top-right of the Process Definition page, click the 'New Process Definition' button.
Create a new Process Definition by clicking the 'New Process Definition' option.
Configure Process Definition
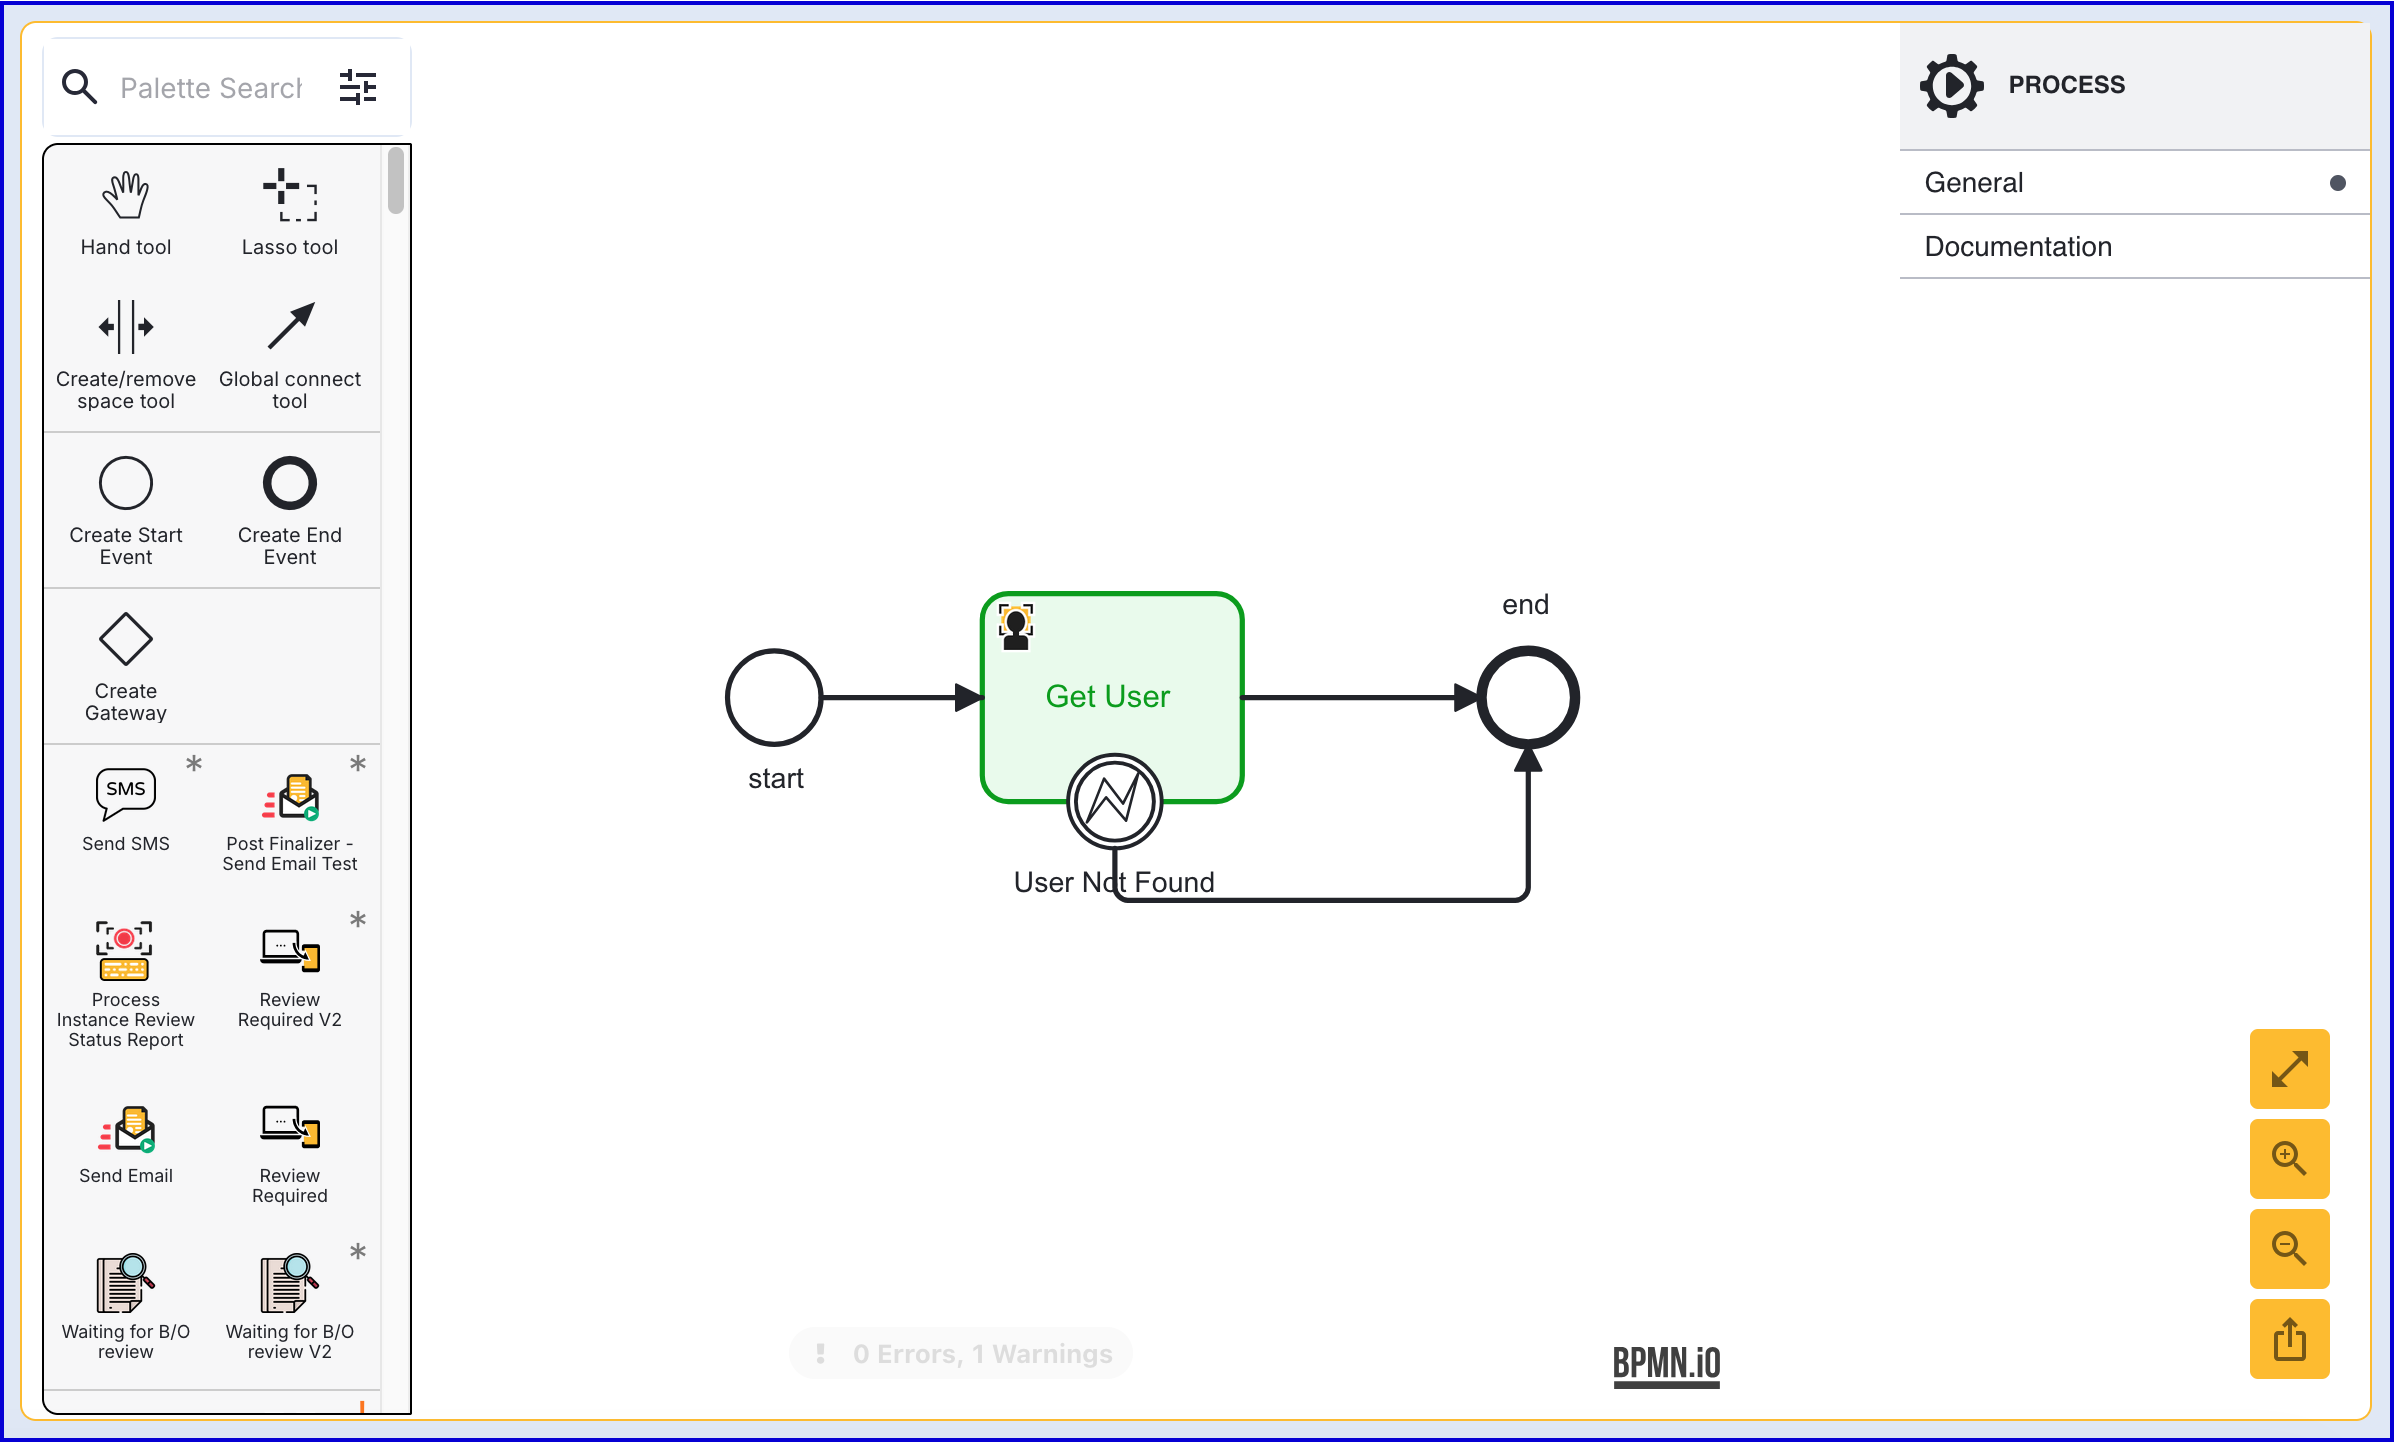
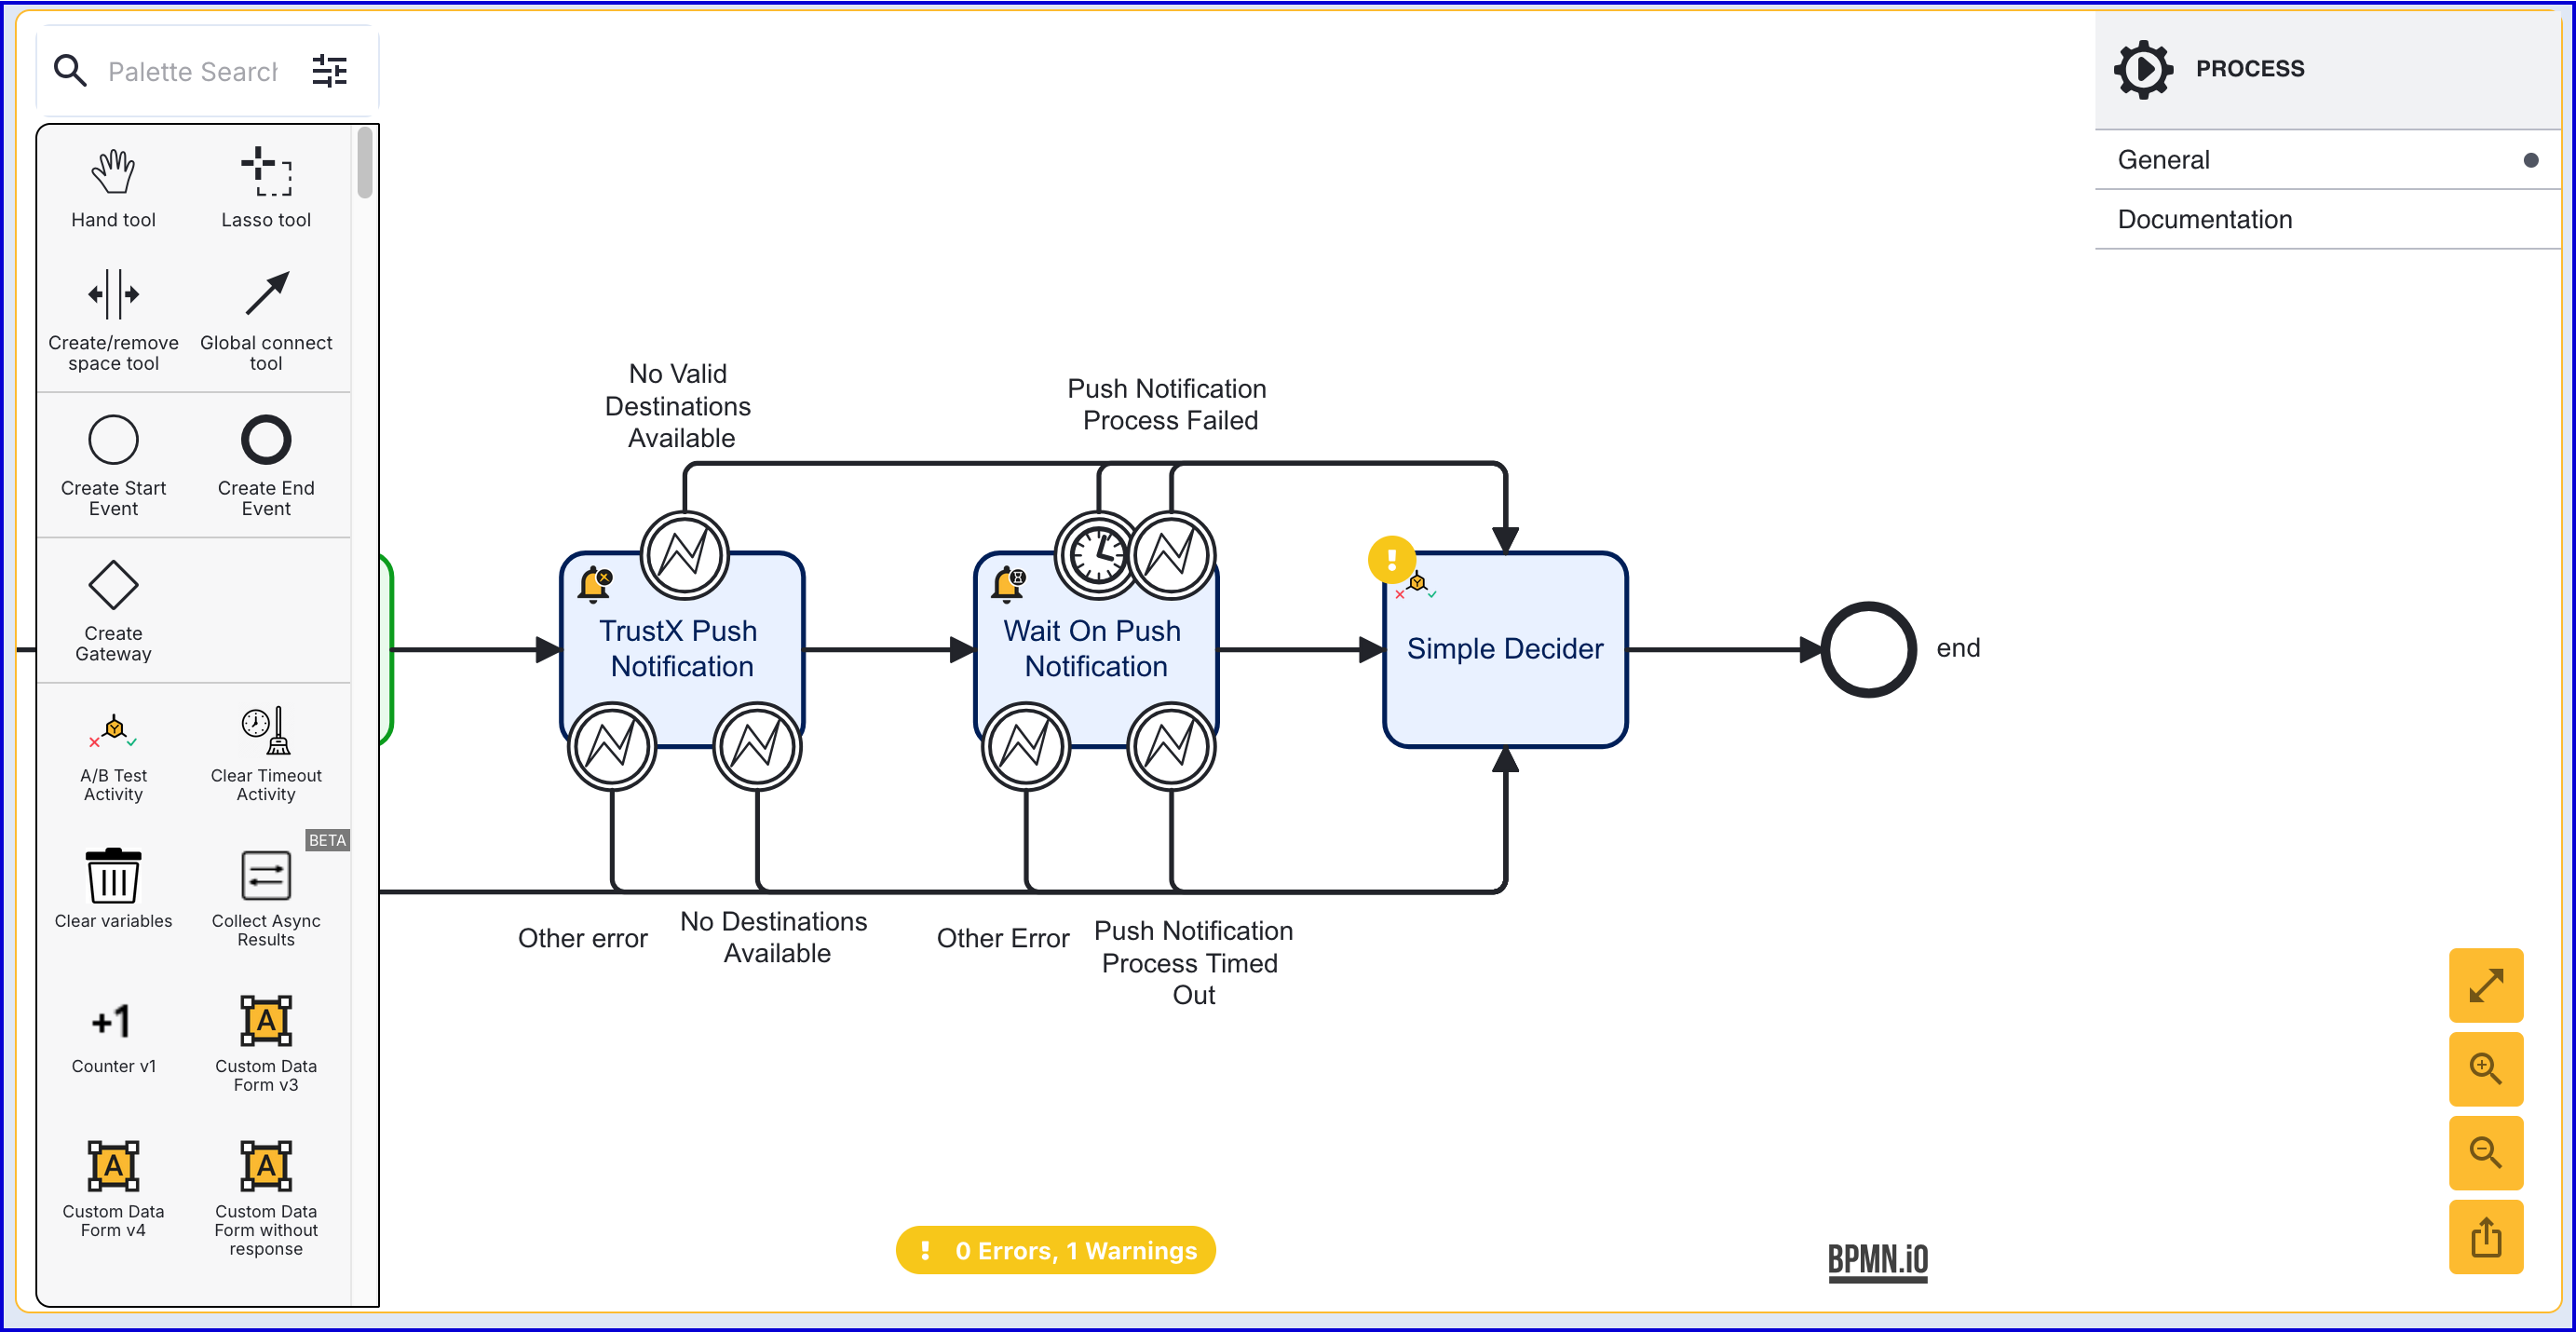
Add a 'Start' event at the beginning of the Process Designer.
Connect a 'Get User' activity to the 'Start' event. This will be used to retrieve information about the the Identity Store User who will be sent a push notification.
The 'Get User' activity supports the following input parameters.
| Parameter | Description | Type | Default |
|---|---|---|---|
| Store Name | Required - Represents the Identity Store that the User belongs to. | String | |
| User External ID | The External ID of the User to be returned. | String | |
| User ID | The ID of the User to be returned. | String | |
| User Key | The User Key of the User to be returned. | String | user1 |
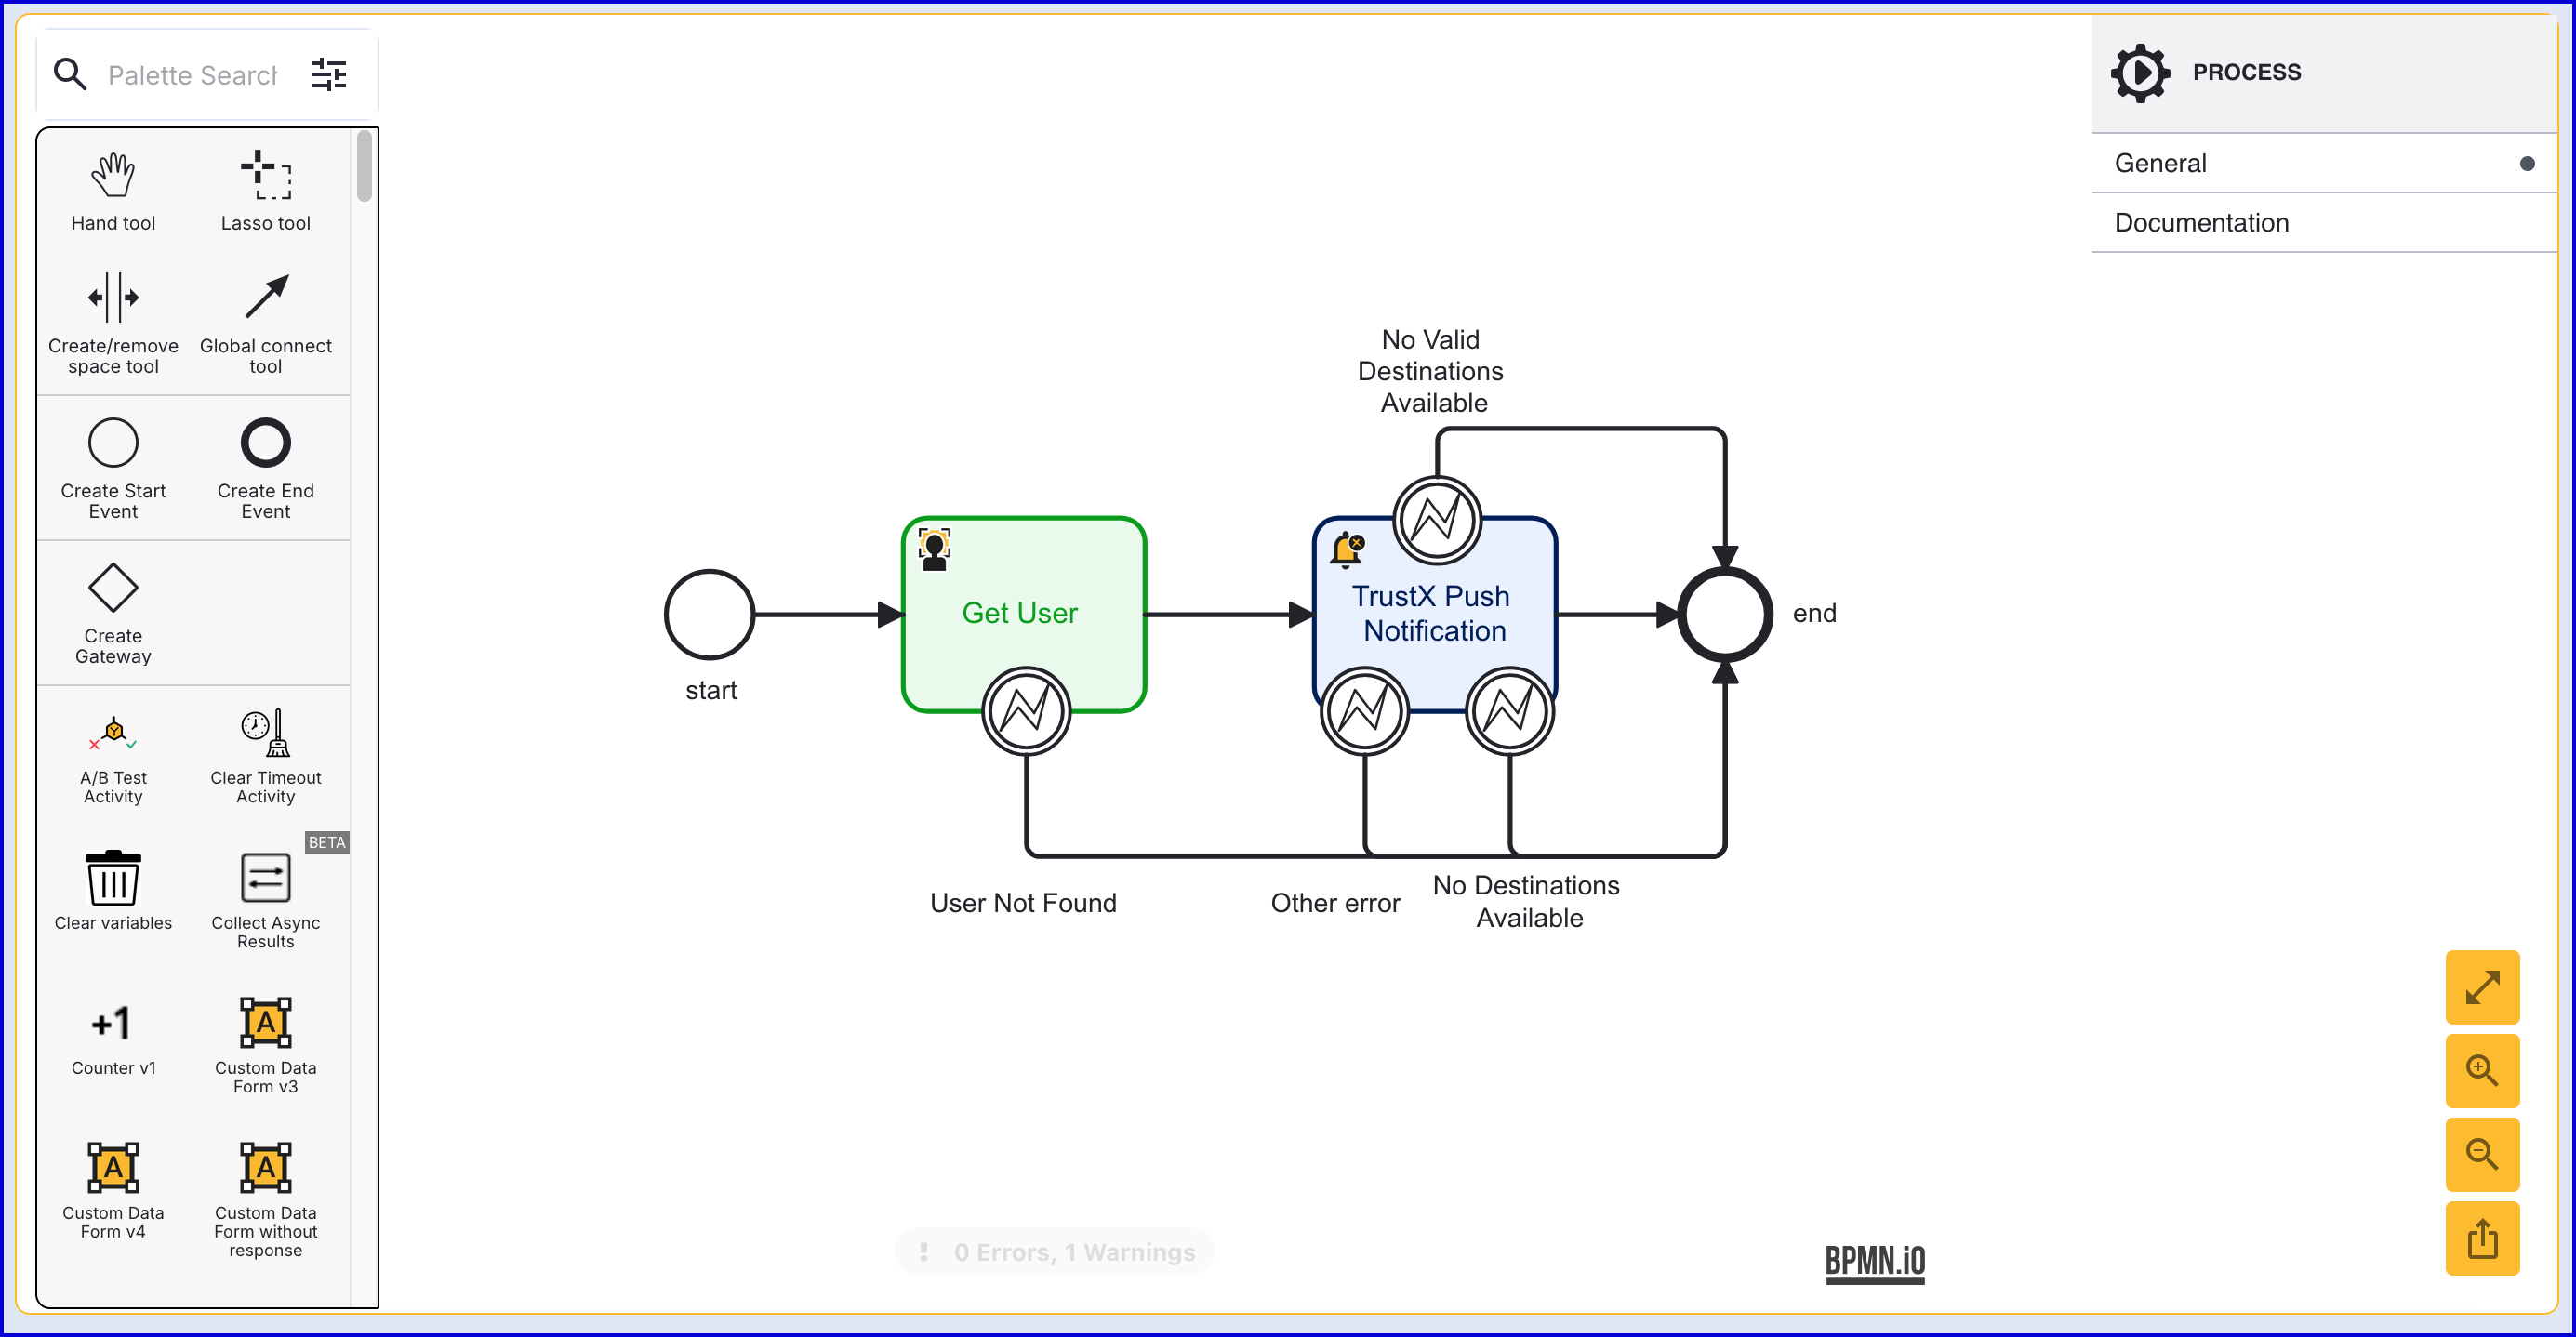
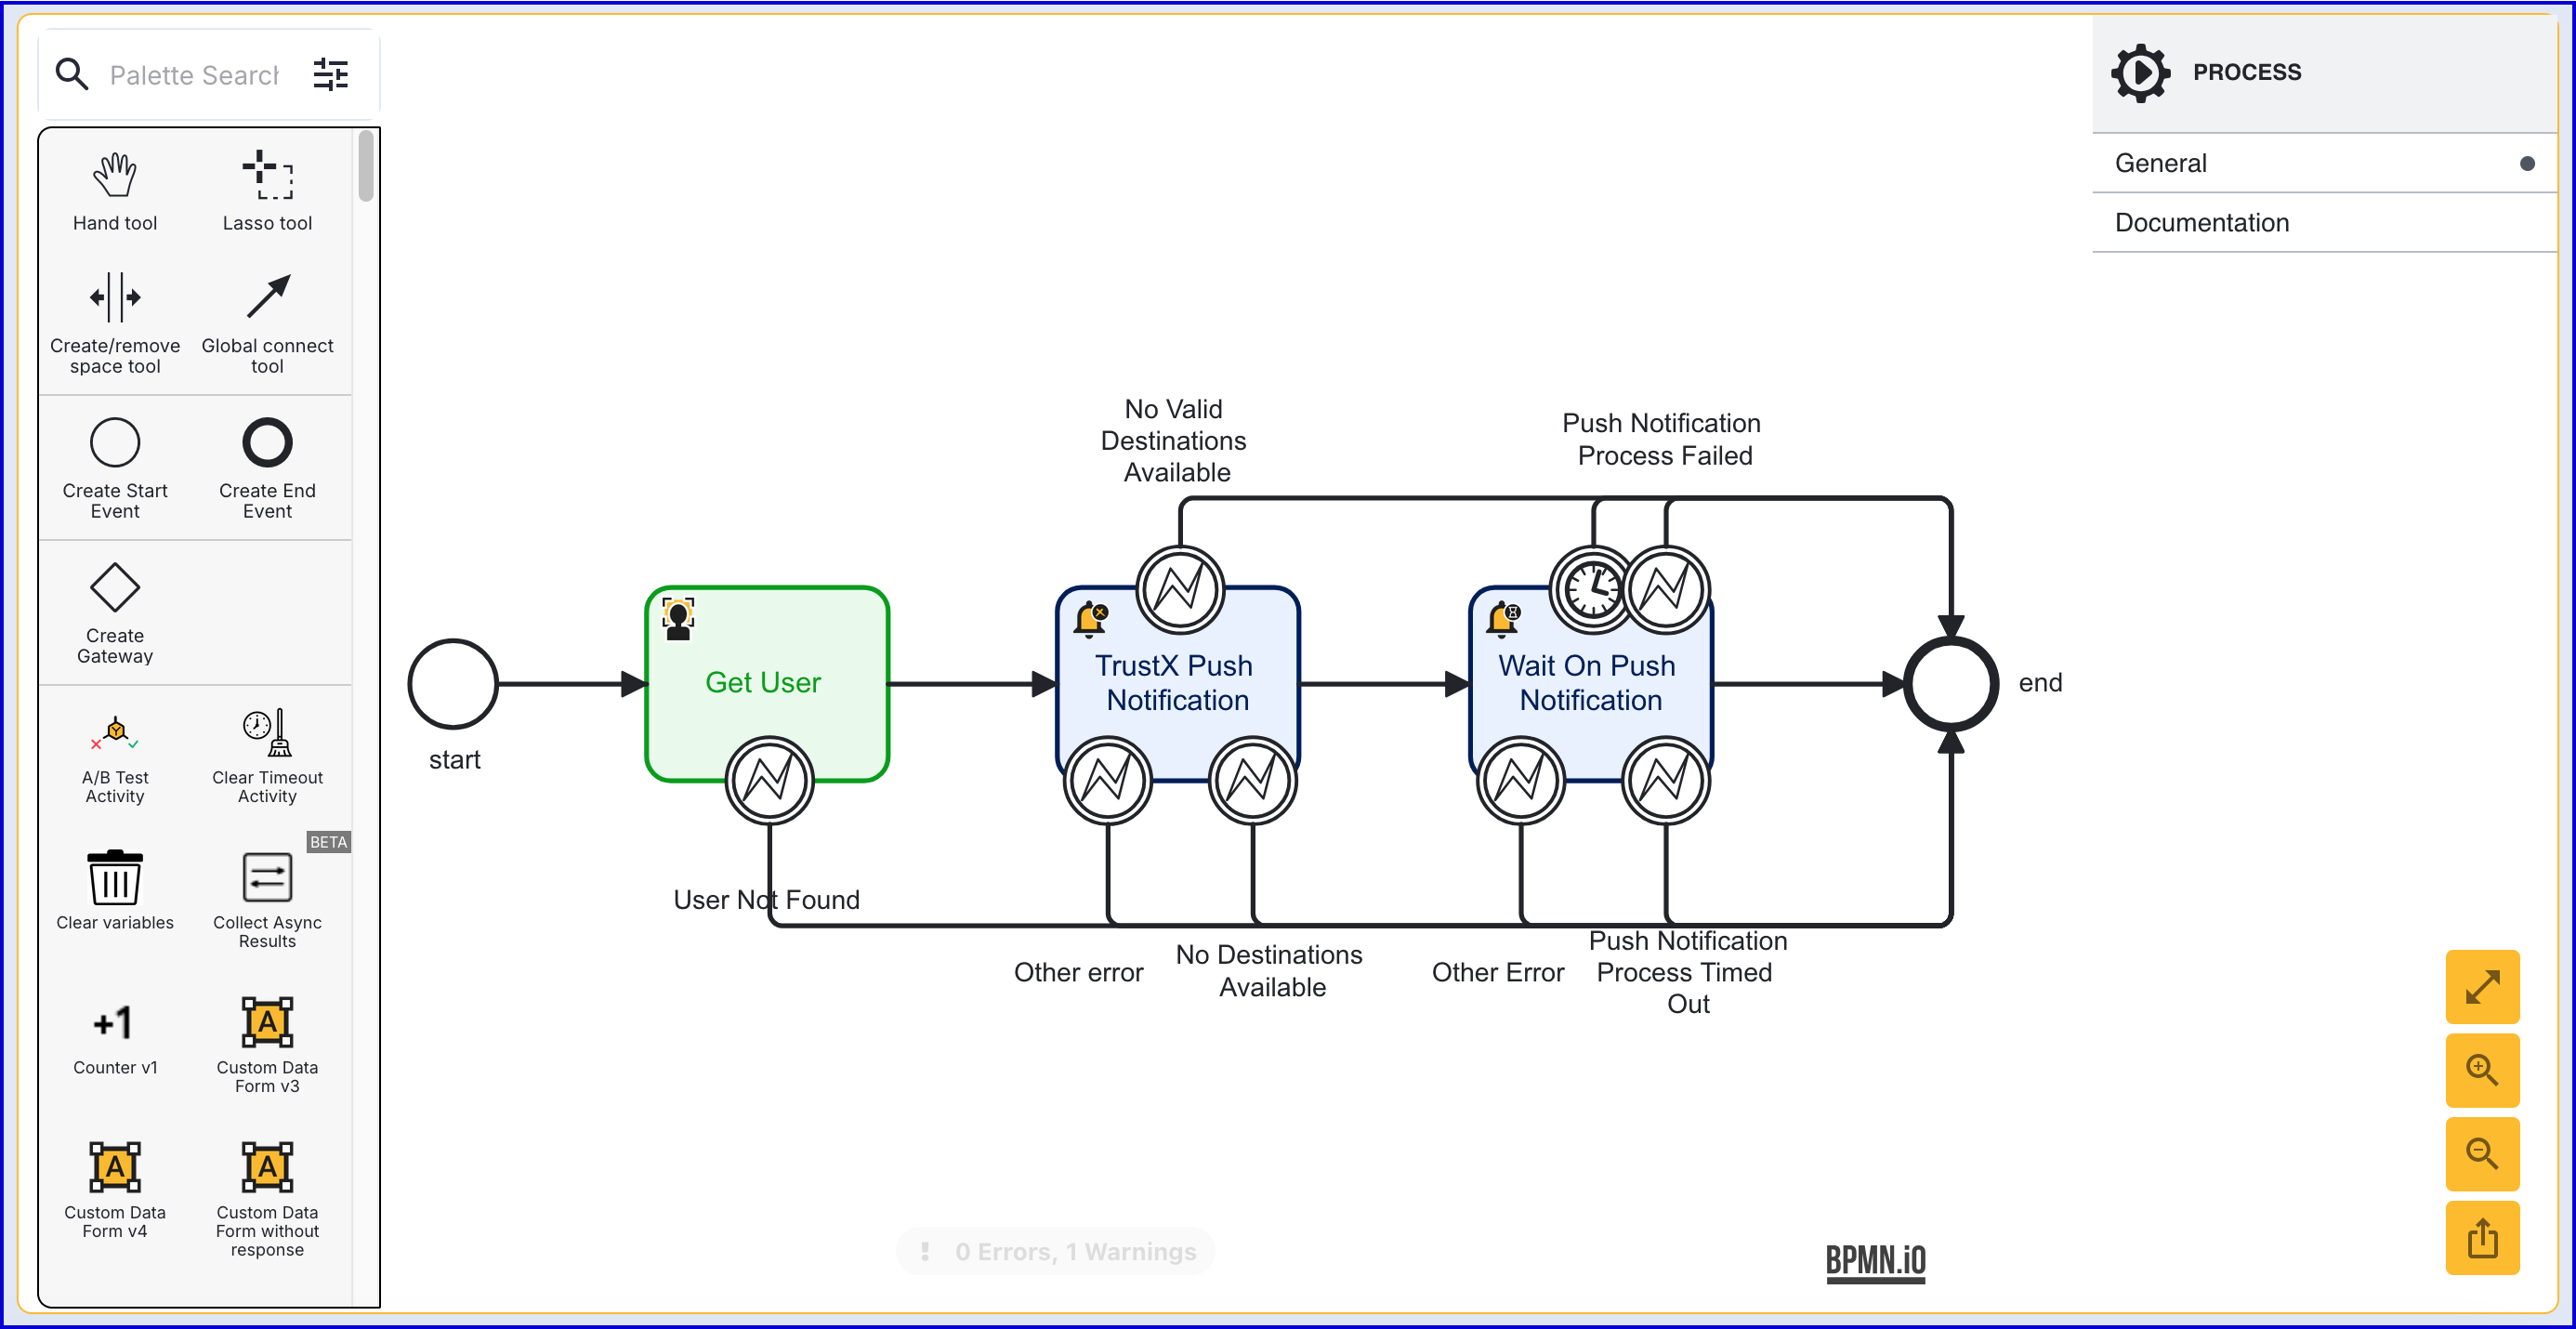
Add a 'TrustX Push Notification' activity to the Process Designer and connect it to the 'Get User' activity using the global connect tool.
The 'TrustX Push Notification' activity supports the following activities.
| Parameter | Description | Type | Default |
|---|---|---|---|
| Localized Message Arguments | Optional list of strings to be inserted into the localised message. Either a title/message or a localised title/message must be supplied, not both or neither. | List[String] | |
| Localized Message Key | Optional. Reference to a localised title in the device application. | String | |
| Localized Title Arguments | Optional list of strings to be inserted into the localised title. | List[String] | |
| Localized Title Key | Optional. Reference to a localised title in the device application. | String | |
| Message | Mandatory. Message to be displayed. | String | |
| Monitor Push Notification Process | If true then the status of the push notification Process Instance is monitored so that the customer can poll and wait for it to complete. | Boolean | ${true} |
| Push Notification Parameters | Optional map of strings supplied in the push notification to the device application. | List[String] | |
| Push Notification Process Definition Name | Optional. The name of the Process Definition which is started for the user when they accept the push notification. Either a process definition name and version, or a tag must be supplied, not both or neither. | String | |
| Push Notification Process Definition Tag | Optional. The tag of the Process Definition which is started for the user when they accept the push notification. Either a process definition name and version, or a tag must be supplied, not both or neither. | String | |
| Push Notification Process Parameters | Optional map of strings to be supplied to the push notification process when it is created. | List[String] | |
| Relying Party ID | Mandatory. The Appkey relying party which references the customer application to which the push notification(s) will be sent. This is typically represented by the ID of the Appkey policy. | String | |
| Retry Hint Duration (Seconds) | Optional. Default value of 60 and a maximum allowed value of 1000. A value of 0 or less indicates that retries are disabled. Indicates for how long to retry sending the push if the service is down or busy. | Integer | ${60} |
| Store Name | Mandatory. The Identity Store containing the user | String | |
| Time To Live (Seconds) | Mandatory. Time to live of the push notification in seconds. Minimum valid value of 60 and a maximum of 2419200 (28 days). | Integer | |
| Title | Mandatory. Title to be displayed. | String | |
| User External ID | Optional. External (customer) ID of the user. | String | |
| User ID | Optional. Internal ID of the user. | String | |
| User Key | Optional. TrustX reference key for the user. | String |
The activity also includes the following error boundary events.
Error Event | Description |
|---|---|
No Valid Destinations Available | This error can occur if the push notification expires. |
No Destinations Available | This error is triggered when no Appkey is found registered to the specified User and device. |
Other Error | This error can trigger if any other error besides those listed above occurs. |
Set the Process Definition Name and version to the one that will be initiated when the push notification is selected.
The 'TrustX Push Notification' includes two output parameters.
Output Parameter | Description | Value |
|---|---|---|
Polling URL | If the push notification process is monitored then this is the URL of the status polling API | ${execution.hasVariableLocal('pollingUrl') ? execution.getVariableLocal('pollingUrl') : null} |
Redirect URL | The URL which starts the push notification process | {execution.hasVariableLocal('pnRedirectUrl') ? execution.getVariableLocal('pnRedirectUrl') : null} |
It is also possible to send a TrustX push notification via API using the example query:
Permissions: TNT#{tenant}#IdentityStore:sendPushNotification
Example:
Response:
Note that the response will including a pollingUrl which can be used to poll the status of the push notification.
After the 'TrustX Push Notification', add a 'Wait on Push notification' activity and connect them using the global connect tool. This activity will poll the server for a response from the child Process Instance that is initiated when the user taps the push notification.
The 'Wait on Push Notification' activity supports the following input parameters.
| Parameter | Description | Type | Default |
|---|---|---|---|
| List of Screens | A list of screens to display to the user. | List[String] | ["wait-init"] |
| Polling Error Retry Count | Optional. The number of retries before a timeout occurs. This value represents the number of retries and not the number of attempts. | Integer | ${5} |
| Polling Interval (ms) | Integer | ${500} | |
| Polling URL | Mandatory. The status polling URL for the push notification Process Instance. | String | ${_pollingUrl} |
| Starting Component ID | The name of the step ID for this activity. | String | push-notification-wait |
| UI Component ID | The name of the screen used to excute this activity. | String | wait-init |
The activity also includes the following error boundary events.
Error Event | Description |
|---|---|
Push Notification Process Failed | The child Process Instances initiated by the push notification has failed. |
Push Notification Process Timed Out | The child Process Instance initiated by the push notification has timed out. |
Timeout | The 'Wait on Push Notification' activity has timed out. |
Other Error | This error can trigger if any other error besides those listed above occurs. |
Add a 'Simple Decider' to the Process Definition and connect each of the boundary events to the activity. This activity will determine the final outcome of the Process Instance.
Once the Process Definition has been configured, click the 'Save & Deploy' button.
Test and View Results
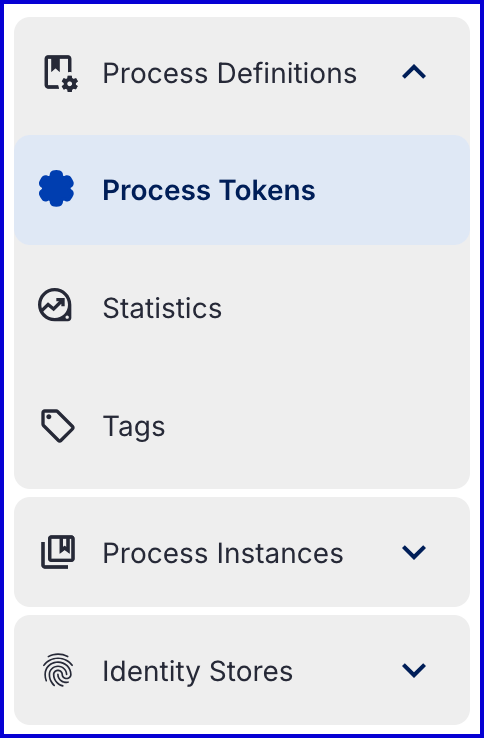
To test the Process Definition, create a new Process Token by navigating to the Process Definitions > Process Tokens page in the Backoffice application.
On the Process Tokens landing page, click the 'New Process Token' button.
A popup modal will appear where details of the Process Token can be entered.
Once the push notification is sent, a wait screen with be presented to the user in the Trust Web application.
Viewing Push Notifications Per User
Active push notifications associated with an IDS User can be viewed from the Users page in the Backoffice.
From the Backoffice application, navigate to Identity Store > Users.
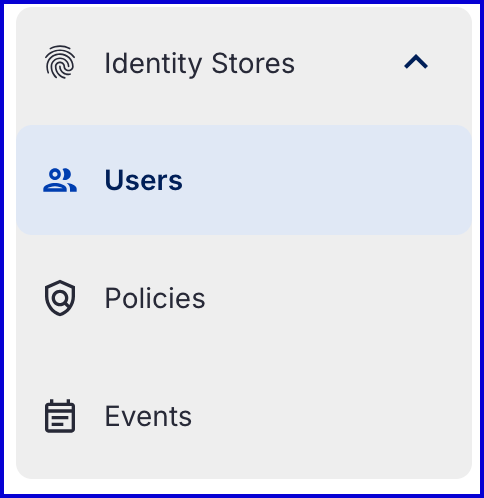
Using the filter options available, chose the Identity Store and optional ID to find the desired IDS User.
Activity Push Notifications will be listed under the Active Push Notifications section.
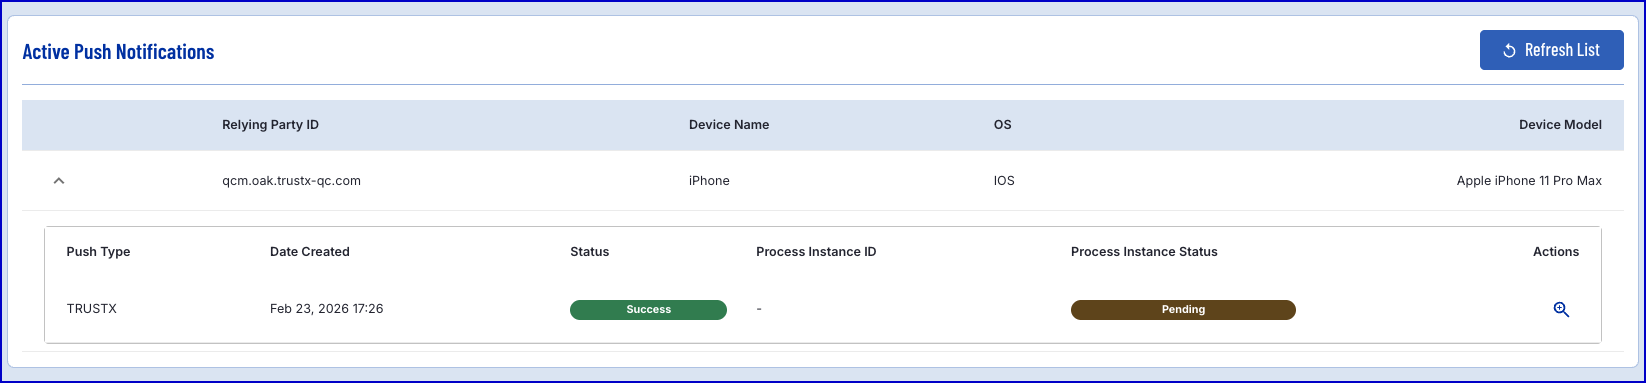
This section will include the following information.
Title | Description |
|---|---|
Push Type | The type of push notification. Options can be TRUSTX or GENERIC. |
Date Created | The date the push notification was originally created. |
Process Instance ID | The ID of the child Process Instance that was initiated via the push notification. This is only applicable for the TrustX push notification type. |
Process Instance Status | The current status of the Process Instance. |
Selecting the magnifying glass under the 'Actions' column will expand to provide more details on the push notification.
Push Notification Details
The Push Notification Details page displays a list of details relating to a specific push notification.

Included in this page is the following information.
Title | Description |
|---|---|
Relying Party ID | The ID of the relying party. |
Type | The push notification type. Options can be TRUSTX or GENERIC. |
Created At | The date the push notification was created. |
Expires At | The date and time in which the push notification will expire. |
Title | The title of the push notification. |
Message | The message of the push notification. |
Title Key | Reference to a title in the device application. |
Title Arguments | Optional list of strings inserted into the title. |
Message Key | Reference to a message in the device application. |
Message Arguments | Optional list of strings inserted into the message. |
Delivery Information
This section presents information regarding the delivery of the push notification.
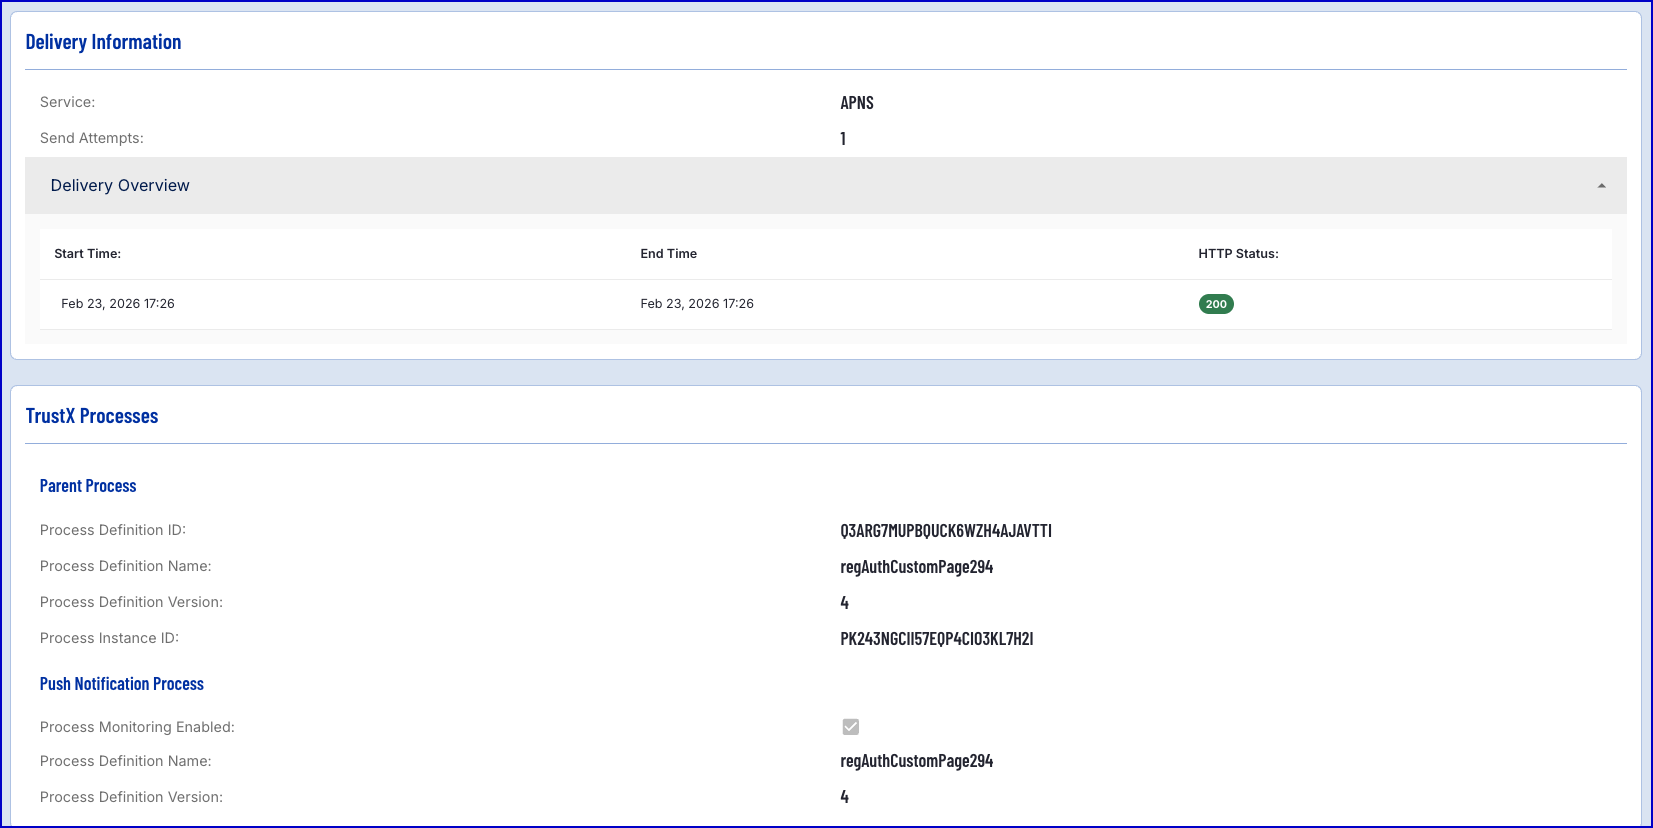
Information provided is described as follows:
Title | Description |
|---|---|
Service | The service used to send the push notification. |
Send Attempts | The number of attempts to send the push notification. |
Start Time | The time in which the push notification was delivered. |
End Time | The time in which the push notification was received. |
HTTP Status | The HTTP status response from the push notification deliver. |
Parent Process | |
Process Definition ID | The ID of the parent Process Definition. This typically represents the Process Definition used to send the push notification. |
Process Definition Name | The name of the parent Process Definition. This typically represents the Process Definition used to send the push notification. |
Process Definition Version | The version of the parent Process Definition. This typically represents the Process Definition used to send the push notification. |
Process Instance ID | The ID of the parent Process Instance. |
Push Notification Process | |
Process Monitoring Enabled | Whether polling of the push notification is enabled to check the status of the child Process Definition. |
Process Definition Name | The name of the child Process Definition that is started when the push notification is selected by the user. |
Process Definition Version | The version of the child Process Definition. |